
Have you ever had a steak that just wasn’t cooked right? So disappointing. There is nothing better than a perfectly cooked steak, but with so many ways to get it wrong it is no wonder that grilling can be intimidating. After all, there is more to it than just meat, heat, and eat.
This post may contain affiliate links, and I may earn a little commission when you click these links at no additional cost to you. All opinions are my own.
Never fear! I have 6 simple steps to grilling the perfect steak on the charcoal grill every time. We love our new charcoal grill. But before I get into the grilling steps, let’s talk about which meat to buy.
What are the different grades of beef and which one should I choose?
What do we mean when we say “grades of beef?” Maybe you have never considered how the different grades of beef affect the texture and flavor profile of meat. There are basically three grades of beef steak that you will find in the grocery store or meat market: Prime, Choice, and Select. The USDA grade shields are assigned to beef to signify high-quality meat that is safe for eating. Suppliers, restaurant owners, and consumers rely on these grades to safely enjoy a variety of different beef products. The process of assigning a grade to beef is extremely rigorous, and it is not easy to make the grade of Prime, Choice, or Select.
Prime
This beef not only makes the grade, it is top of its class! It has superior quality and intramuscular fat content, which makes it extremely popular with steak connoisseurs. Most Prime beef is sold only in upscale fine restaurants and specialty beef suppliers. Only about 2 or 3% of beef makes the grade of Prime.
Choice
Choice beef is still good quality but has slightly less fat marbling than Prime. Marbling is when the fat is evenly distributed throughout the muscle, as opposed to a layer of fat on the outside edge. This makes the cut a little bit less juicy, but when prepared correctly it is still an excellent steak. Choice beef is the one you see most often in grocery stores and makes up over half of the beef people eat.
Select
Select is basically what you see advertised as the sale-priced meat. It has a lower fat content, making it the most uniform in quality, but it can also lack the moisture and flavor of higher grades. On the plus side it is leaner, which makes it have less calories, and if it is cooked properly it can still turn out to be a tasty steak.
However, most true steak lovers believe it is always worth it to pay the extra money per pound for the choice grade. It will say choice grade somewhere on the packaging, and it is usually well advertised as choice. If your grocery store carries Prime grade, that is even better!
Buy Choice or Prime Grade steaks for the best results.
How to Cook the Three Different Grades of Beef
Prime Beef
The moisture and flavor profile in Prime beef make it ideal for seasoning. According to beef purveyors Schweid & Sons the key to maximizing the flavor is to break up the meat and gently disperse the seasonings throughout, as seasoning on the outside can sometimes fall off the meat. The superior taste of Prime beef makes it an excellent choice for the more rare preparations.
Choice Beef
There is less fat content to cook off in this grade of beef, so you will have to be careful to try and reach the desired level of doneness before all the moisture melts away. The thicker it is the longer it will take to cook.
Select Beef
With Select beef you run the risk of having your steak come out too dry, so you need to be careful how you cook it. You may want to add a little bit of meat tenderizer or Worcestershire sauce to replace the flavor of fat. It is usually best to marinate Select cuts before cooking or braise them to obtain maximum tenderness and flavor. Only the tender cuts should be cooked with dry heat.
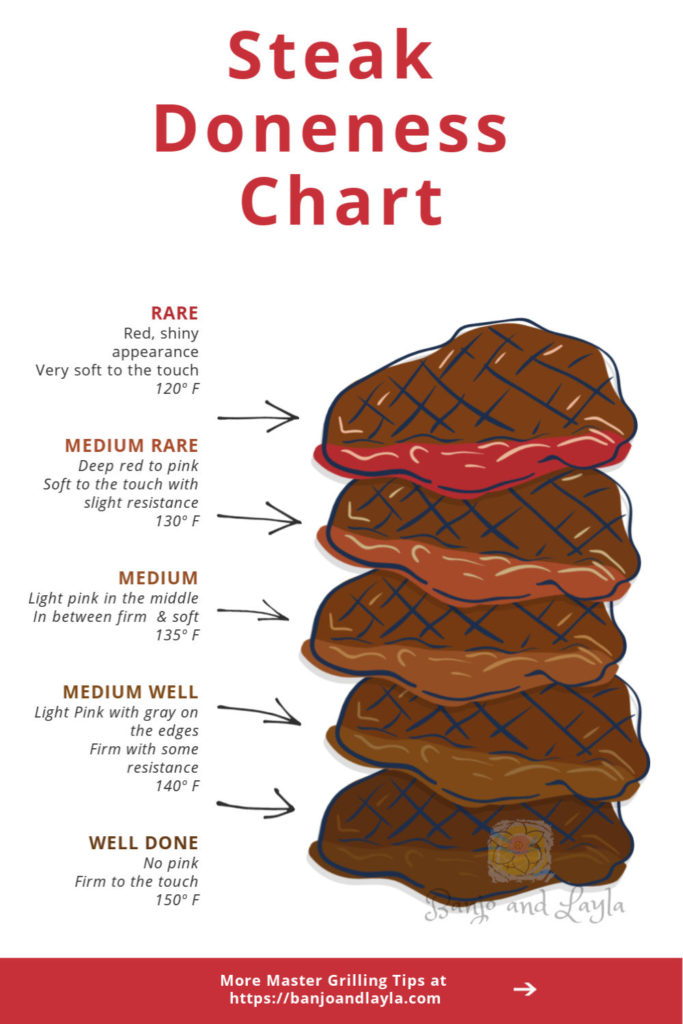
What temperature should steak be cooked to?
People can be very particular about how their steak is cooked. Medium Rare is the standard most chefs use. Cooked medium rare the steak will be tender, juicy, and if it is prepared correctly will practically melt in your mouth.
The chart below will help you please everyone’s tastes, from steak that is practically raw on the plate to dry as a bone with “no pink” as some like to say. Cooking times vary and depend on the thickness of the cut, so it is best to go with the temperature rather than a cooking time. You can use an instant read meat thermometer for the most accurate results.
With practice you can tell how cooked a steak is just by feel alone. As my husband says on the video the tougher it feels the more done it is. He has gotten so good at grilling steaks (I call him the Grill Master) that he can tell when a steak is ready without even using a meat thermometer.
Which cut of steak should I get?
The cut of steak you use depends on what you like in a steak and the flavor you prefer. There are 5 main cuts of steak, and each one differs a little in their texture and tenderness. Here is a brief description and some benefits of each one.
Top Sirloin Steak
Top Sirloin comes from the back area that is off the short loin area. This is a less expensive cut of steak but can still be tender and tasty, especially if marinated before cooking. The bones and the round muscles on the bottom have been removed from this type of steak. If you are on a tight budget Top Sirloin might be a good option for you.
Porterhouse and T-Bone Steaks
I put these two together in the same category, because they are very similar cuts of beef that both come from the short loin. They both have a T-shaped bone in the middle and contain two different pieces of meat: the tenderloin and the strip steak.
Basically Porterhouse steaks are cut from the rear end of the short loin and have a bigger portion of the tenderloin, while T-Bone steaks are cut from the front end and have a smaller portion of the tenderloin. Those are the main differences. What’s great is that there are really two different steaks in one! The bone in the middle keeps things cooking evenly, where one side is tender and the other very meaty.
New York Strip Steak
New York Strip steak is a lean cut of beef that comes from the short loin area. It is one side of the porterhouse or T-bone steak described above, and it is always served boneless. There is very little fat in this cut, and it is quite popular.
Ribeye Steak
Ribeye is a beef steak that is cut from the middle rib area. You can buy it bone-in or boneless. Ribeye steak is a flavorful, marbled piece of meat and can be very tender when cooked hot and fast. This is a fattier cut of steak, but that is what makes it taste so good. The marbling of fat makes it a melt-in-your-mouth steak when cooked correctly. The bone-in kind cooks a little more evenly than the boneless steak.
Filet Mignon
Filet Mignon comes from the small tip portion of the tenderloin and is the most tender of the beef steaks. Although tender, it is actually very lean. Prepared many times wrapped in bacon, it can be a little pricey but is so delicious. It is one of my favorites.
6 Steps to Grilling the Perfect Steak
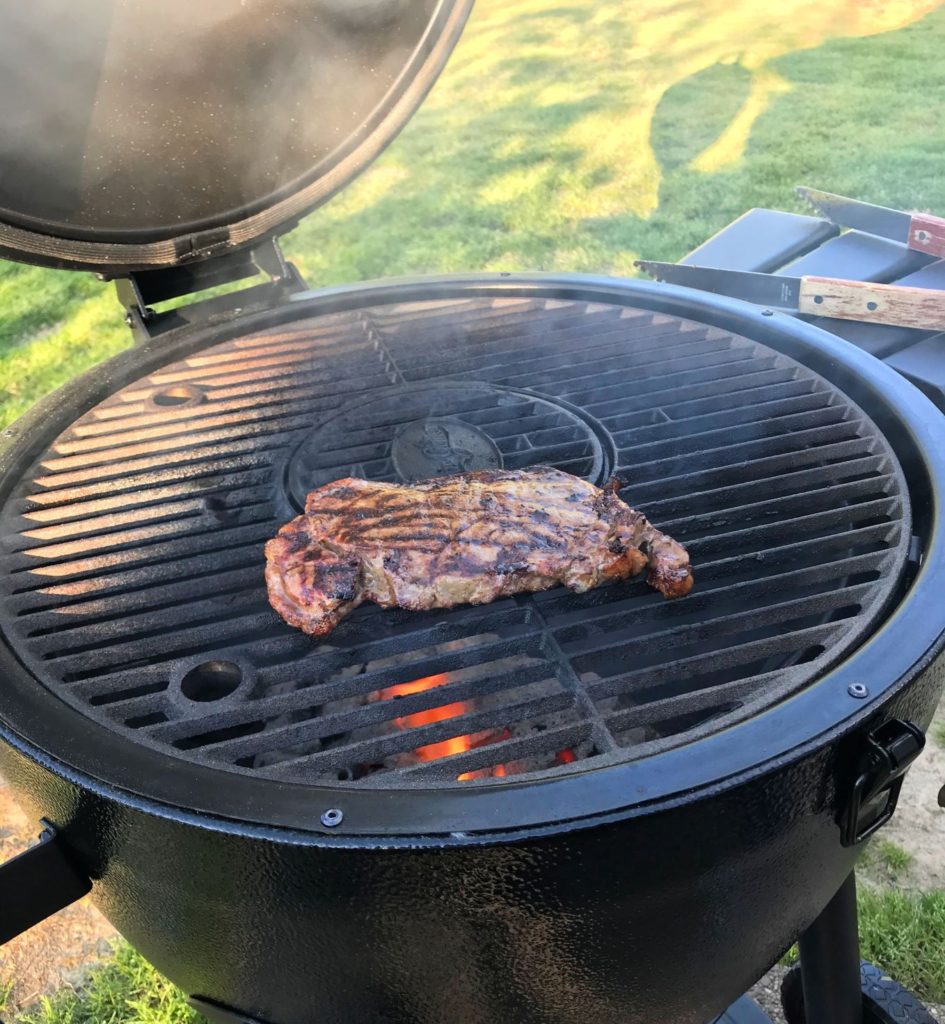
1. Fire up the Grill

We just got a new Char Griller Acorn grill, and my husband loves it. It is his new toy. For grilling steaks, you will want the heat as high as possible. You want it extremely hot, or your steak will cook unevenly. First make a chimney of charcoal and light it up. That makes the center hotter than the outside part of the grate. My husband uses a box fan to get air more quickly to the flames. You will know the charcoal is ready when they turn almost white. When the charcoal is ready, put the top grate back on. Allow it to heat up with all the vents fully open, then pour cooking oil on a folded paper towel and oil the grate using long-handled tongs.
2. Season the Steak
Never cook a steak straight from the refrigerator. A cold steak will cook unevenly. Always take the steak out of the refrigerator and let it sit for about 30 minutes until it reaches room temperature. Trim excess fat off of it to avoid flame flare-ups, and vertically slash the thin piece of fat around the outside of the steak to keep it from curling. Generously apply coarse salt and freshly ground pepper. Flip the steak and repeat the process. Salt and pepper should be all you need for a high grade cut of meat, because the natural flavors are enough.
3. Sear and Flip the Steak
Place the steak at the hottest part of the grate, directly above the coals, and let it sear a few minutes, then flip the steak over and sear the other side for the same amount of time. During this searing process, do not move the steak around with the tongs, because this will keep you from getting those great looking grill marks. Close the lid to prevent flame flare-ups. It is a myth that searing locks in juices. However, it does give steak that crusty covering and assures great flavor.
4. Slide the Steak
Searing may be all you need unless your steak is very thick. If the steak is more than 1 inch thick, after you have seared the steak, slide it over to the warm side of the grate but not directly over the coals. Close the lid and continue to cook the steak until it’s at your desired temperature for doneness (see chart from earlier). You do not need to flip the steak during this time.
5. Check for Doneness
Using a digital instant read meat thermometer, check the temperature of the steak while it’s still on the grill. Using the Steak Doneness Chart, grill the steak to your desired taste. Keep in mind that the steak will continue to cook a few degrees more after it’s removed from the grill.
One of the most important parts of grilling a steak is taking it off the heat before it has lost too much moisture. There is a short window of time, usually just a minute or two, when steaks go from medium rare to medium, or from medium to medium well.
You have to stay alert to keep from overcooking your steak. Never walk away from a steak on the grill. And remember, it’s always better to take it off when it’s underdone and then return it to the grill than it is to let a steak get too done. Once that happens, you can’t fix it.
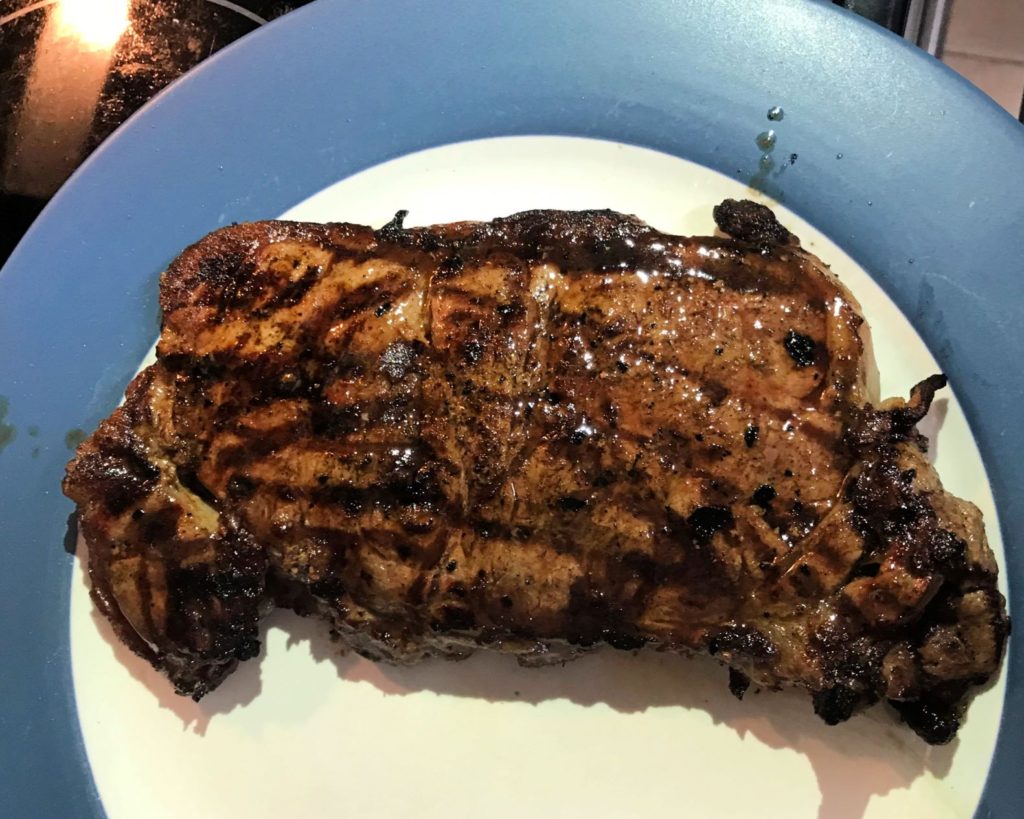
6. Remove Steak and Let it Rest
After removing the steak from the grill, put it on a plate or cutting board and set a loose piece of aluminum foil over it. Let it rest for about 5 minutes, because the temperature will keep going up a little bit and the juices will blend into the meat.
Did you try this method? Let me know how it worked out!


I have a little trouble cooking meat, but my husband doesn’t. Thanks for the tips.
Same here. Thanks for commenting! 🙂