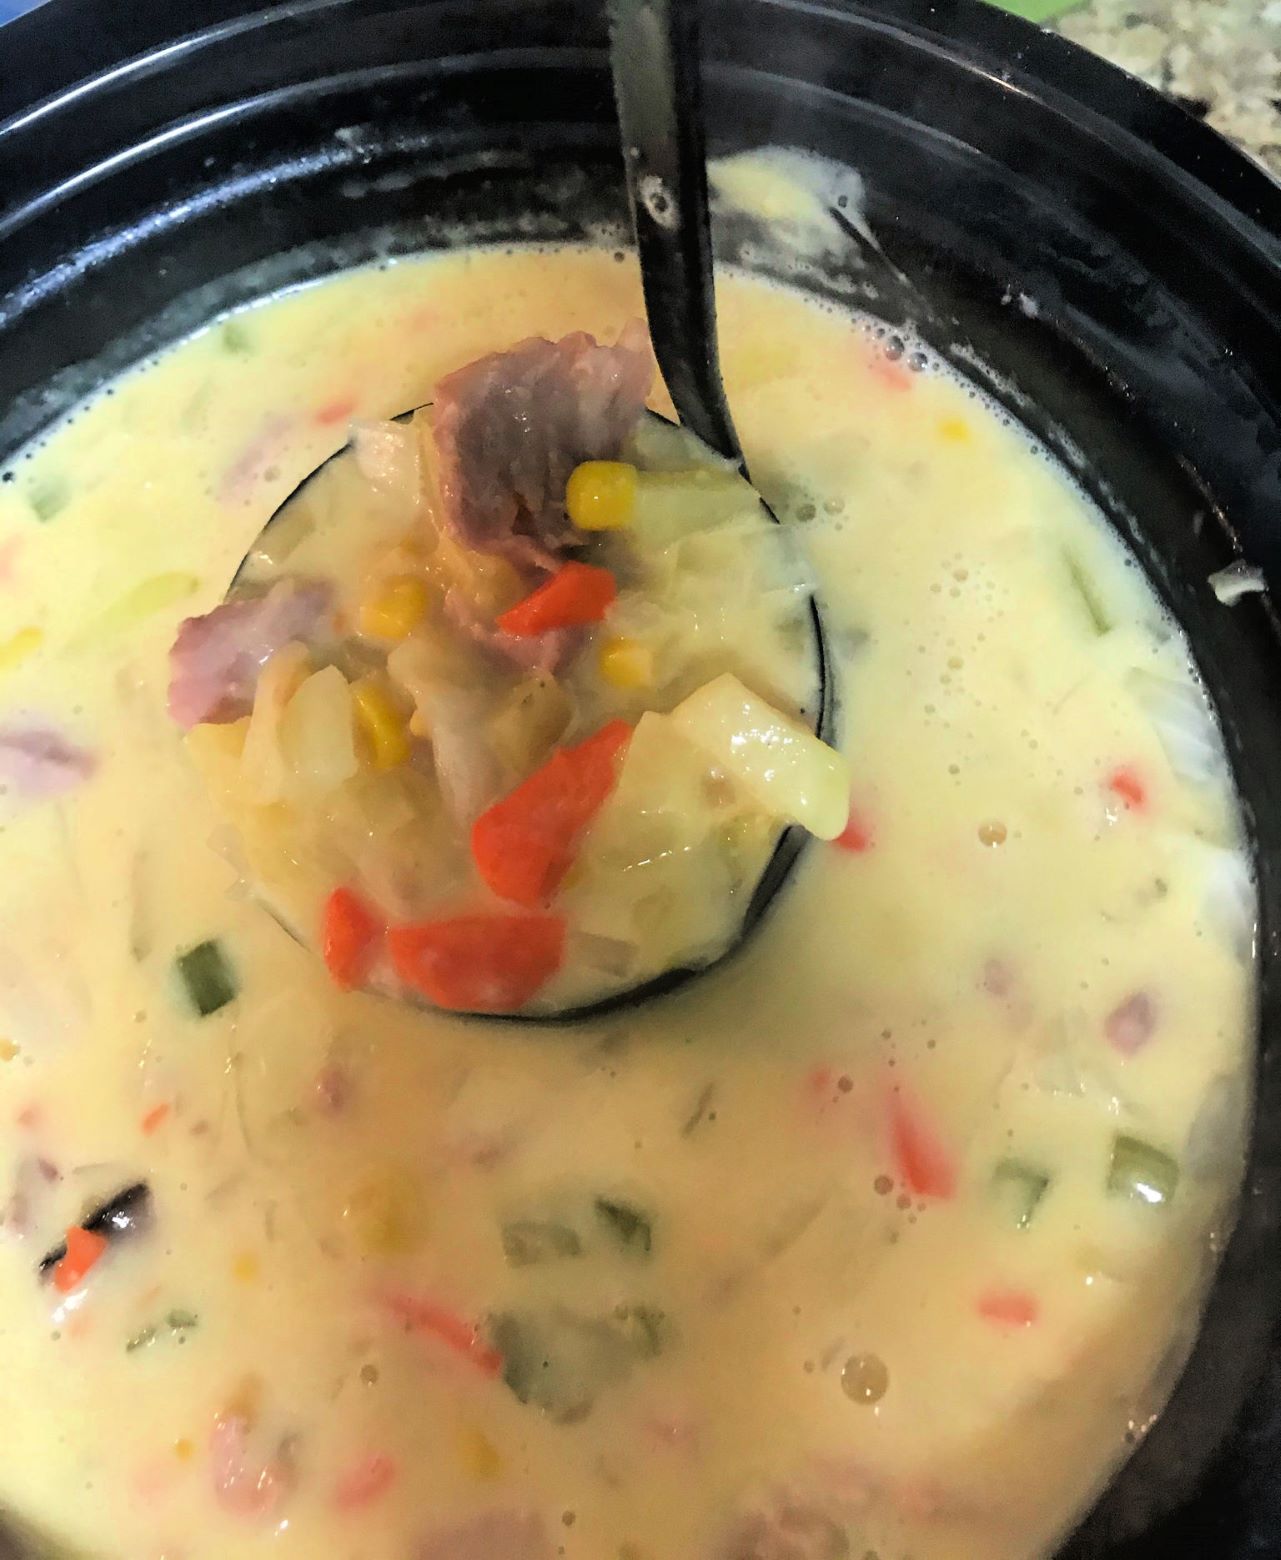
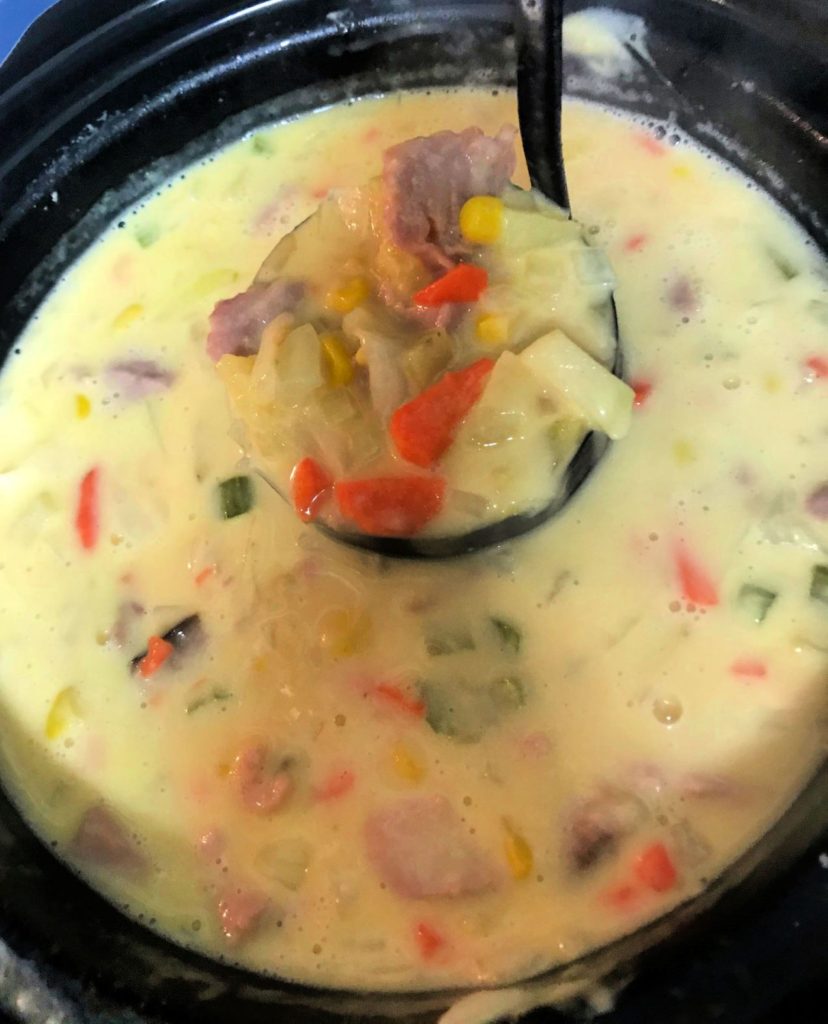
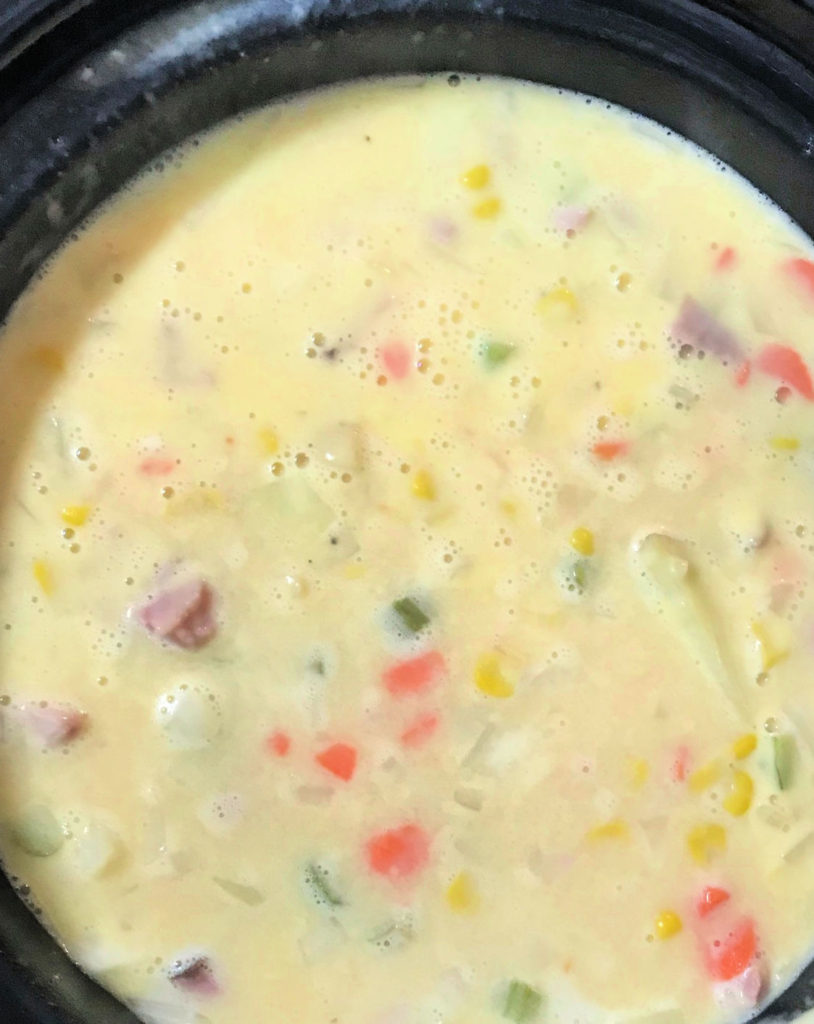
Looking for something to do with all of your leftover holiday ham? Try this creamy cheddar ham and potato soup. Seasoned with a ham bone, this hearty soup is chock full of seasoned veggies and leftover ham. The recipe makes a lot (my slow cooker is one of the smaller ones, but it was full to the brim), but this soup will not last long around your house.
This recipe for cheddar ham and potato soup serves at least 7 people.
Homemade soup is great any time of the year but especially in the winter or on rainy days. That’s why using leftover holiday ham is perfect for this recipe. I used leftover Honey Baked Ham in this picture. If you choose this make sure to cook off any of the sugary coating or skin. Otherwise, your soup will taste sweet instead of salty.
Cheddar Ham and Potato Soup is perfect on a cold day!
Let me know if you try it. I made this recipe up using bits and pieces of other soup recipes I’ve used, so rate my recipe if you like it. Enjoy!
This hearty cheesey soup full of potatoes, veggies, and leftover ham.
Prep Time20 minutesmins
Cook Time3 hourshrs
Total Time3 hourshrs20 minutesmins
Course: dinner, lunch, Main Course
Cuisine: American
Keyword: cheddar ham potato soup, ham, potato soup, recipes for leftover ham, soup recipe
Servings: 7servings
Calories: 330kcal
Author: Cindy Baker
Ingredients
1meaty hambone(optional)
3gold potatoesdiced
2carrotspeeled and diced
2celery stalksdiced
1canwhole kernel corn
1large yellow oniondiced
1 1/2cupsfully cooked hamcubed
2cupsshredded cheddar cheese
2cupswater
1/4cupbutter
1/4cupall-purpose flour
1 1/2cups1% or 2% milk
1tspgarlic powder
1/2tspsalt
1/4 tsppepper
Instructions
In a slow cooker, combine the potatoes, carrots, celery, onion, and water. Place hambone in for extra flavor (optional). Cover and cook on high 2 1/2 hours.
Remove hambone and set aside. If there are any good bits of meat left on the bone you can cut them off and add them to the soup.
In a saucepan on the stove, melt the butter. Stir in the flour until smooth.
Gradually add the milk, stirring constantly.
Add garlic powder, salt, and pepper. Bring to a boil, stirring constantly. Keep stirring and cook until thickened (about 2 minutes).
Stir in cheese until melted. Stir milk/cheese mixture into the potato mixture. Add ham.
Continue to cook in the slow cooker on high for another 20 – 30 minutes or until heated through.
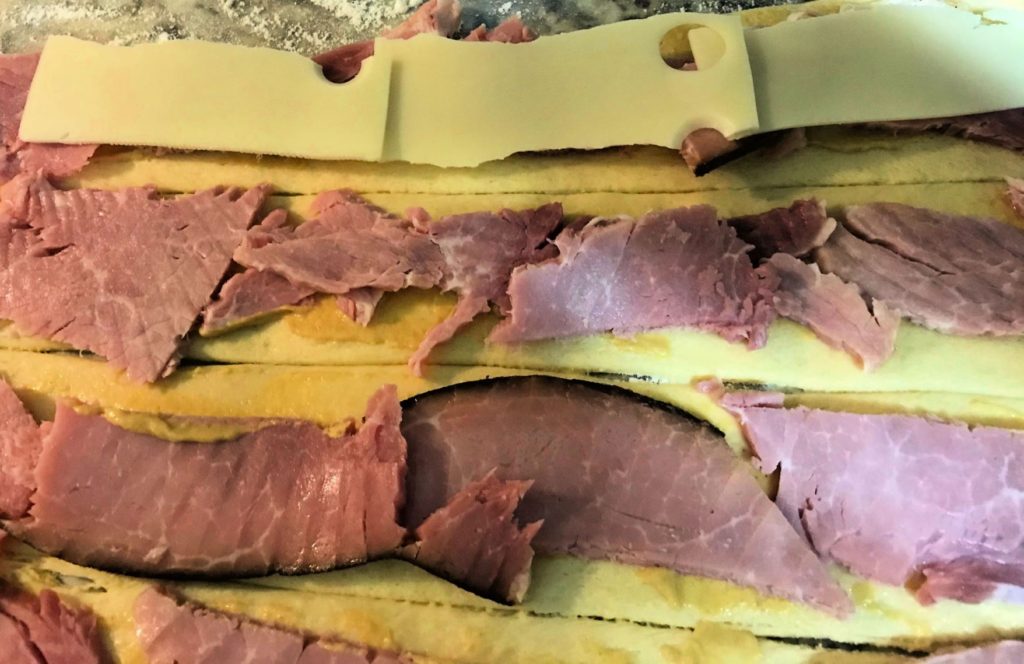
Ham and cheese pinwheels are one of those appetizers that always look so fancy, but they are really super easy to make if you use Crescent Roll dough sheets. I love crescent rolls, and this is a great way to use up your leftover holiday ham. These warm buttery treats are great to serve as a snack for all those armchair quarterbacks in your house who like to cheer on their favorite football team from home. They are sure to be a favorite any time of year!
Ham and Cheese Pinwheel Ingredients:
1 8 oz. tube crescent roll dough
1/2 lb. deli-sliced ham (or leftover baked ham)
8 oz. Swiss cheese sliced
2 Tablespoons Dijon mustard
4 Tablespoons butter melted
1/2 Teaspoon garlic powder
2 Tablespoons chopped parsley
1 teaspoon poppy seeds
Ham and Cheese Pinwheel Instructions:
Preheat oven to 350 degrees F.
Spray a 8 x 8 ” baking pan with cooking spray.
On a lightly floured surface, unroll dough and cut the sheet into 4 long triangles. Spread mustard onto each rectangle.
Top with sliced ham then cheese.
Starting with one short side, roll up each rectangle. Pinch edges to seal.
Cut each roll into 3 slices. Place cut side up in the baking pan.
In a small bowl, whisk together melted butter, garlic powder, and parsley. Brush over pinwheels, then sprinkle poppy seeds on top.
Bake for 15 minutes or until rolls are golden brown.
I used leftover Honey Baked ham for these ham and cheese pinwheels. Brush melted garlic butter over the ham and cheese pinwheels before sprinkling with parsley and poppy seeds.
Place the pinwheels close together in the pan.
You can use deli-sliced ham or baked ham. I used Swiss cheese, but you could also use Gouda or any other cheese of your choice. Now that you know how to make the pinwheels you can get creative and try your own variations. Try spinach, cream cheese, and turkey. Or cranberry sauce and turkey. The sky’s the limit! You do not have to divide the dough either. If you want to make one long roll then slice it, you can. I find it easier to slice in smaller rectangles. It seems to get squished when it is in one long roll.
Let me know if you try it and how it turns out. I’d love to read your comments below. Also, please rate my recipe and pin it on Pinterest.
Have you ever wondered how to make homemade chicken pot pie? I love chicken pot pie, but I always thought that it would take a long time to make and be somewhat difficult. Well, I made this recipe for the first time last week, and it was not only easy and simple but so good! This is bound to be one of the most popular and highly rated recipes on my blog. It is absolutely delicious!
This is a classic homemade Chicken Pot Pie with a twist. I do not like peas, so instead of a canned vegetable mix or frozen peas, I used fresh chopped onion, carrots, and celery. And what saves time and gives it a flaky, buttery crust is using refrigerated pie crusts. The sauce is extra creamy because of a little heavy cream, and using a grocery store rotisserie chicken saves time and gives it a hearty savory taste your family will love. It is a super easy recipe to prepare, even for beginner cooks. Busy families will love this warm delicious popular comfort food!
Flaky, buttery crust makes this chicken pot pie extra delicious!
Ingredients
1 box refrigerated pie crusts (2 per box)
1/3 cup butter
1/3 cup all-purpose flour
1/2 teaspoon salt
1/4 teaspoon pepper
1 3/4 cups chicken broth
1/2 cup heavy cream
1 rotisserie chicken skin removed and meat chopped into small pieces
1 small onion chopped
2 whole carrots peeled and chopped
3 celery stalks chopped
Instructions
Heat oven to 450 degrees F.
Remove skin from chicken and discard. Remove meat and chop into small pieces. Set aside.
In large saucepan melt butter over medium heat.
Add onion, carrots, and celery. Cook 2 minutes, stirring frequently.
Stir in flour, salt, and pepper until well blended.
Gradually stir in chicken broth and cream, cooking and stirring until bubbly and thickened.
Remove from the heat.
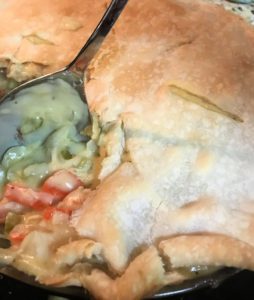
The filling for this chicken pot pie is thick and creamy.
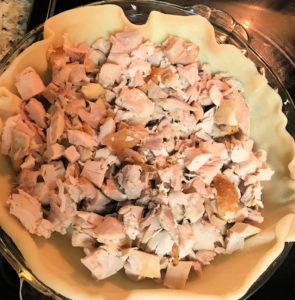
Line a pie pan with one pie crust and pour in the chicken pieces.
Rotisserie chicken works great for this chicken pot pie recipe.
Pour hot creamy mixture on top of the chicken.
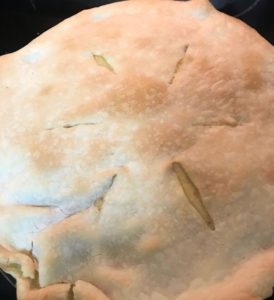
Top with second crust; seal edge and flute sides. Cut slits in several places in the top crust to let steam out.
Bake 30 – 40 minutes or until crust is golden brown. During the last 15 – 20 minutes of baking, cover the edges of the crust with strips of aluminum foil to prevent the edges from browning too much. Let stand 5 minutes before serving.
Chicken Pot Pie is the perfect comfort food!
A Few Tips To Help You Out:
The edges of the crust burn easily, so during the last 15 minutes of baking make a pie crust shield out of aluminum foil and place it all around the pie like a collar. This protects the edges from over-browning.
Add a little sage or poultry seasoning to the sauce for extra flavor.
I used a standard 9-inch glass pie plate.
Make sure you cook the sauce until it thickens. If it is too runny like soup then it will make the bottom crust soggy and possibly leak.
You don’t have to use rotisserie chicken. But the chicken needs to be cooked before you put it in the crust. Leftover chicken or Thanksgiving turkey works great too!
You can make the filling ahead of time and refrigerate it up to 1 day, but if you do make sure to heat it a little on the stove before you pour it into the pie.
You can also freeze the filling and the chicken for up to 1 month. Cool it off first by placing it uncovered in the refrigerator for about half an hour. Pour it into a gallon-sized freezer bag and leave a little room at the top. When you are ready to use it just thaw the mixture overnight in the refrigerator then heat it before pouring it into the pie.
Easy chicken pot pie recipe using refrigerated pie crusts
Prep Time20 minutesmins
Cook Time40 minutesmins
Total Time1 hourhr
Course: dinner, lunch, Main Course
Cuisine: American
Keyword: chicken pot pie, chicken recipes, easy dinner recipes, pie, Pie Crust
Servings: 6servings
Calories: 216kcal
Author: Cindy Baker
Ingredients
1boxrefrigerated pie crusts(2 per box)
1/3 cupbutter
1/3cupall-purpose flour
1/2teaspoonsalt
1/4teaspoonpepper
1 3/4 cupschicken broth
1/2cupheavy cream
1rotisserie chickenskin removed and meat chopped into small pieces
1small onionchopped
2whole carrotspeeled and chopped
3celery stalkschopped
Instructions
Heat oven to 450 degrees F.
Remove skin from chicken and discard. Remove meat and chop into small pieces. Set aside.
In large saucepan melt butter over medium heat.
Add onion, carrots, and celery. Cook 2 minutes, stirring frequently.
Stir in flour, salt and pepper until well blended.
Gradually stir in chicken broth and cream, cooking and stirring until bubbly and thickened.
Remove from the heat.
Line a pie pan with one pie crust and pour in the chicken pieces.
Pour hot creamy mixture on top of the chicken.
Top with second crust; seal edge anbd flute sides. Cut slits in several places in the top crust to let steam out.
Bake 30 – 40 minutes or until crust is golden brown. During the last 15 – 20 minutes of baking, cover the edges of the crust with strips of aluminum foil to prevent the edges from browning too much. Let stand 5 minutes before serving.
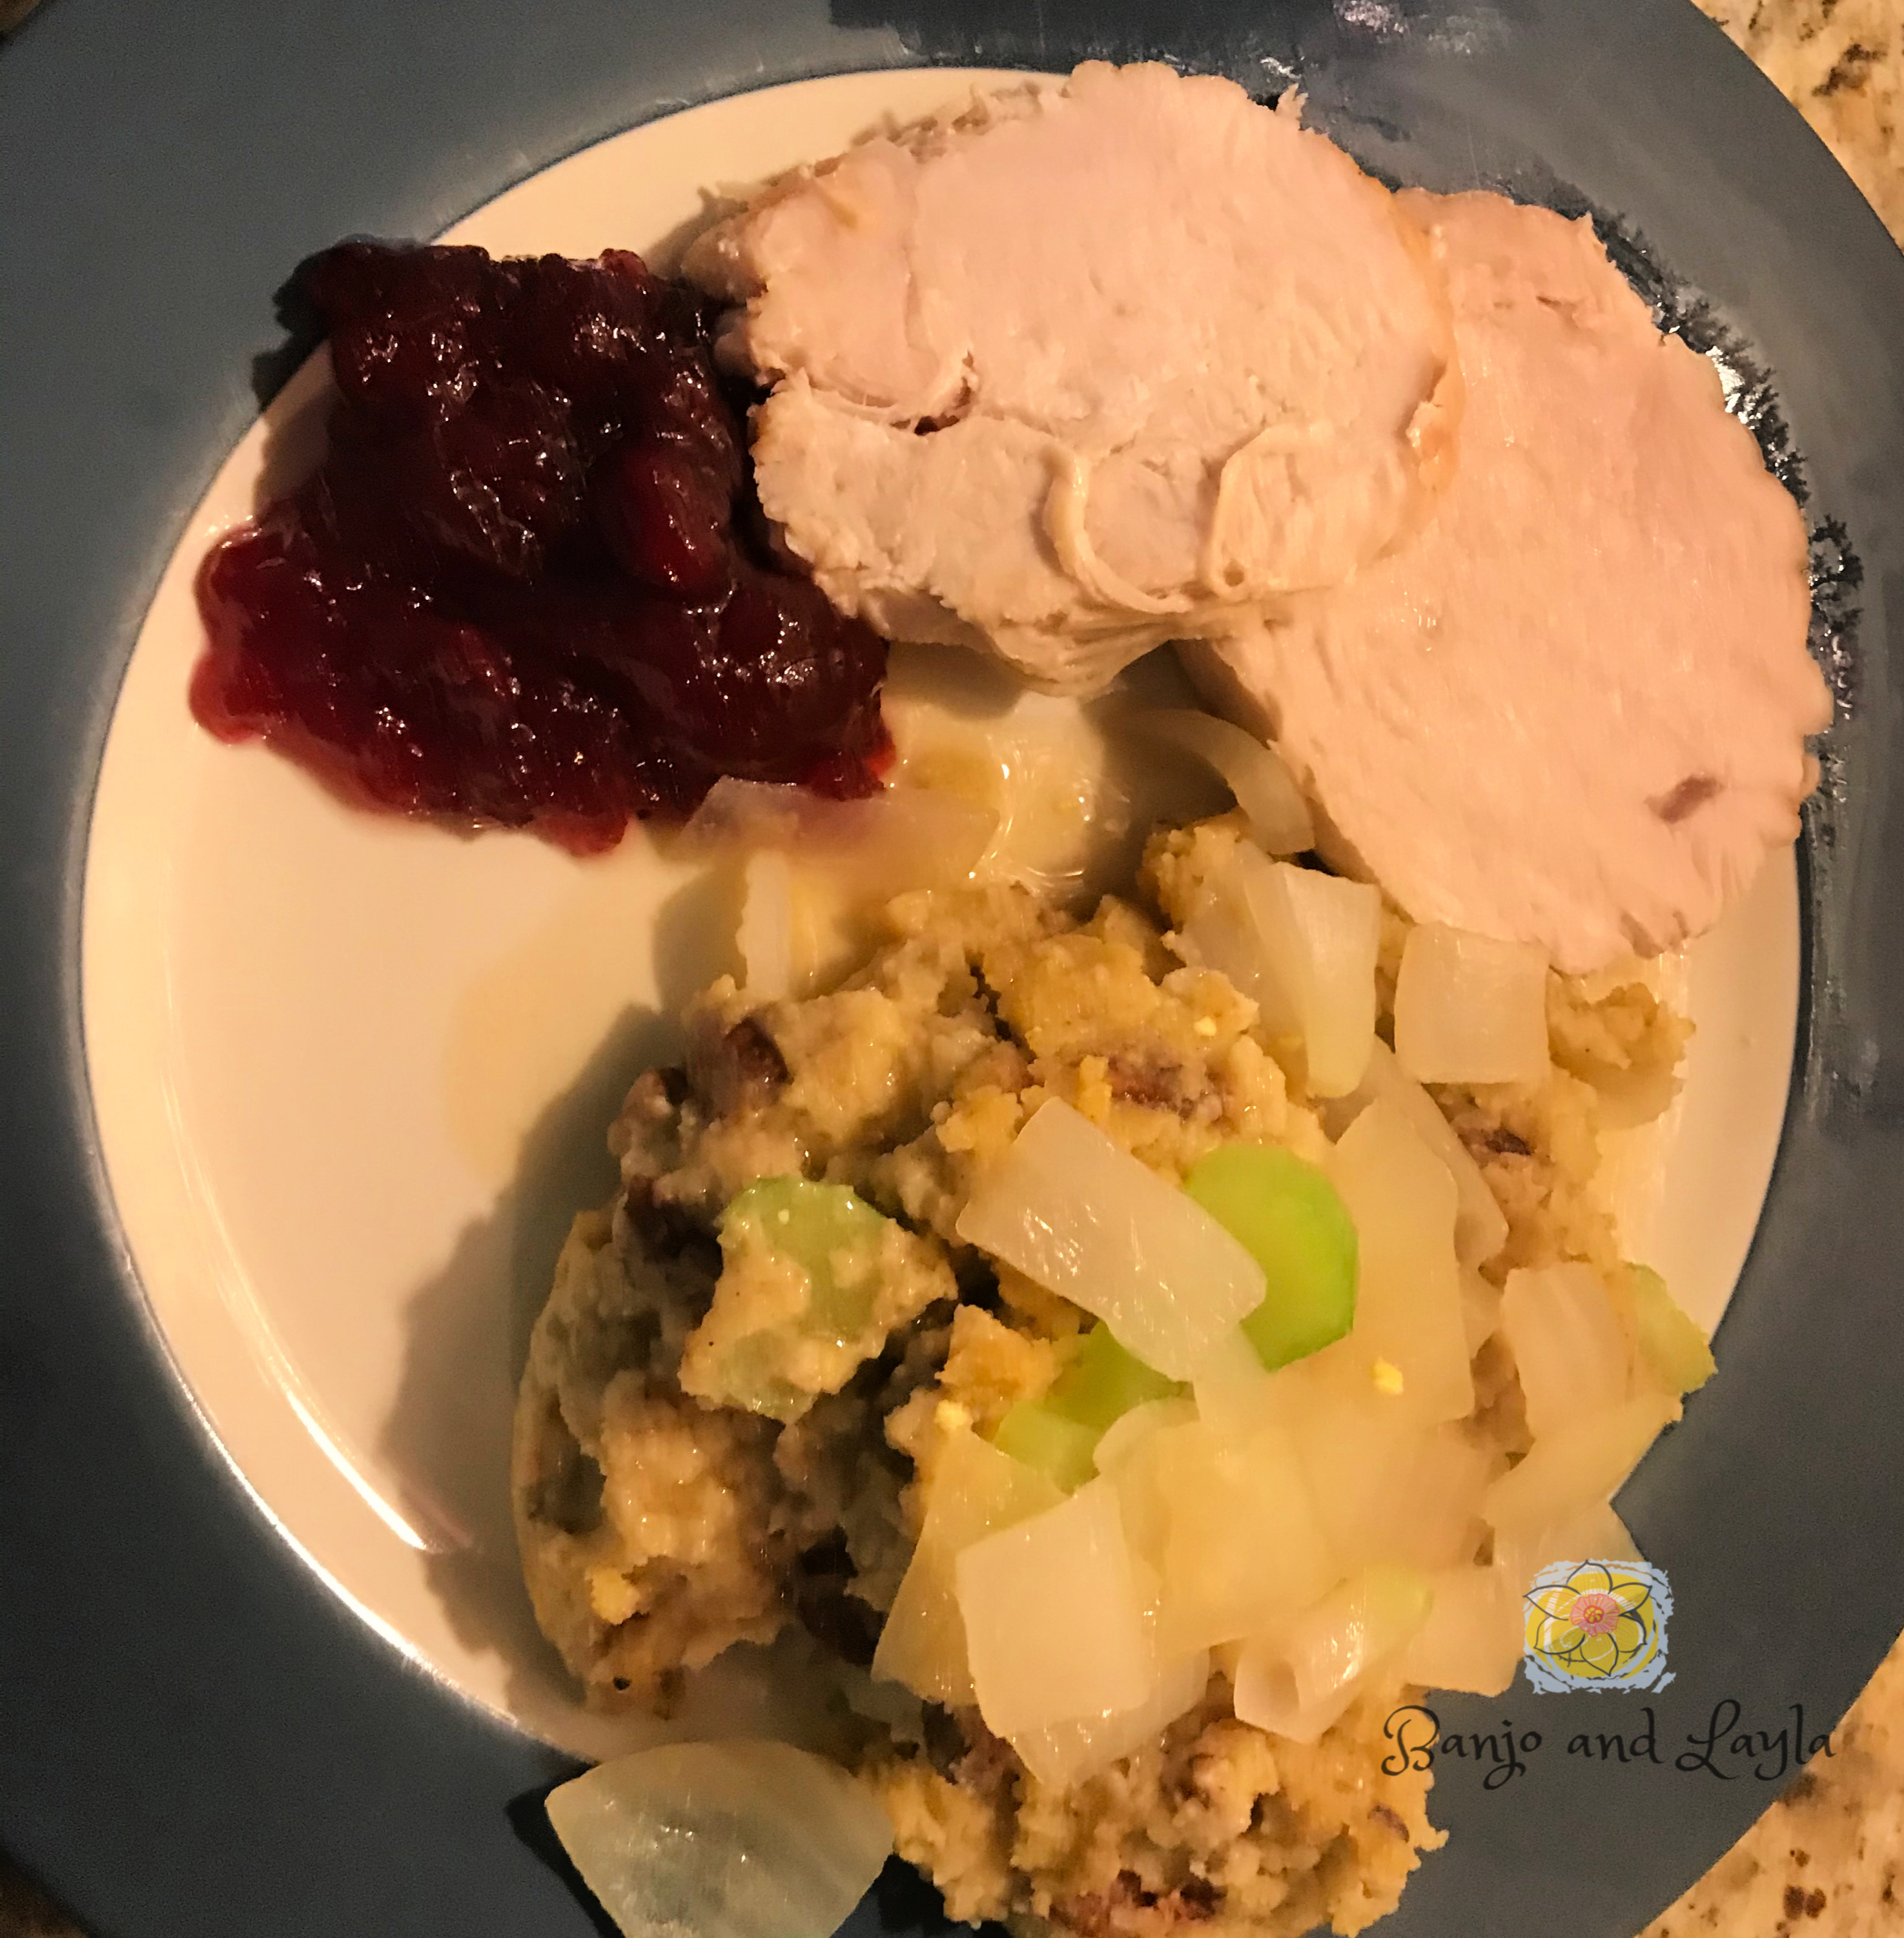
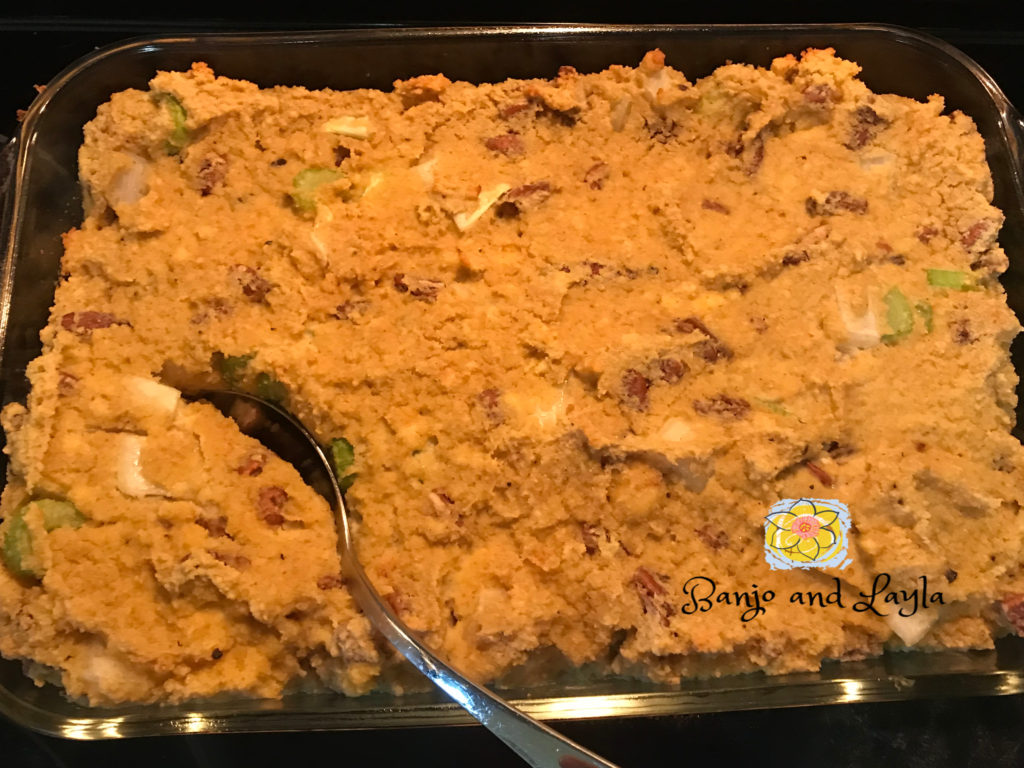
This is absolutely the world’s greatest cornbread dressing – at least that’s what I think. It is my Mama’s recipe, and she is a good cook! Disclaimer: Since I originally posted this, I was gently reminded by my mom that it is not exactly her recipe because she makes her cornbread from scratch. Well alrighty then, I admit I made mine from a mix. But it still turned out awesome.
I am not exaggerating when I say that I have never tasted any I like better. I was born on Thanksgiving Day, and one of my favorite meals is turkey and dressing (sometimes with birthday cake). I have never shared this recipe with anyone before, so you are the first to learn my secret. I’ll even throw in the gravy recipe as well!
This post may contain affiliate links, and I may earn compensation when you click on the links at no additional cost to you.
Ingredients
3 boxes Jiffy cornbread mix
3 eggs
1 cup milk
1 can cream of mushroom soup
1 can cream of chicken soup
1 – 2 cans chicken broth
1 stick butter, melted
1 teaspoon salt
1 teaspoon pepper
1 1/2 Tablespoons sage
1 onion, chopped
3 stalks celery, chopped
1/2 – 1 cup pecans, chopped
Instructions
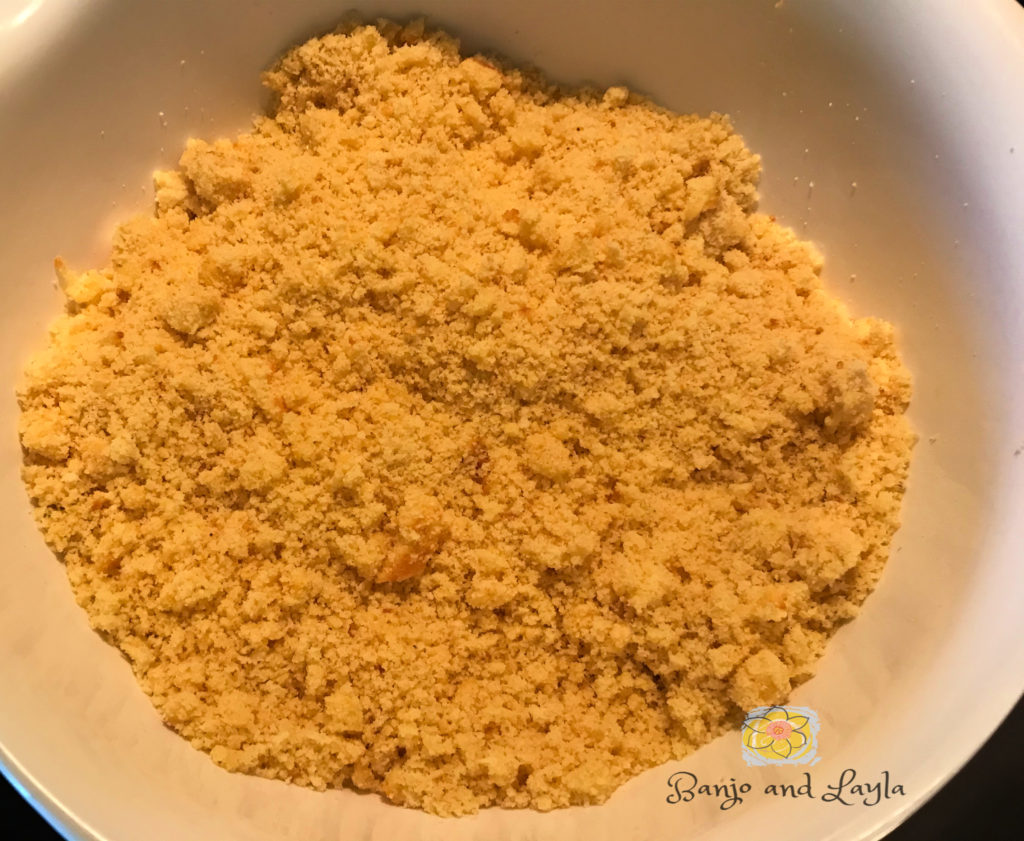
Us 2 – 3 boxes of the cornbread mix to make the cornbread (I usually make it the night before). Crumble the cornbread into a bowl.
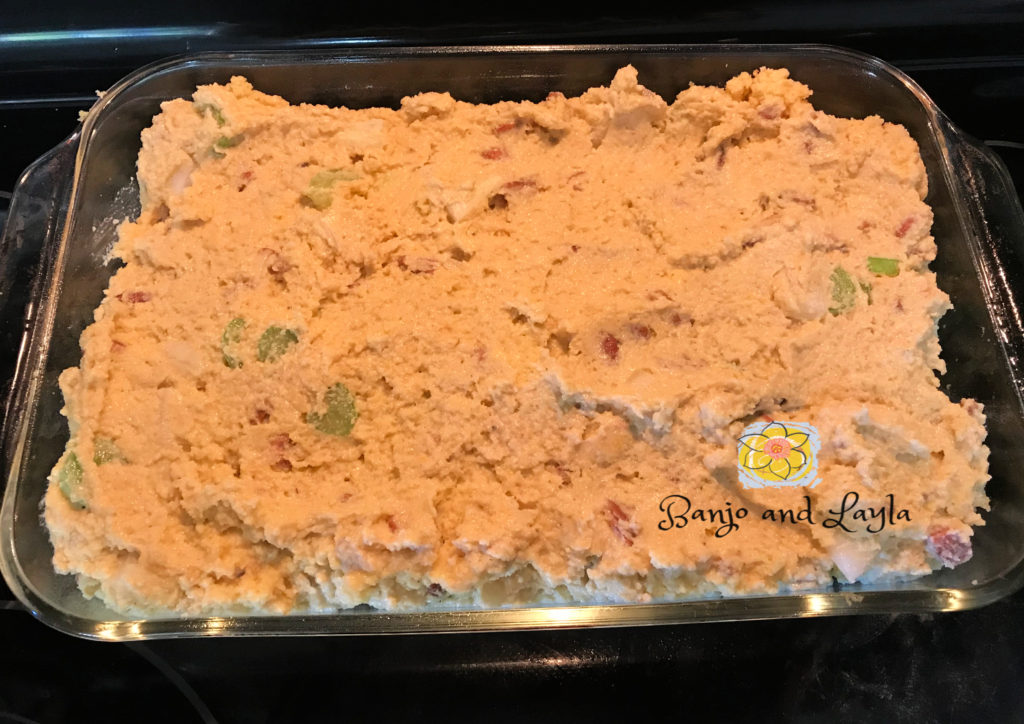
Pour soups and chicken broth over the cornbread and stir. Add melted butter, sage, and salt and pepper. Add half of the onions and celery and the pecans and stir until well mixed.
Pour into a greased 8 1/2 x 11 dish (or similar size). I used Pam spray.
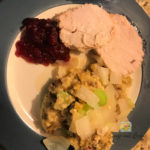
Cook uncovered on 325 degrees for one hour. Serve with gravy, turkey, and cranberry sauce.
For the Gravy:
In a pot on the stove heat to boiling 32 oz. chicken broth and the rest of the onions and celery. You can add turkey giblets if you want to. I also add two chopped up boiled eggs. Reduce heat and simmer covered for 8 – 10 minutes.
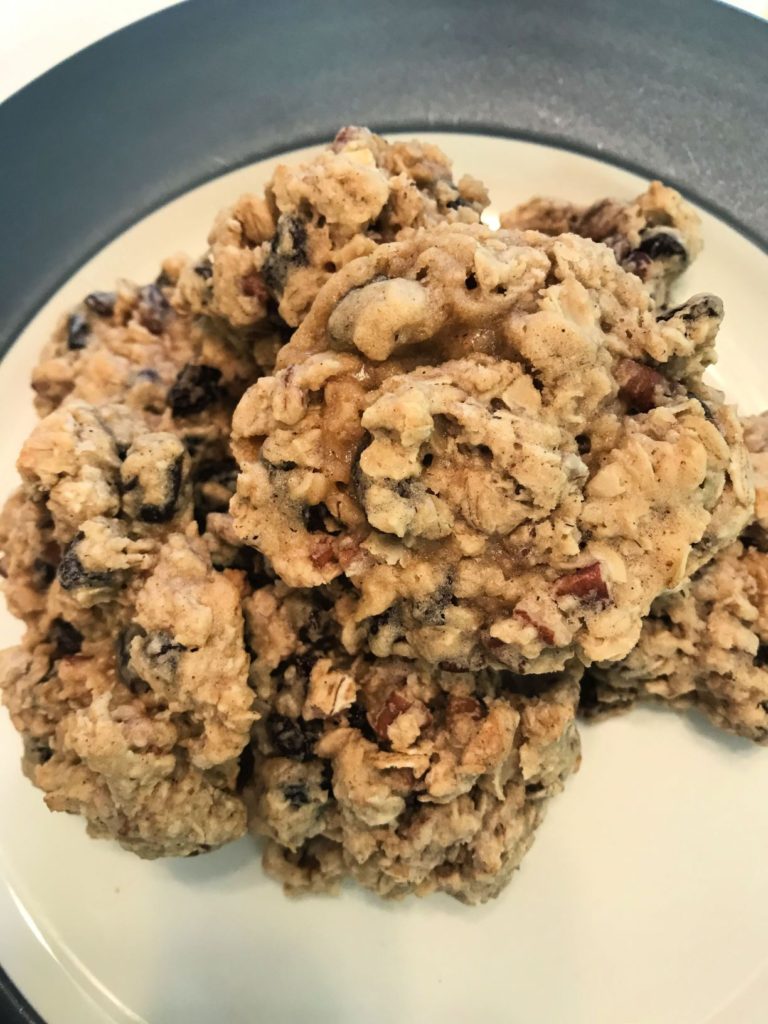
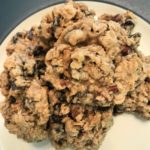
Where I live school starts back tomorrow – whether all in person, all virtual, or a hybrid of both versions. It will be a different year for sure, but one thing should not change. Great after school snacks! One of my favorite kinds of homemade cookies is oatmeal raisin cookies with chopped pecans. These are my dad’s most favorite, and I just made him some for his 80th birthday last week. I wish I could take credit for this recipe, but it actually comes straight off the inside of the lid to the package of Quaker Oats. The only thing I changed is that I added chopped pecans.
So if you have children or are a teacher like me try some delicious oatmeal raisin cookies for that mid-afternoon snack. And if you just turned 80 what better way to celebrate!
Oatmeal Raisin Cookies With Pecans
I like to put them in a plastic bag and freeze them then just take a few out at a time. After about 5 seconds in the microwave, they are soft, warm, and chewy. I find that they stay fresher that way. I hope you enjoy this fun recipe. Here is all you need to know:
Ingredients
1 stick plus 6 Tbsp. butter softened
3/4 cup firmly packed brown sugar
1/2 cup granulated sugar
2 eggs
1 teaspoon vanilla
1 1/2 cups all-purpose flour
1 teaspoon baking soda
1 teaspoon cinnamon
1/2 teaspoon salt (optional)
1 cup raisins
3/4 cup chopped pecans (optional)
3 cups Quaker Oats (quick or old fashioned, uncooked)
Instructions
Heat oven to 350 degrees F.
In a large bowl, beat butter and sugars on medium speed of electric mixer until creamy.
Add eggs and vanilla; beat well.
Add combined flour, baking soda, cinnamon, and salt; mix well.
Add oats, raisins, and nuts; mix well.
Drop dough by rounded tablespoonfuls onto ungreased cookie sheets.
Bake 8 – 10 minutes or until light golden brown. Cool 1 minute on cookie sheets; remove to wire rack. Cool completely. Store tightly covered. Can be frozen.
Keyword: cookies, dessert recipes, oatmeal, oatmeal raisin cookies
Servings: 4dozen
Ingredients
1stick plus 6 Tbsp.buttersoftened
3/4cupfirmly packed brown sugar
1/2cupgranulated sugar
2eggs
1teaspoonvanilla
1 1/2cupsall-purpose flour
1teaspoonbaking soda
1teaspooncinnamon
1/2teaspoonsalt(optional)
1cupraisins
3/4cupchopped pecans(optional)
3cupsQuaker Oats(quick or old fashioned, uncooked)
Instructions
Heat oven to 350 degrees F.
In a large bowl, beat butter and sugars on medium speed of electric mixer until creamy.
Add eggs and vanilla; beat well.
Add combined flour, baking soda, cinnamon and salt; mix well.
Add oats, raisins, and nuts; mix well.
Drop dough by rounded tablespoonfuls onto ungreased cookie sheets.
Bake 8 – 10 minutes or until light golden brown. Cool 1 minute on cookie sheets; remove to wire rack. Cool completely. Store tightly covered. Can be frozen.
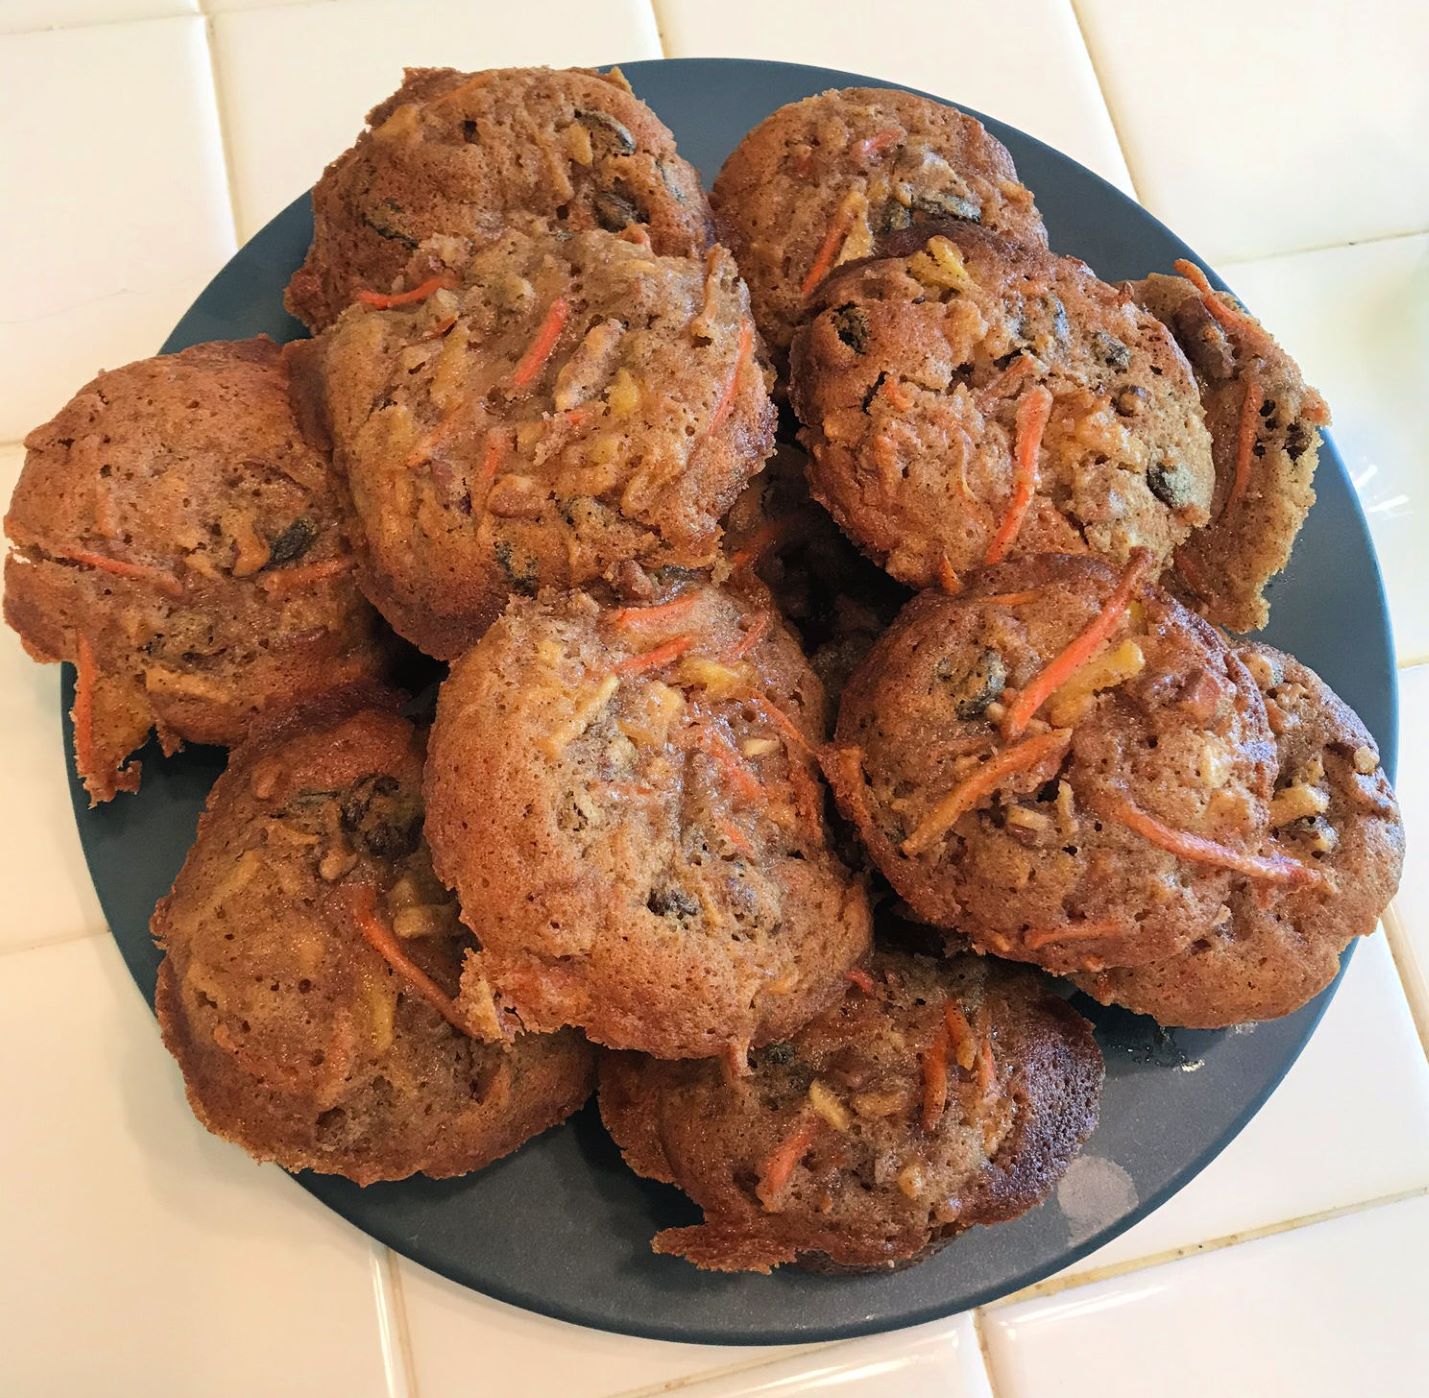
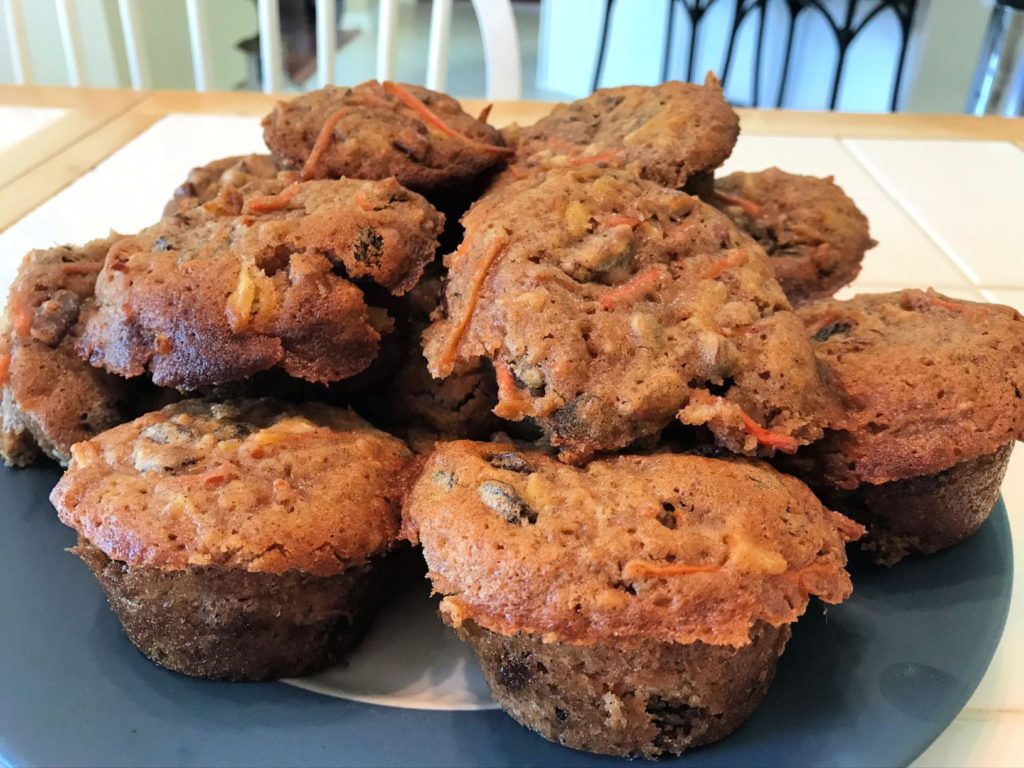
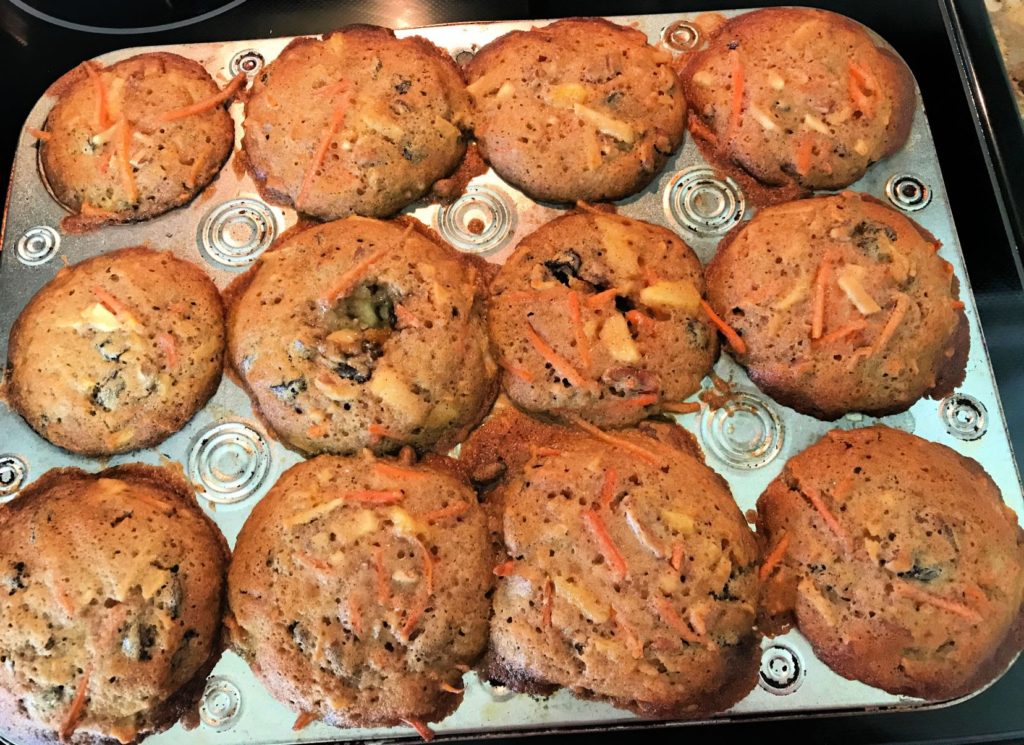
I went to graduate school on Boston’s North Shore and lived in a little town called Ipswich. One of my favorite places there was a little cafe called “Chipper’s” where they served the best morning glory muffins. I’m not sure if it is still there or not, but I have never forgotten those muffins.
Packed with healthy ingredients such as carrots, apples, pineapple, and nuts, these tasty muffins are full of fiber, minerals, nutrients, and healthy fats. There are lots of different variations of the recipe for morning glory muffins floating around, but I am going to share with you the one I like the best. My favorite part: crushed pineapple!
Filled with carrots, pineapple, nuts, and more!
It’s a really simple recipe, and you can change up the things you add into the basic mixture. For instance, some people add coconut. I don’t like coconut, so mine is more fruit-based. Another great idea is to add shredded zucchini. Substitute walnuts for the pecans for extra richness. Substitute 1/2 cup applesauce and 1/2 cup oil for the 1 cup vegetable oil to make it healthier. Be creative!
These muffins freeze well also. I had batter left over after filling 12 muffin cups, so I made little mini loaves to freeze and serve later. Great for breakfast, lunch, or a snack. They make a wonderful grab-and-go breakfast for me to eat on the way to my teaching job at school. You will love these tasty treats! Try them this week, and tell me what you think.
I put the left-over batter in two mini loaf pans, baked them, then froze them for later.
Ingredients
2 cups all-purpose flour
1 1/4 cup sugar
2 tsp. baking soda
2 tsp. cinnamon
1/2 tsp. salt
1 1/2 cups grated carrots
1 apple, peeled, cored, and grated
1 cup raisins
1/2 cup crushed pineapple
1/2 cup pecan pieces
3 eggs
1 cup vegetable oil
2 tsp. vanilla
Instructions
Mix together flour, sugar, baking soda, cinnamon and salt in a large bowl. Stir in carrots, raisins, apple, and pecans. In another smaller bowl beat eggs with oil and vanilla. Stir into the flour mixture until combined.
Spray muffin tins with non-stick cooking spray. Spoon mixture into muffin cups, filling them all the way to the top. Bake for about 20 minutes in a 350-degree oven or until a toothpick stuck in the center comes out clean. Makes 14 large muffins.
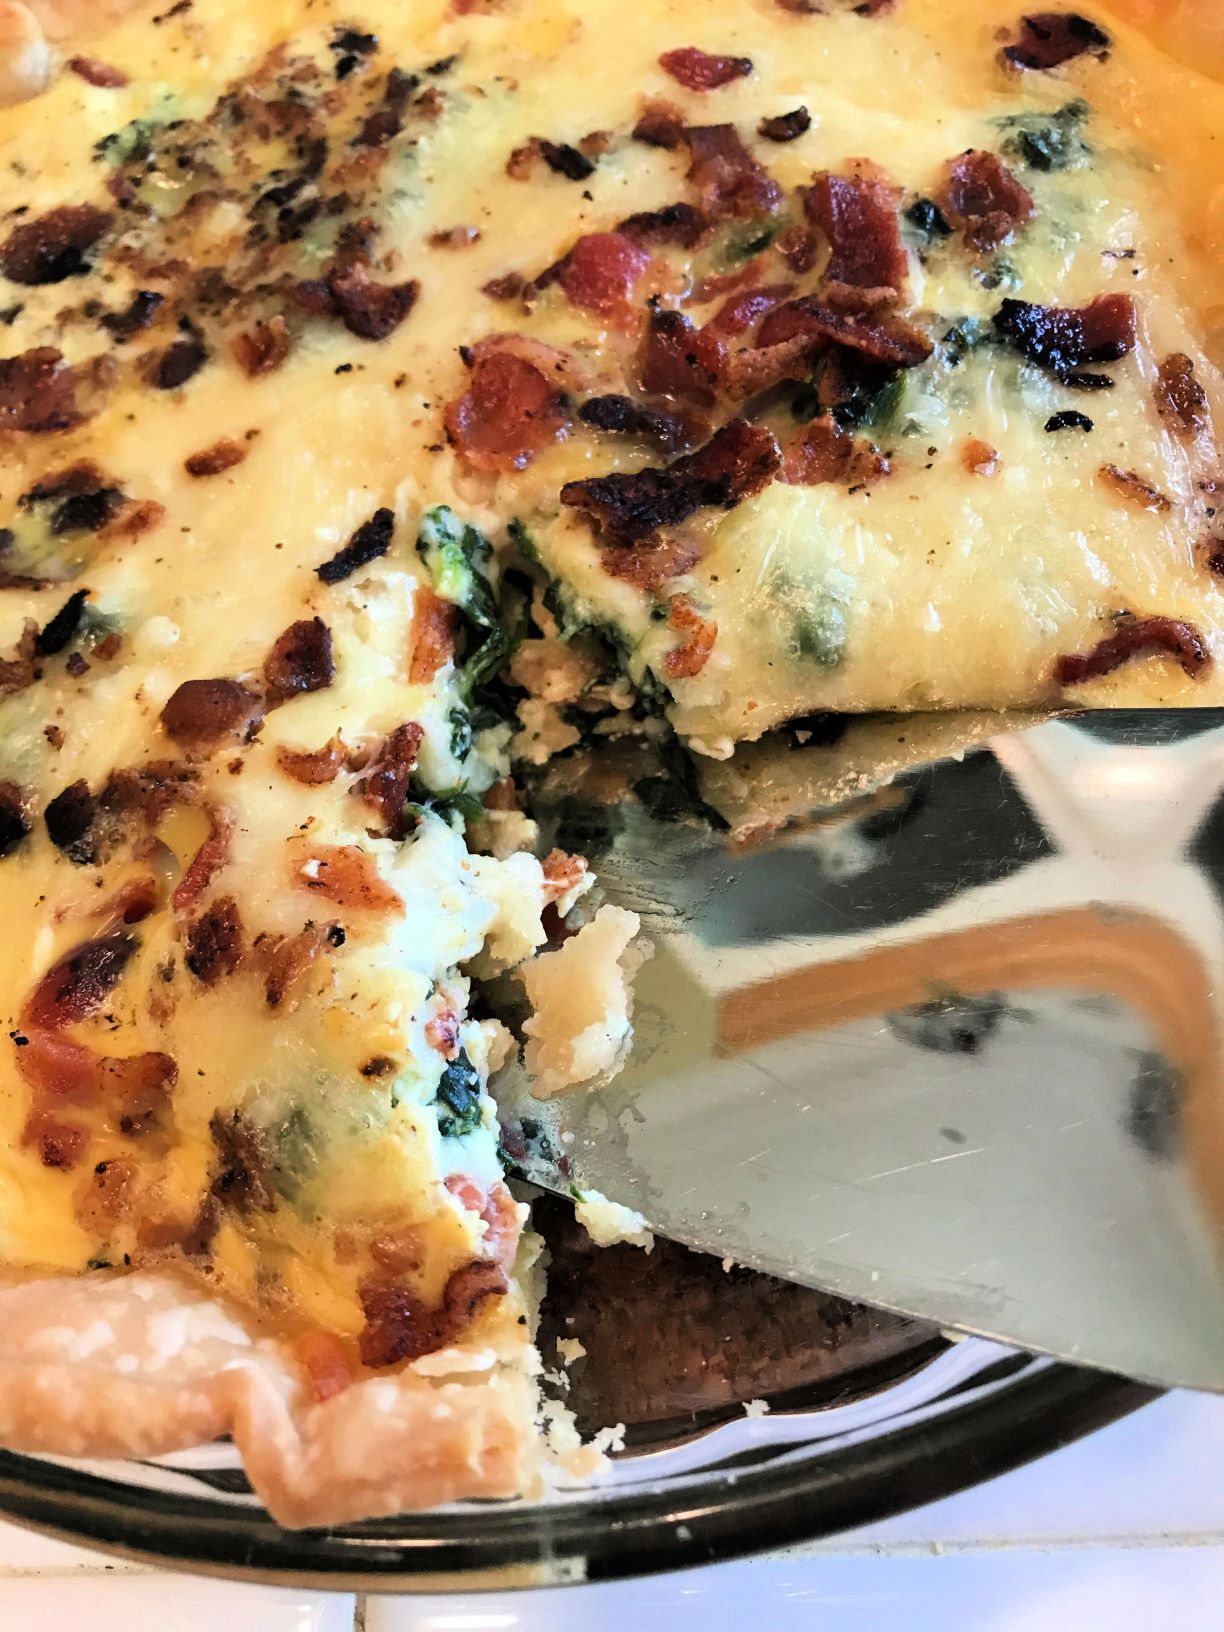
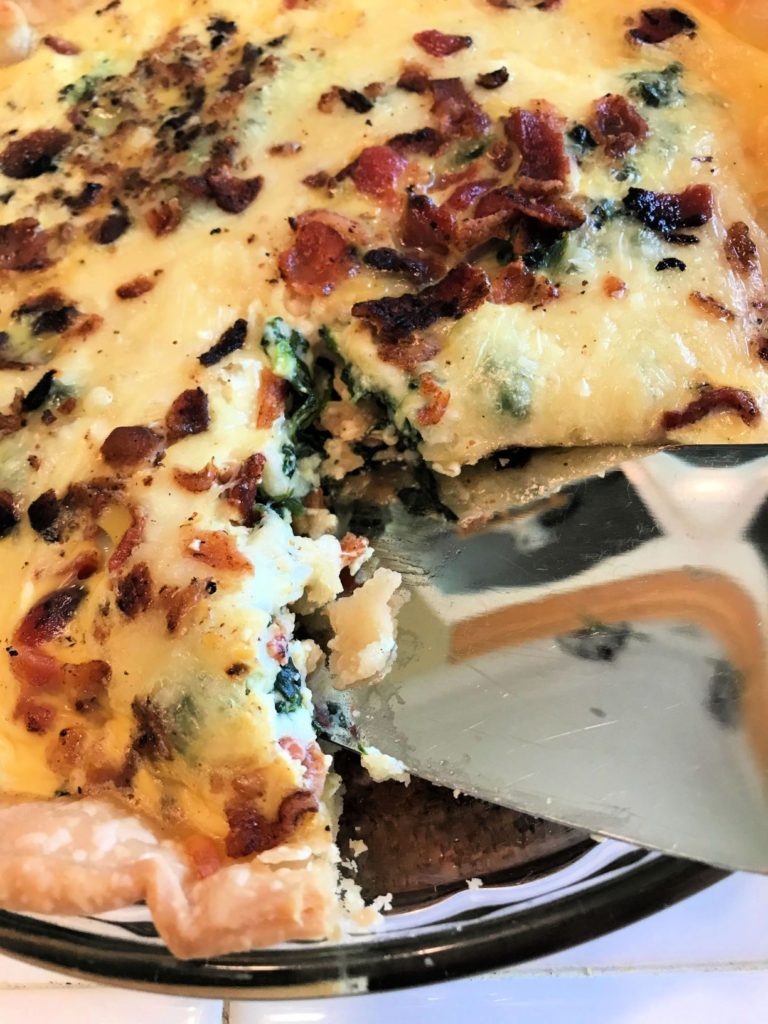
Quiche is one of those fancy classic French foods that you tend to eat at a fancy brunch or in little bite-sized appetizers, but you never have at home. Well, now you can thanks to my super easy Spinach Quiche Lorraine recipe. Take it to your next pot luck gathering, and you will see why it is named the Disappearing Spinach Quiche Lorraine.
Bring this quiche Lorraine to your next pot luck, and you will bring your dish home empty!
Although we categorize quiche as French cuisine, did you know that quiche actually originated in Germany? That’s right. It was first created in the medieval kingdom of Lothringen, which was under German rule. The French later renamed it, Lorraine. The word “quiche” is from the German word “Kuchen,” which means cake.
The original “quiche Lorraine” was actually an open pie filled with egg, cream custard, and bacon. Later on, people started adding cheese to the quiche Lorraine. The bottom crust was originally made from bread dough, but now we normally use a pastry crust.
The dish became really popular in England sometime after the Second World War, and thanks in part to Julia Child it became a favorite in America as well during the 1950’s. Because there is very little if any meat, the phrase “real men don’t eat quiche” hit popular culture. It was somehow considered an “unmanly” dish.
Today, there are lots of different varieties of quiche, from the original quiche Lorraine to ones with spinach (like mine), broccoli, onion, mushrooms, shrimp, and ham. The great thing about quiche is that it can be served for breakfast, lunch, brunch, or made into appetizers.
I hope you enjoy this easy recipe for delicious spinach quiche Lorraine. If you like it please comment and give me 5 stars. And don’t forget to follow me on social media for more great recipes as well as travel stories!
Ingredients
pie crust or pastry shell (frozen or refrigerated
eggs
milk
flour
salt
nutmeg
shredded Swiss cheese
bacon
spinach
Instructions
1. Bake pastry shell or pie crust in a 450-degree oven only 7 minutes or just until lightly browned. Remove from oven and reduce oven temperature to 325 degrees.
2. Fry bacon until crisp; drain and crumble. While bacon is cooking thaw spinach according to directions on the package (you will have some left over that you can use for something else.). Blot excess liquid off of spinach with paper towels until dry.
3. Reserve 2 Tablespoons bacon for trim. Place the remaining bacon in the pie shell. Add cheese.
4. Combine remaining ingredients and pour over bacon, cheese, and spinach. Sprinkle reserved bacon on top in a circle.
5. Bake at 325 degrees F for 35 minutes or until almost set in the center. Let quiche cool 20 – 25 minutes before serving. Refrigerate any leftovers.
Bake pastry shell or pie crust in a 450-degree oven only 7 minutes or just until lightly browned. Remove from oven and reduce oven temperature to 325 degrees.
Fry bacon until crisp; drain and crumble. While bacon is cooking thaw spinach according to directions on the package (you will have some leftover that you can use for something else.). Blot excess liquid off of spinach with paper towels until dry.
Reserve 2 Tablespoons bacon for trim. Place the remaining bacon in the pie shell. Add cheese.
Combine remaining ingredients and pour over bacon, cheese, and spinach. Sprinkle reserved bacon on top in a circle.
Bake at 325 degrees F for 35 minutes or until almost set in the center. Let quiche cool 20 – 25 minutes before serving. Refrigerate any leftovers.
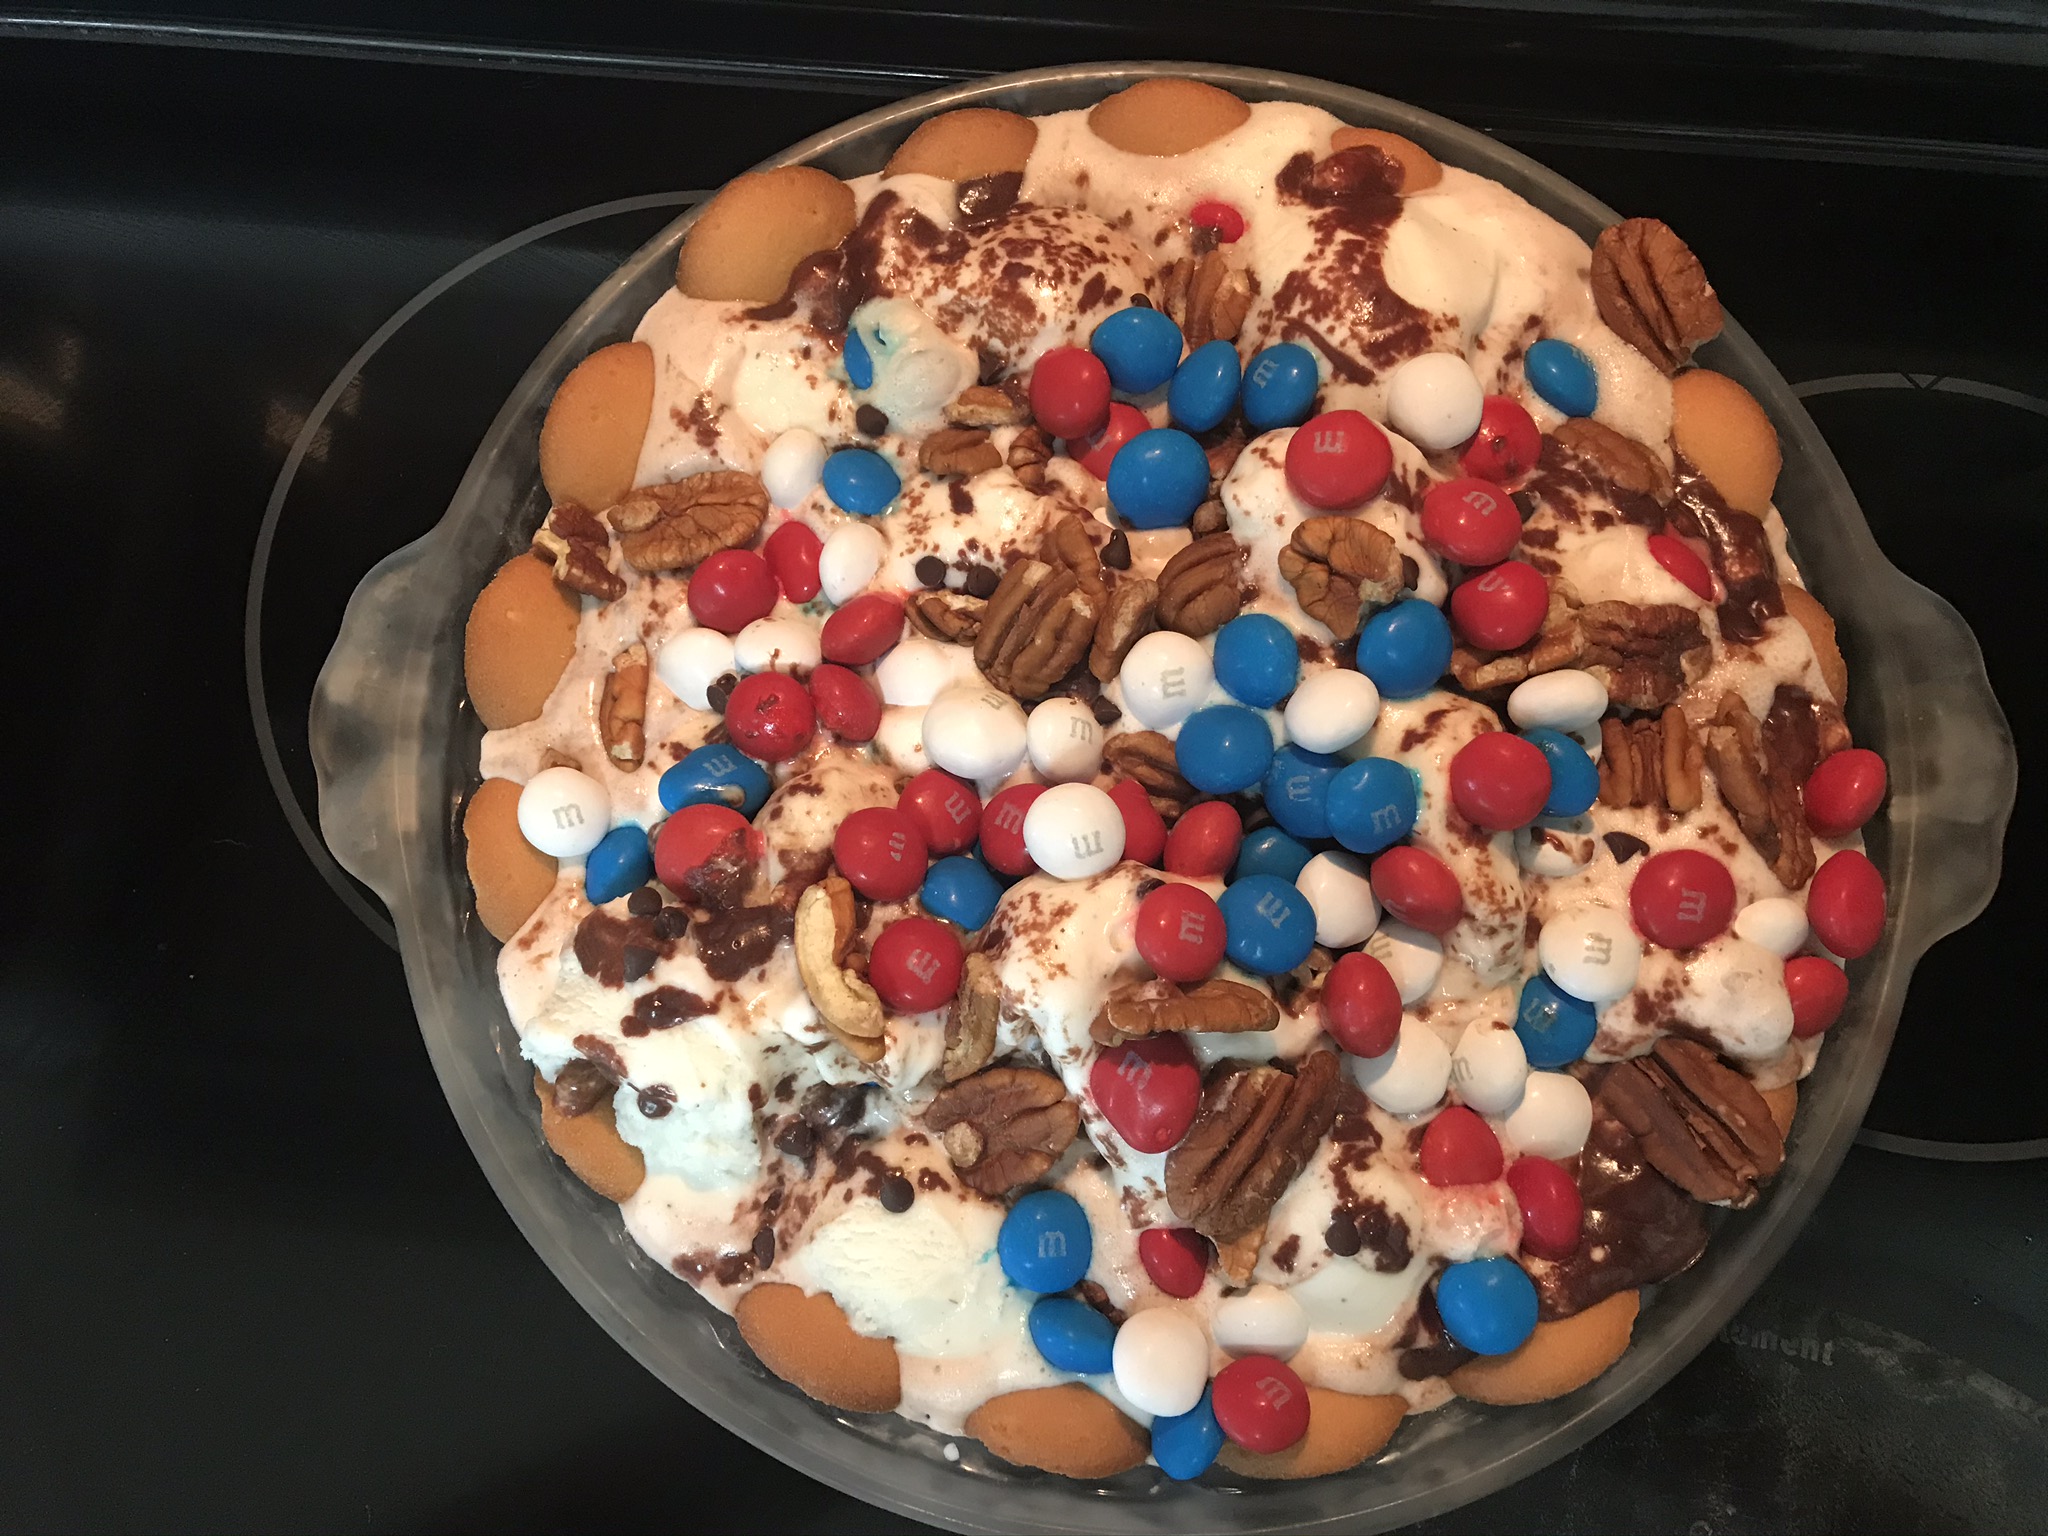
Want to impress your friends at your July 4 cookout or party this year? Try this Fourth of July Ice Cream Pie! Think crunchy cookie crust with thick scoops of ice cream on top. But the best part is that a melted chocolate marshmallow mixture is poured on top before refreezing. And what makes it so festive is the sprinkling of red, white, and blue M&M’s on top! So easy, and you will bring your pie pan home empty, because everyone will want to try a slice.
Ingredients
1/2 box vanilla wafers
vanilla ice cream
1 cup semi-sweet chocolate chips
1 cup mini marshmallows
1 cup evaporated milk
1/4 cup chopped pecans (optional)
red, white, and blue M&M candies
Instructions
1. Make crust
Place a layer of vanilla wafers in the bottom and on the sides of a pie pan.
2. Make the sauce
Over low heat melt chocolate chips, marshmallows, and evaporated milk.
3. Make the pie
Arrange scoops of ice cream over the vanilla wafers in the pie pan and pour sauce over the top.
4. Add the toppings
Sprinkle nuts (optional) and M&M’s over the top. Refreeze for about 30 minutes.
A crunchy cookie crust layered with scoops of ice cream then topped with a delicious melted chocolate marshmallow mixture and sprinkled with red, white, and blue M&Ms on top! Yummy!
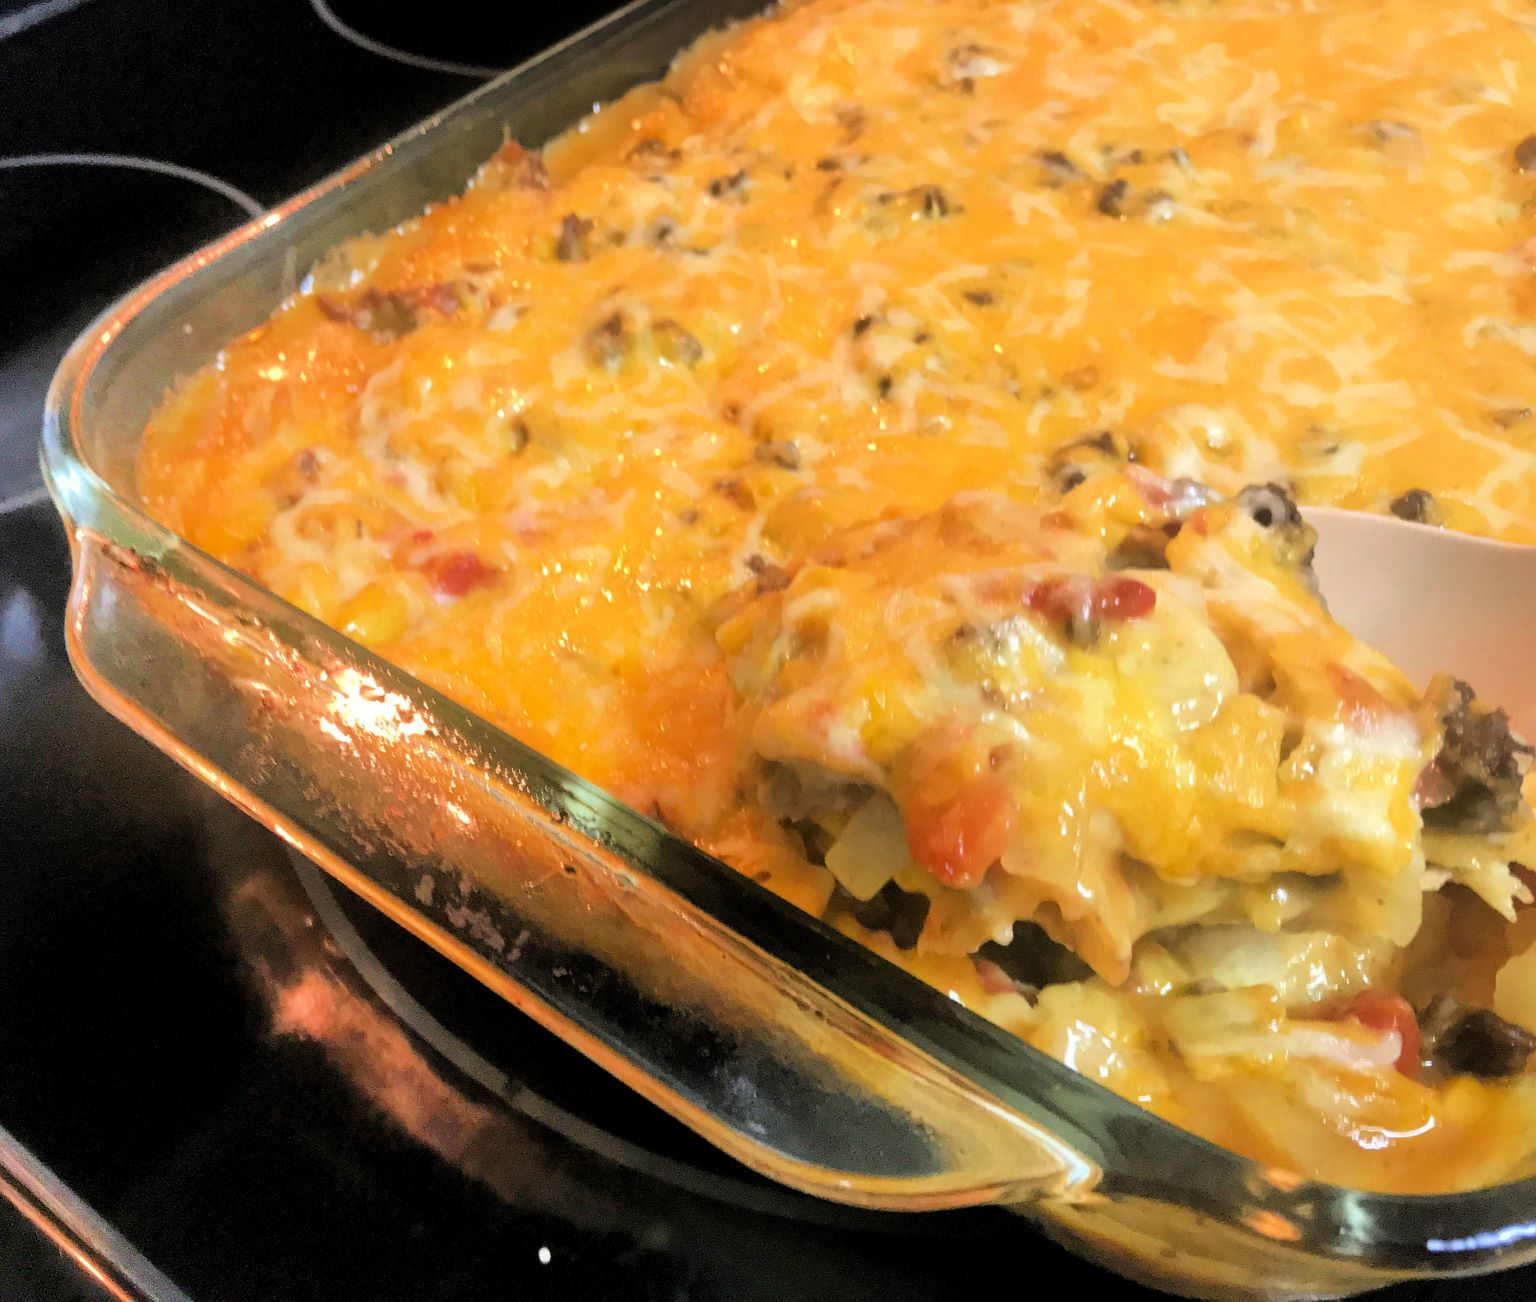
This recipe is super easy, and everyone always seems to love it. Pieces of corn tortillas are layered in between a creamy meat, onion, and tomato mixture and topped with shredded cheese. What’s not to love?
Ingredients
1 lb. ground beef
1 chopped onion
1 can Ro-Tel tomatoes
1 can whole kernel corn
1 can cream of mushroom soup
1 1/2 cans cheddar cheese soup
1 pkg. (about 12) corn tortillas
1 16 oz. pkg. Mexican-style Blend Shredded Cheese
Instructions
1. Brown Meat.
Brown meat and saute onion, then drain.
2. Mix in Other Ingredients.
Stir into the browned meat tomatoes, corn, and soups, then heat.
3. Layer tortillas with meat mixture.
Tear tortillas into bite-sized pieces and layer some on the bottom of a 9×13 casserole dish. Add a layer of the meat mixture on top of the tortillas then add some shredded cheese. Repeat until all the meat mixture is gone (2 – 3 layers). Leave the top layer of shredded cheese off until the last 15 minutes of baking.
4. Bake
Bake at 350 degrees F for 30 minutes. Remove from oven and spread a layer of shredded cheese on top, then bake 15 more minutes.
5. Serve
Serve warm with a dollop of sour cream.
Variations:
To make this casserole healthier, substitute ground turkey for beef and use low sodium soups and low fat cheese.
To add more protein add ranch style beans instead of corn.
To make it spicier add one envelope of taco seasoning.
1pkgcorn tortillasyellow or white (about 12 tortillas)
116 oz. pkg. Mexican Style Blend Shredded Cheese
Instructions
Brown meat and saute onion then drain.
Mix in tomatoes, corn, and soups and heat.
Tear tortillas into bite-sized pieces and layer pieces on the bottom of a 9×13 casserole dish.
Add a layer of the meat mixture then top with some of the shredded cheese.
Continue layering tortilla pieces, meat mixture and cheese (2 – 3 layers). Leave the top layer of cheese off the top until the last 15 min utes of baking.
Bake at 350 degrees F for 30 minutes, then take out of the oven and add a top layer of shredded cheese and bake for 15 more minutes.
Serve warm with a dollop of sour cream.
Video
Nutrition
Serving: 1g | Calories: 288kcal
Serve warm with sour cream
Did you try it? Let me know how it turned out in the comments below, and please rate my recipe. If you like it, please give me 5 stars!
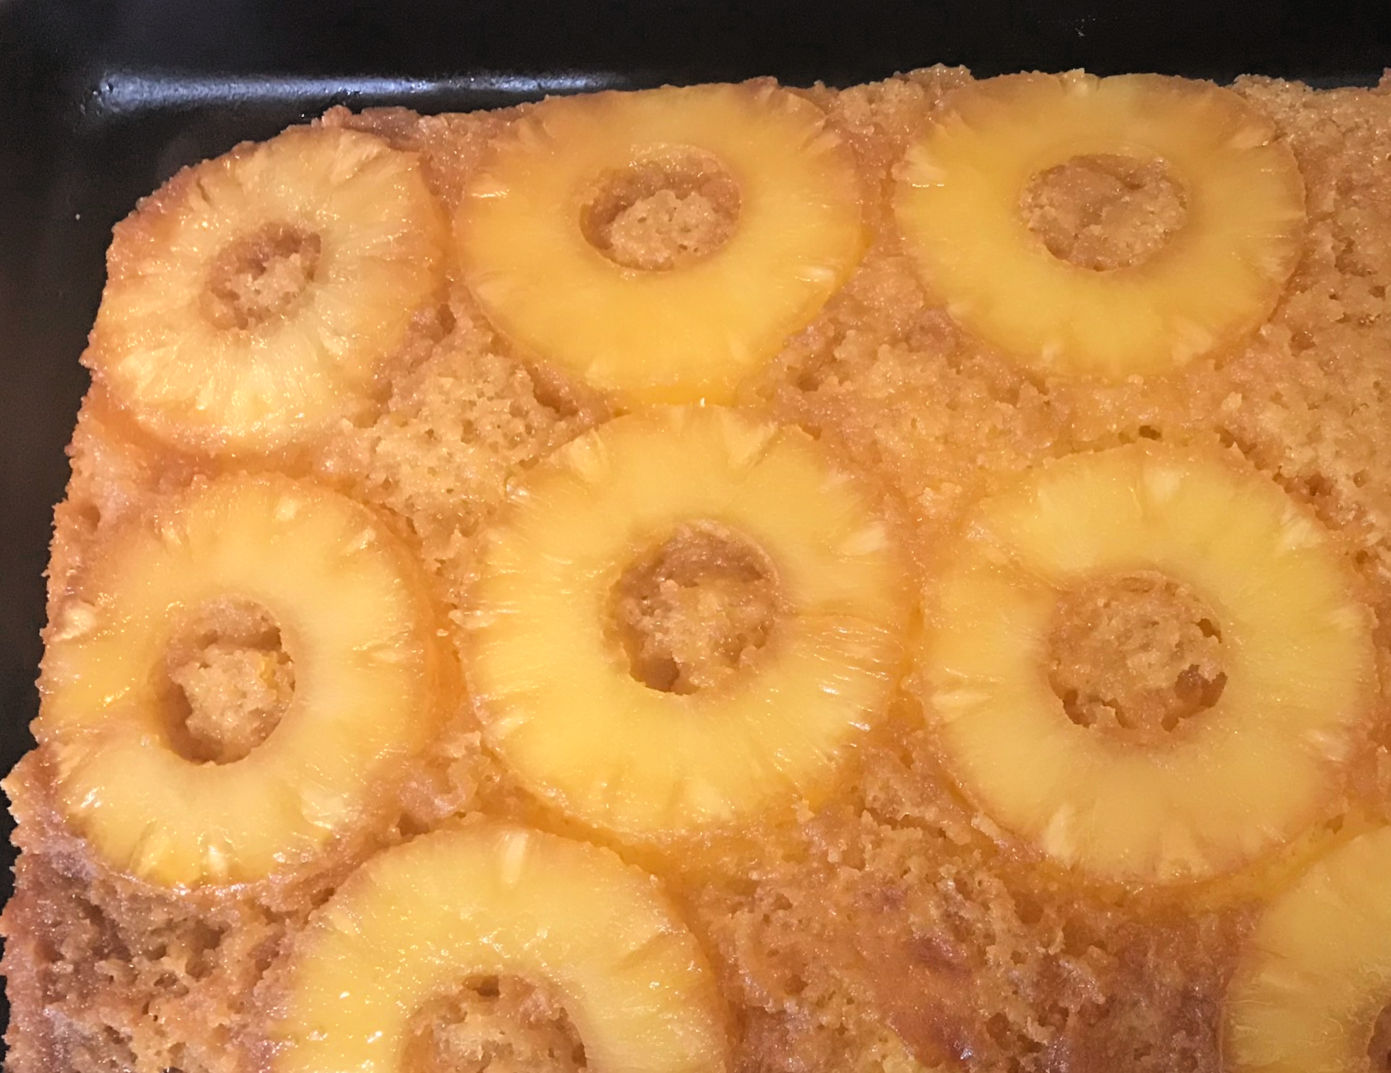
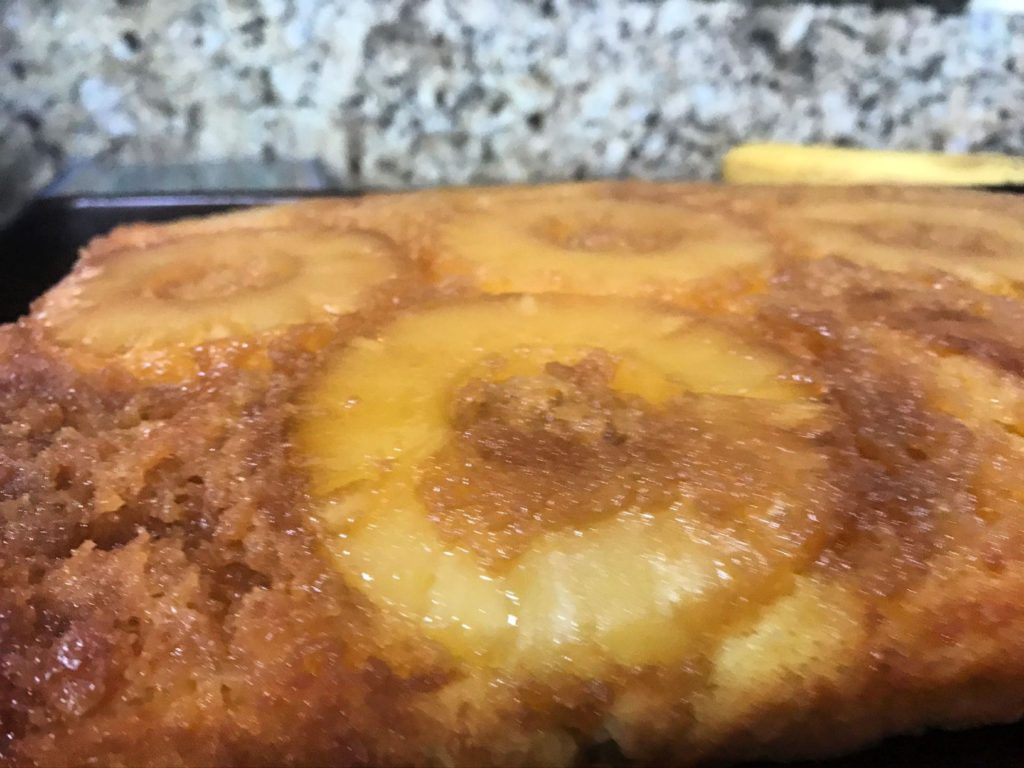
Tomorrow is Father’s Day, and I just made one of my dad’s favorite cakes: Pineapple Upside Down Cake. This cake has been a favorite for generations. Your mom’s mom probably made this cake, and the recipe just keeps getting passed down. My apologies if this looks like other recipes out there, but this is the way my mom made it growing up and it is the best way I know.
The combination of the pineapple fruit taste with the sweetness of the brown sugar and the buttery moist cake makes this an irresistable dessert. It looks impressive with its festive colors too.
This recipe is super easy, because it uses a boxed cake mix. With this secret shortcut you can have it ready to pop in the oven in less than 15 minutes. Once baked just put a pan on top and flip it over to reveal the gooey pineapple goodness that was hiding underneath.
The traditional cake has cherries in the hole of each pinapple slice, but I always make it without the cherries. It is a matter of preference.
The brown sugar and pineapples are on top when you flip it upside down.
The steps are very simple. Here is how to make pinapple upside down cake:
Ingredients
1/4 cup butter
1 cup packed brown sugar (light or dark)
1 can (20 oz.) pinapple slices in juice (drained, juice reserved)
1 box moist yellow cake mix
vegetable oil and eggs called for on cake mix box
1 jar (6 oz. ) maraschino cherries with no stems, drained (optional)
Instructions
1. Heat oven and prepare pan.
Heat oven to 350 degrees (325 degrees F for dark or nonstick pan). Place butter in a 13 x 9-inch baking dish, and place the dish in the oven. Remove when the butter is melted. Sprinkle the brown sugar evenly over the melted butter in the dish. Arrange pineapple slices on the brown sugar.
Optional: Place a cherry in the center of each pineapple slice, arranging any extra cherries around the slices.
2. Make cake batter.
Add enough water to the reserved pinapple juice to equal 1 cup liquid. Make the cake batter as directed on the box, substituting the pinapple juice mixture for the water. Pour cake batter over the pinapple slices and cherries.
3. Bake the cake then flip it over.
Bake 40 – 45 minutes or until a toothpick inserted in the center comes out clean. Ovens vary, so keep an eye on it. Immediately run a knife around the side of the pan to loosen the cake. Place a heatproof serving plate or baking pan upside down on the dish. While holding both together tightly, flip the dish and pan over together so that the serving plate is on the bottom. Leave the baking dish over the serving plate a few minutes to make sure the brown sugar topping drips down over the cake. Remove pan carefully. Cool 30 minutes. Serve warm or cool.
Store cake covered in the refrigerator.
Tip: Try serving with a spoonful of Cool Whip or other whipped topping.
https://youtu.be/2gBxirXDoys
Three simple steps to make a delicious pineapple upside-down cake!
The combination of the pineapple fruit taste with the sweetness of the brown sugar and the buttery moist cake makes this an irresistable dessert. It looks impressive with its festive colors too. And this short-cut style recipe makes it ready to pop in the oven in 15 minutes!
Prep Time15 minutesmins
Cook Time45 minutesmins
Resting Time30 minutesmins
Total Time1 hourhr30 minutesmins
Course: Dessert
Cuisine: American
Keyword: easy desserts, fruit desserts, pineapple, pineapple upside-down cake
Servings: 12servings
Calories: 367kcal
Ingredients
1/4cupbutter
1cupbrown sugar
1can (20 oz.)pineapple slices in juicedrained, juice reserved
Heat oven to 350 degrees (325 degrees F for dark or nonstick pan). Place butter in a 13 x 9-inch baking dish, and place the dish in the oven. Remove when the butter is melted. Sprinkle the brown sugar evenly over the melted butter in the dish. Arrange pineapple slices on the brown sugar. Optional: Place a cherry in the center of each pineapple slice, arranging any extra cherries around the slices.
Add enough water to the reserved pinapple juice to equal 1 cup liquid. Make the cake batter as directed on the box, substituting the pinapple juice mixture for the water. Pour cake batter over the pinapple slices and cherries.
Bake 40 – 45 minutes or until a toothpick inserted in the center comes out clean. Ovens vary, so keep an eye on it. Immediately run a knife around the side of the pan to loosen the cake. Place a heatproof serving plate or baking pan upside down on the dish. While holding both together tightly, flip the dish and pan over together so that the serving plate is on the bottom. Leave the baking dish over the serving plate a few minutes to make sure the brown sugar topping drips down over the cake. Remove pan carefully. Cool 30 minutes. Serve warm or cool.Store cake covered in the refrigerator.