No summer picnic or potluck dinner is complete without deviled eggs. Most people think they are a lot of trouble to make, but this recipe is actually very easy. If you follow these directions you will have perfect deviled eggs every time you make them. These go fast anytime I serve them. Give it a try!
Ingredients
6 large eggs
1/4 cup mayonnaise
1 teaspoon yellow mustard
1 teaspoon pickle relish
salt and freshly ground black pepper
Instructions
Step One
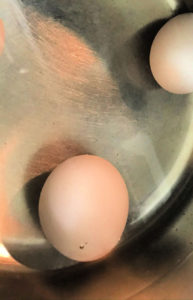
First, you will need to cook the eggs. To boil eggs properly for deviled eggs place the eggs in a single layer in a wide saucepan and add enough cold water (make sure the water is cold, not hot) so that the eggs are completely submerged with around an inch of water on top. Starting with cold water makes the temperature rise slower, and this prevents the shells from cracking and ensures even cooking.
I used only three eggs for illustrative purposes. If you do not have enough room in the pan for the eggs to fit in one bottom layer you may need to boil half at a time.
Make sure the eggs are completly under water when boiling them.
Over high heat let the water come to a rolling boil, then immediately cover the saucepan with a lid, cook for 30 seconds – 1 minute (never more than 1 minute) more on medium heat.
Remove the pan from the heat right away and let it stand with the lid on for 14 minutes (less if your eggs are smaller). Make sure you remove the pan right away so that the eggs will not overcook and give you that weird gray ring.
Step Two
Next, prepare a bowl of ice water and carefully place the eggs in the bowl using tongs or a slotted serving spoon. You want to stop them from cooking as fast as you can, so the ice water helps. Leave them to cool off for about 5 minutes.
Let the boiled eggs cool off in ice water before peeling.
NOTE: It is actually easier to peel eggs that are a little older. So buy your eggs a few days before you plan to boil them.
Now, gently crack the egg shells and carefully peel them off. If the shells do not come off easily put them back in the ice water for a while or try peeling them under cold running water.
Step Three
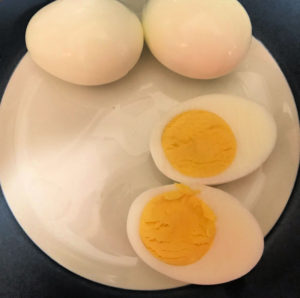
After you peel the eggs pat them dry with a paper towel so they don’t slide around on the plate. Slice the eggs in half, lengthwise. Remove the yolks and put them in a medium bowl.
Cut the eggs in half lengthwise.
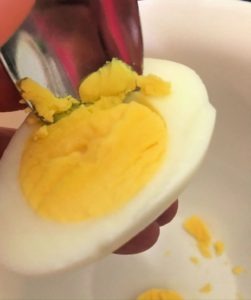
Scoop out the yolks.
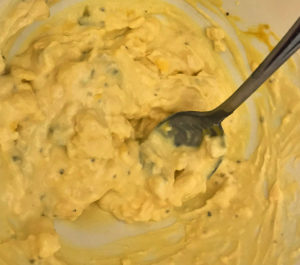
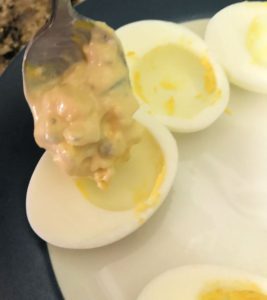
Put the whites on a serving platter with the hollow part facing up. Mash the yolks up in the bowl with a small spoon or fork until they are crumbly. Stir in mayonnaise, mustard, relish, and salt and pepper. Stir until smooth.
Mash up the yolks and stir in mayonnaise, mustard, relish, and salt and pepper.
Use a small spoon or scoop to fill the egg whites with heaping spoonfulls of the mixture.
Evenly distribute the yolk mixture into egg whites.
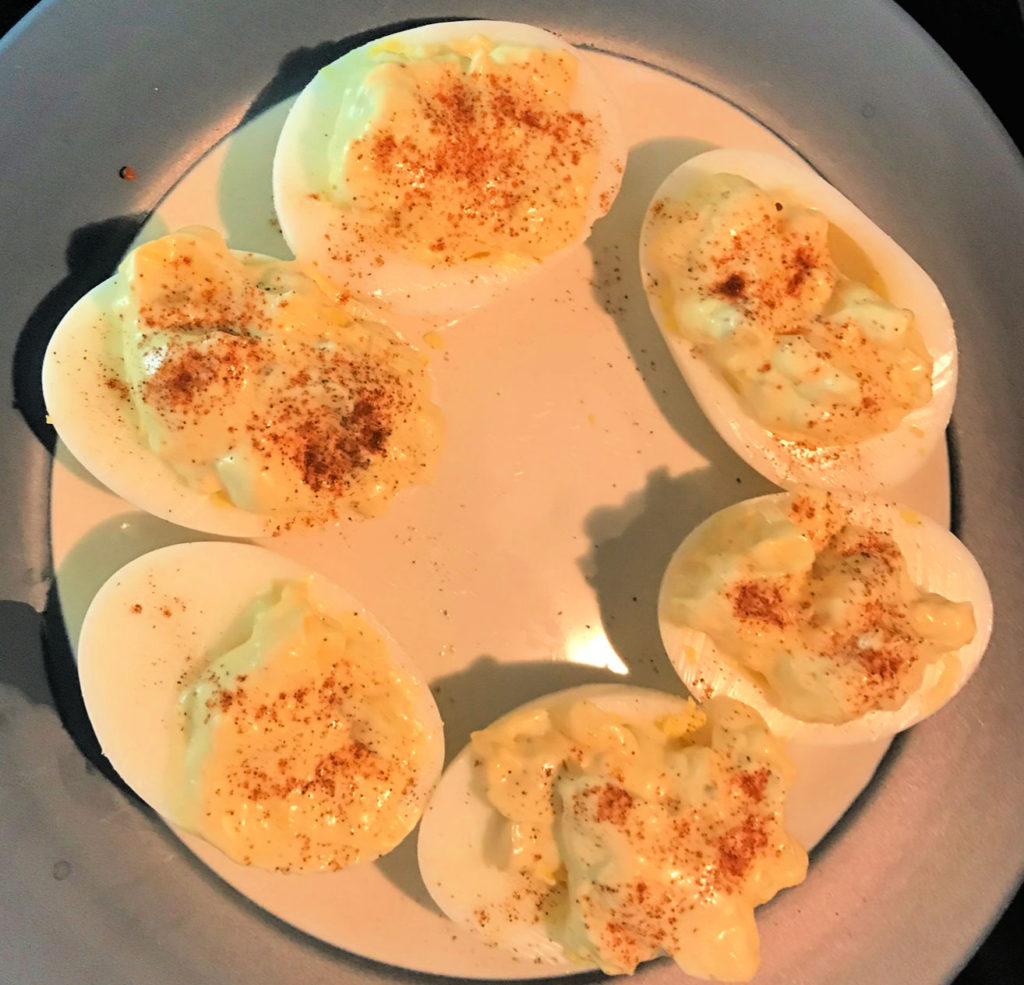
Now sprinkle with paprika (smoked paprika is really good) and serve.
These classic deviled eggs are always a favorite.
There are lots of other toppings you can use instead of paprika for garnish if you’d like. Chives, parsley, or bacon crumbles also work well.
Let me know if you try this recipe and how it turned out. Give it a rating, and leave a comment. Share it if you like it. Happy picnicking!
Place eggs in a single layer in a wide saucepan and cover with enough water so that the eggs are completely under the water. Bring water to a boil, then reduce heat to low, cover, and cook for 30 seconds – 1 minute (no longer then 1 minute).
Remove from the heat immediately and leave saucepan covered for 12 – 14 more minutes depending on the size of the eggs.
Remove the eggs carefully with tongs and immediately place them in a dish of ice water. Let them cool at least 5 minutes.
Crack egg shells and carefully peel the shell off under cool running water. Gently dry eggs with a paper towel.
Slice the eggs in half lengthwise, removing the yokes and putting them in a medium bowl. Place the white half eggs on a serving platter.
Mash the yokes until crumbly using a fork or small spoon. Add in mayonnaise, mustard, relish, and salt and pepper and mix well.
With a small spoon scoop heaping spoonfuls of the yolk mixture into the egg whites. Sprinkle with paprika and serve.
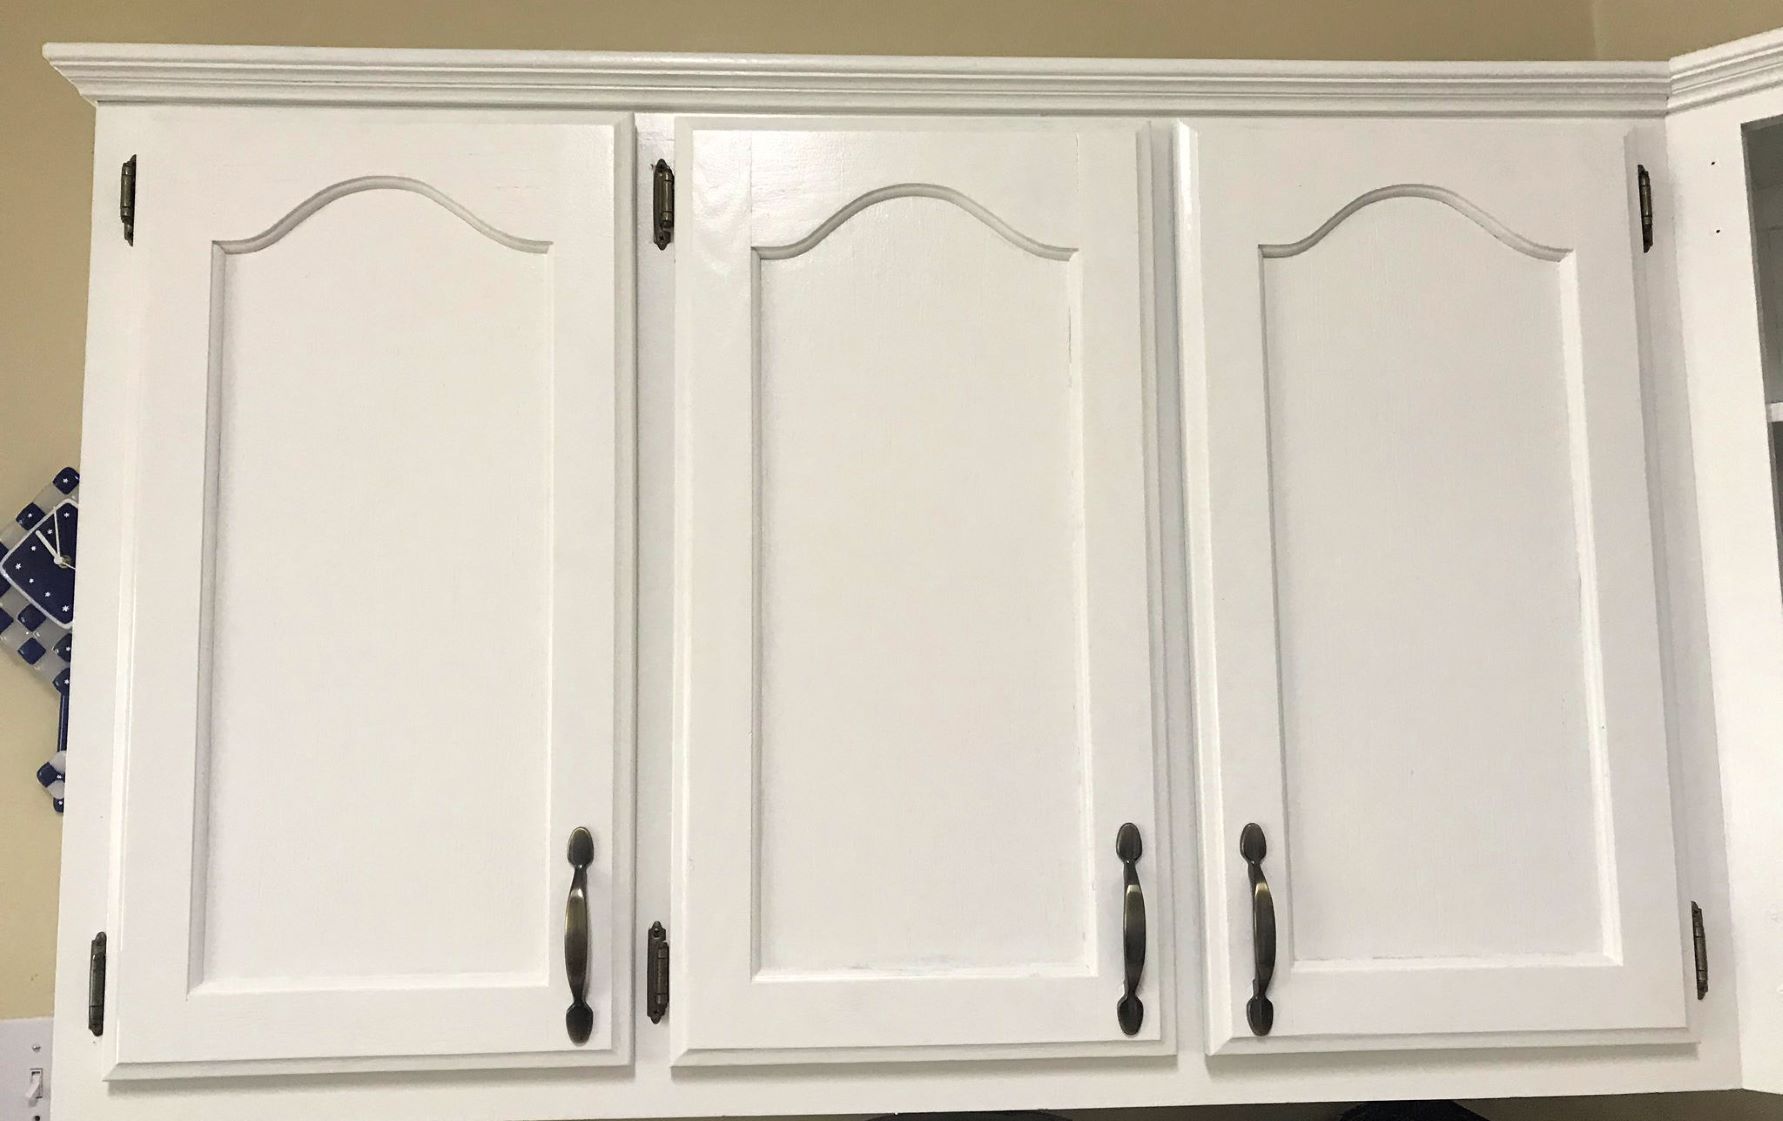
Want to know the best way to update your kitchen cabinets without having to replace them? Paint them! How much does it cost to get your kitchen cabinets painted white like we did? If you hired someone it would be about $2,000. But the cost to paint kitchen cabinets goes way down when you do it yourself.
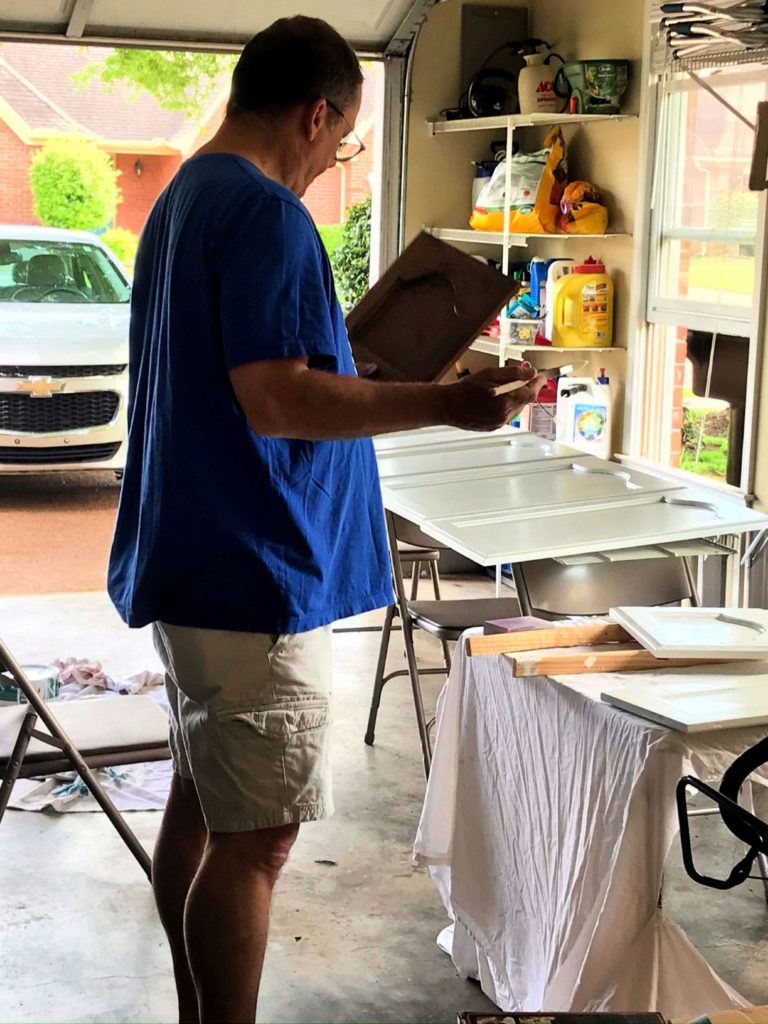
My wonderful husband is painting mine now, and it looks fabulous! This is something he had never done before, so do not be afraid to take on this DIY paint project if you have always dreamed of having painted cabinets.
Richard painted the kitchen cabinet doors in the garage.
I am going to give you easy to follow step by step instructions as well as things to remember and things to avoid. We did all the research and trial and error for you, so you don’t have to.
Painting cabinets looks so easy in magazines and on Pinterest, but if you decide to take on this project be prepared to spend four to seven days on it – or a few weeks if you are only working on it nights and weekends like my husband. This is not a mere weekend project. Remember it will take several days to complete this paint project, so be ready to have your kitchen turned upside down for a while.
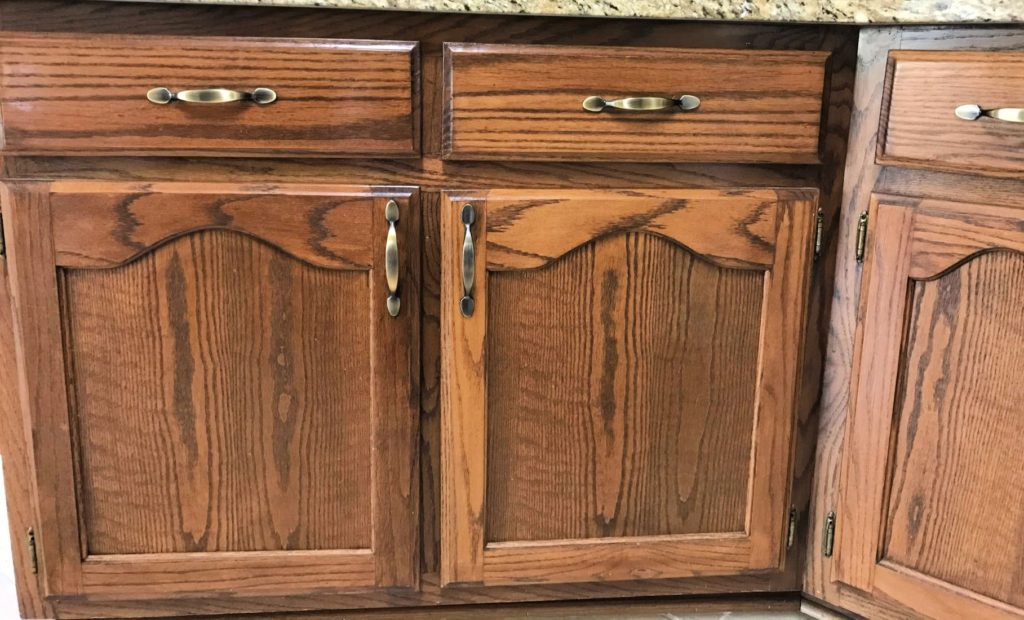
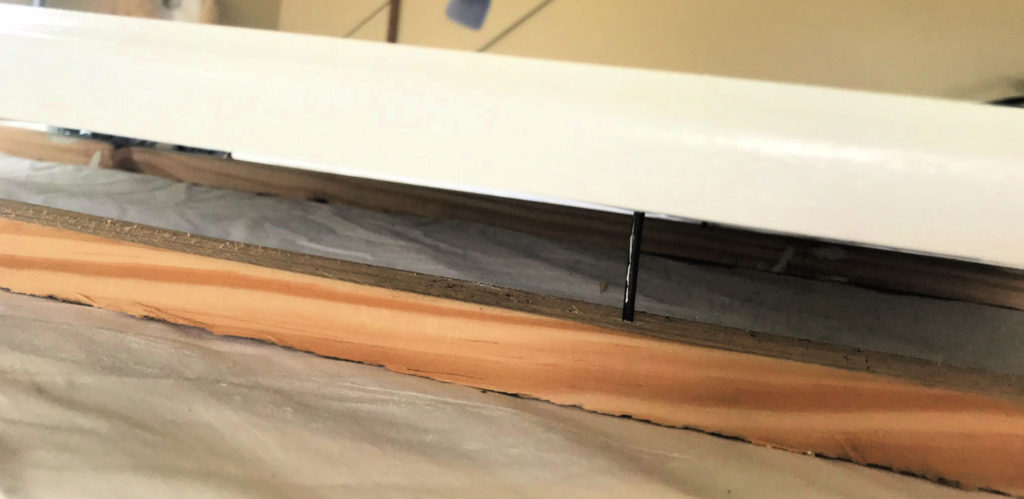
This stained wood is what our kitchen cabinets looked like before we painted them.
But no worries. If you follow my advice you will end up with the updated kitchen you’ve always wanted. You will enjoy a major sense of accomplishment and the many compliments you will receive for all of your efforts. You might even get motivated to try out one of my recipes!
This post may contain affiliate links, and I may earn commission when you click on the links at no additional cost to you.
First, make sure you choose the right paint for your type of cabinets.
Are your cabinets solid wood, laminate, or metal? It is important to buy the right kind of supplies for your kitchen cabinet project. Make sure you are following the specific instructions on your paint can label.
Wood cabinets like ours are ideal for painting, but really any surface that you can scuff up some with sandpaper can be painted. If your cabinets are laminate, you will need a special bonding primer. Also, it will not work well unless the laminate is in pretty good condition. I used chalk paint to paint an old piano that had a laminate surface, and it looks good.
The main thing to remember about choosing paint is to make sure you pick a high-quality paint. Go ahead and spend the money on good quality paint. It does not have to be a specialized cabinet paint, but it does need to be high quality.
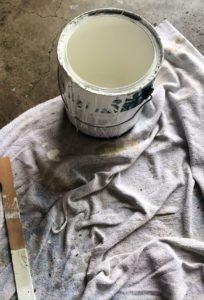
Use a drop cloth to keep your garage clean.
You will want acrylic latex-based paint, because this kind is durable and easy to clean up. Make sure it is acrylic, not vinyl. With latex paints it is important to follow the manufacturer’s instructions regarding the cure time also.
We are using paint with a semi-gloss finish. A glossy finish looks shiny, but it will show every little ding and mistake. Semi-gloss and satin finishes are chosen most often for kitchens. Additionally, flat finish paints can be difficult to clean.
Prep the Kitchen Cabinets for Painting
Make sure you have some ventilation for the paint fumes, and have a drop cloth or papers handy to keep paint from getting everywhere. Richard removed the doors and drawers and worked on them in the garage with the windows open. This seems to work best.
Prep Step 1
First, examine your cabinets. What condition are they in? If the surfaces are already painted, you can paint over the old paint. The only time old paint needs to be removed is when it is in such bad condition that it can’t be covered. In that case you will need to purchase one of many stripping products on the market. Make sure to follow the manufacturer’s instructions.
If your house was built before 1978 the old paint may be lead-based and will need to be removed. You can use a testing kit yourself or have it tested to check for lead.
Prep Step 2
Empty the cabinets and set everything out of the way of the dust and paint. My kitchen table was covered with dishes during this project, and we had to eat on TV trays, but it was worth it.
Next, remove all the doors, drawers and hardware. Some people try to save time by painting everything at once – hinges and all. But over time your cabinets and hardware will start to show chips and other wear and tear. When the paint on the hardware starts to crack you will have a hard time getting it off. It’s just not worth it.
One big mistake people often make is not labeling where your doors, drawers and hardware go. All of this needs to go back in the same place, so label them with numbers or descriptions on painter’s tape. That way you can reinstall them in the rights spots. Put all the screws and hinges in a jar, plastic bag or cup for safekeeping and label where it goes. Don’t leave it all up to guesswork.
Don’t forget to label cabinet doors so you can put everything back in the right spot.
Prep Step 3
Even if you normally keep your kitchen clean it is extremely important to wipe down all surfaces with a grease remover such as TSP cleaner to remove any grease and dirt. We made our own concoction with vinegar, warm water, and dish soap.
Next, repair any damaged areas. Use wood filler to fill in any dents or holes then smooth it out with a putty knife. Then you will need to let it dry according to the directions. If you’re planning to use the same hardware you can leave the hardware holes.
Cover the areas you want to protect and put painter’s tape on the wall along the cabinet edges.
Prep Step 4
Now sand everything with a medium grit (150 or 200) sandpaper to help the paint stick to the surface. Fold the sandpaper to get into the detailed areas on doors and drawers, and in the corners on the frames. You just want a quick buffing to take the gloss down to matte. You don’t want to get down to the bare wood.
Richard borrowed my dad’s Dewalt Random Orbit Sander, and this saved him hours of time and muscle sanding. This is well worth purchasing, and the one in the link above is the one we used.
Prep Step 5
All of this sanding creates dust that stays on the surface of the wood. Vacuum up this dust and use a tack cloth to wipe the surfaces before painting anything. If even just a little dust is painted over it can ruin the look of the surface and make it look gritty. Everything should be dust free before you paint.
Prime the Kitchen Cabinets
We used water based semi-gloss paint and primer combined, so we got to skip this step. But for other kinds of paint applying primer is a very important step in the painting process. Primer prepares the surface so that the paint sticks to it properly, and it also covers imperfections.
As tempting as it is, don’t skip this step. If you do you might notice the wood starting to bleed through your paint in a few months. You don’t want any surprise blotches that you could have avoided.
Primer Step 1
On the cabinet frames, work from the inside out. If you’re painting the inside of the cabinets, start at the back and work your way toward the front. you will need a brush to get into corners and detailed areas. Make sure to use even strokes.
Primer Step 2
You can use a mini roller on large, flat areas. The primer doesn’t have to look perfect, because you will be painting over it. Its purpose is to cover the surface and provide a good base for the finish paint. Work on one area at a time.
Primer Step 3
Once you’ve covered the surface, take your dry roller or brush (don’t reload it) and lightly go over the surface once again to remove any buildup. This is called “laying off” and helps create a smoother surface.
Primer Step 4
Next you will want to paint the doors and drawers. Take off the tape labels but keep them nearby. It is best to start with the backside of each door and apply a smooth even coat. When its dry, flip the door over and paint the front.
Use a brush for the detailed areas, and make sure that the primer doesn’t build up in the corners. Then you can use a foam roller for the larger flat surfaces. You only need to paint the front part of the drawers. If you paint the rest of it the paint might make it stick in the drawer frame.
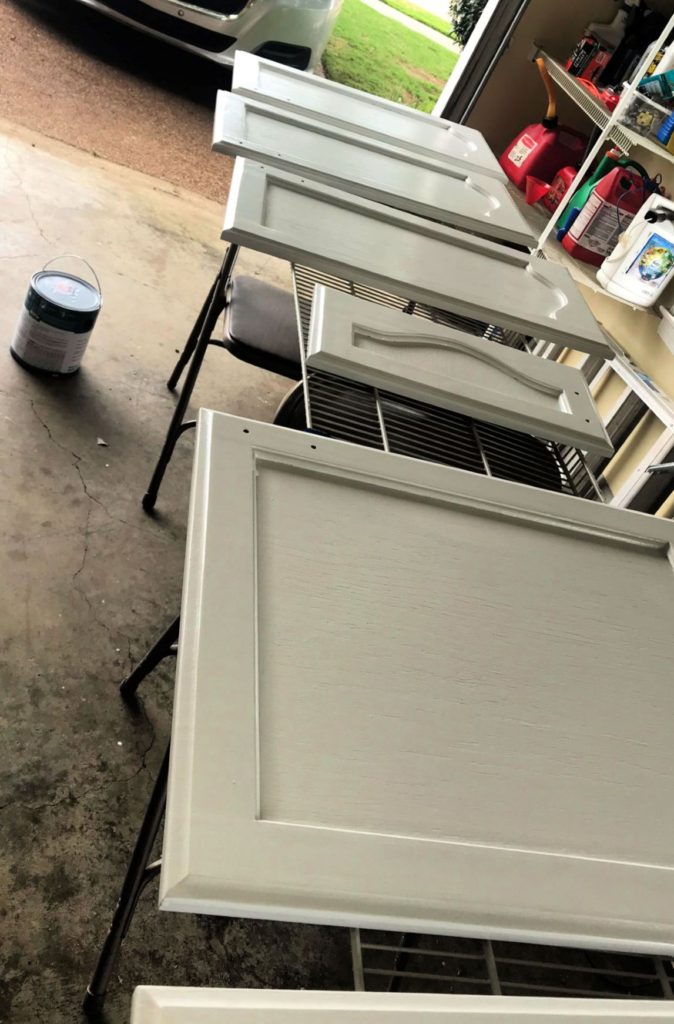
Richard propped a shelf on chairs to make a long work area for painting kitchen cabinets.
Since the paint we used already had primer in it, we used three coats of the paint instead of one coat of primer and two coats of paint. When painting, my husband took a long shelf and propped it up on chairs in the garage. This gave him a long work area to use when he painted the doors.
He propped each door up on nails in order to have as few touch points as possible – sort of DIY painter’s pyramid. That way he was also able to paint the sides more easily. Make sure you let the primer dry completely (several hours).
The nails provided very little touch point and allowed Richard to paint the sides more easily.
Paint the Kitchen Cabinets
Painting Step 1
Just like with the primer you will want to use a high quality brush for smaller areas and a foam roller for the larger surfaces. Start with the cabinet frames, and use long even strokes with the brush. Feather out the edges. Once the surface has been painted resist the urge to keep going over it. Just let it dry.
A small foam roller can be used for the larger flat surfaces.
Also, make sure you pick out the best color for your kitchen. We have white crown molding, floor boards, and doors, so we wanted our cabinets the same color. My husband removed a piece of the wood flooring from his closet and took it with him to the paint store so that they could match the color when they mixed the paint.
If you are not sure what color to choose, try painting a large poster board with the color. Then hang the poster board up next to your backsplash and appliances and see how you like it. You don’t want to have to redo such a large project!
Painting Step 2
Next, paint the backs of the cabinet doors and drawers, After they have fully dried paint the fronts. Follow the directions on the paint can lable for the correct amount of time to let it dry. You do not want to rush this step or the paint won’t cure correctly.
Follow the directions on the paint can for dry time. Make sure the paint is fully cured.
Painting Step 3
Once the paint is dry apply a second coat of paint (or a third if you used paint/primer combined for the first coat). This should be your finishing coat of paint. Allow the paint to completely dry before trying to put anything back together. The long dry time is one of the reasons this project takes several days.
If you try to move any parts before the paint has cured and you accidentally smudge the paint, you will have to start all over by sanding the door and repainting it.
Refinish Cabinet Hardware
Clean your old hardware to spruce it up or replace it with something different for a new look. You can work on cleaning the hardware in between coats of paint while you are waiting for the paint to dry.
Scrub the hardware in warm water with dish saop and pat it dry. If you are going to paint the hardware lightly scuff it first with thin steel wool. Then attach them to a piece of cardboard and lightly spray them with primer then paint. Not too much!
You can work on cleaning up old hardware in between paint coats.
Reassemble the Kitchen Cabinets
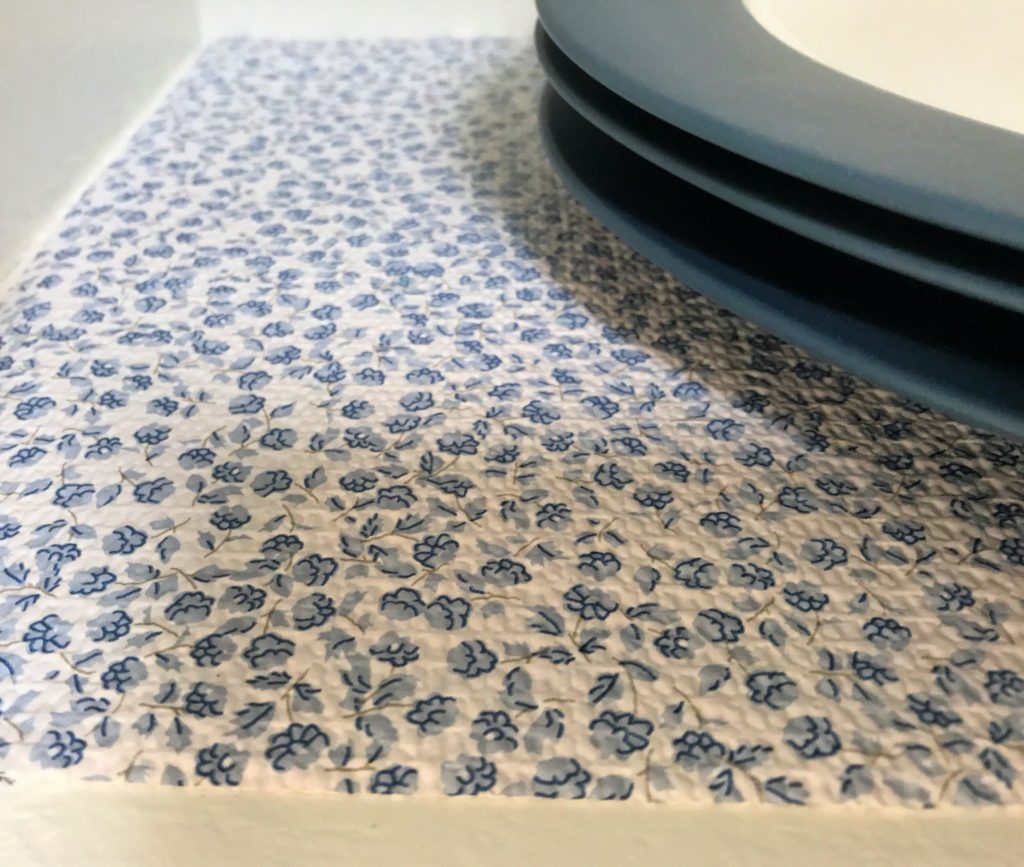
I added shelf paper before we put the dishes back in. You can buy adhesive paper or padded liners that keep the dishes from slipping. You can choose plain or decorative.
I liked this shelf paper because it matches my blue dishes, is padded to help protect the dishes, and is made of a material that is easy to wipe clean.
Now it is time to put the cabinets back together. Make sure you look at your labels to know where everything goes, and put the doors and drawers all back in the right spots.
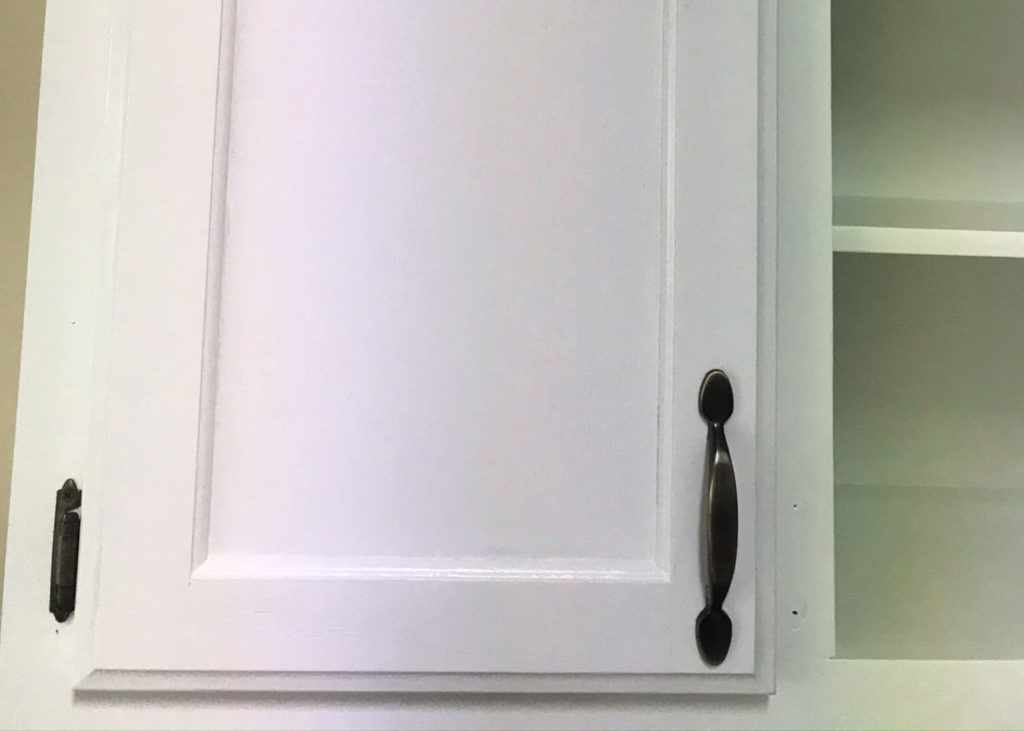
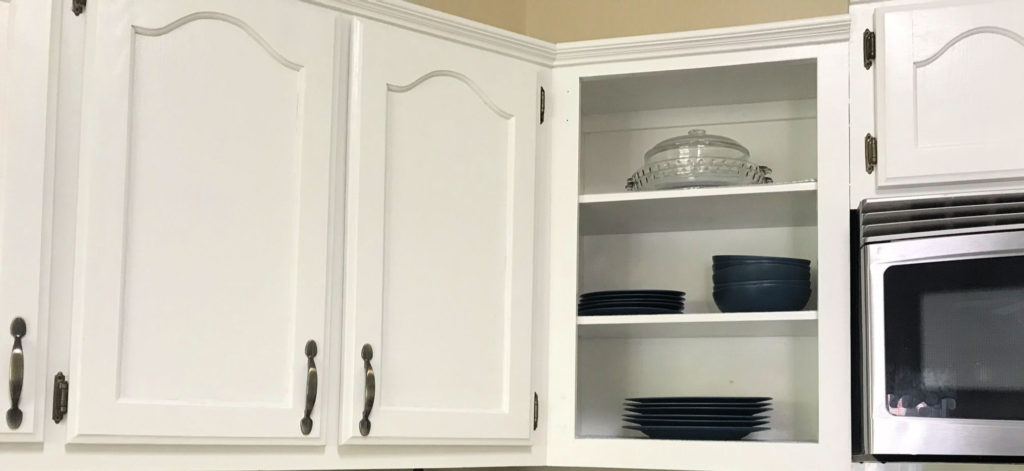
The door is missing here, because we are replacing it with a glass one.
If you are installing new hardware use a mounting template (special jig designed for cabinet and drawer hardware) to make sure everything is lined up correctly before you drill new holes.
Now you can refill your cabinet shelves. I used this as an opportunity to clean out all the contents get rid of what I don’t use or need. I sold several items on Facebook resale sites and made a little cash!
Now stand back and admire your work! Isn’t it beautiful? My husband gave me this “gift” for Christmas. He promised that he would paint my cabinets. And since school closed and I’ve been home, now was the perfect time. I love my new cabinets! It brightens up the kitchen and gives it a whole new updated look. Who’s got the best husband? Me! 🙂
What DIY project have you been wanting to try? Have you accomplished something big around your home during this quarantine? I would love to hear about it. Please leave a comment below.
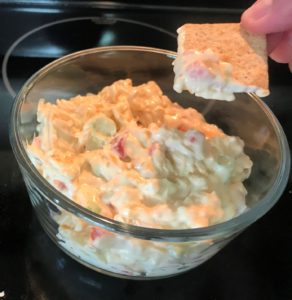
Who doesn’t love pimento cheese? Well, maybe folks who are not from the South. But us Southerners, we love us some pimento cheese and fried green tomatoes!
The cream cheese makes it stick together for a great dip.
This recipe is so easy, and there are so many creative ways that you can change it up. You can make it spicy, tangy, or plain. I may be boring, but I like mine plain. My husband likes the spicy taste of jalepenos in his pimento cheese.
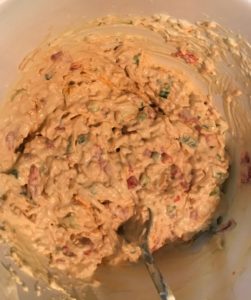
Jalepenos and cayenne pepper spice up this pimento cheese spread.
This recipe only takes about 10 minutes to make, and everybody loves it. It makes a great dip for crackers or vegetables, so you can serve it as an appetizer. But it also makes a great grilled cheese sandwich. And how about grilled pimento cheese and bacon sandwiches? What?! Yes! That’s what I’m talking about.
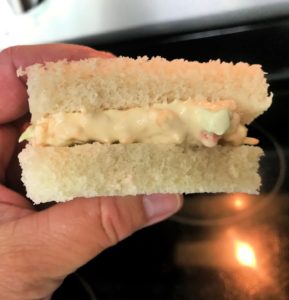
Grilled Pimento Cheese and Bacon Sandwich
This recipe is so easy. All of the ingredients go into the bowl at the same time, then you just stir it up. That’s it!
All the ingredients go in the bowl together, and you just stir.
You can serve it right away or refrigerate it for later. I think you will love this delicious recipe.
Cut the crust off the bread and make finger sandwiches.
I love travel quotes. Are these some of the best travel quotes of all time? You will have to decide. These are just a few of my favorites.
Why do I love travel quotes so much?
When I read these memorable inspirational travel quotes I am reminded of experiences I had and emotions I felt on past adventures, and it fuels my wanderlust for more travel.
See, I do not believe that we were meant to live a mediocre life, and these quotes clarify what I believe to be true about living adventurously and joyfully. These quotes from famous travelers and the beautiful images that accompany them capture little moments that change us.
The thing about people who travel is that we all “get it.” We may look different from one another, but we are all beautifully connected by our love for travel and our understanding of how important new experiences are to our own personal growth.
Below you will find some of my favorite travel quotes with shareable images. You are more than welcome to share these image quotes on your own Pinterest or Instagram accounts.
Paris is always a good idea. Audrey Hepburn
Paris is magical!
When I lived in Germany some friends and I rode on a train to France. It was my first time in a sleeper train car, and I was sort of nervous. I think I slept with my bag under the cover with me, because I was worried about thieves. But I was so tired I just crashed. It was the coolest thing. I went to sleep in one country and woke up in Paris! Paris is truly a magical city.
Once a year, go somewhere you’ve never been before. Dalai Lama
Yellowstone National Park
I have friends who like to vacation in the same spot year after year. Maybe they always go to the beach right when school ends, or they have a house at the lake. Me? I like to see new places. I always learn something new about myself each time I venture out of my comfort zone.
I took that picture in the image above last summer when we visited Yellowstone National Park for the first time. There is a special excitement that is reserved only for surprises and seeing something for the first time. If you are interested in Yellowstone, check out my 7 Day Wild West Adventure series.
Traveling – it leaves you speechless, then turns you into a storyteller. Ibn Battuta
The mountains tell stories.
Each destination has a story, if we will train our ear to listen. The mountains have always spoken to me. One year toward the end of college I spent the summer as a backpacking guide in Colorado. I saw mountains that you can only get to by foot or horseback. It was beautiful wilderness country!
Many times our stories begin with, “Do you remember that trip….?”
You have to take the trip to tell the story. Where will you go this year?
The world is a book and those who do not travel read only one page. Augustine of Hippo
Everyone should visit Europe at least once in their lives.
This is the way I feel when I am having a conversation with someone who has never left his or her hometown. There is a whole world out there just waiting for us to get off the couch and explore!
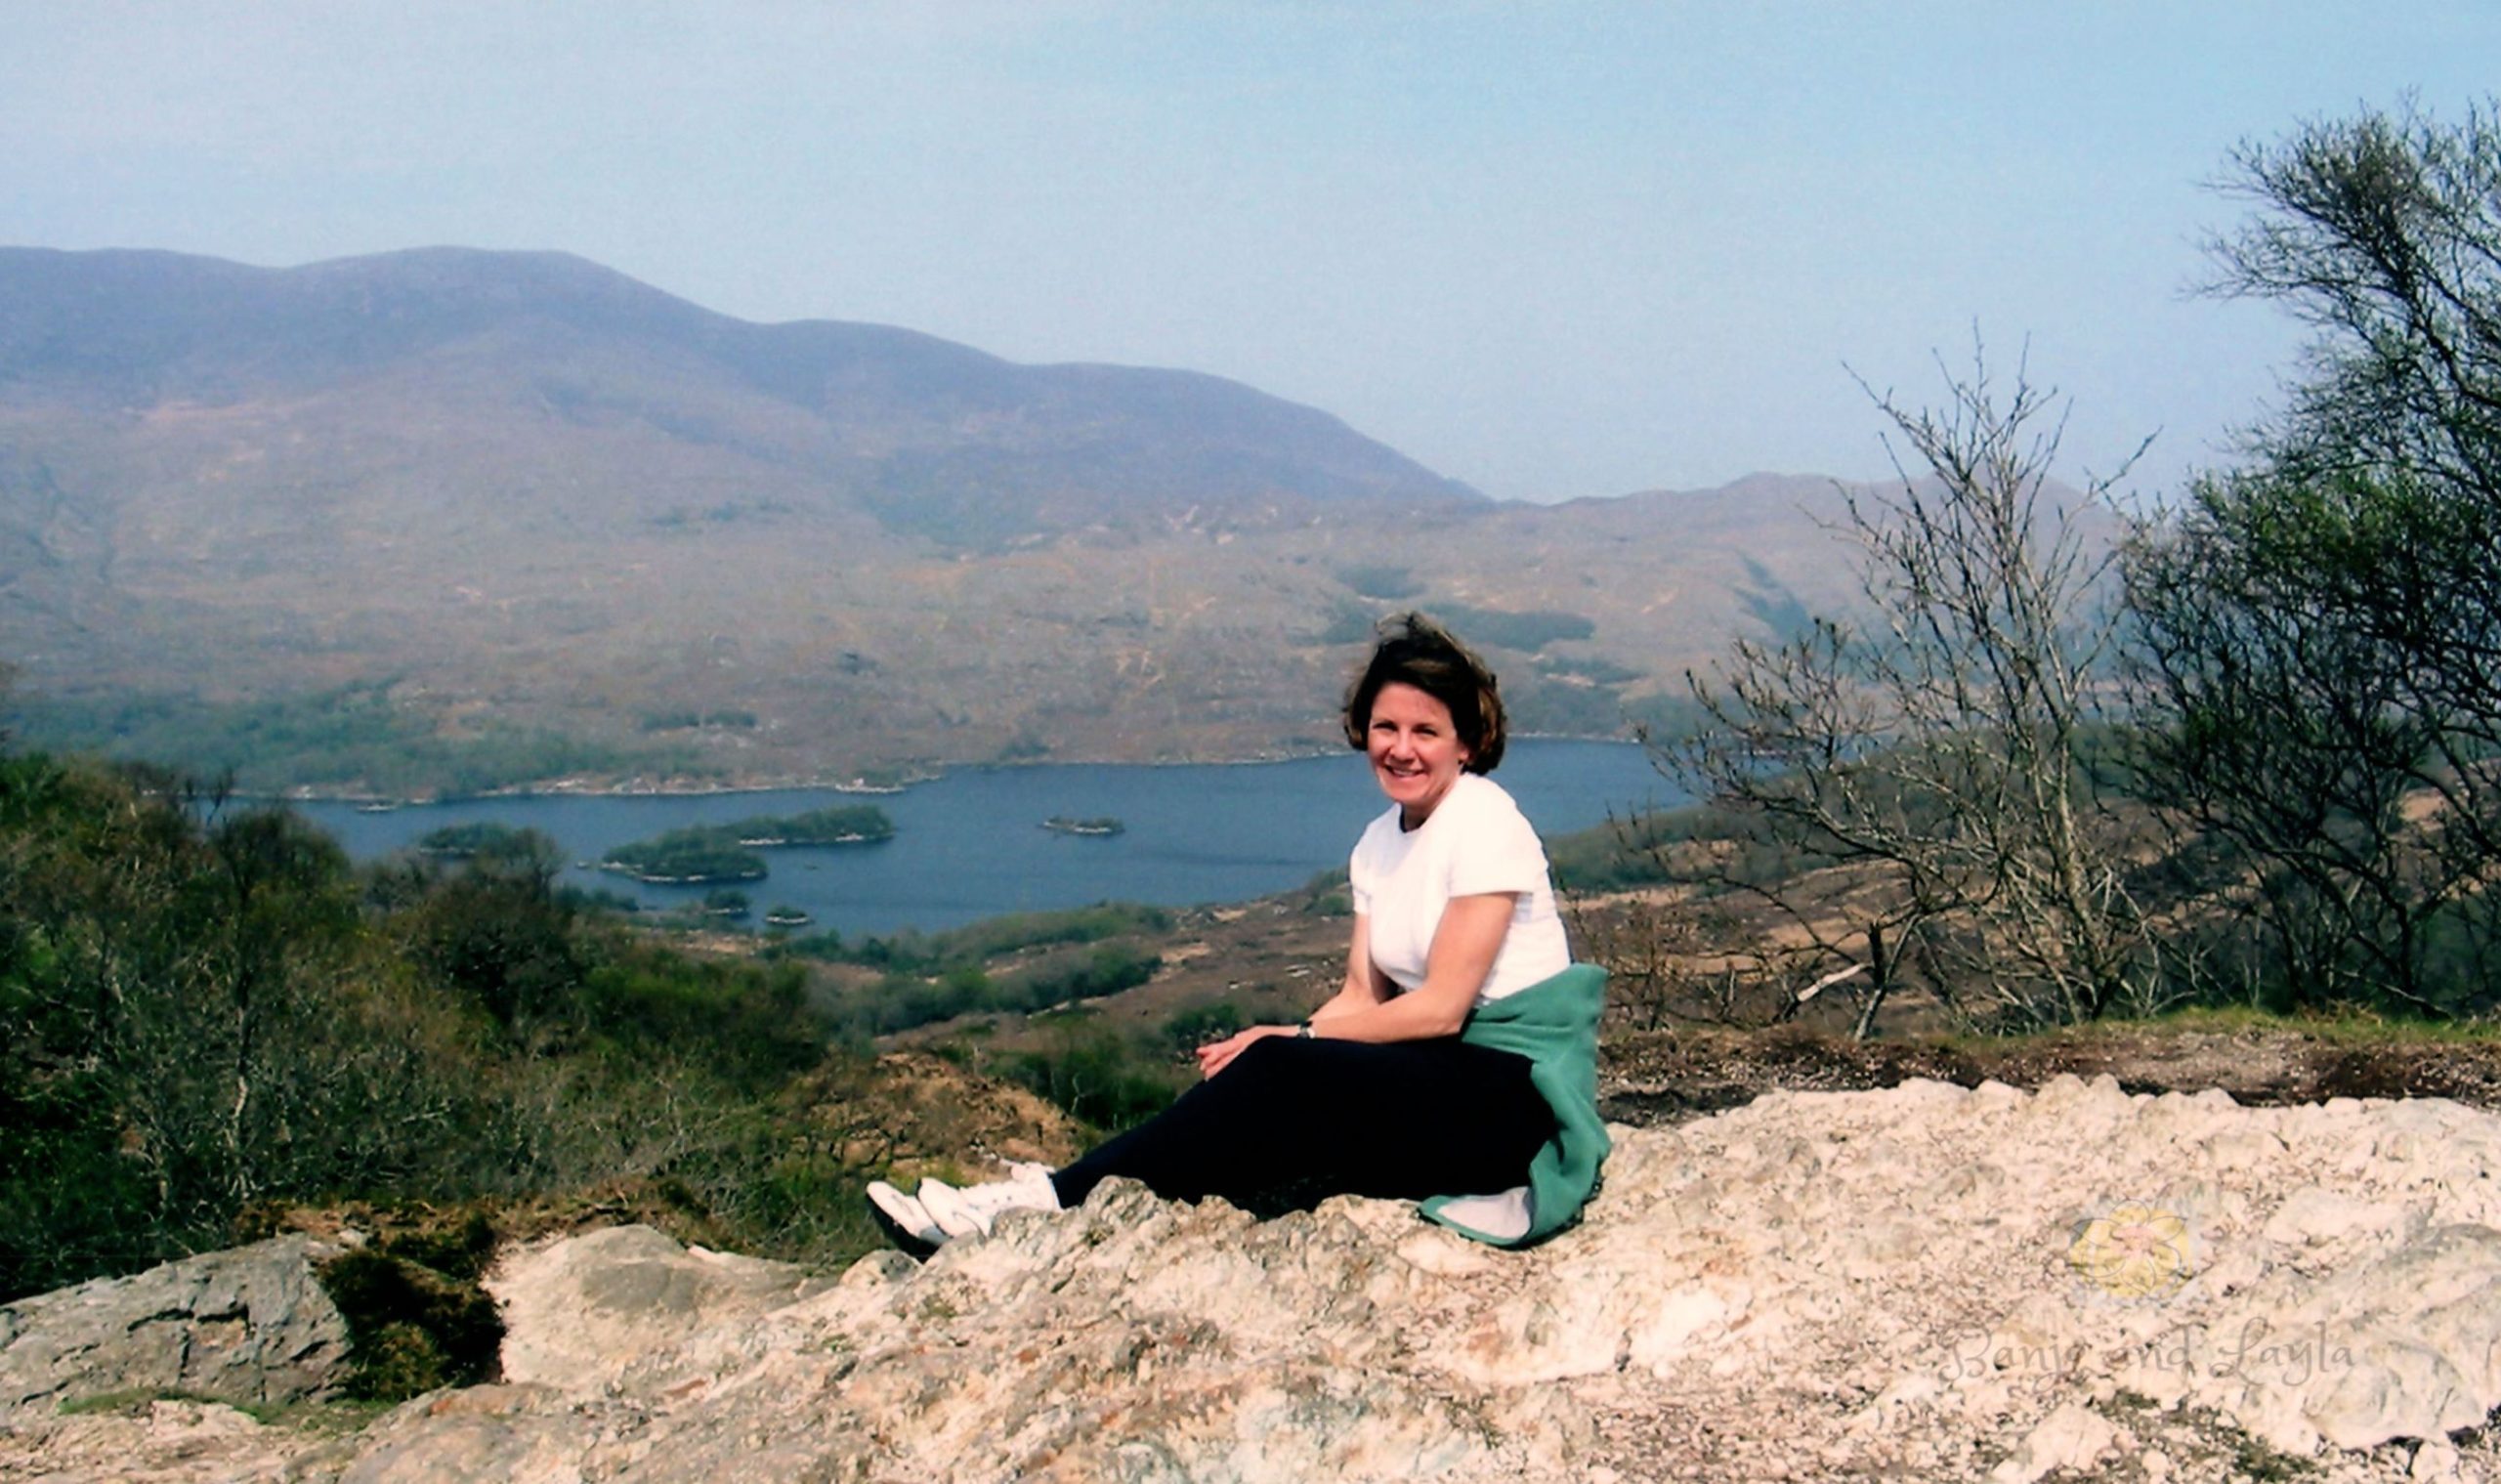
Traveling is good for our souls in so many ways. I lived in Germany for four years back when the dollar still went really far over there, so I was able to travel some around Europe. I lived four hours from where “The Sound of Music” was filmed in Austria. I could easily drive to historic castles and cathedrals, the ski slopes, and quaint little villages, and I still consider living there one of the highlights of my life.
I grew personally while there, and I learned to understand and respect people from other cultures. This led to me becoming a certified English as a Second Language (ESL) teacher and attend a multi-cultural, multi-ethnic church. I would have missed all of this if I had never traveled.
Twenty years from now you will be more disappointed by the things you didn’t do than by the ones you did do. So throw off the bowlines. Catch the tradewinds in your sails. EXPLORE. DREAM. DISCOVER. Mark Twain
Have no regrets.
At the end of my life I want to look back and know that I made a difference in the world. I want to have precious memories of adventures with loved ones or even alone.
I don’t want to be that girl who sits on the pool deck afraid to get wet because it will mess up her makeup. I want to be the one who does a flip off the diving board. I want to take risks and live with abandon. I want to have no regrets!
Do not go where the path may lead; go instead where there is no path and leave a trail. Ralph Waldo Emerson
Dare to be different.
Some of the best hiking experiences my husband and I have had are when we do not follow the most traveled path. We spend our honeymoon in the Great Smokey Mountain National Park in Gatlinburg, Tennessee. The Smokies are awesome!
However, the week we were scheduled to be there was during a government shut-down. So many roads and trails were closed, and there were no rangers on duty. Because of this we ended up exploring some lesser known trails.
One time we asked some locals where we could see a waterfall (always ask the locals for advice), and they directed us to a beautiful waterfall we had never seen on the map. It was actually over the border into North Carolina, and we would have never known about it had we stuck to the same trails everyone else follows.
Not all those who wander are lost. J.R.R. Tolkien
Explore just for the fun of it.
Sometimes our lives can so overly planned that we miss hidden treasures found only when we are leisurely wandering around just enjoying our surroundings.
Sometimes the ones who are lost are the ones who never wander. All who wander are not lost; some are right where they should be.
I am not the same, having seen the moon shine on the other side of the world. Mary Anne Radmacher
The same moon shines on you and me.
I have spent many weeks nestled in a green valley surrounded by mountains in North Carolina at a fabulous youth camp called Windy Gap. It is a beautiful place, and there is a night towards the end of each week where they send everyone out to just sit by themselves in silence for about 15 minutes to talk to God or just think.
During this time they turn off all the lights except for the emergency lights, and when they do there are literally millions of bright stars visible in the night sky. Many of the kids there are from the city and have never actually seen stars like this at night.
It is awe inspiring to think that someone on the other side of the world might also be sitting out on a similar grassy hill looking at those same stars and maybe talking to God like me.
We may all be very different, but wherever we travel the same moon shines on me you as it does on me.
And then there is the most dangerous risk of all – the risk of spending your life not doing what you want, on the bet you can buy yourself the freedom to do it later. Randy Komisar
The best time to travel is now.
I have found that when I think about how to afford travel there always seems to be something else pressing that requires my money. When you are working on your budget for the year always make at least one trip a priority, and then don’t dip into that saved money for anything else!
Earth and sky, woods and fields, lakes and rivers, the mountain and the sea, are excellent schoolmasters, and teach of us more than we can ever learn from books. John Lubbock
Get outside more!
This seems like a strange quote for a school teacher to like, but I was an outdoor recreation major in college and love being outdoors in nature. I do love books, but there are some things that you can only learn from new traveling experiences and being outdoors.
I hope you enjoyed these travel quotes and that they have fired you up a little bit more about the importance of travel and helped feed your wanderlust!
Check out some of my travel blog posts and let me know your thoughts below. I’d love to hear from you! Now go live your adventure!
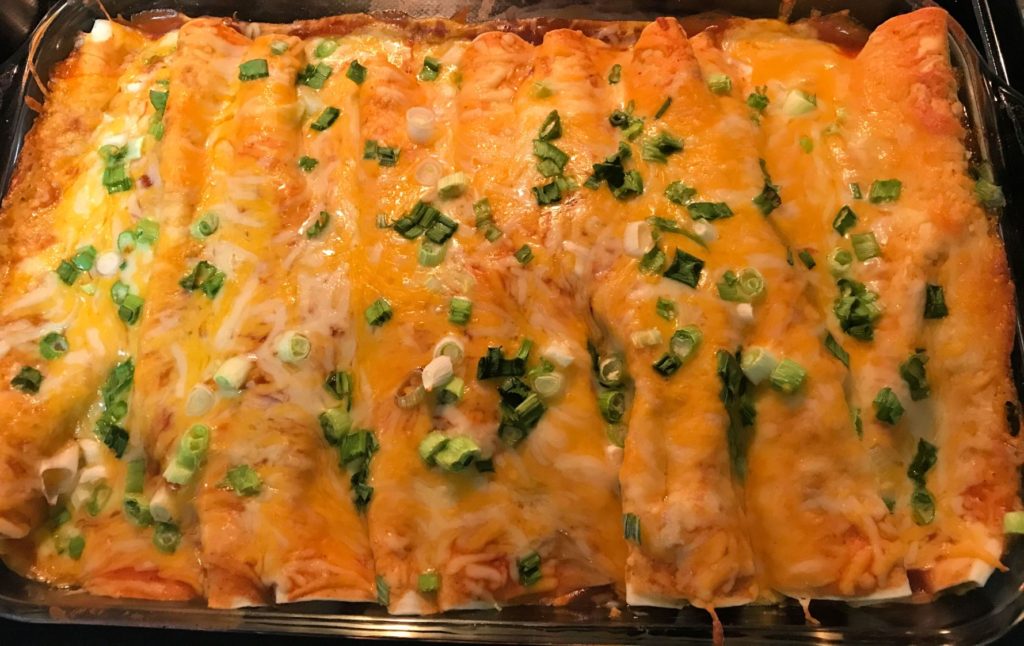
This beef enchilada recipe is super easy. These enchiladas look like they would take a lot of time to make, but you will be surprised at how simple this recipe is. Filled with seasoned beef, onions, green chilies, and cheese and covered with red enchilada sauce, this dish is a family favorite.
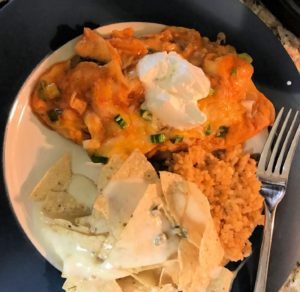
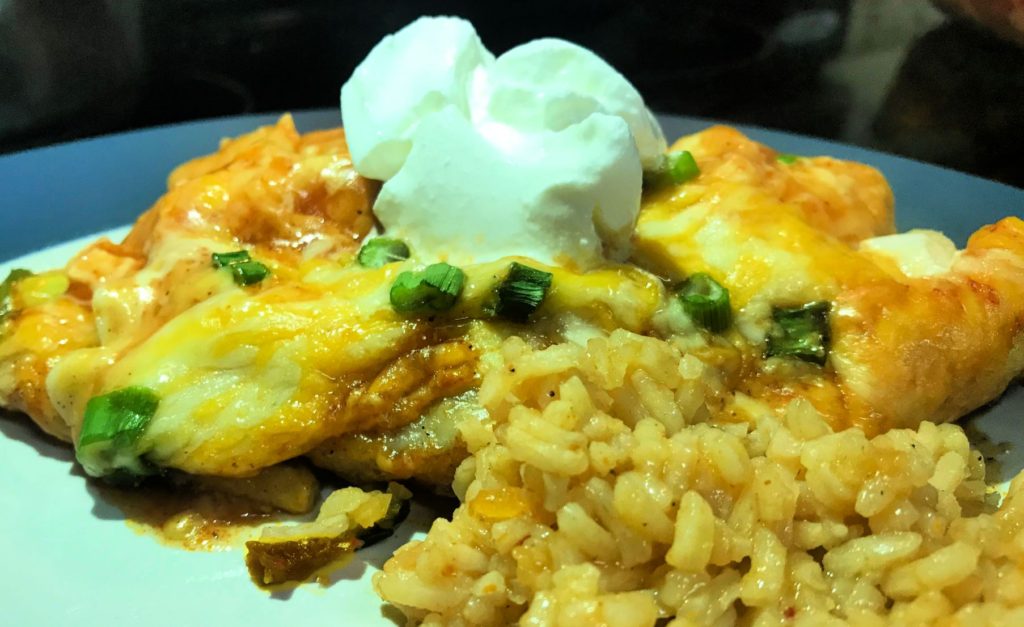
Top it with sour cream, diced green onions, pico de gallo, salsa, diced avocado, or any of your other favorite taco toppings. Serve it with Mexican rice, beans, or chips with cheese dip. Nothing is as good as homemade Mexican food. It’s the best!
Easy Dinner Recipe
Ingredients:
1 pound ground beef
3/4 white onion diced
1 4.5 oz. can chopped green chilies
2 1/2 cups red enchilada sauce
1/4 cup water
1 envelope taco seasoning
8 – 10 soft taco sized tortillas corn or flour
16 oz. Mexican style cheese shredded
8 oz. sour cream (optional topping)
3 green onions diced (optional topping)
Instructions
Preheat oven to 375 degrees F.
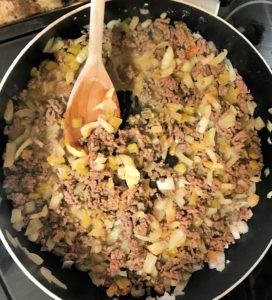
Brown the ground beef and onion in a skillet over medium heat until beef is crumbled up and no longer pink. Drain fat and return skillet to stove top.
Add in the chopped green chilies, taco seasoning, and water. Stir until combined and the water is absorbed. Remove from the heat.
You can add in the amount of onions you want. Pictured here is almost an entire onion.
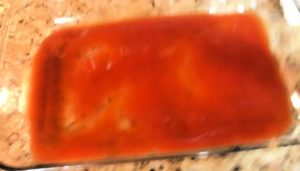
Cover the bottom of a 9×13″ casserole or baking dish with enchilada sauce (1/4 – 1/2 of the sauce) to evenly coat the bottom of the dish. Reserve the remaining sauce for later.
Spread red enchilada sauce over the bottom of the dish first.
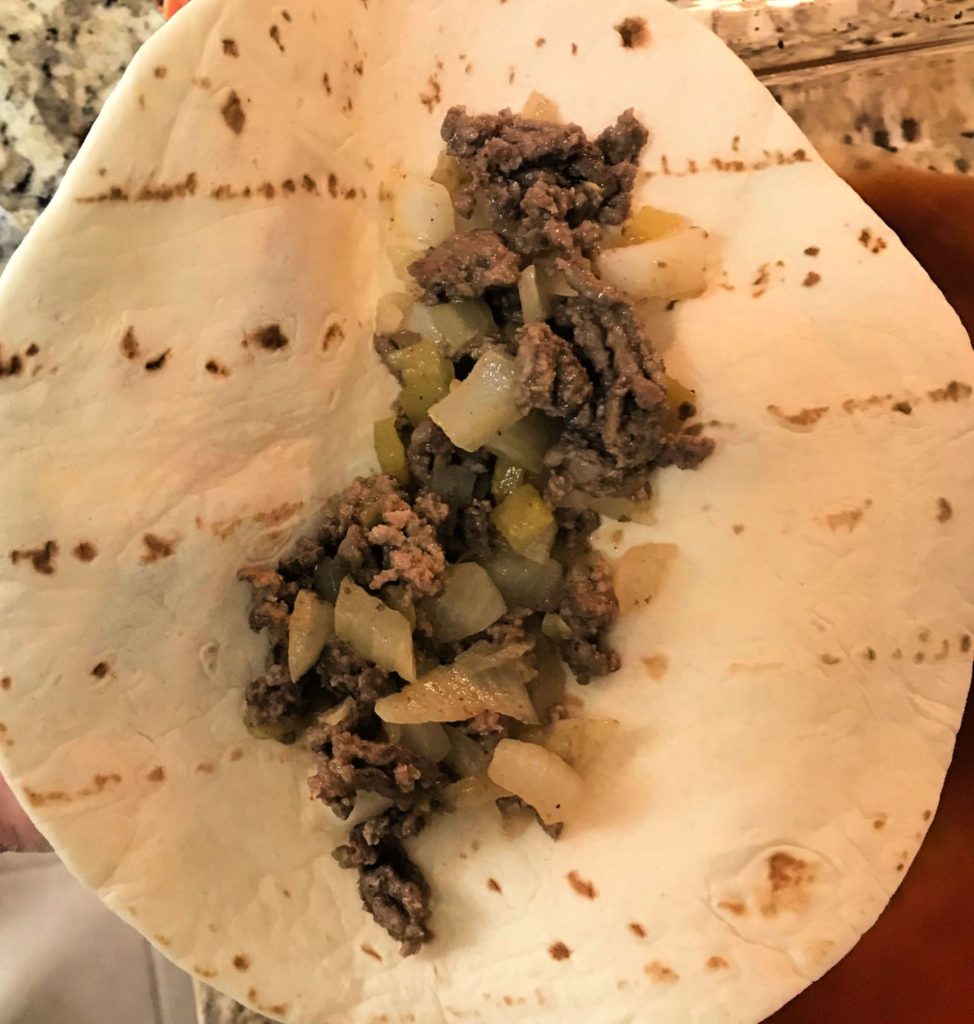
Spoon about 1/3 cup of the ground beef mixture in a straight line in the center of each tortilla.
Spoon beef mixture onto the center of the tortilla.
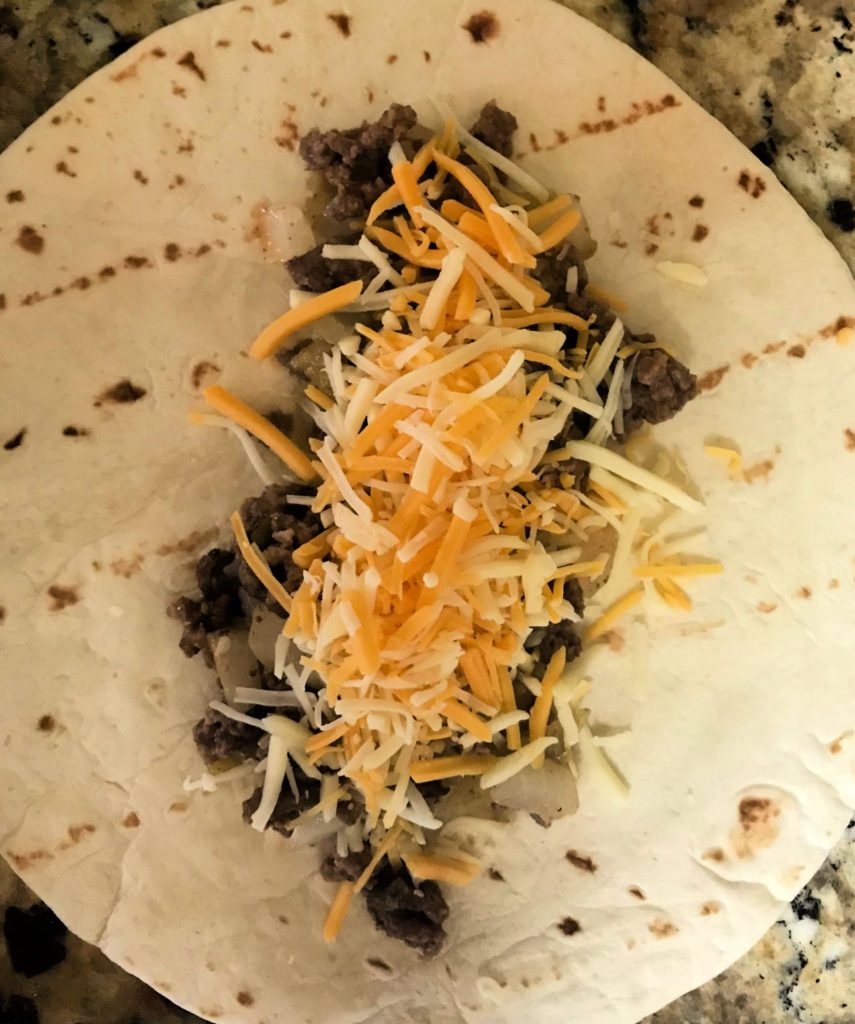
Add about 1/4 cup of the shredded cheese on top of the beef mixture and roll up tightly.
Add about 1/3 cup cheese to cover the ground beef mixture.
Lay the rolled enchiladas seam side down in the casserole dish. Repeat with remaining tortillas, filling up the dish. If you have any beef mixture left over, just sprinkle it over the top of the rolled enchiladas.
Pour the rest of the enchilada sauce over the top of the tortillas, making sure to spread it evenly to coat each tortilla.
Pour the remaining red enchilada sauce on and spread to cover before adding cheese.
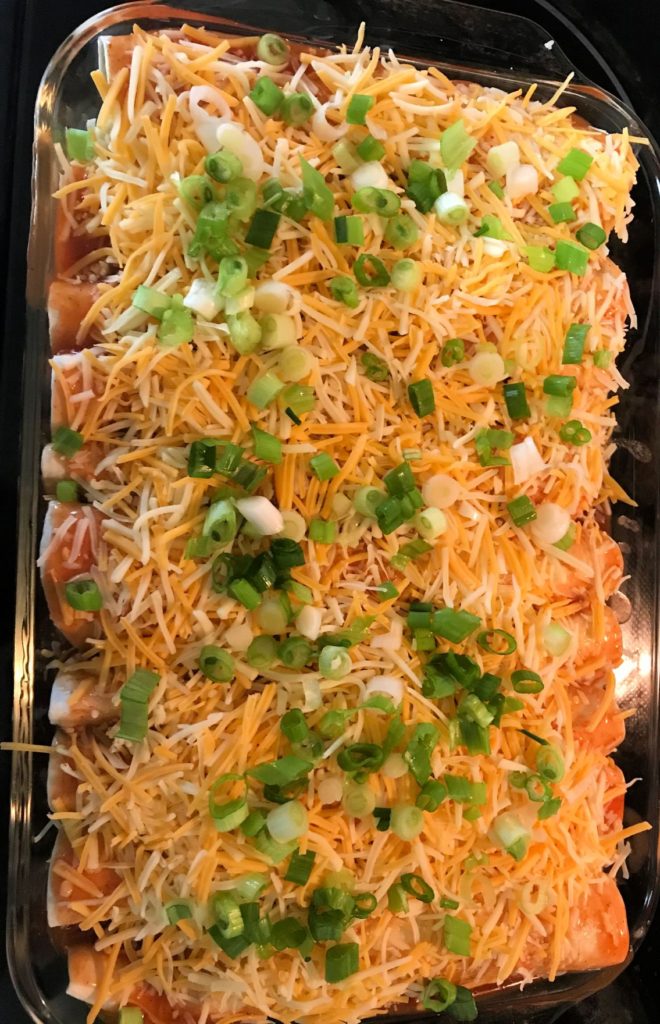
Sprinkle all of the remaining cheese over the top of the tortillas. Top with diced green onions if desired.
I like to sprinkle diced green oinions on top before baking. I think it makes it look fancy. 🙂
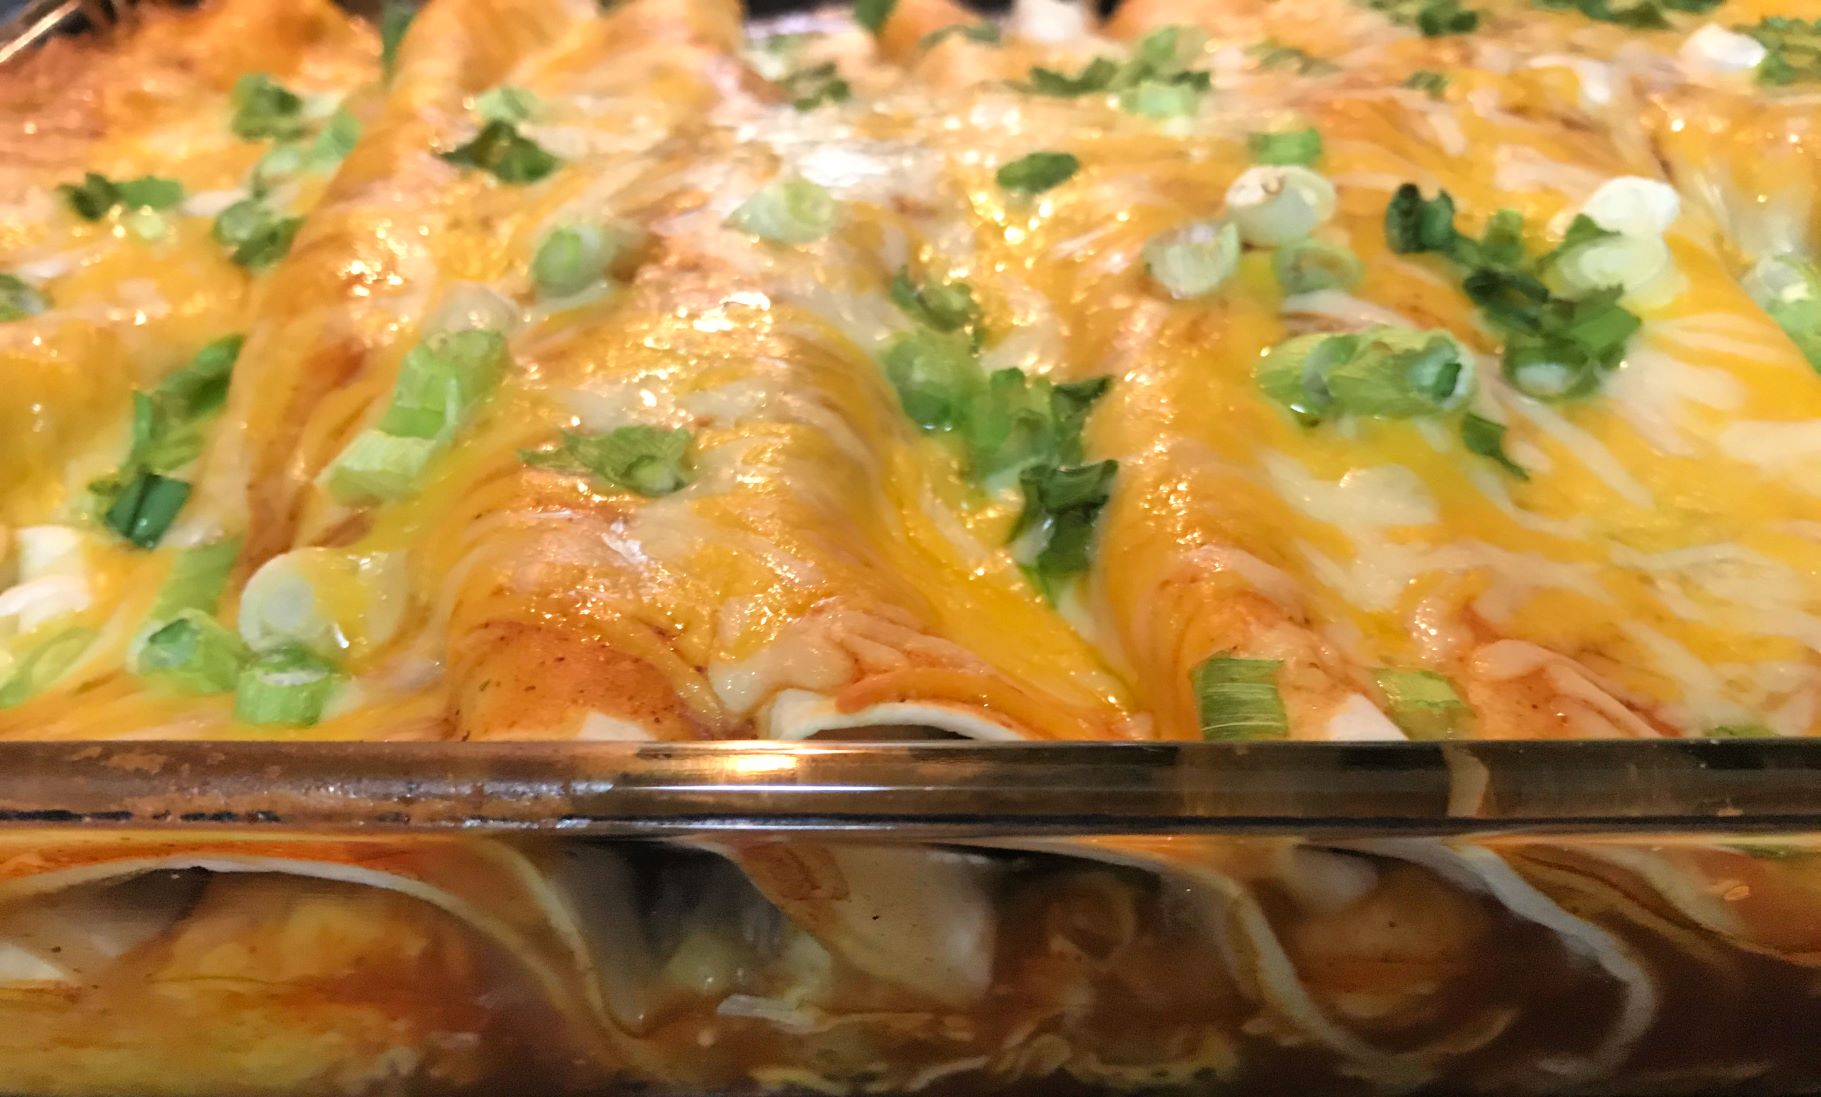
Bake for 25 minutes or until the center is bubbly.
Cheese should be fully melted, and the edges of the tortillas should be crispy.
Easy and delicious! These enchiladas are filled with seasoned beef, onions, and cheese, then topped with your favorite Mexican toppings.
Prep Time25 minutesmins
Cook Time25 minutesmins
Total Time50 minutesmins
Course: Main Course
Cuisine: Mexican
Servings: 8
Calories: 215kcal
Author: Cindy Baker
Ingredients
1poundground beef
3/4 white oniondiced
14.5 oz. canchopped green chilies
2 1/2cupsred enchilada sauce
1/4cupwater
1envelopetaco seasoning
8 – 10soft taco sized tortillascorn or flour
16oz.Mexican style cheeseshredded
8oz.sour cream(optional topping)
3green onionsdiced (optional topping)
Instructions
Preheat oven to 375 degrees F.
Brown the ground beef and onion in a skillet over medium heat until beef is crumbled up and no longer pink. Drain fat and return skillet to stove top.
Add in the chopped green chilies, taco seasoning, and water. Stir until combined and the water is absorbed. Remove from the heat.
Cover the bottom of a 9×13" casserole or baking dish with enchilada sauce (1/4 – 1/2 of the sauce) to evenly coat the bottom of the dish. Reserve the remaining sauce for later.
Spoon about 1/3 cup of the ground beef mixture in a straight line in the center of each tortilla.
Add about 1/4 cup of the shredded cheese on top of the beef mixture and roll up tightly.
Lay the rolled enchiladas seam side down in the casserole dish. Repeat with remaining tortillas, filling up the dish. If you have any beef mixture left over, just sprinkle it over the top of the rolled enchiladas.
Pour the rest of the enchilada sauce over the top of the tortillas, making sure to spread it evenly to coat each tortilla.
Sprinkle all of the remaining cheese over the top of the tortillas. Top with diced green onions if desired.
Bake for 25 minutes or until the center is bubbly.
I love to laugh, and I really love to travel. Going on an adventure to someplace I’ve never been with family and friends is one of my favorite things to do. So why not put these two things together and give you some of my favorite funny travel quotes.
Some of these are things you might see on a travel mug or quotes from famous people or lines from movies. I hope that you get a little chuckle as you read them and that they cheer you up and make you smile.
1. If you think adventure is dangerous, try routine, it’s lethal. – Paulo Coelho
2. Make salsa, not war! – Anonymous
3. The worst thing about being a tourist is having other tourists recognize you as a tourist. – Russell Baker
4. Boy, those French! They have a different word for everything. – Steve Martin
Funny Travel Quotes
5. I’ve almost been to as many places as my luggage. – Bob Hope
Funny Travel Quotes
6. Don’t worry about the world ending today; its already tomorrow in Australia. – Charles M. Schulz
7. Kilometers are shorter than miles. Save gas; take your next trip in kilometers. – George Carlin
Funny Travel Quotes
8. Spain travel tip: If bathroom genders are indicated by flamingos, the boy flamingo is the one with the hat. I learned this the hard way. – Dave Barry
Funny Travel Quotes
9. I haven’t been everywhere, but it’s on my list. – Susan Sontag
10. If you come to a fork in the road, take it. – Yogi Berra
11. If you are going through hell, keep going. – Winston Churchill
12. I have found out that there ain’t no surer way to find out whether you like people or hate them than to travel with them. – Mark Twain
13. If you reject the food, ignore the customs, fear the religion, and avoid the people, you might better stay home. – James Michener
14. I wish travel therapy was covered by health insurance. – Anonymous
15. You can’t buy happiness, but you can buy plane tickets, which is kinda the same thing. – Anonymous
16. I need some vitamin SEA. – Anonymous
Ocean Therapy
17. I travel a lot. I hate having my life disrupted by routine. – Caskie Stinnett
18. I need a vacation of 6 months. Twice a year! Anonymous
19. Vacation calories don’t count. – Anonymous
20. Girls don’t wait for the prince anymore; they pack their bags and travel the world! – Anonymous
Girls love to travel!
21. I just want to travel the world, overspend at IKEA and drink coffee while cuddling puppies. – Anonymous
22. Have you ever stopped to think, maybe travel is addicted to me? – Anonymous
23. A plane ticket is the answer. Who cares what the question is? Anonymous
24. Can we just skip to the part of my life where I travel the world? – Anonymous
25. It’s bad manners to keep a vacation waiting. – Anonymous
Funny Travel Quotes
26. If you look like your passport photo, you probably need a trip. -Anonymous
27. Yeah, working is great….but have you tried traveling? Anonymous
28. Sometimes the road less traveled is less traveled for a reason. – Jerry Seinfeld
29. If you had to choose between true love or traveling the world, which country would you visit first? – Anonymous
30. When preparing to travel, lay out all your clothes and all your money. Then take half the clothes and twice the money. – Susan Heller
So did these quotes make you smile?
I hope so. We all could use a lot more smiling these days. And I know I could use some traveling for vacation. How about you? Let me know what you thought of these quotes in the comments below.
This is one of the easiest recipes ever, and yet it is so delicious and can be served in so many different ways. So this week we’re traveling with our taste buds again. This time to Mexico!
This post contains affiliate links, and I may earn commission when you click these links at no additional cost to you. All opinions are my own.
This chicken is so tender and juicy it just falls apart as it soaks in the flavors of salsa and taco seasoning. It is one of those meals that takes only a few minutes to prepare, then you just walk away and let it cook in the slow cooker all afternoon while you do other things.
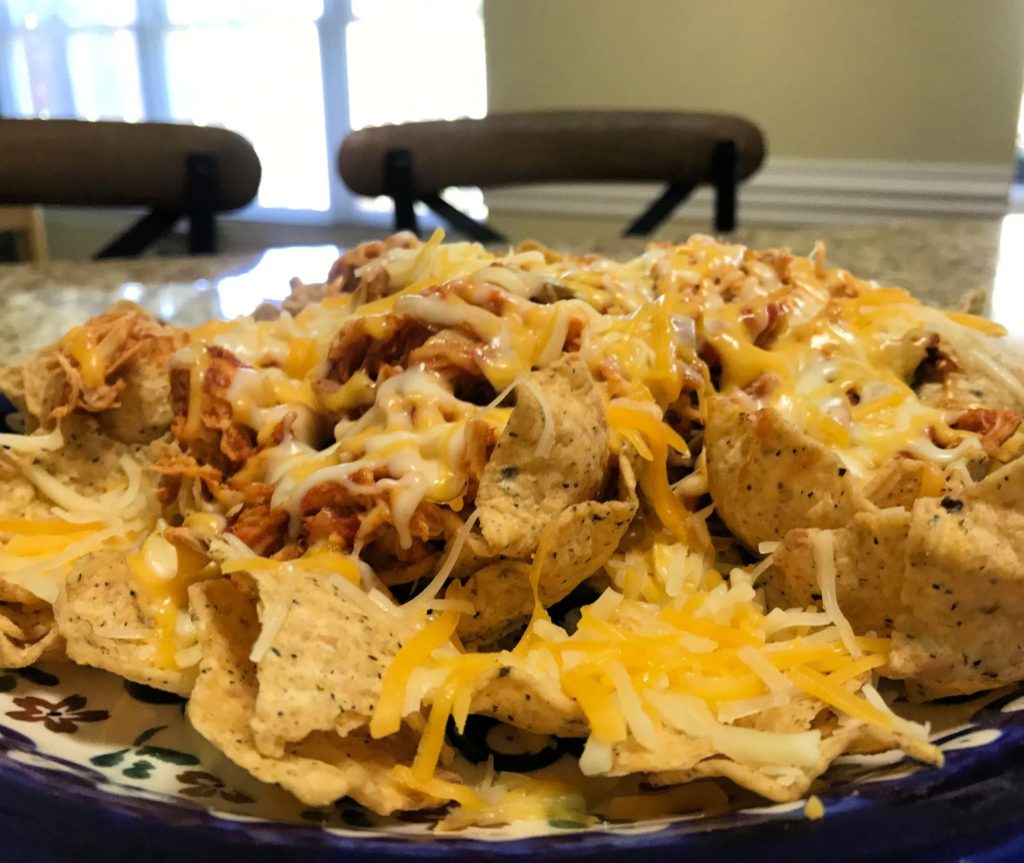
It is easy to shred, because it becomes very tender in the salsa. It can be served over rice with or without cheese, in tacos or lettuce cups, or my favorite: chicken nachos! Spritz a little lime juice on it right before serving, and you have yourself a perfect crowd pleaser for a meal or appetizer. Just in time for Cinco de Mayo too!
Slow cooker salsa chicken makes great chicken nachos!
Here’s How to Make It:
Ingredients
2 – 4 boneless, skinless chicken breasts (I used 2 in my pictures. You may want to adjust the amount of salsa to taste. We like a lot!)
1 envelope taco seasoning (mild or hot)
1 16 oz. jar or larger of chunky salsa
1 cup Mexican style blend shredded cheese for topping
Instructions
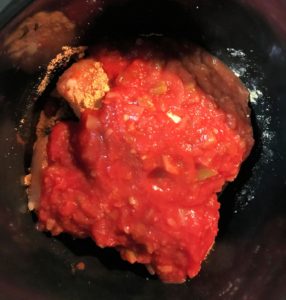
1. Place the chicken breasts in the slow cooker.
2. Sprinkle taco seasoning over all sides of the chicken.
3. Pour half the jar of salsa over the chicken.
Sprinkle the taco seasoning over the chicken breasts first.
Then pour half the jar of salsa on top.
4. Cover and cook on high 3 hours (or on low 6 hours).
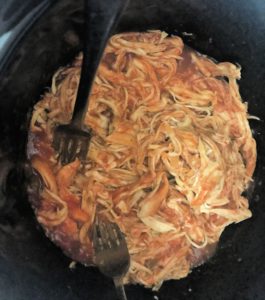
5. Shred the chicken in the slow cooker.
The chicken will be falling apart and very tender, making it shred easily.
You will not need to remove the chicken to shred it. Using two forks, you can just shred it right in the slow cooker.
6. Pour the remaining salsa over the chicken and toss to coat. Cook 10 more minutes before serving to heat the salsa.
Serve over rice, in tacos, in lettuce cups, or as a nacho plate. Let me know if you try this and how it turned out. I think you will really like how easy it is.
There are so many different ways you can serve salsa chicken.My favorite way to serve salsa chicken is a chicken nacho plate as an appetizer or meal.
If you are from the South like me you probably are a fan of biscuits. Growing up my mom used to make homemade biscuits “from scratch,” and they were so good! She has done it so many times that after awhile she did not even have to look at the recipe any more.
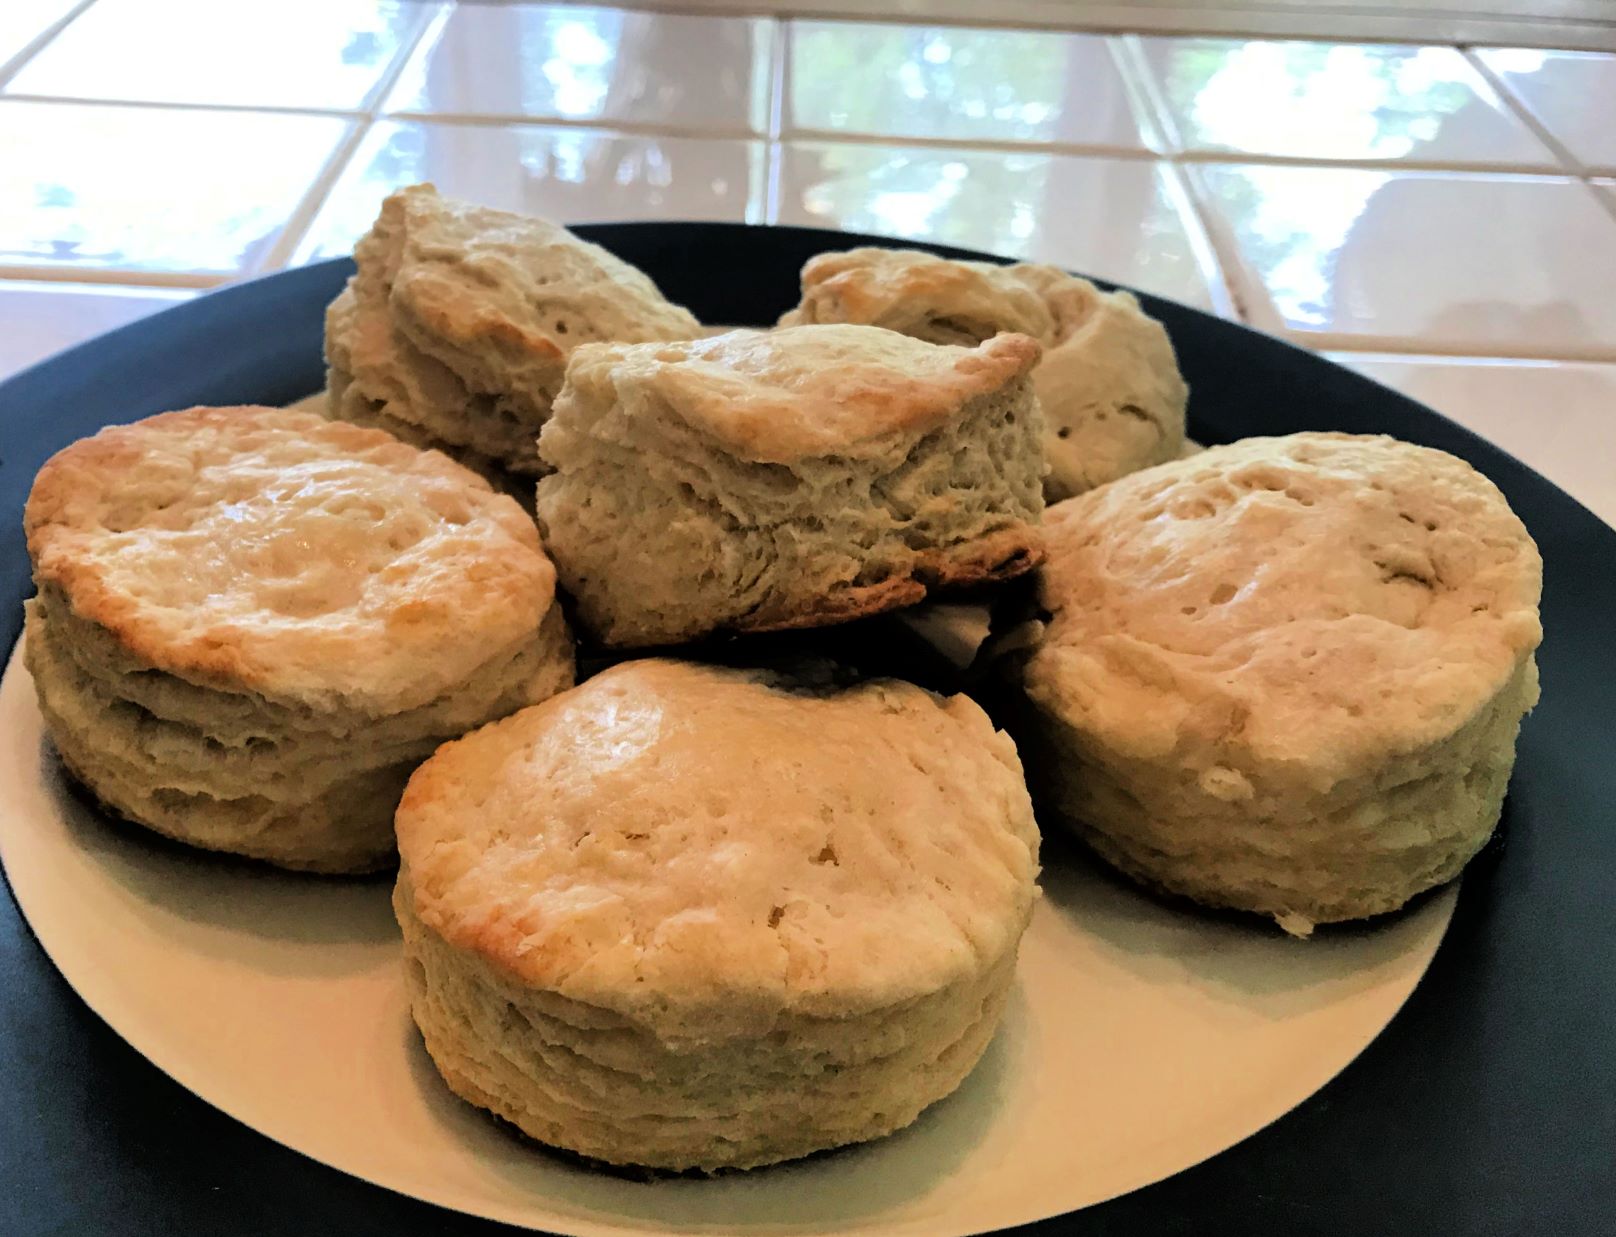
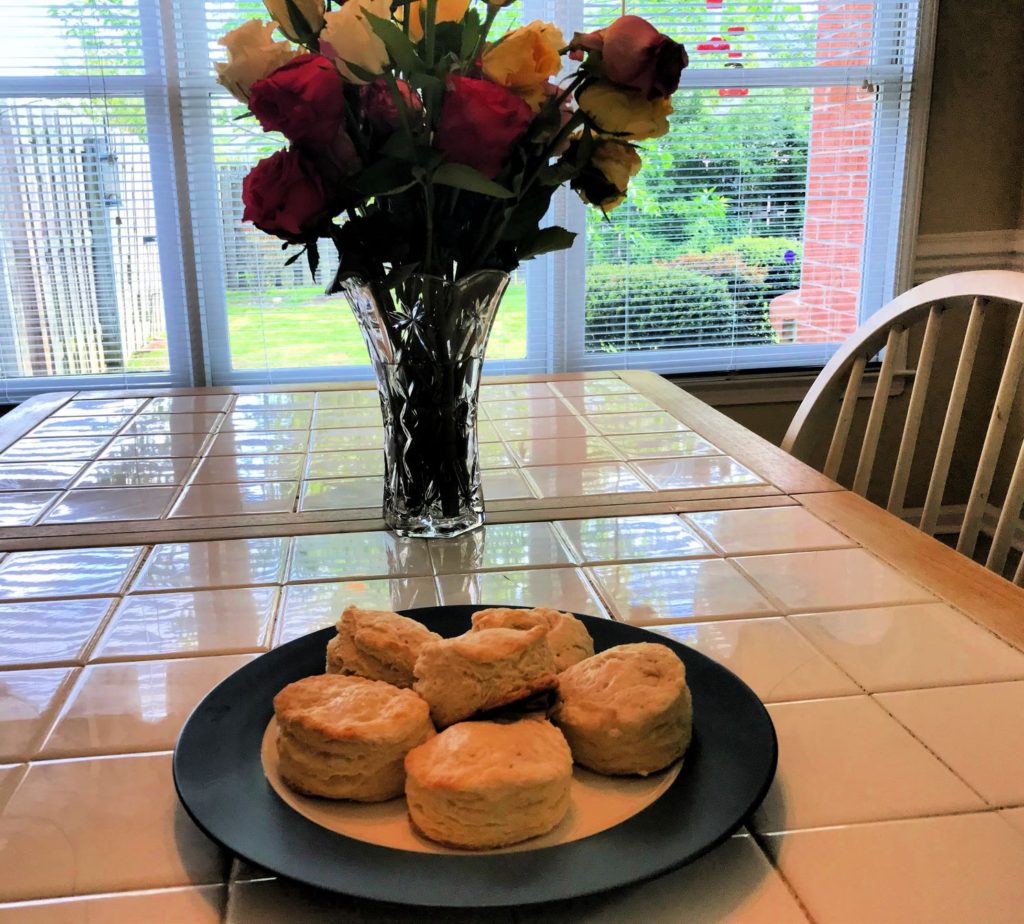
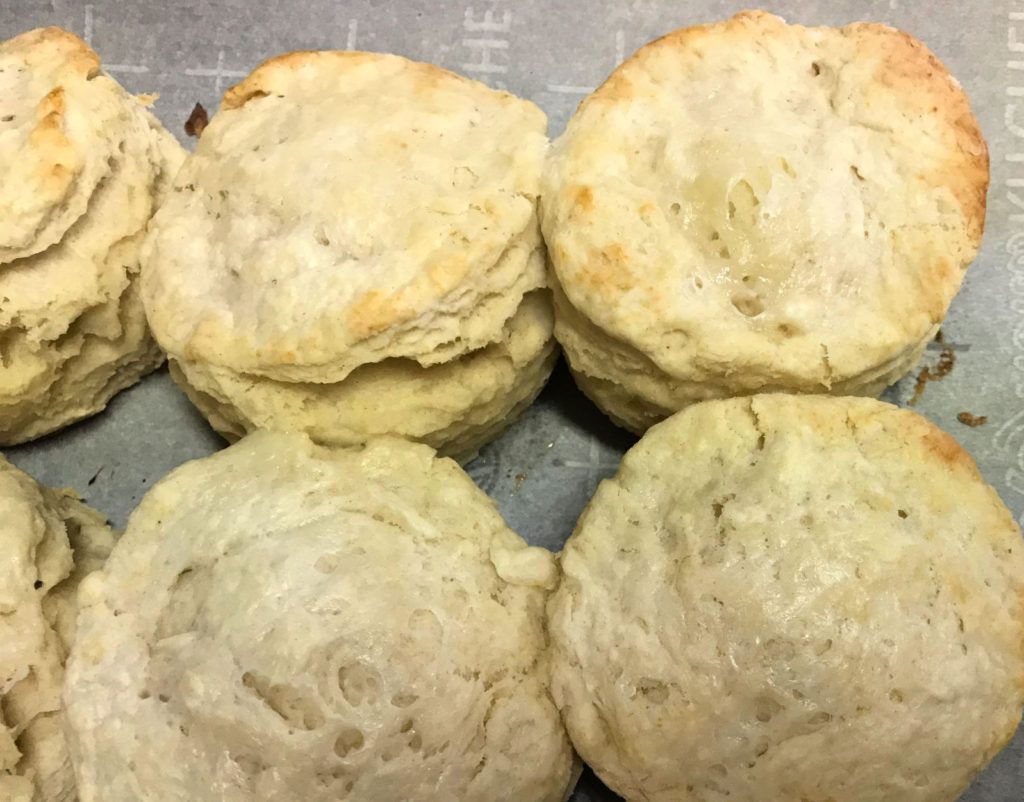
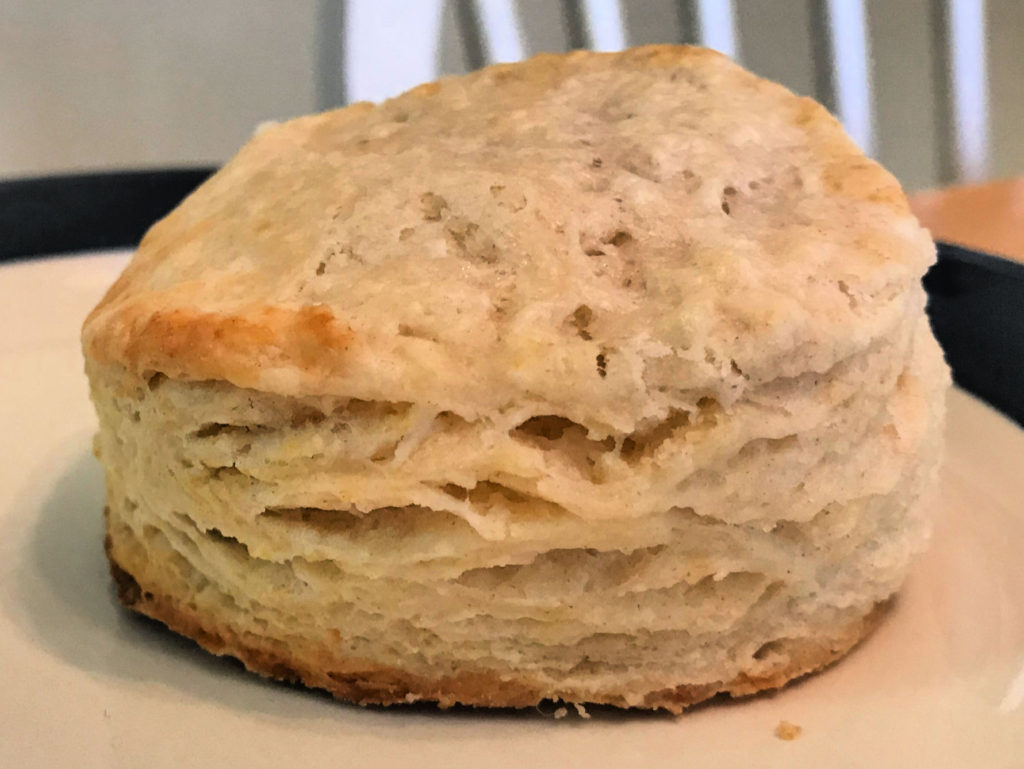
A plate of hot buttermilk biscuits looks good on any table.
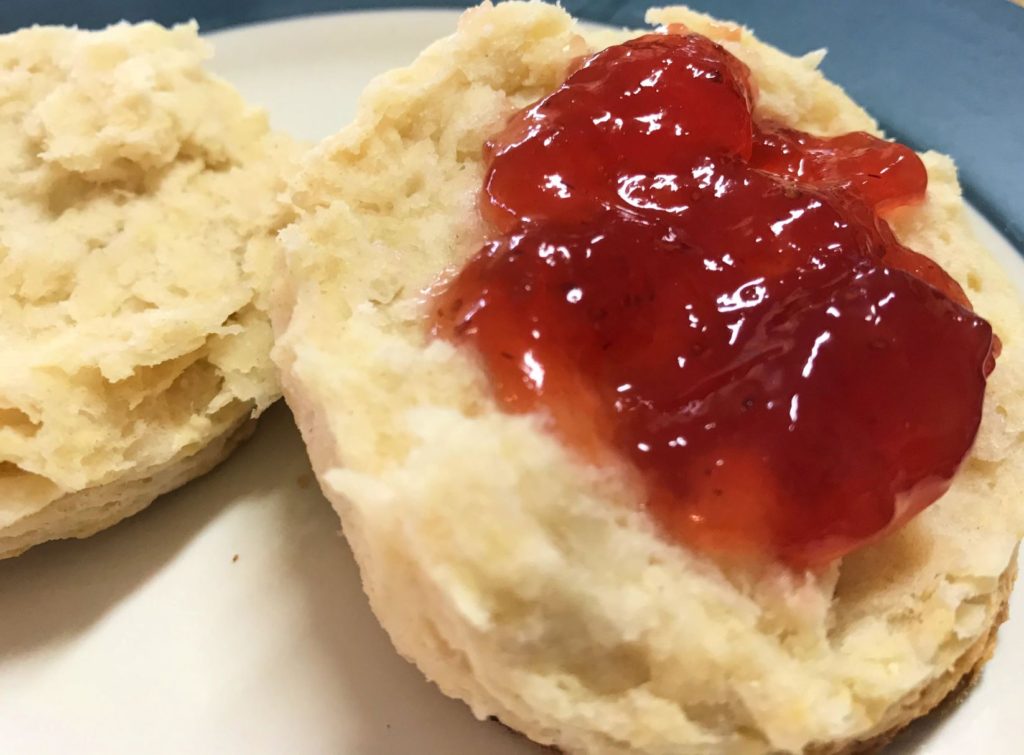
One of my favorite kind of biscuits is homemade buttermilk biscuits. The kind from the can or frozen biscuits are OK if you don’t have time to make your own, but none of those can compare to the fresh goodness of hot, flaky, buttery homemade buttermilk biscuits. Topped with strawberry jam or some good honey ham and your taste buds will be in heaven!
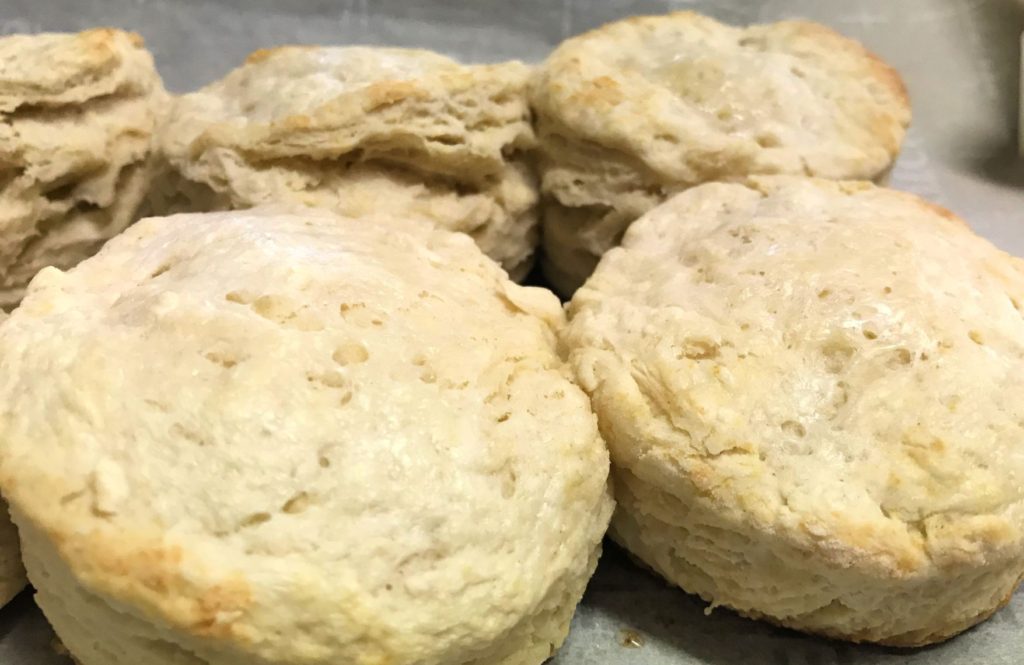
As they bake you can see the hot flaky layers form.
This biscuit recipe is not difficult at all, but it does take about half an hour from start to finish. I made the ones in the pictures on a Saturday morning when we had more time to enjoy our breakfast.
But biscuits are not just great for breakfast. We had biscuits the other night with spicy jumbalya. The biscuit helped cool down some of that hot spice in my mouth, and it made a perfect pairing. Biscuits with shrimp or fried chicken is also good.
Buttermilk Biscuits make a great side dish.
A hot biscuit with a little butter and jam and a good cup of coffee in mid afternoon can keep me going until dinner time. Maybe that is why the Brittish like tea and biscuits in the afternoon. Anyway, you will find this recipe fairly easy to follow. I hope you enjoy them!
Buttermilk Biscuits with Strawberry Jam
Ingredients
2 cups all-purpose flour, leveled and spooned
1/4 tsp baking soda
1 Tbs baking powder
1 tsp salt
2 tsp sugar
3/4 cup cold buttermilk, plus some extra to brush on top
6 Tbs cold unsalted butter, cubed
Directions
First, preheat the oven to 450 degrees F.
Line a large baking sheet with parchment paper.
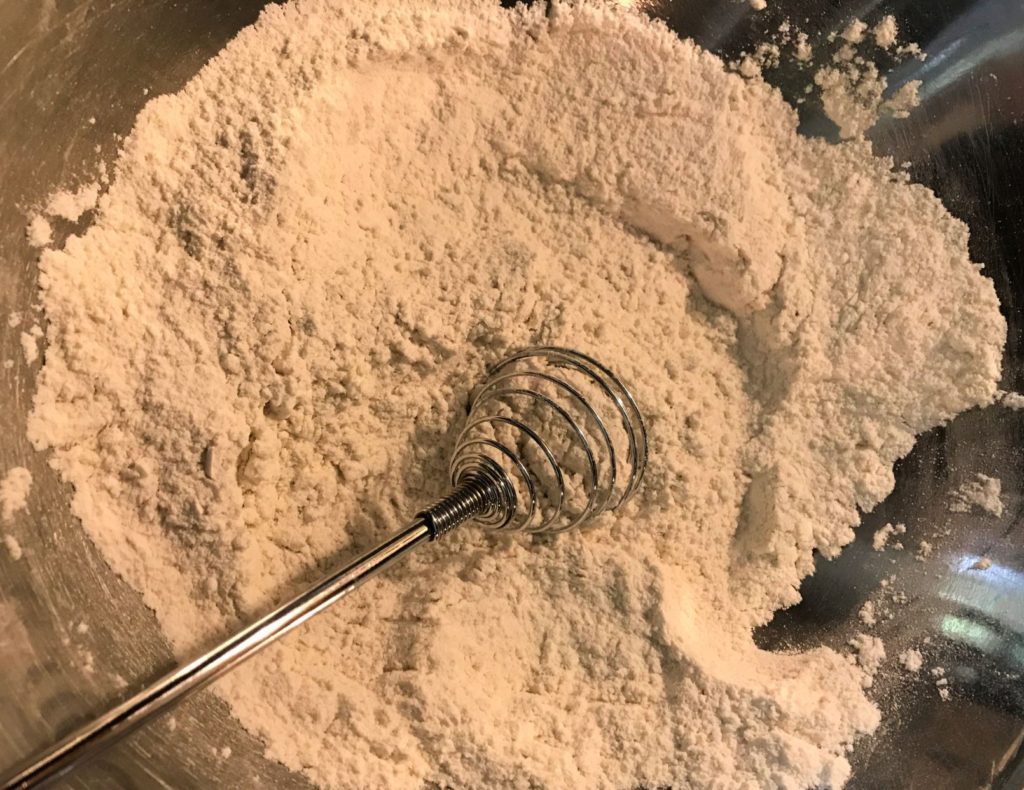
In a large mixing bowl, whisk together the flour with the other dry ingredients.
Using a whisk helps distribute the dry ingredients evenly.
Using a pastry cutter or a fork cut the butter cubes into the flour mixture until the butter is in tiny little balls. A food processor can also be used. Honestly, I just used a fork for the ones pictured in this post and it worked fine. Also the butter should not be left out of the refrigerator. Make sure it is cold and not soft.
Pour the cold buttermilk in and gently stir until a dough starts to form. Just like the butter make sure you do not leave the buttermilk out while you are following the other steps. Make sure it is cold.
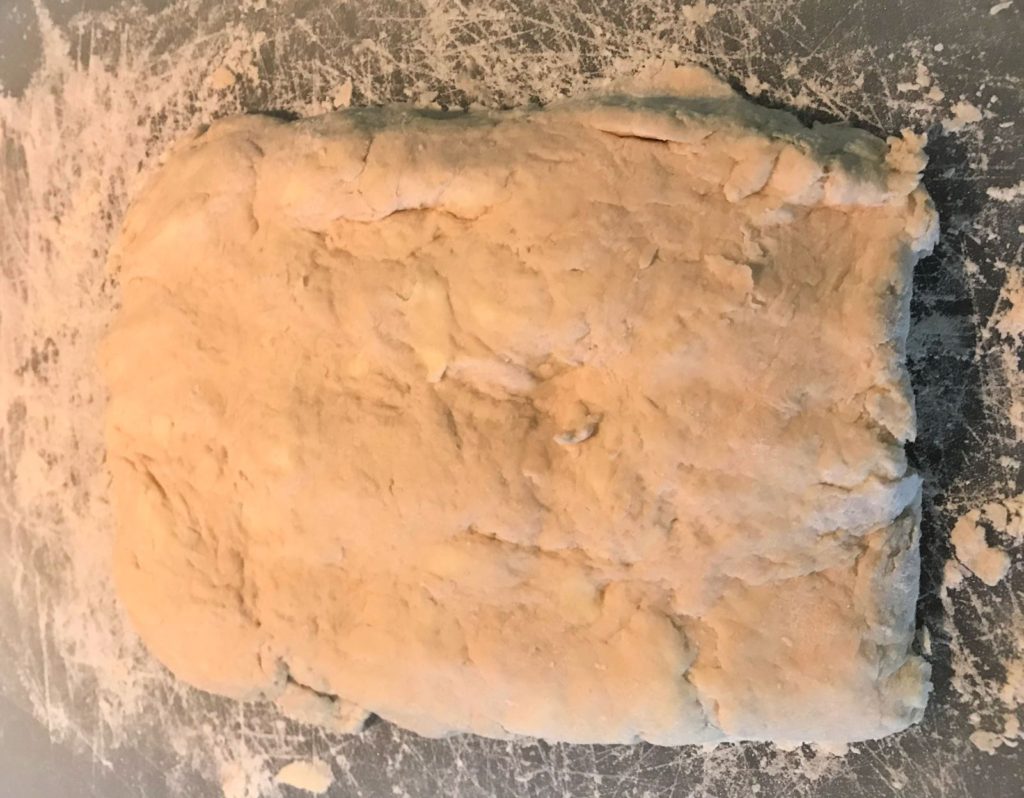
Place the dough on a lightly floured surface and gently work it with your hands to distribute all the ingredients. Pat the dough down down flat (you do not need to use a rolling pin) and fold it in thirds. Turn the dough and flatten again. Repeat this process two more times.
The dough will be thick. Make sure you don’t overwork it.
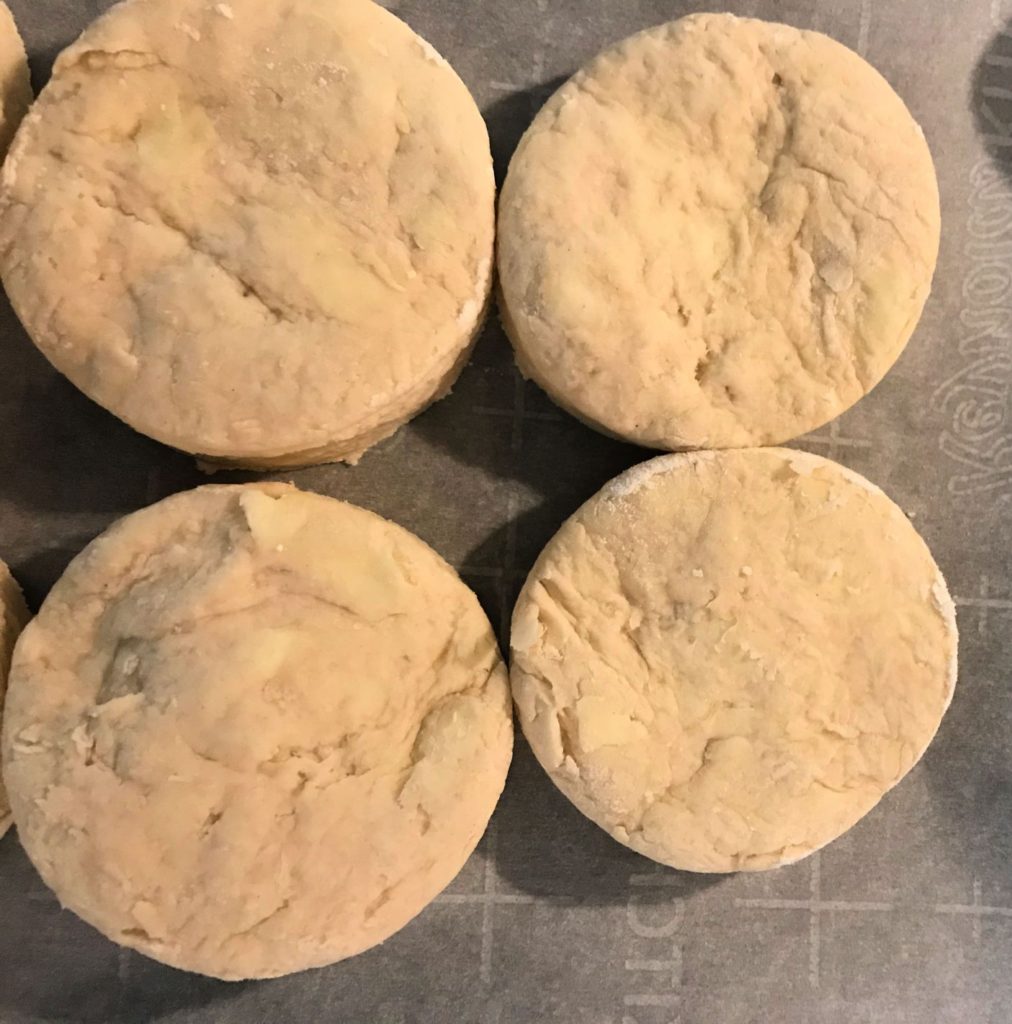
Pat the dough down into a thick rectangle (about 1/2 inch thick – I actually measured mine). Using a floured 2 1/2 inch biscuit cutter, cut the biscuits out of the dough. Gather any scraps and continue flattening and cutting the dough until you have approximately 8 – 12 biscuits. Try to get as many as you can cut the first go around so as to not overwork the dough and make it tough or have too much flour in it.
Line the biscuits up on the baking sheet so that they are touching each other. Brush a little bit of buttermilk on the tops of the biscuits.
Place the cut dough biscuits on the baking sheet to that they are touching each other.
Bake at 450 degrees F for about 15 – 17 minutes or until the biscuits are lightly golden brown on top. Remove the biscuits from the oven and allow them to cool 1 – 2 minutes. Add a little butter and enjoy!
Placing them together so that the sides touch helps the dough rise while baking.
Did you try it?
Let me know if you tried this recipe and how it turned out. I did not make this recipe up, but variations of it is found several places on the internet so I don’t know where it originated. If you like it, please share this post and pin it. Thanks for spreading the love!
Easy and Delicious Hot Flaky Buttery Buttermilk Biscuits from Scratch make a yummy breakfast or side dish. Put a slice of ham in between two halves or top with jam. These will be a hit with any meal!
Prep Time15 minutesmins
Cook Time15 minutesmins
Total Time30 minutesmins
Course: Breakfast, Side Dish
Cuisine: American
Servings: 8biscuits
Calories: 95kcal
Ingredients
2cupsall-purpose flourleveled and spooned
1/4 tspbaking soda
1 Tbsbaking powder
1tspsalt
2tspsugar
3/4 cupbuttermilkvery cold, plus more for brushing on top
6Tbscold unsalted buttercubed
Instructions
Preheat oven to 450 degrees F.
Line a large baking sheet with parchment paper.
In a large mixing bowl, whisk together the flour and other dry ingredients until well combined.
Cut in the cold butter cubes until the butter is only small pieces. If you do not have a pastry cutter a fork will work.
Pour the cold buttermilk into the mixture and gently stir it until a dough starts to form.
Place the dough onto a lightly floured surface and gently work together with your hands until all ingredients are mixed. You do not need to use a rolling pin. Pat the dough flat and fold it in thirds. Repeat this process two more times.
Pat the dough into a thick rectangle (about 1/2 inch thick). Using a floured 2 1/2 inch biscuit cutter, cut out the biscuits in the dough.
Continue gathering scraps and patting it back down and cutting until you have 8-12 biscuits. Try to cut as many as you can the first time so as not to overwork the dough.
Place biscuits on baking sheet so that they are touching each other. Brush a little buttermilk on the top of each biscuit.
Bake at 450 degrees for about 15 – 17 minutes or until lightly golden brown on top. Remove from the oven and allow to cool for 1 – 2 minutes. Enjoy!
Looking for some great stay at home date ideas? We do not have kids in the home at this stage in our lives, but we still find it a challenge to think of creative and affordable dates out on the town sometimes. Maybe you have kids, but are looking for fun ways of spending time together after you get the kids to bed.
This post contains affiliate links, and I may earn commission when you click on those links at no additional cost to you. All opinions are my own.
We both have stressful full-time jobs in addition to my side hustle (this blog) and often just do not have the energy to go out at the end of a long week. We also live in a small suburb over 30 minutes from the city of Memphis and just don’t feel like driving downtown much. Going out occasionally can be really fun, but you don’t have to be extravagant to have a special night together.
Your circumstances for staying home might be different than ours. If you are reading this the month I’m writing it we are currently under stay-at-home quarantine orders, so we really don’t have a choice but to stay in. Maybe you have kids and that makes it difficult to go out. Maybe you are on a tight budget.
Whatever the reason, I have a list of fun ideas for you to enjoy as a couple at home. Maybe you will get some ideas of things to do instead of just playing video games or watching Netflix (nothing wrong with movie night though). Besides being fun, these great ideas will also save you money!
We recently took silly selfies on one of our stay at home dates.
20 Date Night Ideas You Can
Enjoy at Home
1. Game Night
When was the last time you had a game night just with your spouse? Set out some wine or soda and snacks and if you are competitive like me make a bet with your spouse. My favorite bet involves winning a foot rub. It can be a board game, card game, or any game really.
A little game night competition adds fun to date night. Photo Courtesy of Unsplash
2. Theme Night
Choose a theme and center everything on your date around that theme. If you watch a movie make the dinner match (for example watch “Joy Luck Club” and eat Asian food). Play music and even dress up to match the theme. Sample themes might be Marvel characters, Oscars Night, International Night, Wrestling, Country, you get the idea.
3. Play “Would You Rather”
Make a pact not to talk about work or the kids or anything else but each other. Play “Would You Rather?” These are a series of bizarre questions where you have to choose between two things. You may learn something new about your spouse when listening to the answers to these thought provoking and sometimes silly questions.
4. Karaoke Night
Have a karaoke night. If you like to sing (even if it sounds terrible) this is a fun date night activity. Look up song lyrics on YouTube and sing along. Try a sappy love song duet. Go ahead, no one’s listening. Take turns picking the song, and if you’re really daring try out some of the dance moves from muisc videos. Be prepared to laugh.
5. Go on a Picnic
If the weather is good eat outside for a change. Maybe even plan some signature picnic foods – things you only eat on picnics. If the weather is bad spread out a blanket and eat on the floor inside the house. We couldn’t do this, because our two dogs would come over and try to help themselves, but it is a fun idea. If the timing is right you might even be able to watch the sunset together outside.
6. Make Bread
Bread is one of those things that takes a long time make, because you have to wait for the dough to rise. So this is a good food to bake when you are not in a hurry. I have a bread maker machine, and you can make all kinds of variations of bread by adding in things like cheese or spices. But you don’t have to have a bread machine. You can use a good bread recipe and get creative all on your own. And hot buttered bread right from the oven is so delicious!
7. Eat by Candlelight
Any dinner feels more romantic by candlelight, even pizza. It doesn’t have to be fancy. Another idea is to pretend the electricity is out. Really. No Wi Fi. Tell stories, play games, eat by candlelight. Maybe get a fire going in the firplace and make s’mores. See if you can go old school and go an entire night without checking your phone or turning on the television.
Any dinner can feel romantic by candlelight. Photo Courtesy of: Unsplash
8. Tell Stories
Write out the story of how you met and fell in love, then read them to each other. Or video yourselves telling the story. What a cool thing to give your kids one day! Also, you can get it back out and watch it again or read it every anniversary to remind yourselves of the details of your love story.
9. Have a Camp Out
When we were first married we would sometimes put the mattress on the living room floor in front of the fire in the fireplace and sleep there for the night. It was just something a little different than the norm and that made it feel cozy and romantic.
By the way having a good mattress is so important for getting a good night’s sleep whether it is on a bed frame or on the floor in your living room. I recommend Puffy mattresses, and believe me it is worth the investment.
Try making a tent in the living room like you used to do when you were a kid and sleep on a blow-up air mattress and sleeping bags. You can even make s’mores or other camping type foods.
10. Movie Marathon
Binge watch as many movies as you can with a certain theme – like a certain genre or actor (James Bond or Star Wars for example). Try to remember the lines and act out some of the scenes together.
11. Discover Your Love Languages
Dr. Gary Chapman wrote a popular book called The 5 Love Languages which helps you discover the way you and your spouse prefer to give and receive love. You can take the quiz for free here, but I encourage you to buy the book if you haven’t read it yet.
This should bring up some very interesting conversations as you try to figure out how to speak your spouse’s love language, which may be very different from your own.
Learning each other’s love languages can help communication. Photo Courtesy of: Unsplash
12. Have a Tasting Party
A tasting party can be for anything: wine tasting, chocolate, cheese, whatever. Set up tasting stations with cards to write responses on. Play some instrumental music in the background and pretend you are at a fancy smancy high priced ticketed event or an exclusive vineyard. Plan ahead and buy mini cheese boards or tasting glasses to really make it authentic.
13. Crazy Question Time
Here is a list of fun questions to help you get to know each other better even if you’ve been married a long time. You can even guess what you think your spouse will answer then write it down. That way there is no cheating if you decide to make it a game and keep score.
What is your favorite thing about your spouse?
What’s your favorite memory of us dating?
What is your least favorite food?
What is a hobby you’d like to try?
What’s one goal you’d like to achieve by the end of the year?
What’s your favorite childhood memory?
Which celebrity couple would your spouse compare you to?
If your spouse could choose one thing of yours to get rid of , what would it be?
Who said “I love you” first?
What do you remember the most from our wedding day?
What’s something that would surprise me about you?
What is your greatest fear?
Focus on the Family has an awesome list of conversation starters for date nights to help you get started talking and getting closer together as a couple.
14. Exercise Together
As I write this, the spring weather where I live has been beautiful lately. We have enjoyed watching a bluebird raise her babies in the birdhouse in our yard. Click here for more information on how to attract bluebirds to your yard. Get outside and walk the dogs, run together, or ride bikes.
If you are staying inside, try one of the many online exercise classes. Try yoga or stretching and let off some of the stress from the day.
15. Spa at Home
This is a fun one. Pretend that you are spending the evening in a high priced luxury spa with a treatment of “the works.” Light candles, play some relaxing instrumental piano music.
Don your robes and slippers and make face masks, do facial scrubs, and have foot soaks and bath treatments. Drink water with cucumbers in it, paint your nails, give massages, and just relax.
16. Travel to Another Country
Make a dinner that reminds you of a country you have visited in the past or have always wanted to travel to. Make pasta for Italy, sushi for Japan, enchiladas for Mexico, fondue for Switzerland, corned beef for Ireland, you get the idea. Play music from that country’s culture and maybe even watch a movie set in the country you want to visit.
You might even take this time to actually plan your next vacation or that dream trip you’d like to take someday. This is a great way to cure wanderlust without actually traveling. And you will have a head start on your vacation plan for when you do travel.
International cuisine always makes for a fun date night. Photo Courtesy of: Unsplash
17. His and Hers Bucket List
Come up with a list of all the things you’d like to experience as a couple – adventures you want to share, things you want to learn together, places you’d like to visit, restaurants you’d like to try, and the types of dates you’d like to go on. Then take turns every month doing some of the things on the list. One month you get to pick, and the next month your spouse can choose.
18. Write Love Letters
Take some time to sit down and write a love letter to each other, telling your spouse all the things you appreciate and admire about him or her. You can decide to read them to each other right then, or you can save them for a special occasion.
19. Visit a Museum Together
Did you know that lots of museums and art galleries have virtual tours you can take online? Experience “walking” through the halls of famous places together and tell each other which pieces of art you like. For a list of places you can visit virtually with links click here.
20. Get a Fancy Dessert Delivered
You can save money by cooking at home then splurge on a fancy dessert. Think of an expensive restaurant you have always wanted to try then order one dessert to share. You can use a meal delivery service.
Or you could get lots of toppings ahead of time and make a giant ice cream sundae to eat together at home.
21. Do a Puzzle Together
The good thing about doing a puzzle together is that if you do it without the television on and decide to put your phones away you have nothing else to do while fitting pieces together but to talk. Set out a charcuterie board and drinks and just enjoy a relaxing time of being together and having conversation.
22. Look at Old Photos Together
Look through old photos and tell stories or reminisce about the good times. Look at childhood pictures and ask about each other’s families. Maybe even pick some digital ones that you want to print and frame or make a photo book out of.
According to Psychology Today, date nights are not a luxury; they are a necessity for a healthy marriage. The small amount of planning and creativity it takes to experience a great date night at home will pay off big dividends in the end. Investing in your love for each other by spending quality time together is always worth the effort, and these ideas will help jump start your thinking as you plan your own stay-at-home date nights.
What at-home date night ideas for couples do you like the most? Please share your throughts in the comments below! And if you like this post, please pin it and share it!
I love Germany. I lived in the Bavaria region of Germany for four years before I was married. I was working with American students who parents were stationed in the U.S. Army there, and I enjoyed being close to many tourist areas. So you will be hearing a lot more about Germany as soon as I can sort out all those pictures I took (those were the days before smart phone cameras and cloud storage).
Welcome! Image from Unsplash
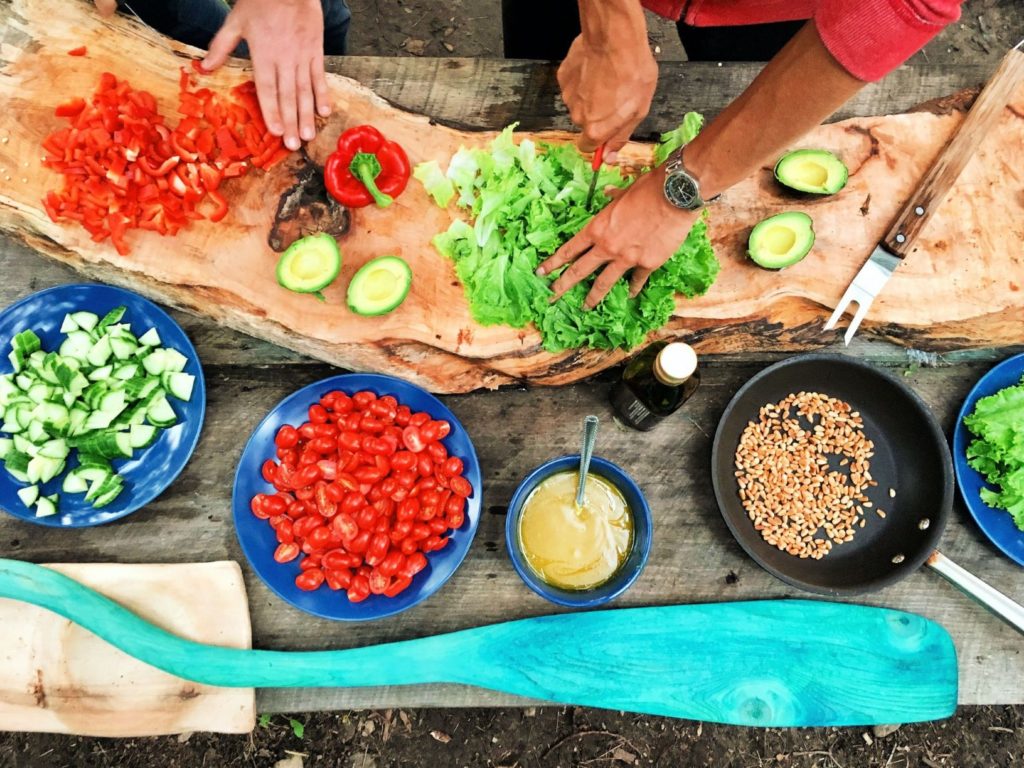
Usually when we travel one of the fun things to do is to experience some of the local cuisine. Heck, just going out to eat in general is one of the best parts of traveling. Along with weinerschnitzel and apple strudel, when I think of German food I always think of bratwurst first. There are street vendors in almost every little village selling bratwurst, and most restaurants have it on their menu as well.
This post contains affiliate links, and I may earn a commission if you click on those links at no additional cost to you. All opinions are my own.
Grilled Bratwurst is a great choice for summer cookouts.
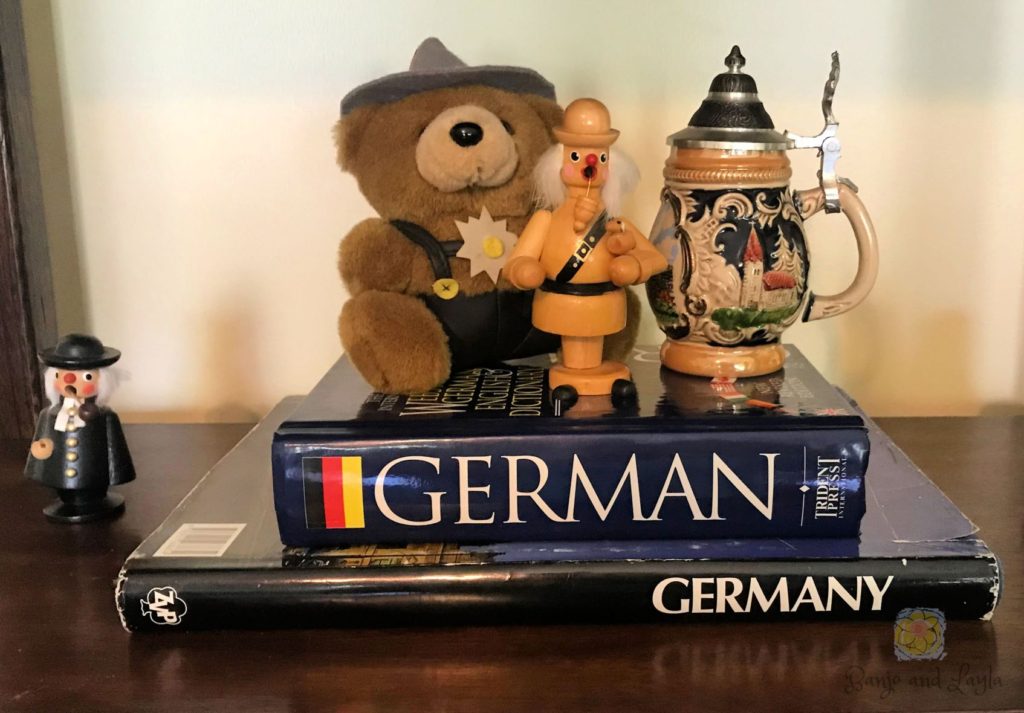
Germans are very proud of their country’s many different types of sausages, and some recipes in certain areas of Germany are actually closely guarded secrets. If you travel through Germany, you’ll find that every region has their own particular style of preparing bratwurst. There are variations on size, shape, ingredients, cooking methods, and how it is served. In fact, there are over 45 different versions of bratwurst sausage in Germany! So go put on your best lederhosen and grab your beer stein. We’re going to Germany for bratwurst!
The bear actually looks good in lederhosen.
Bratwurst Trivia Question #1: Where does the name Bratwurst come from?
The German word for fry is braten, but the word Bratwurst actually comes from the word Brat. Brat refers to the meat mixture that makes up the sausage. It means finely chopped meat. Wurst in German means sausage. Now you know.
Bratwurst Trivia Question #2: Who invented the Bratwurst?
Both the people of Franconia (Franken) and the people of Thuringen claim to have invented the Bratwurst. The oldest evidence of the Bratwurst in Thuringen is in 1404, and in Franconia the oldest record is from the year 1313 in one of my favorite German cities: Nurnberg. Heinrich Hollerl, a Bratwurst Researcher (yes, it is a thing), discovered that Bratwurst actually had its origins with the Celtics and the Franconians just developed it further. Now you can impress all your friends with your vast bratwurst knowledge at your next cookout.
So What is Bratwurst?
Originating in Germany in the 14th century, bratwurst (in German the ‘w’ is pronounced like our ‘v’) and what is called Rostbratwurst is a sausage made of finely minced pork and veal or sometimes beef and seasoned with caraway, nutmeg, ginger, or other spices. It is usually grilled then served with sweet German mustard and a piece of bread or hard roll. It can also be sliced and used in various recipes.
Should I buy raw or pre-cooked bratwurst?
Some bratwurst sausages are sold pre-cooked, which means you only have to brown them in a pan or on the grill before serving. Make sure you check with the butcher at your deli to know if it is pre-cooked or not. It is important to know this before you try to prepare them for eating.
But those of us who like to channel our inner European and live on the edge go for cooking the raw ones. Raw bratwurst in the store will be pink in color. Grilling the raw ones requires some skill and care because they must be fully cooked on the inside but not burned or charred on the outside. This is not easy to do. Some people recommend cooking them in hot (but not boiling) water for a few minutes before putting them on the grill or in the pan. But we usually don’t do that.
How do you Cook Bratwurst?
Besides grilling there are lots of different ways to cook bratwurst. Bratwurst sausages can be roasted, boiled, or steamed as well. Brown them in a skillet, add a small amount of water or broth, then cover the pan to let them steam. We like to grill raw bratwurst on our charcoal grill.
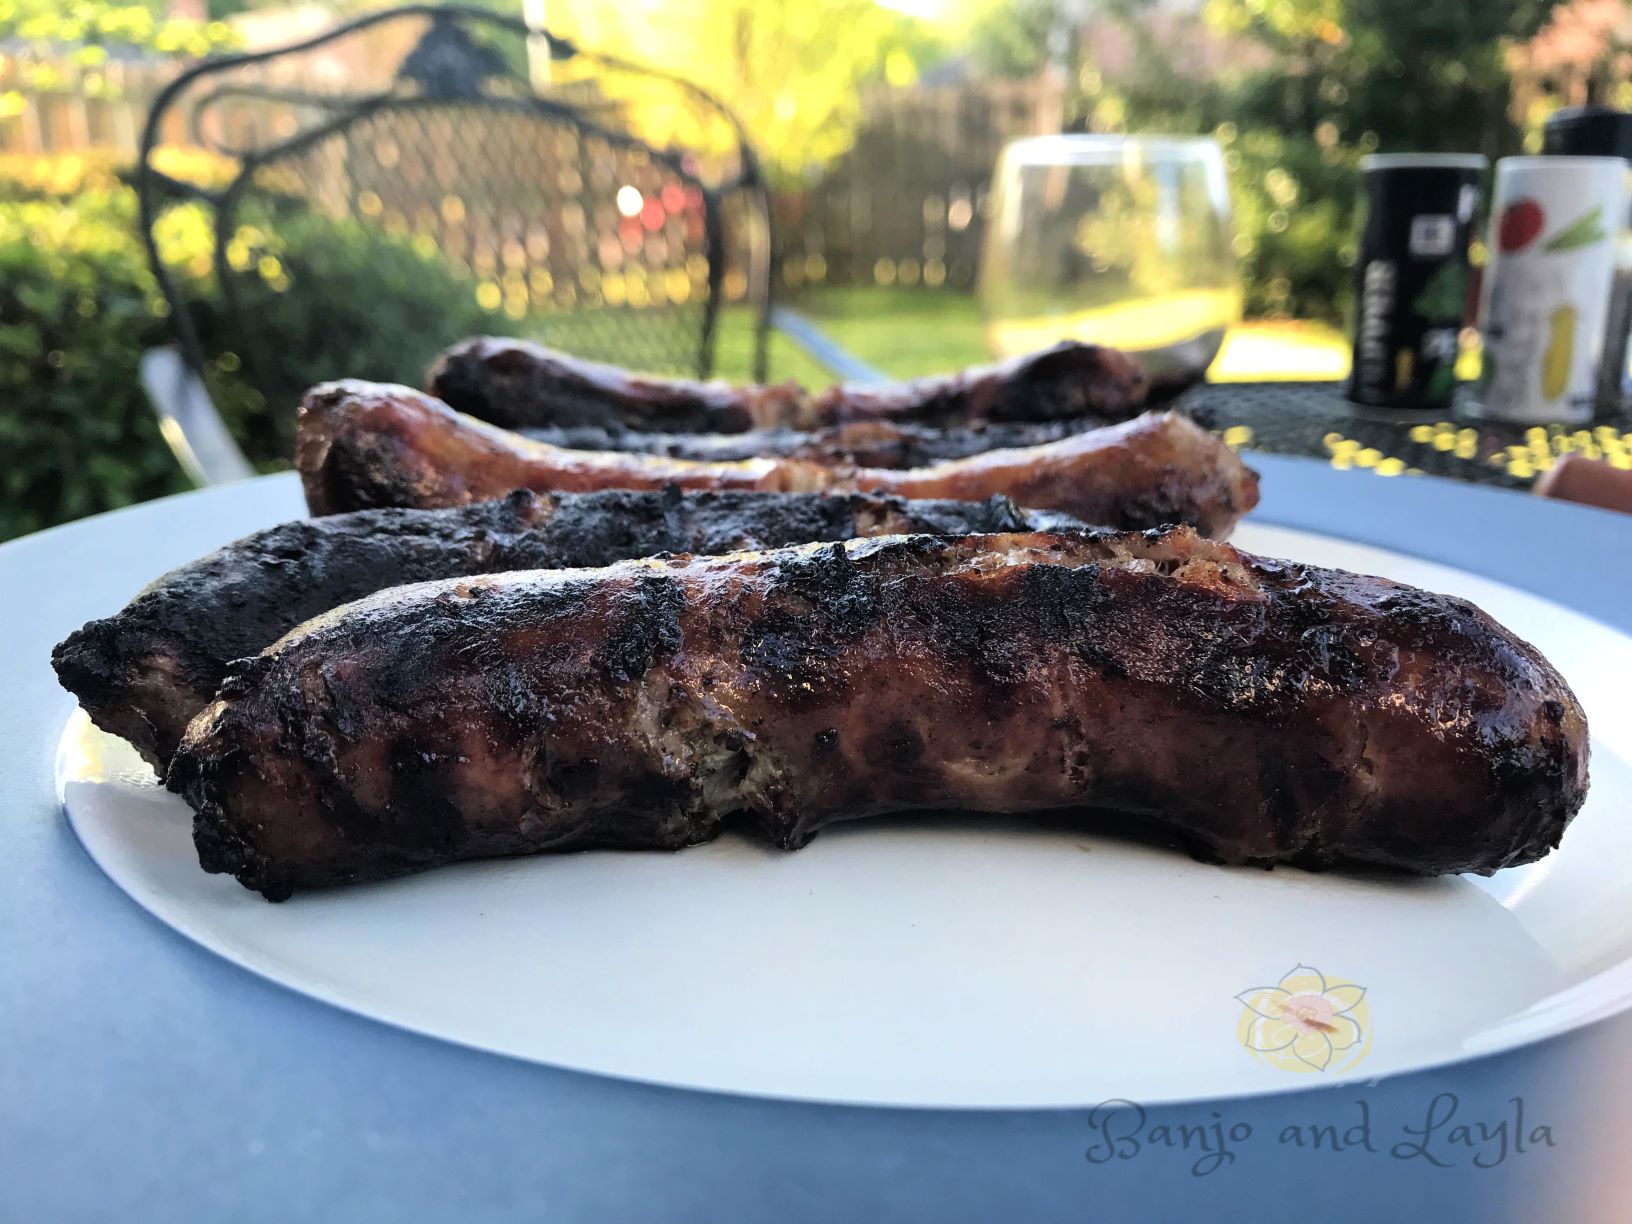
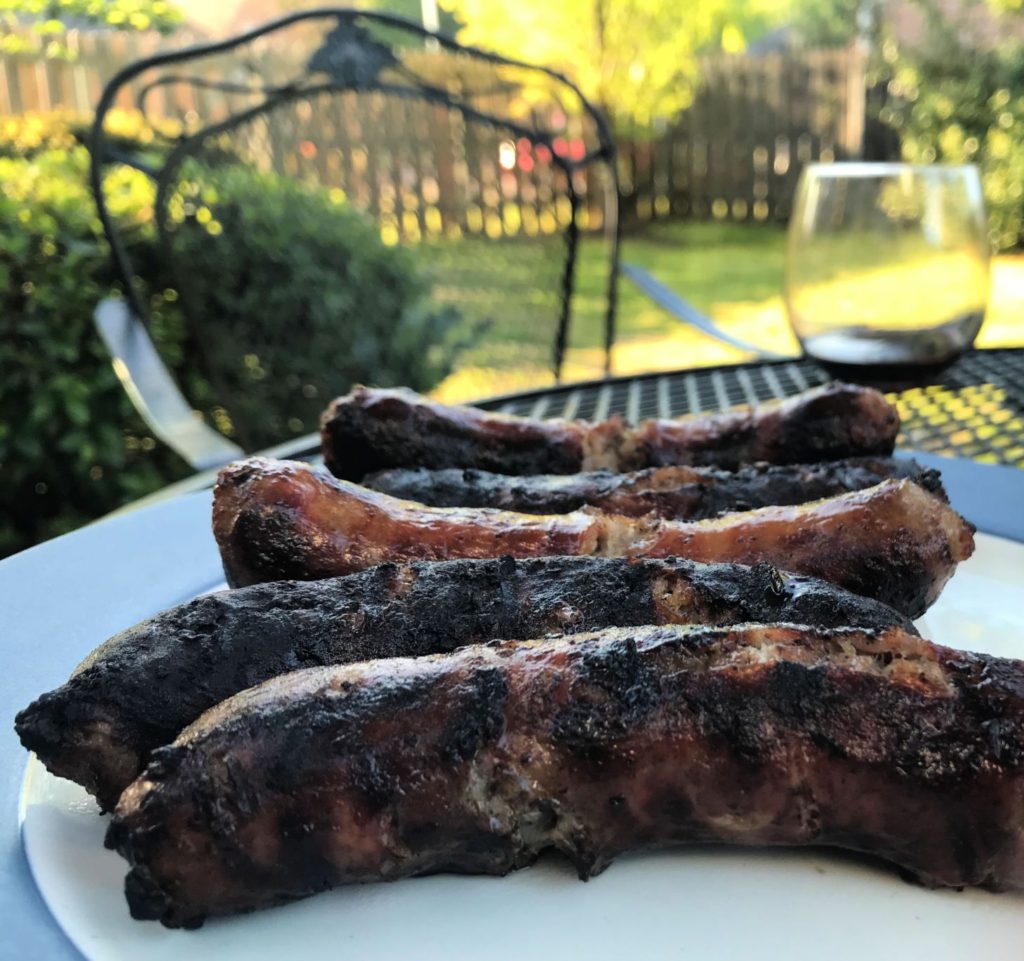
On the Grill
Since my husband is the Grill Master, as I like to call him, he knows a few tricks to grill them perfectly every time. He cuts a few slits in the sausage first, taking care not to cut all the way through. Two or three slits is enough, as you don’t want to let too much juice out. He also says it is important to turn them frequently, especially if they are not over low heat. You can spritz a little water or beer on them occassionally to cool the skin and prevent burning. You will also want to make sure you do not char the outside too much, as that can pose some health risks. After you remove the bratwurst from the heat it will actually continue to cook on the inside a few minutes longer, so make sure to let it rest a few minutes before eating. You might also like my post on how to cook the perfect steak on the grill every time.
Brats With Beer and Onions
Bratwurst is not just for Oktoberfest or SuperBowl parties. It is awesome any time of the year. Another one of my favorite bratwurst recipes involves grilling the brats in a pan. It is super easy. You just slice some yellow onions in thick slices and cook them in a pan in a little butter with some caraway seeds. You can add sliced peppers too if you’d like. Add the bratwurst in and a bottle of pale ale beer or apple cider. Reduce the heat and simmer about 30 minutes, turning the brats occassionally. Add a little salt if desired.
Finish the brats by browning them in the pan with the oinions and liquid removed or on the grill. Add the onions back in and serve brats on a warm crusty bun with grainy mustard (this is the kind they always had in Germany). Some people enjoy sauerkraut with it also, but just the smell of sauerkraut turns my stomach, so I’ll pass on the kraut please. German potato salad might be a better choice.
Hobo Packet Brats
Another easy but delicious way to cook bratwurst is to slice it up and brown it in a pan a little first, then place it in a heavy duty foil bag or packet along with some sliced red potatoes, mushrooms, onions, and carrots. Sprinkle with a packet of onion soup mix (my secret weapon) and a little soy sauce. Seal it up and place it on the grill for an impressive looking cookout dish.
Bratwurst in German Culture
In Germany they have a saying: Alles hat ein Endenurdie Wurst hat zwei. This means “everything has an ending, but the sausage has two.” OK. Not sure I’ll be adding that to my list of proverbs, but it does show you how important sausage is to the German culture.
While reading about bratwurst sausages, I learned that brats are also a very big deal in Wisconsin. Are any of you readers from Wisconsin? I would love to read about your favorite ways to prepare bratwurst as we “travel” to Germany through our tastebuds. Leave your comments below. Prost!
The “Grill Master” of the Baker house shows us to how to grill German Bratwurst.
I Recommend: The travel book I relied on the most when I lived in Germany was called “Day Trips in Germany.” I highly recommend it.