Search

Category Archives: Food

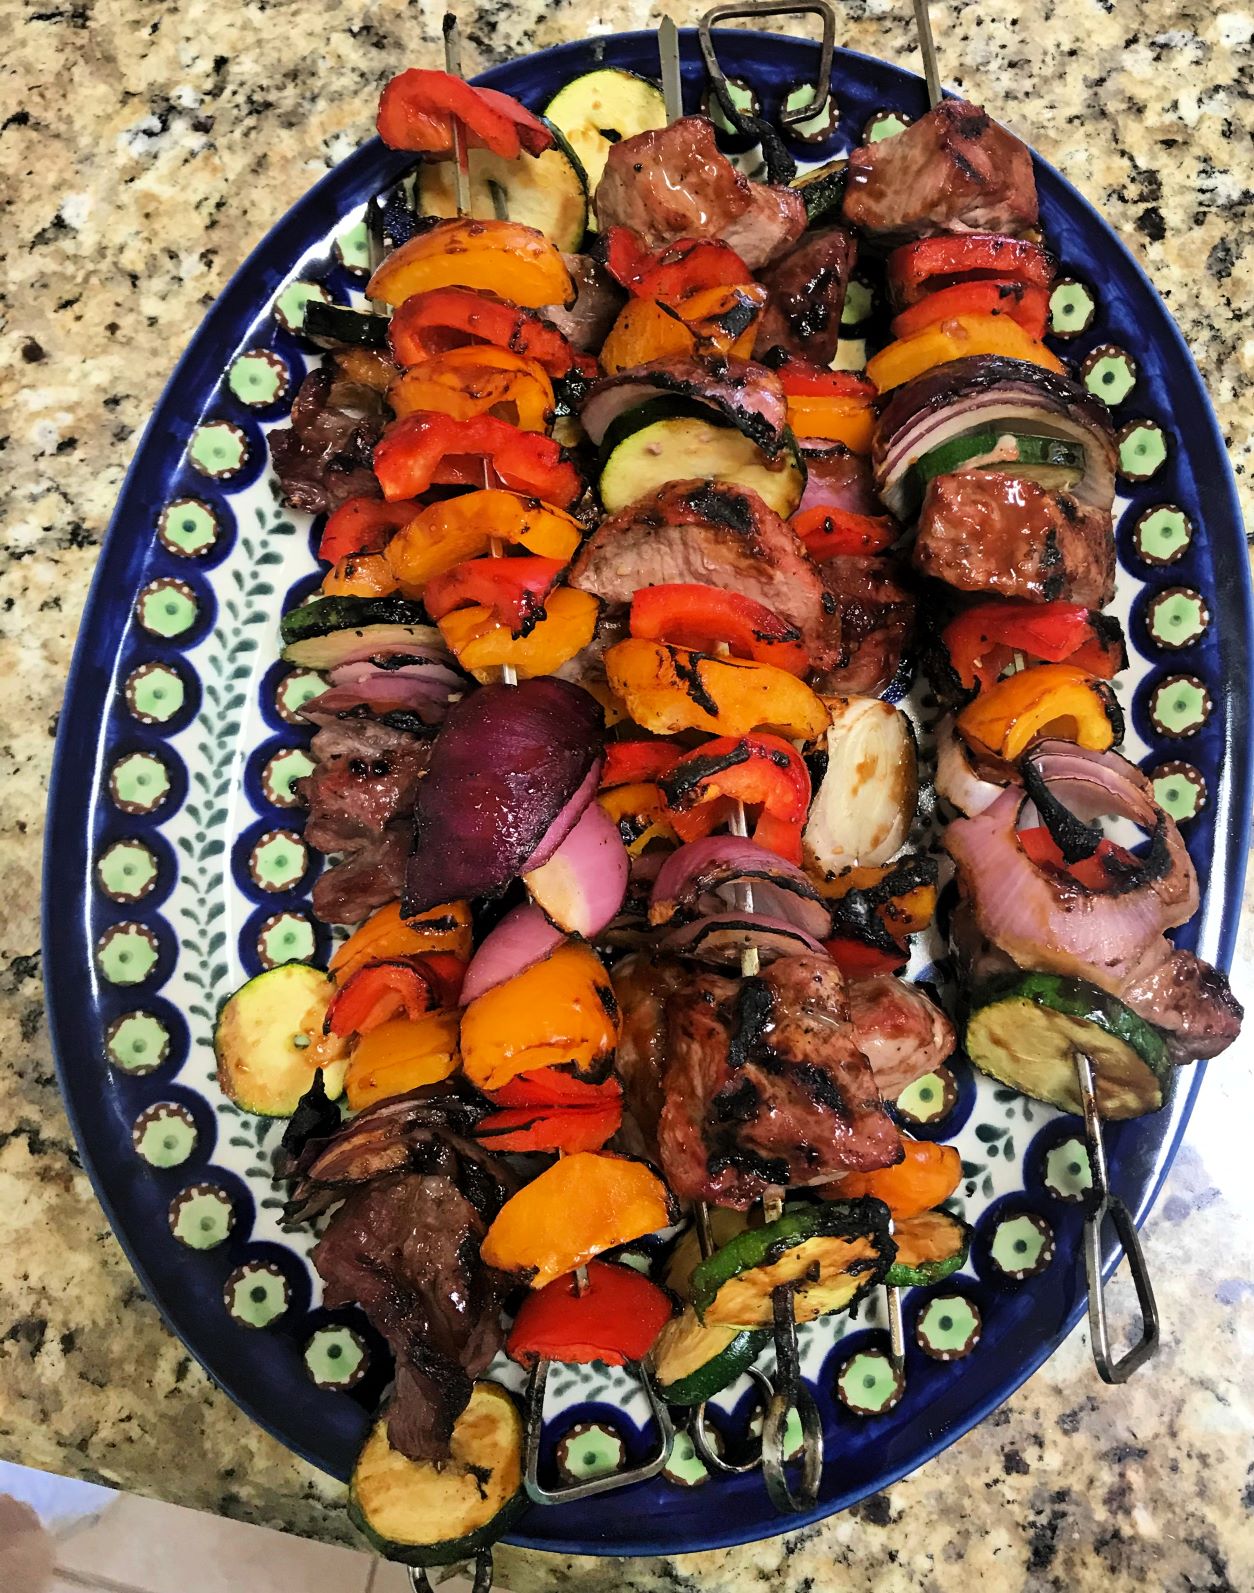
Steak Kabobs
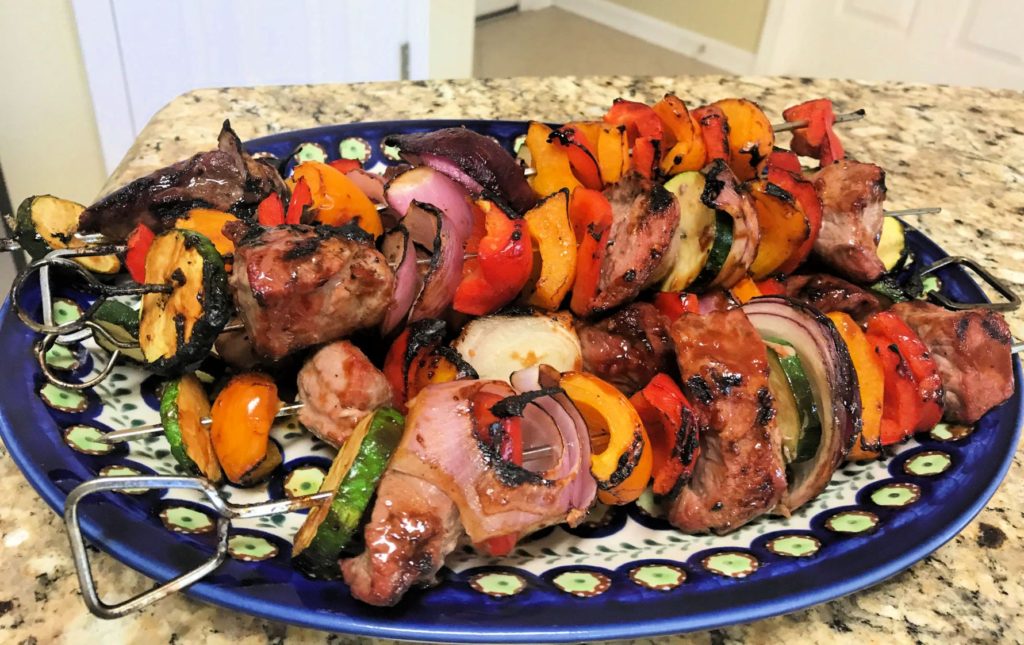
Steak Kabobs on the Grill
Juicy Marinaded Grilled Steak Kabobs

Do you love steak? Summer is in full swing, and it is time to fire up that grill. Steak kabobs are a fun way to grill steak that everyone loves. Juicy tender pieces of beef, marinaded for extra flavor and threaded in between layers of colorful fresh veggies look great on the plate and taste delicious. Served with wild rice they have easily become one of our favorite recipes.

Beef Kabobs: An Easy Flavorful Steak Recipe. Try it tonight!

This post may contain affiliate links, and I may earn commission if you click on the links at no additional cost to you.

Beef or steak kabobs are all about the marinade. Ingredients like Worcestershire and soy sauce bring out the best steak flavor when grilling. Marinating it for several hours is best, because it really allows the flavors to soak into the meat, leaving you with that juicy flavor we want in a steak. However, sometimes when in a hurry we have just brushed the marinade on after the kabobs are on the grill and it still tastes great.

This recipe is super easy and does not take as long as it looks. I purchase pre-cut meat sometimes, and that really cuts down on prep time. Beef kabobs are great for cookouts and parties or just for your family at home. Plan on two skewers per person, and you will always have enough. They taste great as leftovers as well!
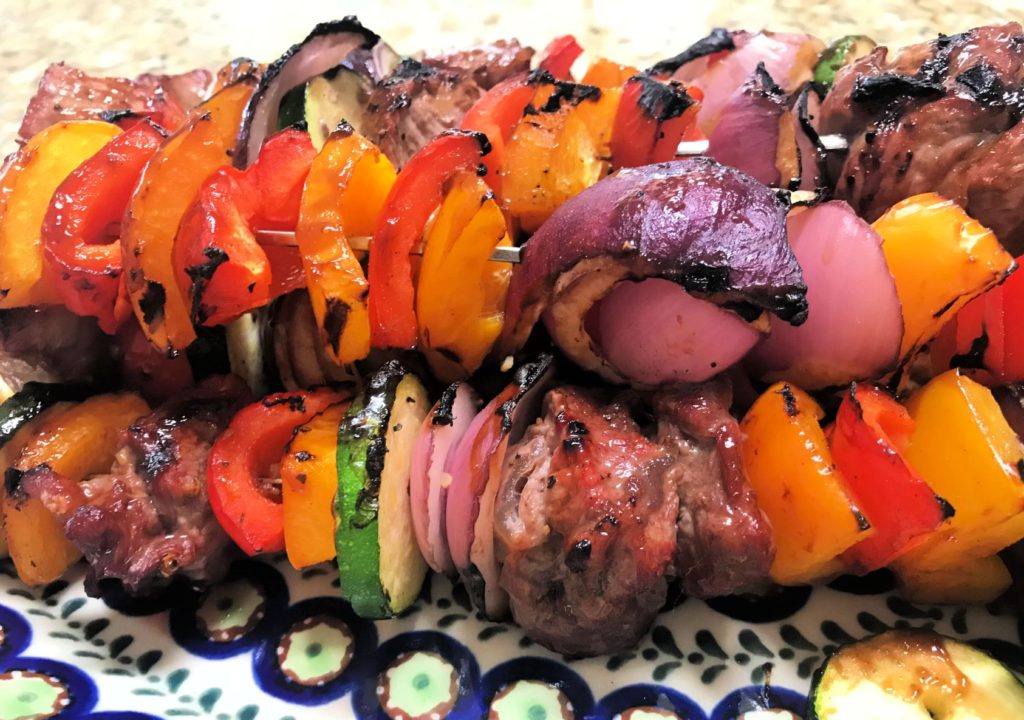
Marinaded steak and vegetables on a skewer
Grilled Steak Kabobs are a hit every time!

Ingredients Needed:

  • Olive oil
  • Sirloin Steak – New York strip or top sirloin (not petite) works best. These thick lean cuts have great flavor without excess fat. They will be very tender after being marinaded and cooked properly.
  • Fresh vegetables – In the picture I used red and yellow peppers, red onion, and zuchinni, but you can use any veggie you like. Mushrooms and tomatoes work well also.
  • Soy sauce
  • Garlic Powder
  • Lemon juice
  • Worcestershire sauce
  • Brown sugar
  • Ground ginger
  • Cornstarch
  • Honey (optional) – I don’t use it, as I think the brown sugar provides enough sweetness.
  • Water
  • Salt and Pepper

How to Make Steak Kebabs

1. Make the Marinade

Combine the water, Worcestershire, olive oil, soy sauce, lemon juice, ginger, brown sugar, honey (optional) and garlic powder in a saucepan over medium heat. Cook about 1 minute until nearly heated through.

Mix cornstarch and 1/4 cup water together in a cup or small bowl and stir until dissolved. Add to the saucepan. Cook and stir sauce until thickened, about 6 minutes. Allow the marinade to completely cool before using it.

2. Marinate the Steak

Cut the meat into uniform sizes if possible so that the pieces cook evenly. The best way I’ve found to marinate meat, especially if it’s cut up into small pieces is to place the steak into a gallon size resealable bag and pour the marinade over the meat. Seal the bag tightly while pressing out excess air. Use your hands to sort of rub the marinade over the steak through the bag to make sure all parts are covered. Warning: Make sure that the marinade has completely cooled before you pour it into the bag!

Allow the meat to marinate in the refrigerator 3 – 6 hours. This is not something you want to marinate over night. If you soak it much longer than 6 hours it gets a little mushy. The acidity of the marinade starts to break the meat down, and you don’t want that.

3. Preheat Grill and Prep Food

Preheat the grill to about 425 degrees. We love our Charbroil charcoal grill. Pour a little oil on some paper towels and use them to clean the grill grates before they get too hot.

Cut up the vegetables into large pieces, toss with oil, then sprinkle with garlic powder, salt and pepper, or your seasoning of choice.

Thread each skewer with even layers of steak and vegetables. I put three steak pieces on each kabob. I use reusable metal skewers, but if you use bamboo ones make sure you soak them in water for at least 30 minutes before using or they will burn. When threading the skewers, leave a little space for the heat to circulate. This will allow your vegetables to soften up a little and cook evenly.
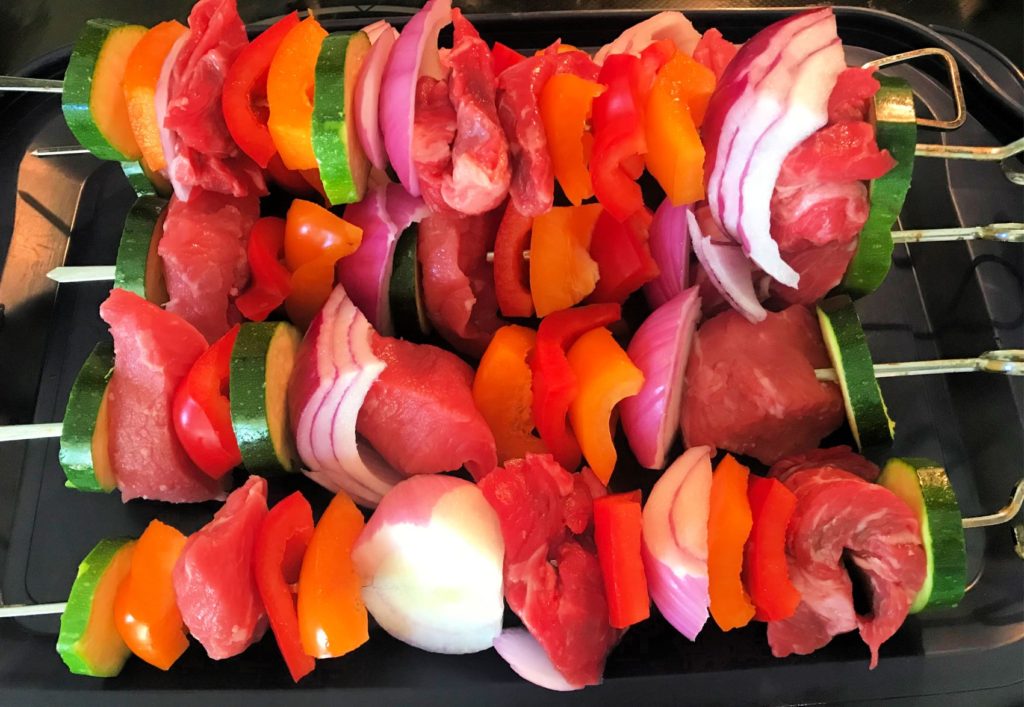
Thread steak and veggies on the skewer.
I try to put at least three peices of meat on each skewer.

4. Cook the Kabobs

You can brush the grill grates lightly with oil if you want to keep the kabobs from burning, but we find that there is usually enough oil left on the grates from cleaning them that you don’t need to add any more.

Place the kabobs on the grill and cook until the center of the steak is about 140 – 145 degrees for medium doneness, a little more if you want them more done. Brush a little left over marinade on the entire kabob in the beginning stages of cooking. Turn the kabobs occasionally for even grilling. Grilling time will be about 9 minutes.

Don’t overcook them! Keep in mind that grill times vary. Factors such as how close the flames are and the wind make a difference, so keep a close eye on them and don’t leave the grill. No one wants to eat dried up steak!
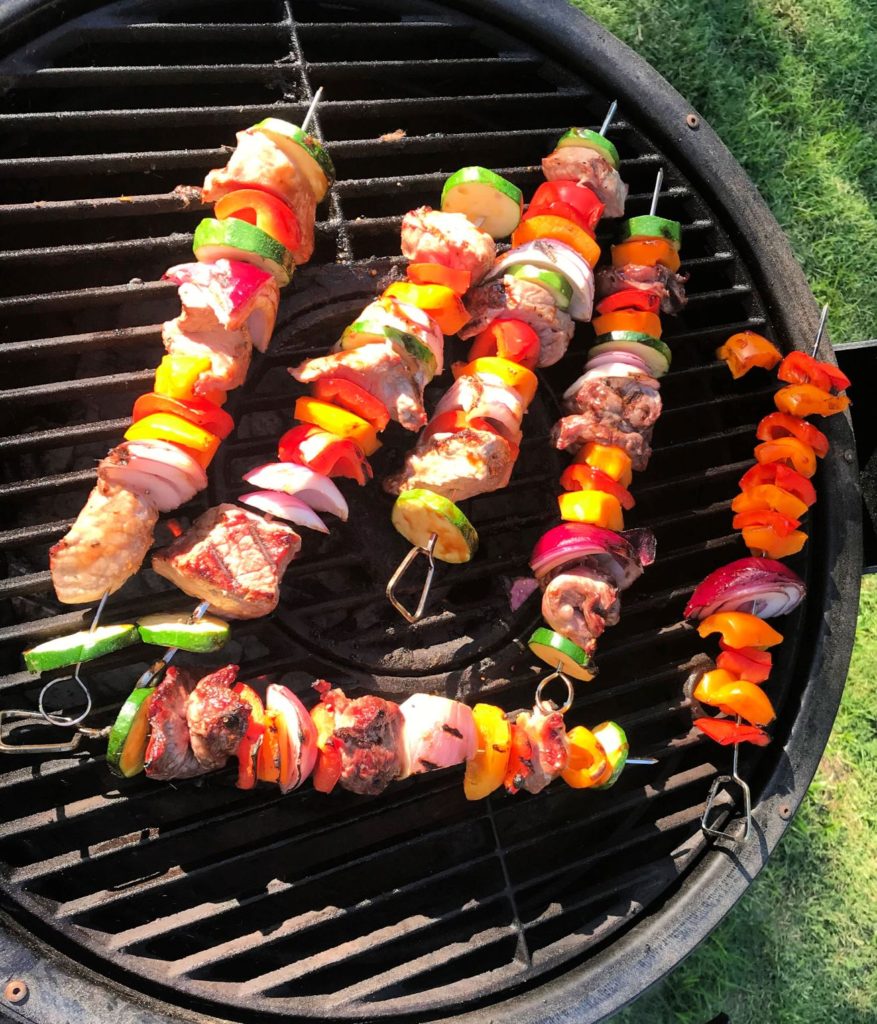
Turn the skewers frequently. Kabobs on the grill
Don’t overcook the steak!

5. Serve steak kabobs warm.

Serve the steak kabobs warm with a side of wild rice. They do not need any additional seasoning such as salt and pepper before serving as the flavors of the marinade are just enough.

Can I Cook Beef Kabobs in the Oven?

You can cook steak kabobs in the oven, but in my opinion they will have much better flavor if you cook them on the grill. But if you have run out of charcoal or it is pouring down rain, just line a baking sheet with foil, spray it with non-stick spray and cook the kabobs in the oven on 425 degrees for about 10 – 13 minutes. Use a meat thermometer if you are not sure about doneness, and turn them once half way through.

Did you try it? Let me know how it turned out!

https://www.youtube.com/watch?v=cGpYHQ3lxf0&t=2s

Steak Kabobs

Juicy marinaded pieces of sirloin steak threaded on a skewer in between seasoned veggies and cooked on the grill or in the oven. Great for cookouts or any time!
Prep Time25 minutes
Cook Time10 minutes
Marinating time3 hours
Total Time3 hours 35 minutes
Course: Main Course
Cuisine: American
Keyword: beef kabobs, cookouts, grilling, quick, easy, Mexican, slow cooker,chicken recipes,easy dinner recipes, steak, steak kabob
Servings: 6 kabobs
Calories: 345kcal
Author: Cindy Baker

Ingredients

  • 1/4 cup olive oil
  • 2 1/2 Tbsp Worcestershire sauce
  • 1/4 cup soy sauce
  • 1 1/2 Tbsp lemon juice
  • 1 Tbsp minced garlic (+ garlic powder to season veggies)
  • 1 1/4 cup water
  • 5 tsp packed brown sugar
  • 1 Tbsp honey (optional)
  • 1/2 tsp ground ginger
  • 2 Tbsp cornstarch
  • 1 3/4 lbs Top sirloin steak (thick), cutinto 1 1/4 inch pieces
  • 1 red onion cut into 1 1/4 inch pieces
  • 2 bell peppers mixed colors, cut into pieces
  • 1 zuchini cut into 1 1/4 inch pieces
  • salt and pepper

Instructions

  • Make the Marinade:
    Combine the water, Worcestershire, olive oil, soy sauce, lemon juice, ginger, brown sugar, honey (optional) and garlic powder in a saucepan over medium heat. Cook about 1 minute until nearly heated through.
    Mix cornstarch and 1/4 cup water together in a cup or small bowl and stir until dissolved. Add to the saucepan. Cook and stir sauce until thickened, about 6 minutes. Allow the marinade to completely cool before using it.
  • Marinate the Steak:
    Cut the meat into uniform sizes if possible so that the pieces cook evenly. Place the steak into a gallon size resealable bag and pour the marinade over the meat. Seal the bag tightly while pressing out excess air. Use your hands to sort of rub the marinade over the steak through the bag to make sure all parts are covered. Warning: Make sure that the marinade has completely cooled before you pour it into the bag!
    Allow the meat to marinate in the refrigerator 3 – 6 hours (no more than 6 hours).
  • Preheat Grill and Prep Food:
    Preheat the grill to about 425 degrees. We love our Charbroil charcoal grill. Pour a little oil on some paper towels and use them to clean the grill grates before they get too hot.
    Cut up the vegetables into large pieces, toss with oil, then sprinkle with garlic powder, salt and pepper, or your seasoning of choice.
    Thread each skewer with even layers of steak and vegetables leaving some space in between. I put three steak pieces on each kabob. NOTE: If you are using bamboo skewers make sure you soak them in water for at least 30 minutes or they will burn.
  • Cook the Kabobs:
    Brush the grill grates lightly with oil.
    Place the kabobs on the grill and cook until the center of the steak is about 140 – 145 degrees for medium doneness, a little more if you want them more done. Brush a little left over marinade on the entire kabob in the beginning stages of cooking. Turn the kabobs occasionally for even grilling. Grilling time will be about 9 minutes. Don't overcook them!
  • Serve Steak Kabobs Warm. Enjoy!
Nutrition

Serving: 1kabob | Calories: 345kcal
Eating Healthy When Eating Out

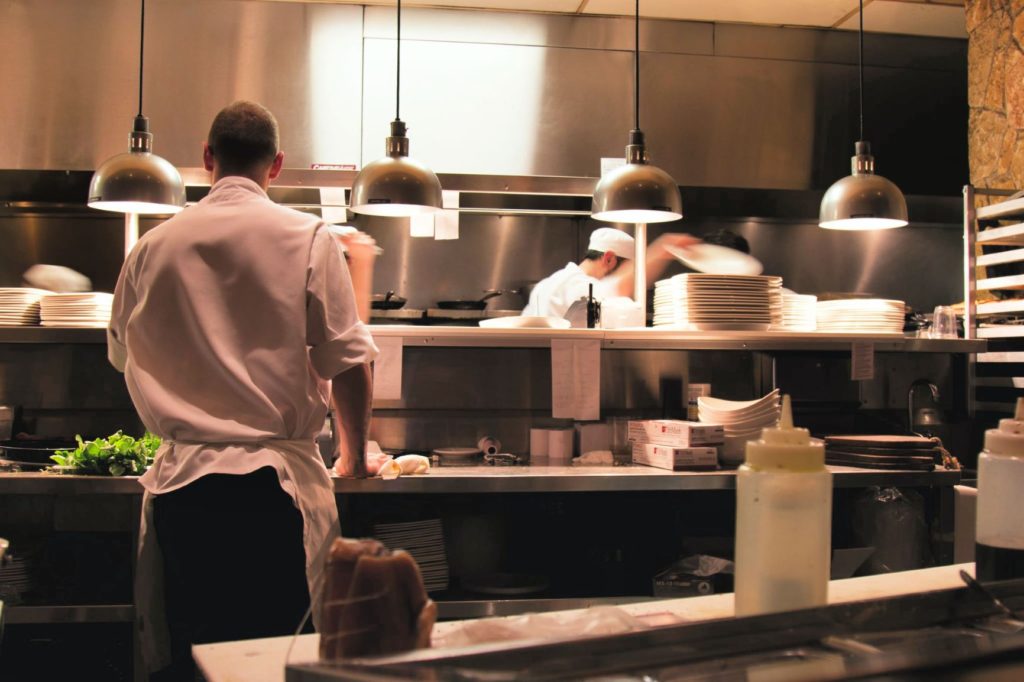
I don’t know about you but when it comes to food two things have happened for me during this pandemic: (1) I have been cooking more and have started trying to eat healthier and lose some weight. And (2) I am tired of being in the house and miss going out to eat.

But here’s the thing about going out to eat – I almost never make healthy menu choices at a restaurant. It’s like I go into this alternate universe and think that I deserve whatever I want because someone else is cooking it. And let’s face it, that is part of the fun of going out to eat. When you are in a restaurant someone else is cooking and cleaning, and they are serving things you would not normally have at home (cheesecake, or fried cheese sticks anyone?). And that bread, what?! Anyway, I digress.

Eating out is a great treat once in a while, but a restaurant’s aim is to make food look, smell, and taste great so that they can make money. Nutrition may get pushed aside in favor of butter, rich sauces, creamy dressings, and sugar. The fat, calories, sugar, and sodium can really add up quickly if you eat out regularly.

But there is good news! You can still enjoy going out to eat and also eat healthy foods. You can both eat healthy and socialize in a restaurant with just a few small changes. Here are my 10 best tips for eating out while also sticking to a healthy diet.

1. Plan Ahead

Sometimes eating out is something we decide to do on the spur of the moment, usually when I forgot to thaw something out the night before or when I am just too tired to think about cooking (in other words hangry). But if you are able to plan ahead for your dinner or social activity at a restaurant that will make eating healthy much easier.

First, you can preview the menu online. Nowadays many restaurants even have nutrition information available online as well. Besides the menu choices you may learn other helpful things about the restaurant through their website. Information such as where their food comes from, how they prepare it, and the restaurant’s overall philosophy can be eye opening. That way when you arrive at the restaurant you will already have a plan in mind and won’t be as distracted by the menu pictures or appetizer specials.

Next, try to order first when possible. Other people can subconsciously influence your decisions without you really noticing. That way your “plan” will not get sidetracked when you hear what others are ordering. Try to stick to your original plan, and don’t change your mind when you get there.

The sight and smell of certain foods can make it more difficult to stick to your plan, especially if you are hungry. But picking out what you will order before you arrive makes it easier to avoid making snap decisions you might regret later.

2. Make sure you are drinking enough water.

Stay hydrated
Drink plenty of water before, during, and after your meal.

This may sound like a weird tip for healthy eating at a restaurant, but staying hydrated can keep you from feeling as hungry. In fact, sometimes when we think our brain is telling us that we are hungry we are actually thirsty, not hungry.

I have been trying to drink more water and less caffeine lately, and it is making a difference. When you are in a restaurant order a glass of water and keep it filled. Drink lots of water before, during, and after your meal. Make sure you are hydrated, then your mind will not trick you into eating more food when it was really water your body needed.

One study showed that people on a diet who drank 500 ml (about 16 oz.) of water half an hour before a meal ate fewer calories and lost more weight than those who didn’t.

The next time you feel hungry at home try drinking a couple of glasses of water. Then wait about 15 minutes before you eat anything. You will either not feel hungry anymore or not as hungry. If it works at home it will work out at a restaurant too.

3. Have a snack before you go.

Have you ever gone to the grocery store hungry? What’s worse is going shopping on payday while hungry. You end up coming home with all sort of things that were not on your grocery list. Well, the same principle applies when you go out to eat or to a party or other social gathering where there is food. If you are super hungry when you get there you will want to eat everything in sight.

Before you go out to eat try eating a healthy snack at home first. Choose a snack that is rich in fiber, protein, and healthy fats. Try a hard boiled egg, a handful of nuts, veggies, yoghurt, or half of a protein shake. That way you are not getting that sinking feeling on the way to the restaurant and end up ordering every unhealthy thing that sounds good when you get there.

If you know you are going to eat at a favorite restaurant for dinner, eat a lighter lunch that day then a snack right before you go.

4. Ask how the food is prepared.

Ask your server how the food is prepared.
Don’t be afraid to ask your server how the food is prepared and make substitutions if needed.

Don’t be afraid to ask questions of the staff at a restaurant. Their job is to make sure you have a good experience. Ask your server how the food is prepared. Sometimes even when a dish sounds healthy it can have many hidden salt, oils, sauces, and even sugar that is not obvious from the menu. Once you have this knowledge you can request substitutions or adjustments for how you want the meal to be prepared.

Instead of frying, opt for steaming, broiling, baking, or roasting. Foods described on the menu as creamy, pan-fried, crispy, crunchy, or sauteed will usually have more fat and calories. Ask for a small amount of olive oil to be used instead of fattening oils.

You can also ask for dressings, sauces and seasonings on the side so that you can control the amount you want to use. Cream sauces should be kept to a minimum, so look carefully at a dish’s ingredients or ask your server exactly how it is prepared.

5. Manage your portions.

Watch portion sizes and heavy cream sauces.
Watch portion sizes and limit heavy cream sauces.

Keep your portions small. Restaurants typically serve bigger portions than what would be considered a normal serving size, sometimes as much as four times more than what most healthy adults need in one sitting. It is usually more than what you would eat at home too. And by all means skip the all-you-can-eat buffets!

Ask for half portions or ask for a box with your meal. I like to ask for a box as soon as I place my order. Before you eat any of your food, box up half of it to take home for later. Or try splitting a meal with a friend. And be careful. In some places even half may be too much. Sometimes an appetizer portion or a side dish is all that you need.

Do you belong to the “clean plate club?” Maybe you grew up in a family environment where you were taught to clean your plate before you could be excused from the table or you were encouraged to eat everything on the plate because leaving food was wasteful (cue the “there are starving children in other parts of the world” line). I get it. But it is okay to just immediately divide your meal into what you’ll eat at the restaurant and everything else that goes in the box. You will make your co-workers jealous when they see you with leftover”restaurant food” the next day at lunch.

6. Eat more vegetables.

Vegetables have fiber that makes us feel full longer and keeps us from feeling hungry.
Vegetables have fiber that makes us feel full longer,

I am trying to learn to eat more vegetables at home, but this is especially important in restaurants. Besides all the vitamins, the fiber in vegetables keeps us full longer. This keeps your blood sugar more even and can prevent you from overeating. Try ordering a hearty vegetable soup like minestrone for an appetizer. Order a vegetable and salad instead of potatoes or pasta as a side dish. Ask for extra veggie toppings on wraps, pizzas, burgers, and sandwiches.

Find something on the menu that’s rich in vegetables and protein. This is the best combination for good blood sugar balance, which regulates your hunger hormones, how full you feel, your energy level, and your digestion. The U.S. government’s dietary guidelines say that half of our plate should be made up of fruits and vegetables daily.

Skip the bread basket and try ordering a salad or broth based vegetable soup first. Eating the salad first gives you the fiber to make you feel full and also helps you stave off the bread basket temptation. Make sure to ask for the dressing on the side, and opt for olive oil based salad dressings instead of the creamy ones.

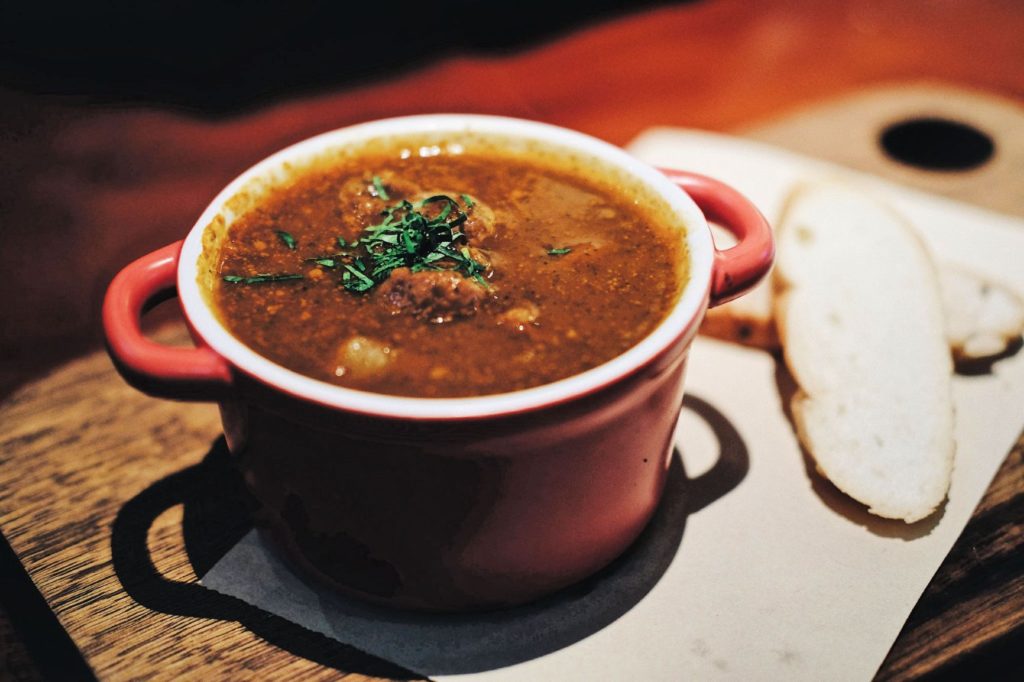
Order a broth based soup before your food comes.
Order a broth based soup before your meal comes to keep from overeating.

For example, I love ranch dressing, but just two tablespoons of it adds an extra 140 caloriesand 16 grams of fat to my meal. Yikes! A serving of salad dressing is about two tablespoons, but most restaurants tend to double that in order to coat everything in the salad and boost the flavor.

But be careful with salads. Restaurants like to add tasty toppings such as croutons, cheese, seeds, nuts, and dried cranberries that can end up having more calories than if you ate a bowl of pasta. Just ask for all toppings to be served on the side. That way you can pick and choose what you want to add and how much.

Instead of focusing on what you can’t have, focus on what healthy foods you can add to your plate. Lean meat, veggies, whole grains, and fruits can be delicious options if prepared properly. Think about choices like a chicken and vegetable kabob.

7. Go for whole grains.

Whole grains increase metabolism and help you lose weight.
Whole grains increase metabolism.

If given a choice, look for dishes made with whole grains such as brown rice, oats, barley, or quinoa. Whole wheat or whole grain buns, tortilla wraps, pasta, or pizza crust are better choices than those made with white flour. Studies have shown that whole grains actually increase metabolism, which helps you lose weight.

8. Watch your beverages.

The best choice for a beverage is always water, but if that is not enough for you make sure your alcoholic drinks are not mixed with syrups and sugar. Limit or avoid soda and sweet tea, as they are full of pure sugar. I do not always follow this advice, but make it simple and order water. It is free and you have more calories left for your food.

9. Skip dessert

Wait! Hear me out. Restaurant desserts look and sound so good on the menu, but they can sometimes have as much or more calories than your your entire meal! If it fits in your diet, and you have a healthy relationship with food then maybe you can split dessert with someone else.

If you feel that you must have something extra after dinner try skipping dessert and ordering coffee instead. Or wait until you get home and choose a lower calorie sherbet or yoghurt at home.

10. Take your time.

Have you ever heard of mindful eating? Recently I have started logging my meals, and it has forced me to stop and be aware of what all I am putting in my mouth. So many times we just wolf our food down without even stopping to really taste it or think about how much we are eating.

Instead, try pausing in between bites. Each time you take a bite of food, casually put your fork down on the plate and rest until you have fully chewed your food and swallowed. I know it sounds weird, but it makes sense. Chewing your food thoroughly and eating more slowly helps you eat less and makes you feel full more quickly.

Pausing helps you pace yourself. Your digestive system takes about 20 minutes to send the signal to your brain that you are full. If you eat until you feel full, then you were probably actually full 15 – 20 minutes earlier. This mind-body awareness keeps you in the moment spending time with others and positively impacts your eating behavior.

Really try to enjoy your food one bite at a time. You can’t truly taste your food if you are eating too quickly. Fast eaters tend to also be overeaters. If you eat slowly and mindfully, you will eat less and still be satisfied.

Enjoy your restaurant experience!

If you like dining out, don’t think you have to stop just because you want to get healthier. With these tips and a little planning, you can order meals that you love that are also nutritious. Remember you always have a choice. You do not have to choose health over taste. Keep your heart and body healthy by making good lifestyle choices work wherever you are. Bon appetit!

Grilled Chicken Kabobs

We like to use our charcoal grill in the warm weather as much as possible, and chicken shish kabobs are one of my favorite things to grill. Growing up this meal was one of my dad’s specialties on the grill. What made it so great was the special sauce he made to drizzle on top (he got mad when we called it gravy and insisted it was not gravy but sauce). I have never quite perfected this special sauce, but if you want to try it it consists of a little oil, flour, and white cooking wine. I just forgo the sauce with mine. I could never make it as good as Dad does.

This post contains affiliate links, and I may earn commission when you click on the links at no additional cost to you.

Juicy chicken seasoned with Garlic Pepper and threaded with a colorful stack of veggies, these yummy Grilled Chicken Kabobs can be prepped ahead of time or put together at the last minute. Memorial Day weekend has come and gone, which means we are officially into the throngs of summer. And summer means it’s time for cookouts, ice cream, and watermelon.

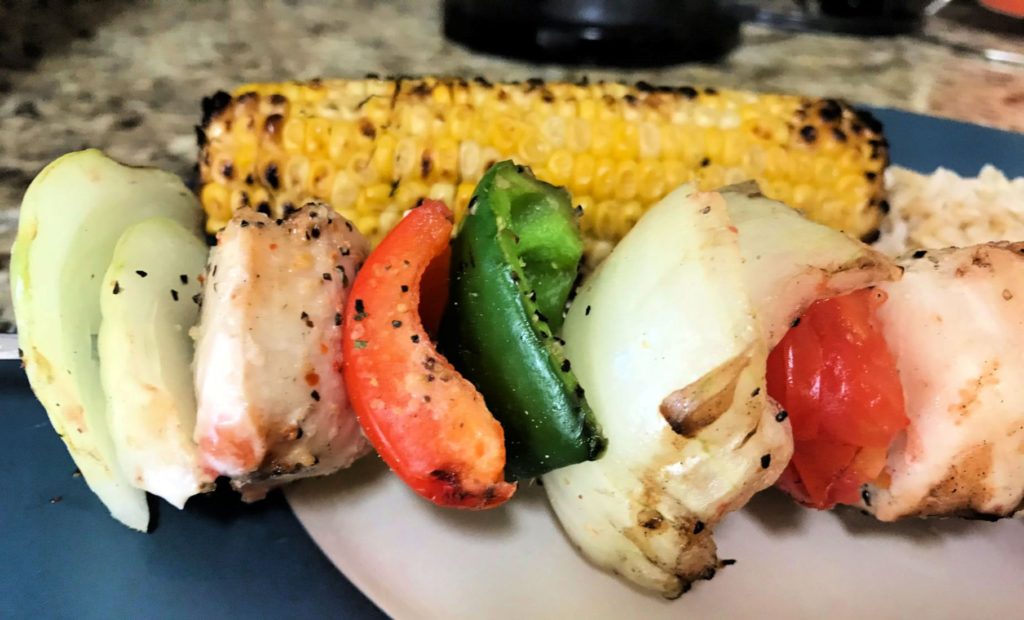
Just like grilled steak or bratwurst, whenever we think of grilling something I turn to these Grilled Chicken Kabobs more often than not. They are easy to make and are so healthy and delicious. Serve them with grilled corn on the cob and wild rice, and they make a complete meal. The appealing colorful presentation makes them perfect for entertaining guests at a party or cookout.

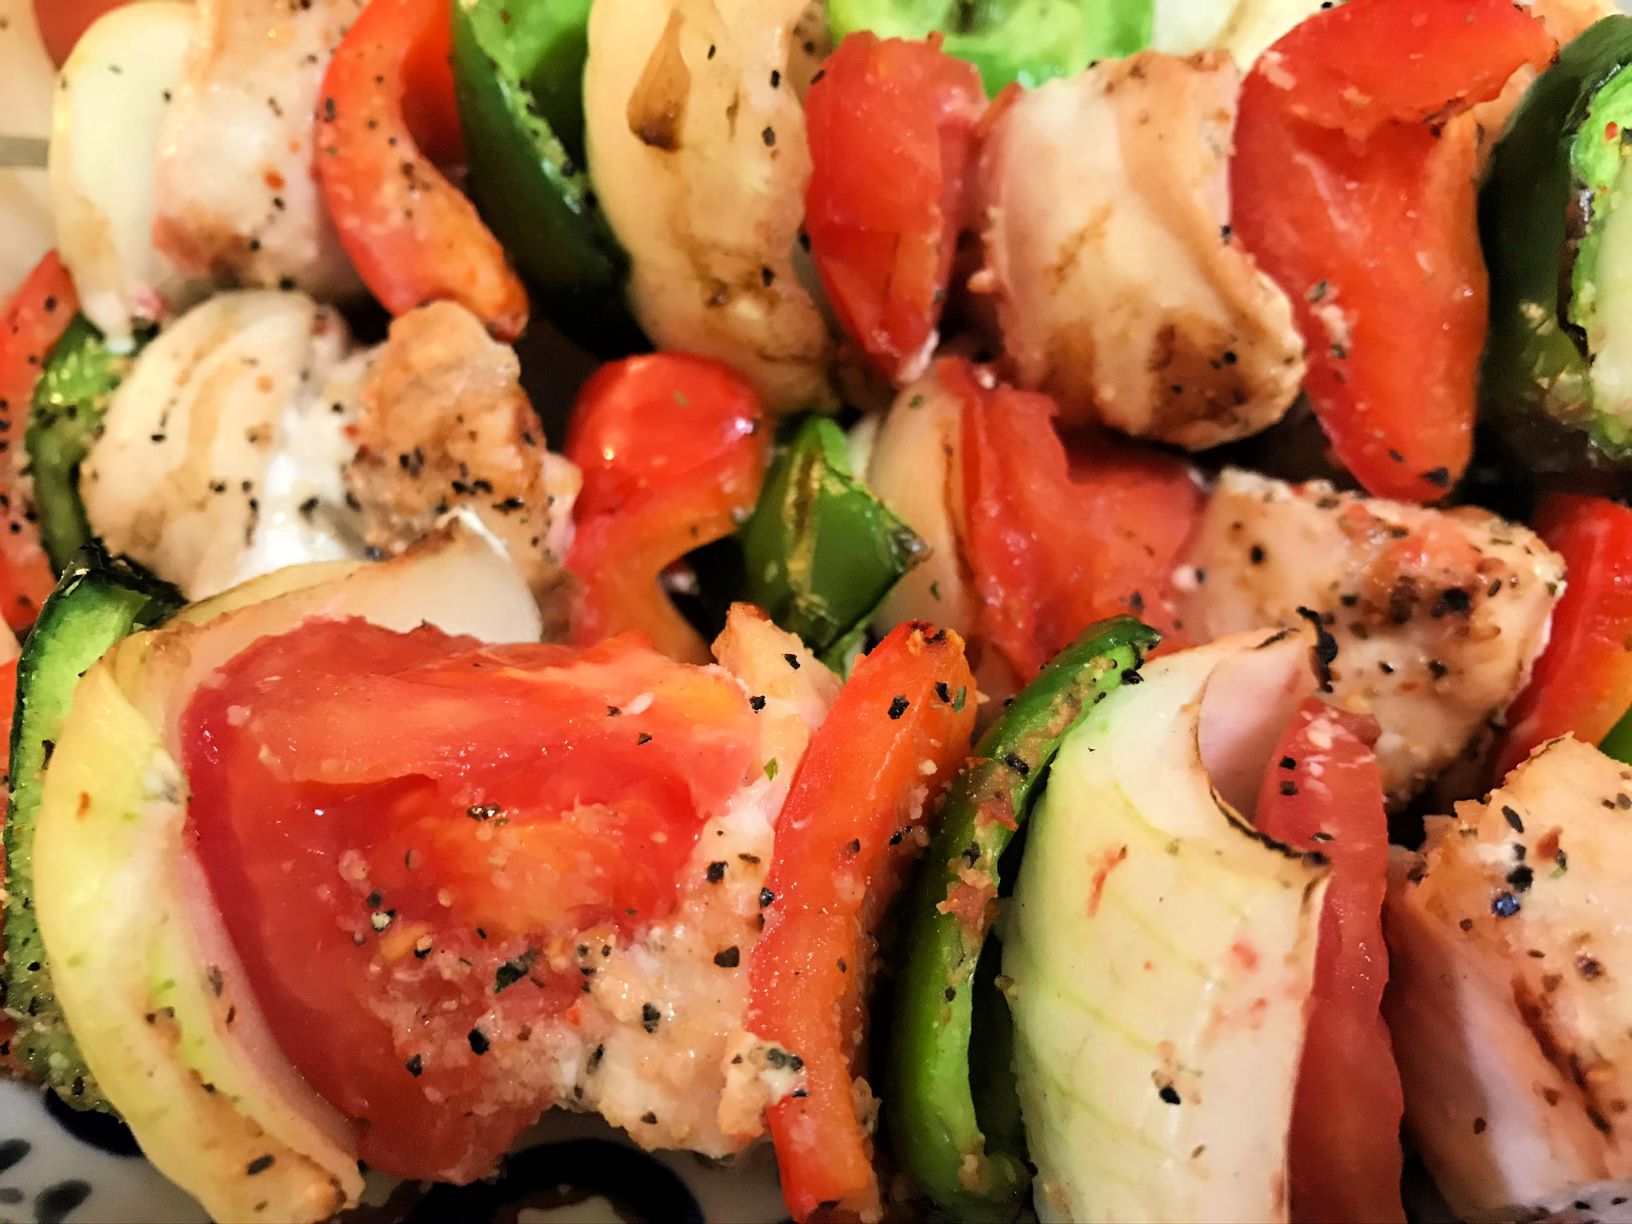
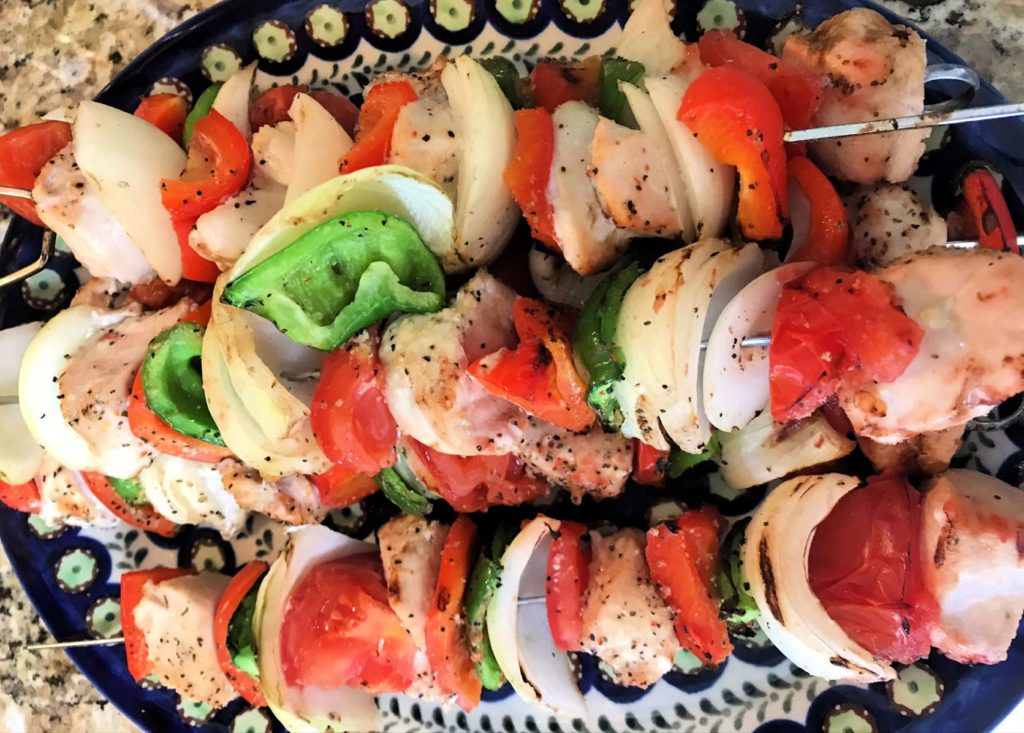
Lots of colors in the Grilled Chicken Kabob
Grilled Chicken Kabobs looks so good on the plate!

(By the way, here in Memphis we never call a cookout a BBQ like you Northerners do. BBQ is a food here and one that Memphis is known for like no other, but that’s a whole other blog post for another time.)

Everyone loves these Grilled Chicken Kabobs. They’re fast and healthy and can be changed up depending on what you have on hand in your kitchen. I’ve suggested certain vegetables, but you can use several different kinds of veggies and choose your own favorite seasoning.

I promise these chicken kabobs will not disappoint. Chicken must be cooked all the way through, but it is easy to overcook chicken. I cannot stand chicken that is too dry or tough, so if you are like me you will love this juicy Grilled Chicken Kabob recipe with chicken cooked just right.

So fire up your grill or oven. Here are the easy steps for cooking Grilled Chicken Kabobs.

Ingredients

  • Boneless skinless chicken breasts: You can purchased fresh (my preference) or frozen chicken, but frozen chicken will need to be completely thawed before using or it won’t cook evenly. If the label says the chicken has already been brined, you can skip the brining step below.
  • Vegetables: I like to use different colored bell peppers, yellow onion, and tomato, but you can add anything else such as zuchini or mushrooms.
  • Oil: Since you will be grilling over high-heat, I recommend regular olive (not extra-virgin). It has a higher smoking point.
  • Kosher Salt: Used in the brine and to season chicken
  • Seasonings: I used California style Garlic Pepper seasoning, but go ahead and substitute any dry seasoning blend you like. Garlic powder, Steak seasoning, and Paprika work well too.
You will also need:

Skewers: Either reusable metal skewers (this is what I use) or wooden skewers. Keep in mind that wood burns, so if you choose to use wooden skewers make sure you soak them in water at least 15 minutes before using to prevent burning.

Grill: Time to fire up the charcoal or gas grill! We love our charcoal grill. Or if you prefer to cook the chicken indoors, you can use a grill pan instead.

More great grilling ideas

How to Cook Grilled Chicken Kabobs

Step 1: Brine the chicken

If your chicken did not come pre-brined from the store, you will want to take this short simple step first to assure that the juices are locked in and the chicken doesn’t dry out on the grill.

First, soak the chicken breasts in lukewarm salt water for at least 15 minutes. Then rinse the chicken off with some cold water, pat the chicken breasts dry with paper towels, and cut the chicken up into bite sized pieces.

Next, cut the vegetables into about 1 inch pieces.

I did not marinate the chicken in this recipe, but if you don’t want to use dry seasonings only you can marinate the chicken in Italian salad dressing for 30 minutes. Just be careful to not burn the chicken as the oil in salad dressing burns easily.

Step 2: Season the chicken and vegetables

Drizzle the chicken and vegetables with olive oil, sprinkle on your desired dry seasonings (I used garlic pepper seasoning), and toss well in a bowl until everything is coated.

Garlic pepper seasoning on grilled chicken kabobs
I add a little more seasoning on top after I’ve threaded everything onto the skewer.

Step 3: Thread the Skewers and Heat Grill

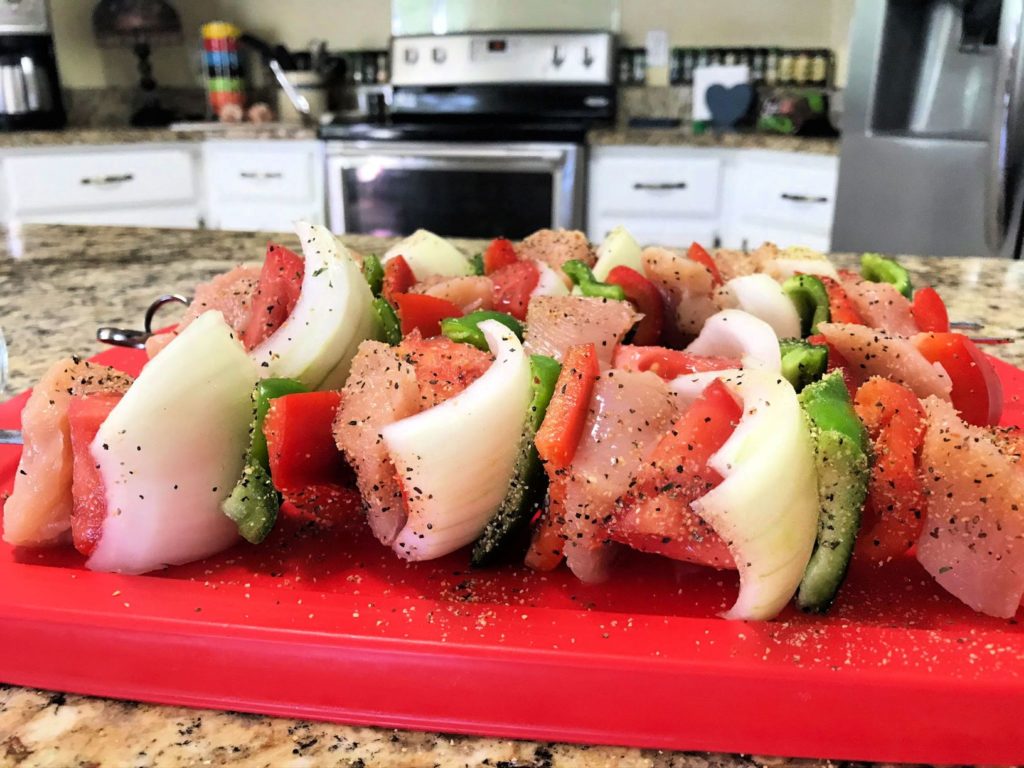
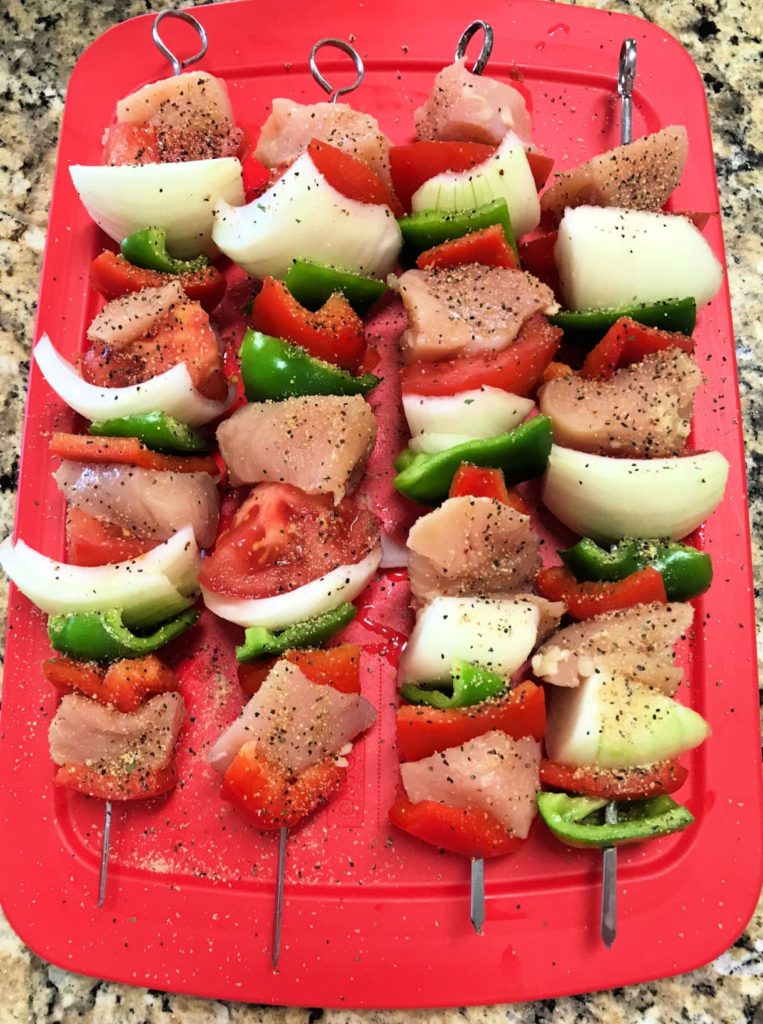
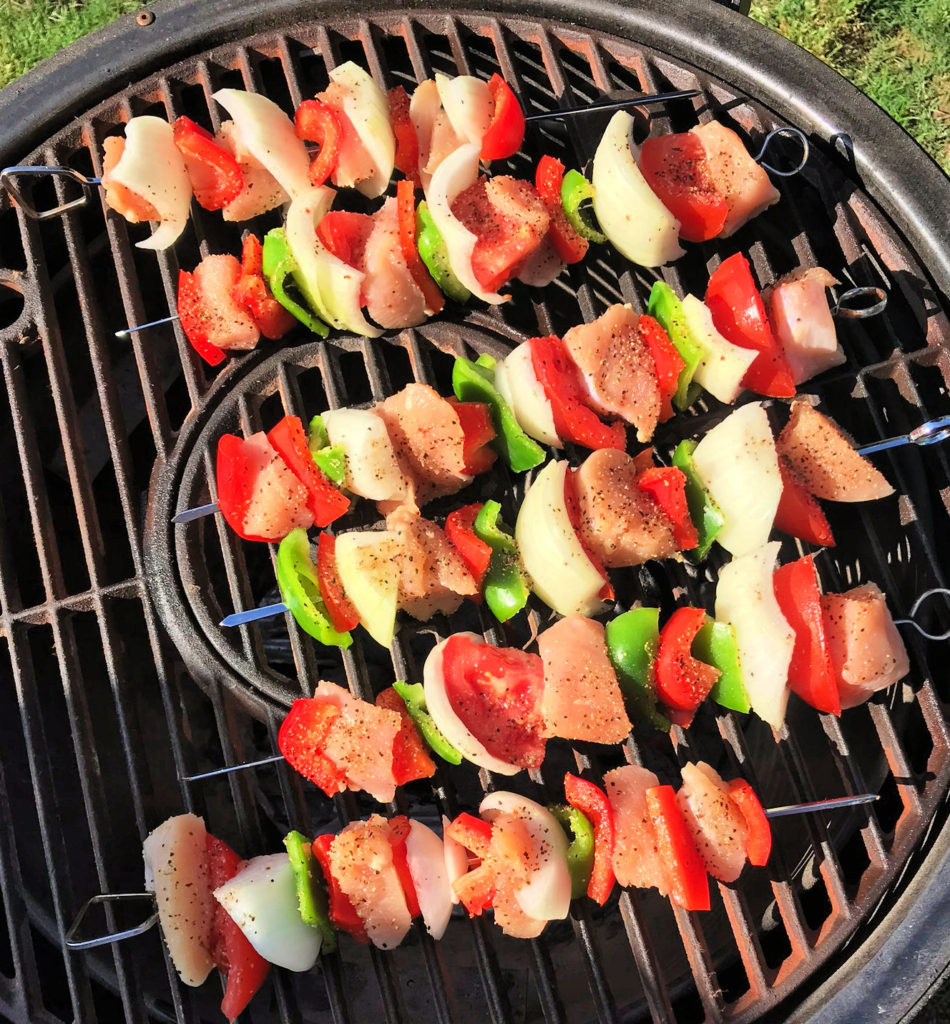
Heat your grill up to medium-high heat. Thread the chicken and vegetables onto the skewers. I used a pattern of chicken, tomato, onion, red pepper, then green pepper, and repeated this pattern until the end of the skewer.

Make sure you do not jam things too close together on your skewer. They will cook better if a little air can get in between the pieces.

Thread chicken and vegatables on skewer for kabobs.
Leave a little space in between pieces on the skewer and follow a pattern.

Step 4: Grill

On 350 degrees F, cook the chicken and vegetable skewers for about 6 or 7 minutes then turn and cook the other side 7 minutes. You can turn them more than once if needed. To keep the chicken from drying out we will occasionally spritz a little water on them as they are cooking, but make sure you don’t put the charcoal out! If you are using the oven, cook them about 25 minutes on 450 degrees turning once halfway through.

Cook chicken kabobs on the grill.
Cook until the chicken is golden brown and cooked all the way through. Do not overcook!

Your chicken should be golden brown and cooked all the way through. It may take a little practice to find that perfect balance between cooking the chicken enough but not overcooking it and drying it out. No one wants undercooked or overcooked chicken. The chicken is cooked when it reaches an internal temperature of 165 degrees F on an instant read meat thermometer and the juices run clear when a piece of chicken is cut.

Transfer the skewers to a clean plate and cover them loosely with aluminum foil to keep them warm. They are best served right away while the chicken is still warm and juicy. Garnish with fresh lemon wedges and a sprinkling of parsley if desired. Serve them with grilled or boiled corn on the cob and wild rice.

Grilled chicken kabobs make an easy healthy meal.

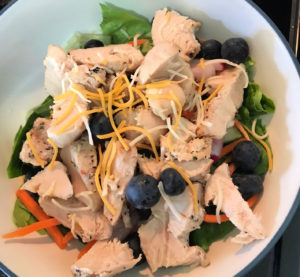
Refrigerate leftovers for up to three days. I cut up the vegetables and used them in chili then put the leftover grilled chicken on top of salad.

Use leftover grilled chicken on top of salads.
Use leftover grilled chicken on top of a salad.

Let me know if you try these and what seasoning you used. Please rate this recipe and share it with others. Happy grilling!

Grilled Chicken Kabobs

Easy and healthy grilled chicken and vegetable kabobs you can cook on the grill or in the oven. Perfect for parties or cookouts!
Prep Time20 minutes
Cook Time15 minutes
Total Time35 minutes
Course: Main Course
Cuisine: American
Keyword: cookout food, grilled chicken kabobs, grilled chicken skewers, healthy dinner, July 4, Labor Day, Memorial Day
Servings: 6 servings
Calories: 270kcal
Author: Cindy Baker

Ingredients

  • 3 boneless skinless chicken breasts
  • 1 Tablespoon olive oil
  • 1 teaspoon kosher salt
  • 2 teaspoons California Garlic Pepper seasoning blend
  • 1 tomato cut into 1 inch pieces
  • 1 red bell pepper cut into 1 inch pieces
  • 1 green bell pepper cut into 1 inch pieces
  • 1 large yellow or red onion cut into 1 inch pieces
  • parsely and lemon wedges (optional) for garnish

Instructions

  • Brine the chicken: If your chicken did not come pre-brined from the store, you will want to take this short simple step first to assure that the juices are locked in and the chicken doesn't dry out on the grill.
    First, soak the chicken breasts in lukewarm salt water for at least 15 minutes. Then rinse the chicken off with some cold water, pat the chicken breasts dry with paper towels, and cut the chicken up into bite sized pieces.
    Next, cut the vegetables into about 1 inch pieces.
  • Seasn the chicken and vegetables: Drizzle the chicken and vegetables with olive oil, sprinkle on your desired dry seasonings (I used garlic pepper seasoning), and toss well in a bowl until everything is coated.
  • Thread the Skewers and Heat the Grill: Heat your grill up to medium-high heat. Thread the chicken and vegetables onto the skewers. I used a pattern of chicken, tomato, onion, red pepper, then green pepper, and repeated this pattern until the end of the skewer.
    Make sure you do not jam things too close together on your skewer. They will cook better if a little air can get in between the pieces.
  • On 350 degrees F, cook the chicken and vegetable skewers for about 6 or 7 minutes then turn and cook the other side 7 minutes. You can turn them more than once if needed. To keep the chicken from drying out we will occasionally spritz a little water on them as they are cooking, but make sure you don't put the charcoal out! If you are using the oven, cook them about 25 minutes on 450 degrees turning once halfway through.
    Your chicken should be golden brown and cooked all the way through. It may take a little practice to find that perfect balance between cooking the chicken enough but not overcooking it and drying it out. No one wants undercooked or overcooked chicken. The chicken is cooked when it reaches an internal temperature of 165 degrees F on an instant read meat thermometer and the juices run clear when a piece of chicken is cut.
  • Transfer the skewers to a clean plate and cover them loosely with aluminum foil to keep them warm. They are best served right away while the chicken is still warm and juicy. Garnish with fresh lemon wedges and a sprinkling of parsely if desired. Serve them with grilled or boiled corn on the cob and wild rice.

Nutrition

Calories: 270kcal
Picnic Basket

Summer time or holidays is usually when we think of picnics. But any time that is not too cold is the perefct time to plan a picnic. Maybe you want to know how to plan a picnic for a group or how to host a company picnic. Or maybe you just want to know how to plan a picnic with friends or how to plan a picnic date. No matter the reason, there are lots of picnic tips and tricks to make your job easier.

Here are some of my best tips for making your picnics some of your greatest memories. Here’s to hosting a perfect picnic!

1. Pick the best spot.

Pick the best spot for a picnic.
The right spot is important for the perfect picnic.

Look for a secluded level place on the ground with lots of soft grass, no rocks, and natural shade. If the weather is warm, make sure you are directly under a tree to get the best shade all day.

If you have children do not set up right next to a playground, as it will be noisy and difficult for you to keep an eye on your kiddos while you are also preparing food. But you will want plenty of open space for them to run around.

Staying at home? You can set up an awesome picnic right in your backyard. You can even have a picnic indoors on cold or rainy days if you are creative and flexible. With the right planning picnics can be fun anywhere! It’s about the people, the food, and the experience.

2. Bring the Best Blanket.

Bring the best blanket for picnics.
Bring a soft waterproof blanket for picnics.

If you are going to be sitting on the ground make sure your blanket is soft and has good cushioning. It needs to be one that is washable or waterproof, because let’s face it, picnics might get messy sometimes. You might even want to put a plastic sheet down first if the ground is damp.

I like to bring old throw pillows in case I want to take an after-picnic nap or have soft seating. You may also want to bring easy to carry folding chairs. This extra large picnic blanket is water resistant and rolls up with a carrying handle so you can carry it like a tote. It’s cute too!

If you are going to be eating at a picnic table in a park try using a fitted sheet for a table cloth. It keeps the table cloth from catching wind and tipping everything over.

3. Pack your food right.

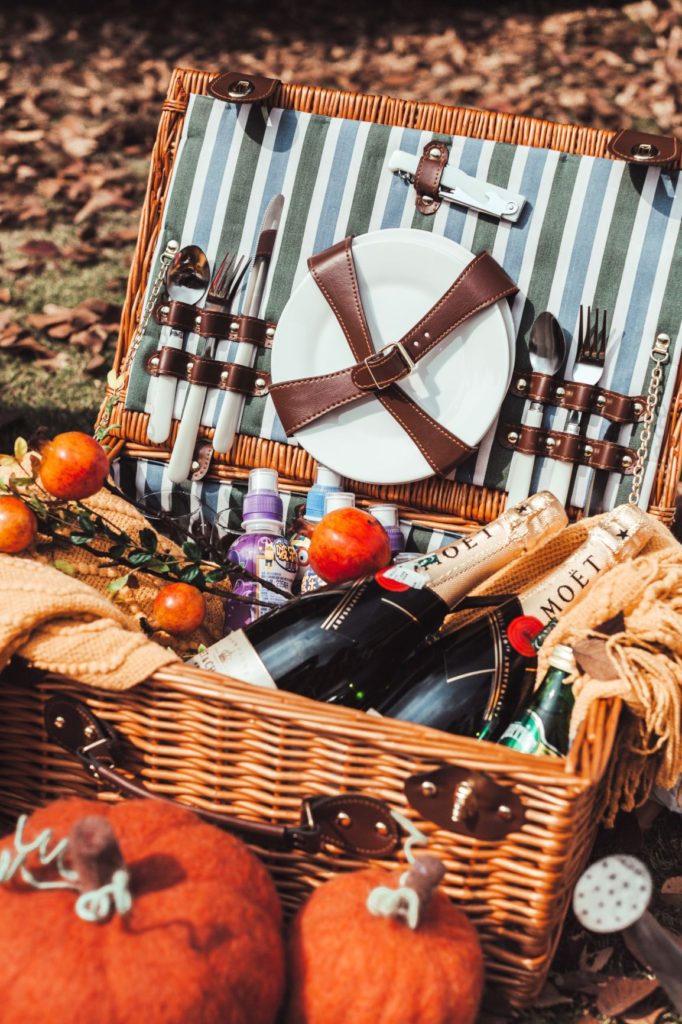
Picnic basket with cutlery set
Picnic baskets or totes with compartments to hold things are best.

We have a cute wicker picnic basket, but we hardly ever use it. Instead we use a small cooler with wheels that has a handle and cup holders on the top. Insulated lunch bags with pockets and compartments work great for food.

Make sure to chill your food thoroughly in the refrigerator before putting it in the cooler. The cooler won’t make the food any cooler if it is not already cold. Pack perishables right next to ice packs, and don’t let fruits or lettuce touch the ice or they might get damaged or have “freezer burn.”

Go ahead and fill your cooler all the way up with ice. This will keep food cooler than a half empty cooler. And make sure to put things back in the cooler when you are not using them. Food should not be left outdoors for more than one hour.

I try not to bring glass, but if I do bring glass, I wrap it in a small towel for padding then use the towel for cleanup later. When it comes to food, I try to prepare things ahead of time and bring only what we will eat in storage containers.

Bring screw top wine bottles and canned soft drinks or tea instead of having to deal with ice and so many cups.

Try this trick: Use cupcake papers to keep bugs out of your drink. You can turn them upside down over your drink and poke a straw through the middle. A ready made lid!

4. You will need a flat surface to rest your food on.

Bring trays to put food on at picnics.
Trays to put your food on work great for picnics.

Don’t forget to bring something like a tray, small folding table, or other flat surface to put your food on. We use our cooler cup holders on the lid for drinks. I love this foldable portable small wine and snack table. Perfect for a picnic! And how cool are these wine glass holders that are on stakes in the ground. So clever! If you really want a posh picnic try this picnic backpack. It comes complete with a waterproof blanket and the whole cutlery set for four. Very elegant!

You might also want to bring a small cutting board, a knife, napkins, paper towels, a garbage bag, some disinfectant wipes, and bug spray. You might want to bring a cup or jar to put utensils in so that they don’t end up on the ground.

5. Pack food in Mason jars.

One cute idea is to pack your salads, side dishes, and condiments in lidded Mason jars. This gives your picnic a little country flare and keeps food from spilling. The jars are also easy to transport in your picnic basket or tote. You can purchase a 6-pack of Mason jars here at a reasonable price.

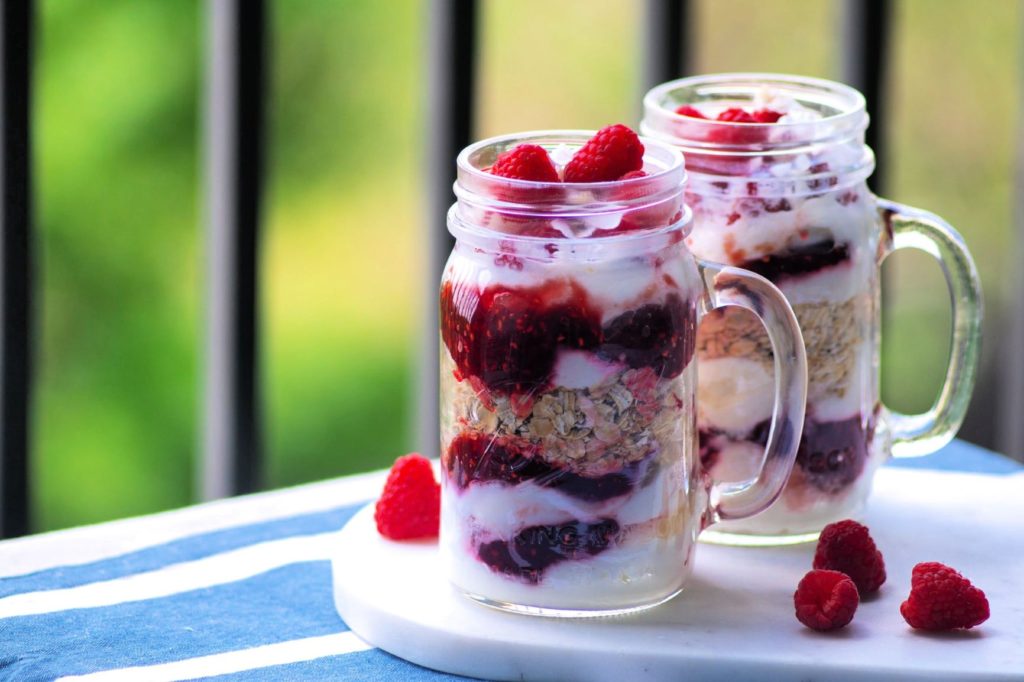
You can even make desserts in a jar by layering crushed graham crackers with pudding and topping it with chocolate chips or layer fruit, yoghurt, and granola.

Layered desserts in a Mason jar for picnics
Layered desserts in a Mason jar work great for picnics.

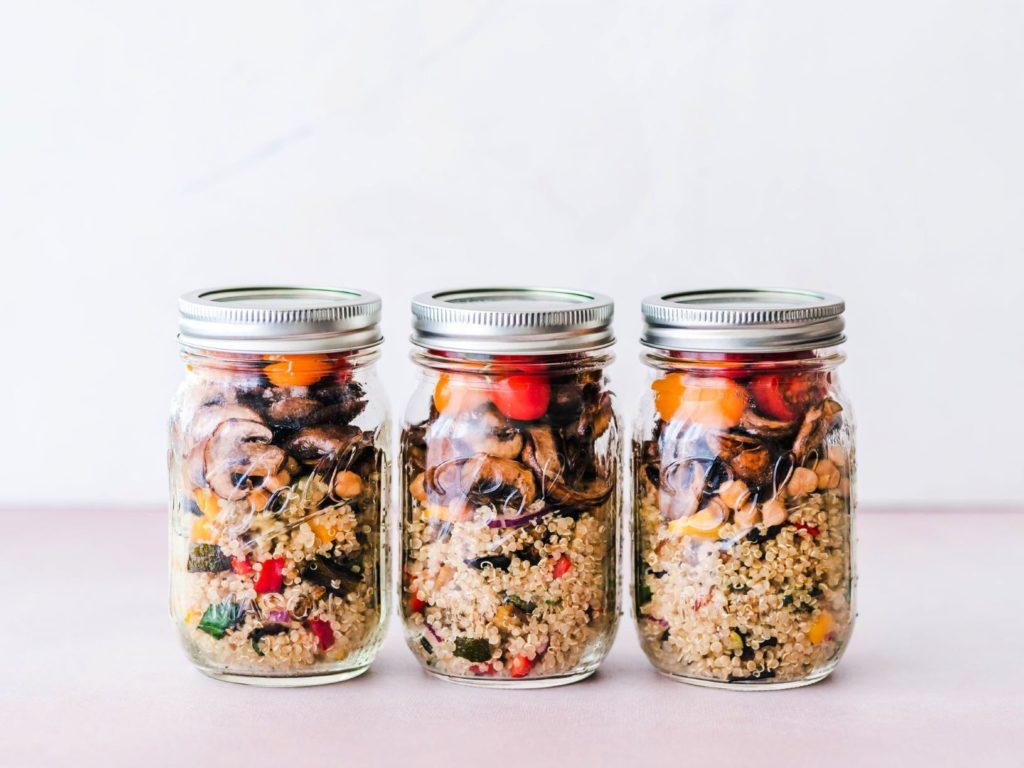
Salads are great in these jars, because the dressing goes in first and marinates things at the bottom. So you want to put in your hardier ingredients like feta cheese or chickpeas on that bottom layer and the more delicate ingredients at the top. Flip it over and dump it in to a bowl when serving, and the dressing will get drizzled over the top of the salad. Pasta salads or couscous works well too.

Pack salads in a Mason jar for picnics.
Pack salads and side dishes in Mason jars for picnics.

6. Get creative with your food choices.

Half the fun of picnics is that you oftentimes eat certain foods on picnics that you normally wouldn’t at home. Start your own traditions and bring a favorite recipe every time you have a picnic. Make sure to try my easy deviled eggs and creamy pimento cheese spread.

Sandwich wraps are great for picnics.
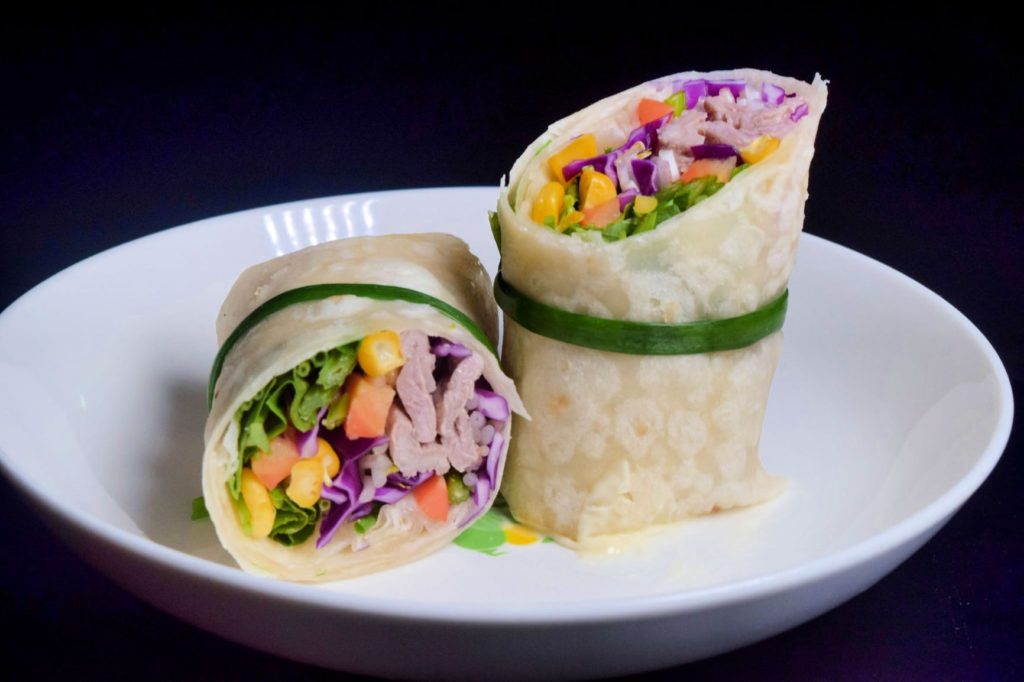
Tie sandwich wraps with a rubber band or spinach tie.

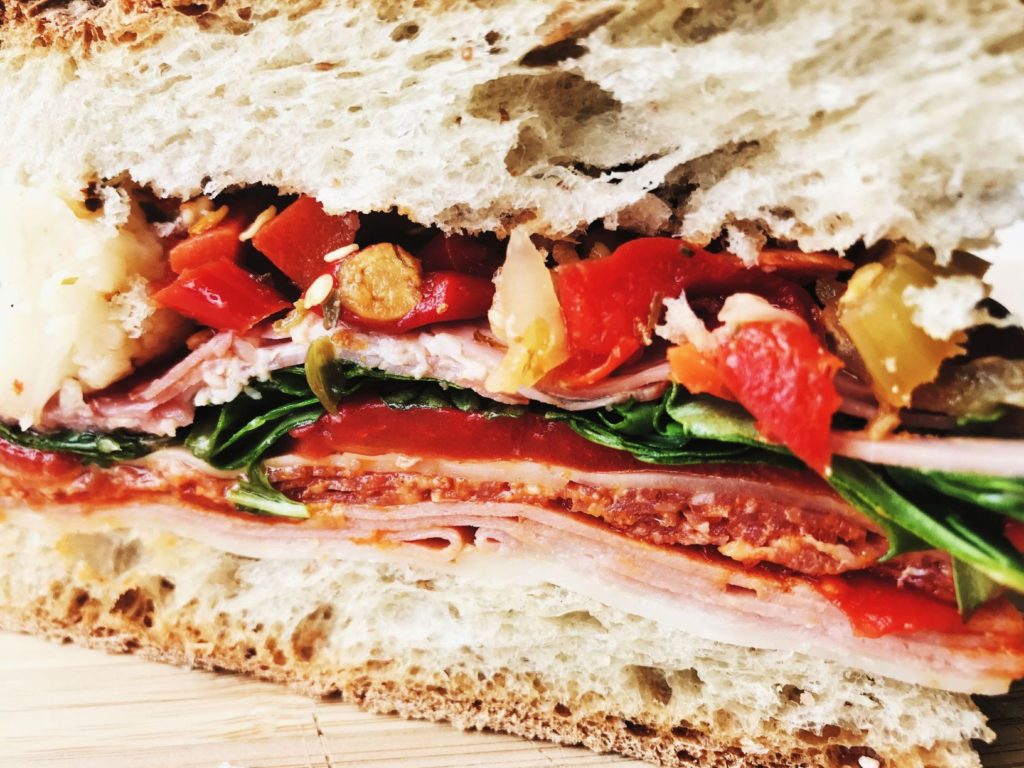
Try wrapping sandwiches in parchment paper then tie them together with string. No one wants to pull their sandwich out of a sandwich bag and have everything fall out of it. Keep sauces and dressings separate, so the bread won’t get soggy. Then add it right before eating. Use a hardy French baguette instead of sandwich sliced bread to keep it fresh and crispy.

French baguette sandwich at picnic
Use hardier breads like French baguettes for picnic sandwiches.

Slice apples before you go, then put the slices back together into the shape of an apple again to keep the slices fresh and prevent them from turning brown. Put a rubber band around them to keep them together. You can also spritz a small amount of lemon juice on them to keep them fresh before putting them together.

7. Keep the flies away.

Lemon and cloves keep flies away.
Flies do not like lemon or cloves.

I hate flies even though here in the South they are just a part of life in the summer. But nothing ruins people’s appetites at a picnic more than having flies light all over the food.

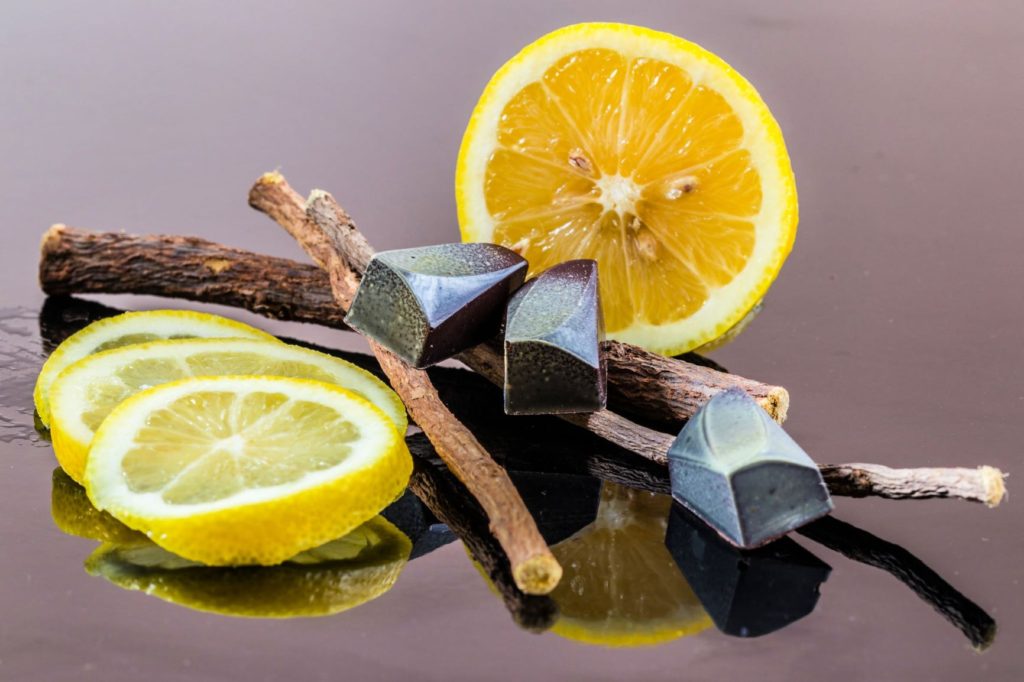
Here’s an easy trick to keep those pests away. Flies hate the smell of lemon and the smell of cloves (really I asked them), so take a lemon and cut it in half then stick cloves in each lemon half. Put the lemons in decorative bowls and place the bowls throughout the food areas. This should help keep the flies away!

Now you are ready to plan the prefect picnic. Have fun, take some cute photos, and enjoy your picnic! Do you have any other picnic tips, tricks, or hacks? Please leave a comment below and share this article. Now I’m hungry! 🙂

Perfect Deviled Eggs

No summer picnic or potluck dinner is complete without deviled eggs. Most people think they are a lot of trouble to make, but this recipe is actually very easy. If you follow these directions you will have perfect deviled eggs every time you make them. These go fast anytime I serve them. Give it a try!

Ingredients

  • 6 large eggs
  • 1/4 cup mayonnaise
  • 1 teaspoon yellow mustard
  • 1 teaspoon pickle relish
  • salt and freshly ground black pepper

Instructions

Step One

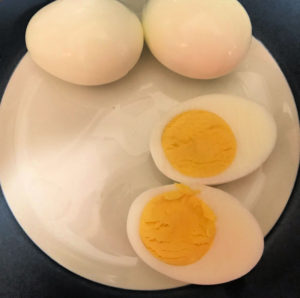
First, you will need to cook the eggs. To boil eggs properly for deviled eggs place the eggs in a single layer in a wide saucepan and add enough cold water (make sure the water is cold, not hot) so that the eggs are completely submerged with around an inch of water on top. Starting with cold water makes the temperature rise slower, and this prevents the shells from cracking and ensures even cooking.

I used only three eggs for illustrative purposes. If you do not have enough room in the pan for the eggs to fit in one bottom layer you may need to boil half at a time.

Place the eggs in a single layer in a saucepan and cover them with completely with water.
Make sure the eggs are completly under water when boiling them.

Over high heat let the water come to a rolling boil, then immediately cover the saucepan with a lid, cook for 30 seconds – 1 minute (never more than 1 minute) more on medium heat.

Remove the pan from the heat right away and let it stand with the lid on for 14 minutes (less if your eggs are smaller). Make sure you remove the pan right away so that the eggs will not overcook and give you that weird gray ring.

Step Two

Next, prepare a bowl of ice water and carefully place the eggs in the bowl using tongs or a slotted serving spoon. You want to stop them from cooking as fast as you can, so the ice water helps. Leave them to cool off for about 5 minutes.

Cool boiled eggs off in a bowl of ice water.
Let the boiled eggs cool off in ice water before peeling.

NOTE: It is actually easier to peel eggs that are a little older. So buy your eggs a few days before you plan to boil them.

Now, gently crack the egg shells and carefully peel them off. If the shells do not come off easily put them back in the ice water for a while or try peeling them under cold running water.

Step Three

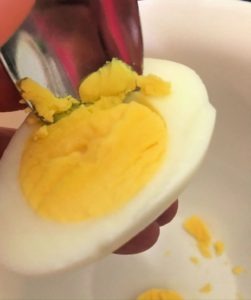
After you peel the eggs pat them dry with a paper towel so they don’t slide around on the plate. Slice the eggs in half, lengthwise. Remove the yolks and put them in a medium bowl.

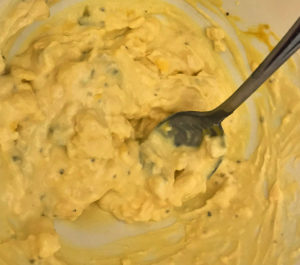
Put the whites on a serving platter with the hollow part facing up. Mash the yolks up in the bowl with a small spoon or fork until they are crumbly. Stir in mayonnaise, mustard, relish, and salt and pepper. Stir until smooth.

Remove the yolks and mash them up in a small bowl with mayonnaise, mustard, and relish.
Mash up the yolks and stir in mayonnaise, mustard, relish, and salt and pepper.

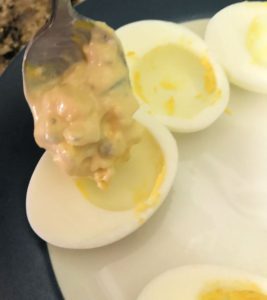
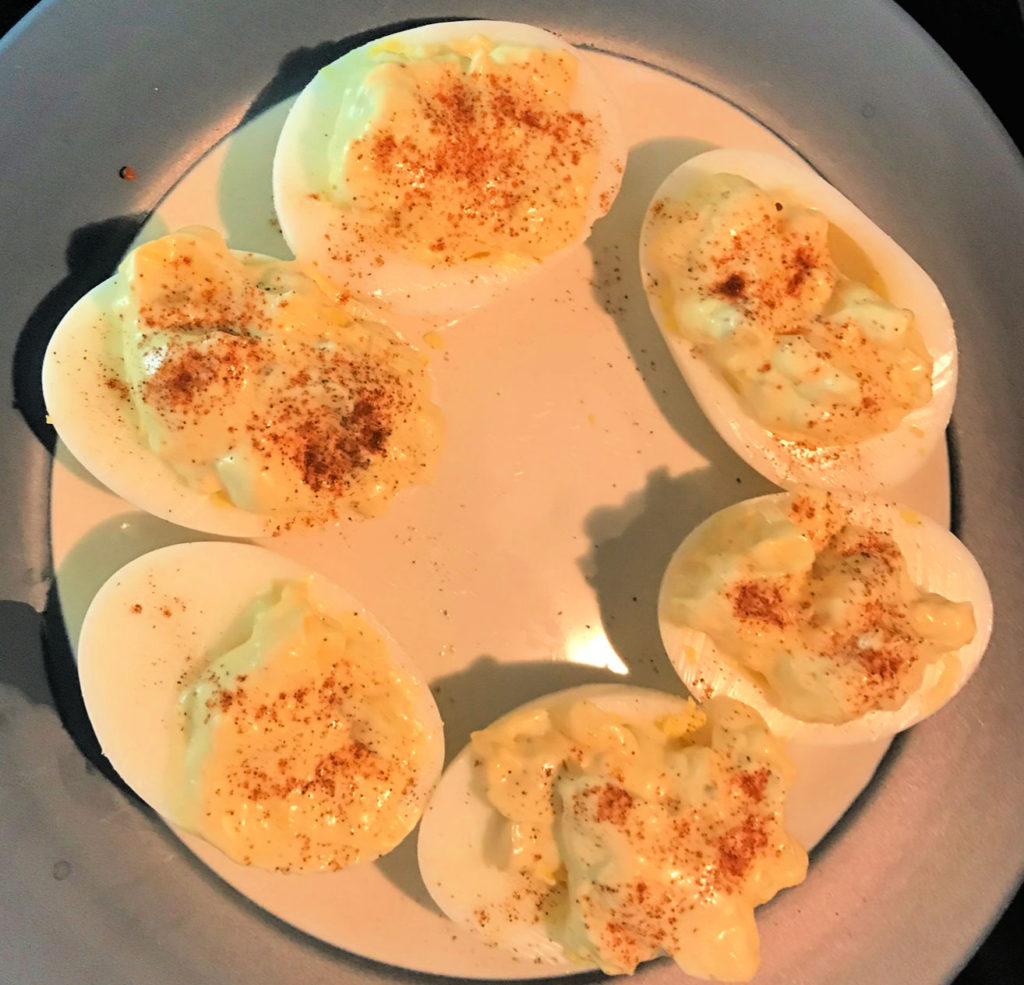
Use a small spoon or scoop to fill the egg whites with heaping spoonfulls of the mixture.

Add the yolk mixture to the egg whites for deviled eggs.
Evenly distribute the yolk mixture into egg whites.

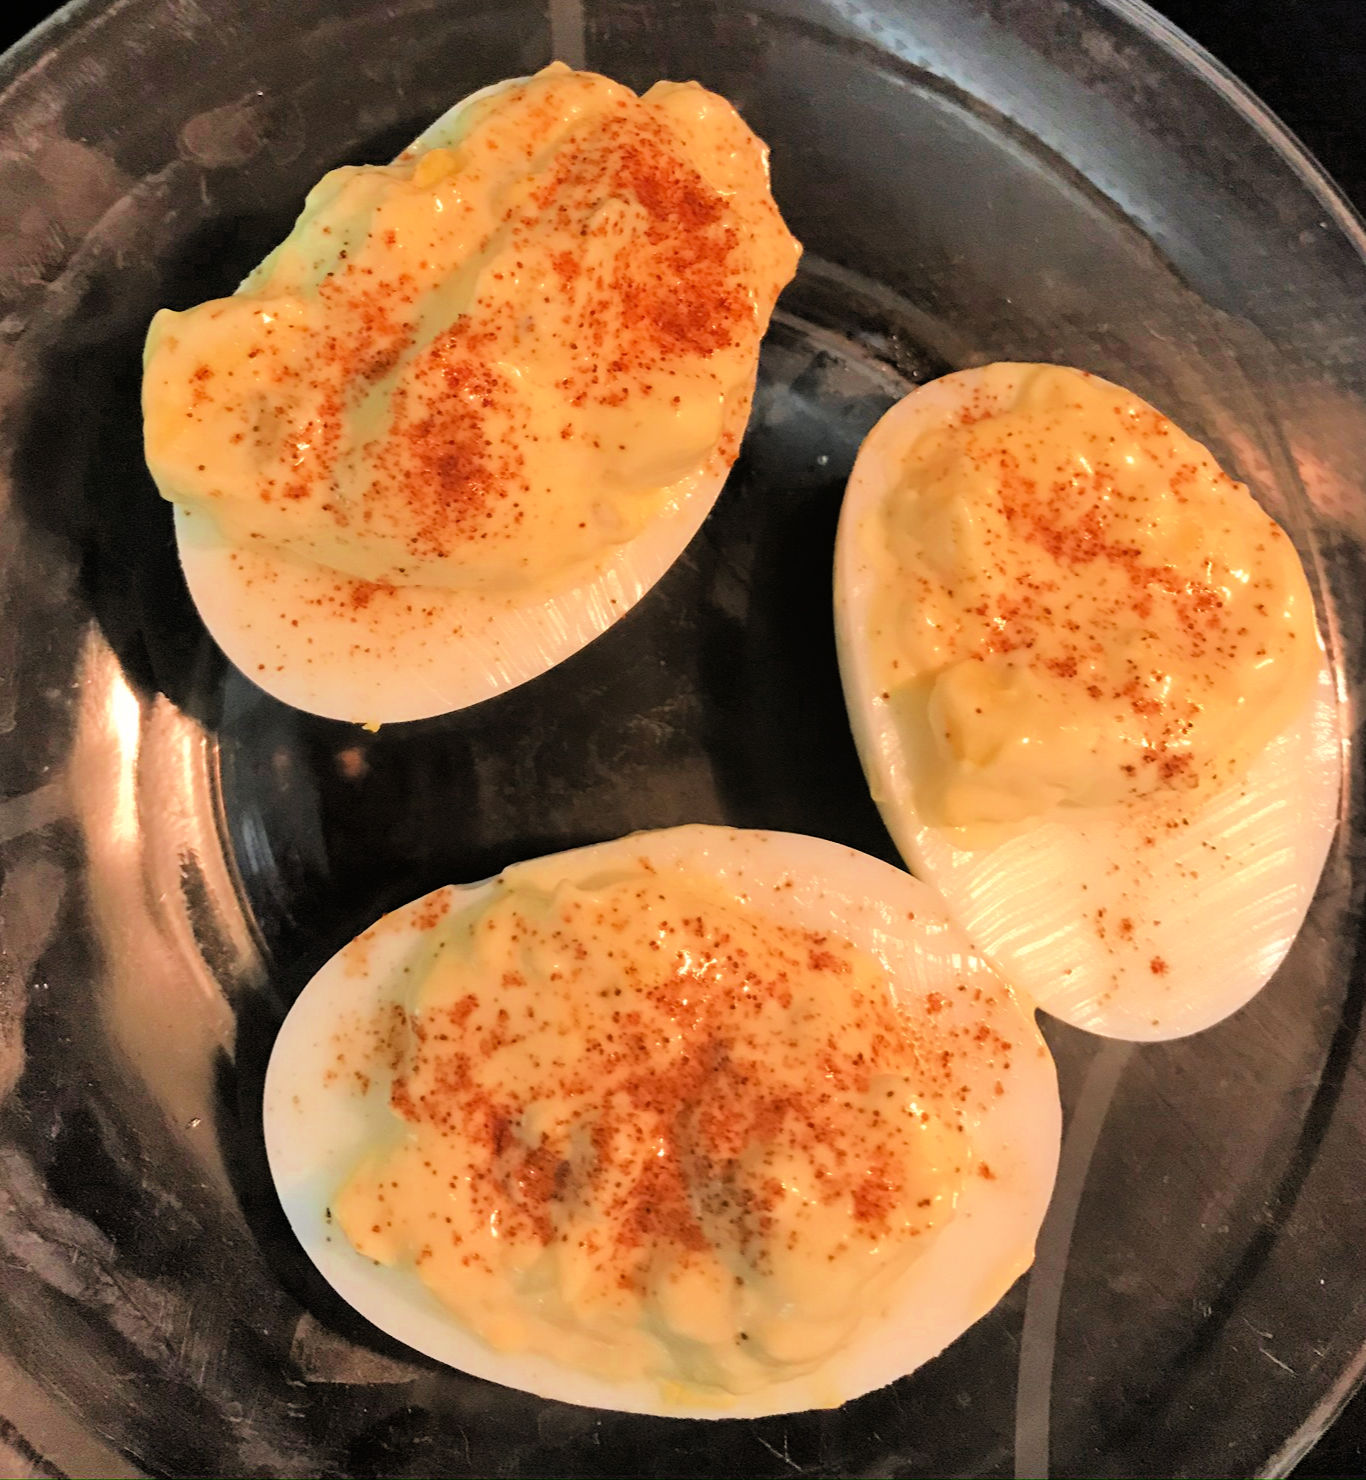
Now sprinkle with paprika (smoked paprika is really good) and serve.

Classic deviled eggs
These classic deviled eggs are always a favorite.

There are lots of other toppings you can use instead of paprika for garnish if you’d like. Chives, parsley, or bacon crumbles also work well.

Let me know if you try this recipe and how it turned out. Give it a rating, and leave a comment. Share it if you like it. Happy picnicking!

Perfect Deviled Eggs

Easy Classic Deviled Egg recipe that turns out prefectly every time. These are a huge hit and go fast at every party or pot luck meal.
Prep Time20 minutes
Cook Time15 minutes
Total Time35 minutes
Course: Appetizer, Side Dish
Cuisine: American
Keyword: appetizer, boiled eggs, classic deviled eggs, deviled eggs, easy deviled eggs, picnic dishes, picnic food
Servings: 12 half egg servings
Calories: 67kcal
Author: Cindy Baker

Ingredients

  • 6 eggs
  • 1/4 cup mayonnaise
  • 1 teaspoon yellow mustard
  • 1 teaspoon pickle relish
  • 1/4 teaspoon salt
  • freshly ground black pepper
  • paprika for garnish

Instructions

  • Place eggs in a single layer in a wide saucepan and cover with enough water so that the eggs are completely under the water. Bring water to a boil, then reduce heat to low, cover, and cook for 30 seconds – 1 minute (no longer then 1 minute).
  • Remove from the heat immediately and leave saucepan covered for 12 – 14 more minutes depending on the size of the eggs.
  • Remove the eggs carefully with tongs and immediately place them in a dish of ice water. Let them cool at least 5 minutes.
  • Crack egg shells and carefully peel the shell off under cool running water. Gently dry eggs with a paper towel.
  • Slice the eggs in half lengthwise, removing the yokes and putting them in a medium bowl. Place the white half eggs on a serving platter.
  • Mash the yokes until crumbly using a fork or small spoon. Add in mayonnaise, mustard, relish, and salt and pepper and mix well.
  • With a small spoon scoop heaping spoonfuls of the yolk mixture into the egg whites. Sprinkle with paprika and serve.

Video

Nutrition

Serving: 1half deviled egg | Calories: 67kcal | Protein: 3g | Fat: 6g | Saturated Fat: 1g | Cholesterol: 94mg | Sodium: 91mg
Creamy Pimento Cheese Spread Recipe

Who doesn’t love pimento cheese? Well, maybe folks who are not from the South. But us Southerners, we love us some pimento cheese and fried green tomatoes!

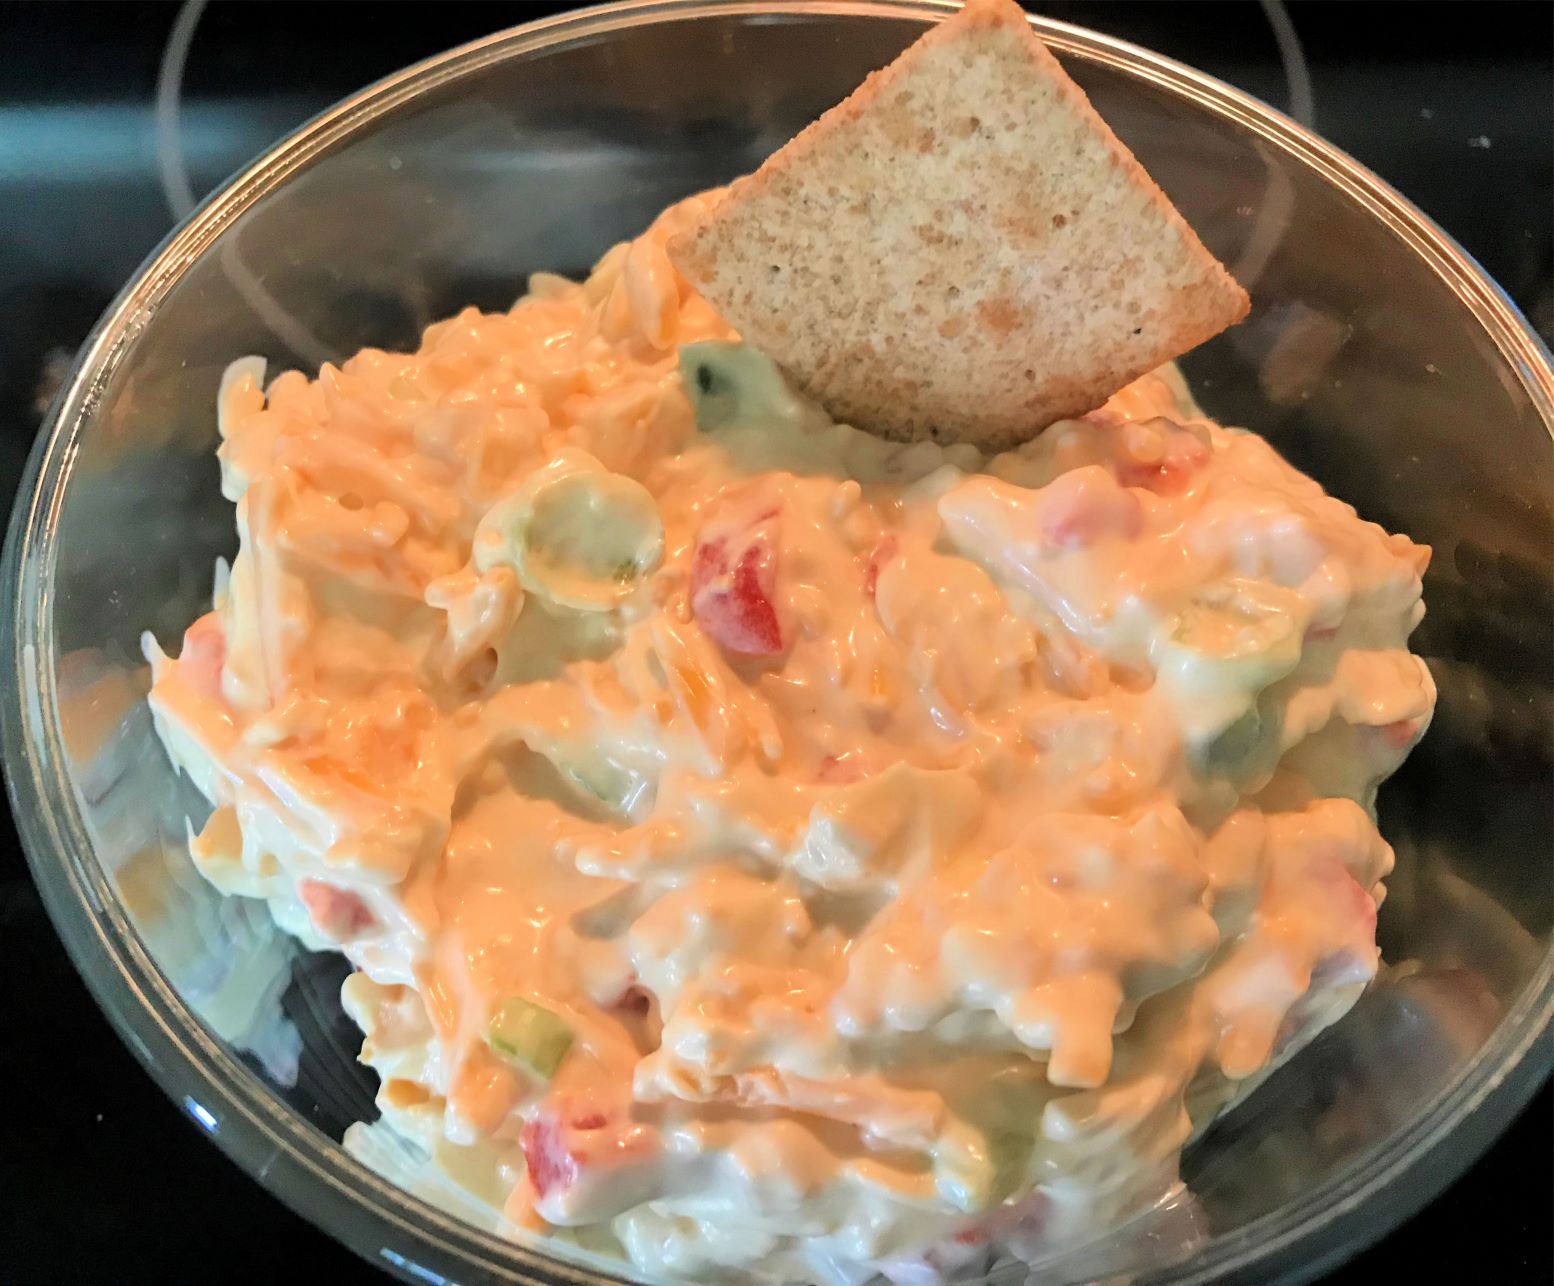
Creamy Pimento Cheese Spread Dip
The cream cheese makes it stick together for a great dip.

This recipe is so easy, and there are so many creative ways that you can change it up. You can make it spicy, tangy, or plain. I may be boring, but I like mine plain. My husband likes the spicy taste of jalepenos in his pimento cheese.

Creamy Pimento Cheese Spread Recipe
Jalepenos and cayenne pepper spice up this pimento cheese spread.

This recipe only takes about 10 minutes to make, and everybody loves it. It makes a great dip for crackers or vegetables, so you can serve it as an appetizer. But it also makes a great grilled cheese sandwich. And how about grilled pimento cheese and bacon sandwiches? What?! Yes! That’s what I’m talking about.

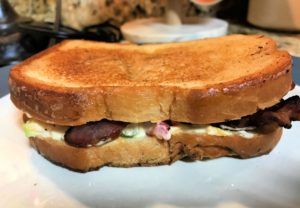
Grilled pimento cheese and bacon sandwich
Grilled Pimento Cheese and Bacon Sandwich

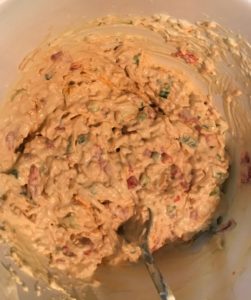
This recipe is so easy. All of the ingredients go into the bowl at the same time, then you just stir it up. That’s it!

Stir all ingredients together for creamy pimento cheese spread
All the ingredients go in the bowl together, and you just stir.

You can serve it right away or refrigerate it for later. I think you will love this delicious recipe.

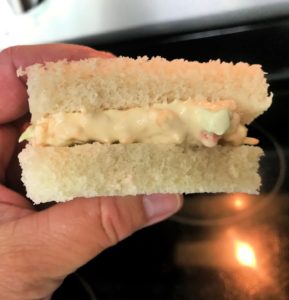
Creamy pimento cheese finger sandwiches
Cut the crust off the bread and make finger sandwiches.
Grilled creamy pimento cheese and bacon sandwich
Grilled pimento cheese and bacon sandwich
Creamy Pimento Cheese Spread Recipe
Print Recipe
5 from 1 vote

Creamy Pimento Cheese Spread

This is the ultimate pimento cheese spread. It is great for dips and grilled cheese sandwiches. Super easy too!
Prep Time10 minutes
Total Time10 minutes
Course: Appetizer, Main Course, Snack
Cuisine: American, Southern
Keyword: appetizer, creamy pimento cheese spread, dips, easy
Servings: 12
Calories: 208kcal

Ingredients

  • 2 cups sharp cheddar cheese shredded
  • 8 oz. cream cheese softened
  • 1 4 oz. jar diced pimentos drained
  • 1/2 cup mayonnaise
  • 1/4 teaspoon garlic powder
  • 1/4 teaspoon onion powder
  • 1/4 teaspoon chili powder or ground cayenne (optional)
  • 1 jalapeno pepper seeded and minced (optional)
  • salt & pepper to taste

Instructions

  • Place all ingredients above in a large bowl and stir with a large spoon. That's it!
  • Use as a dip for crackers or vegetables, as a finger sandwich appetizer, or as a grilled cheese sandwich meal.

Nutrition

Calories: 208kcal

Let me know if you make this, and if you like it please pin it to Pinterest and share it. Leave a comment below.

Beef Enchiladas

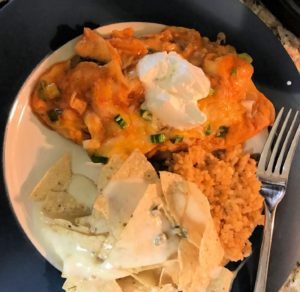
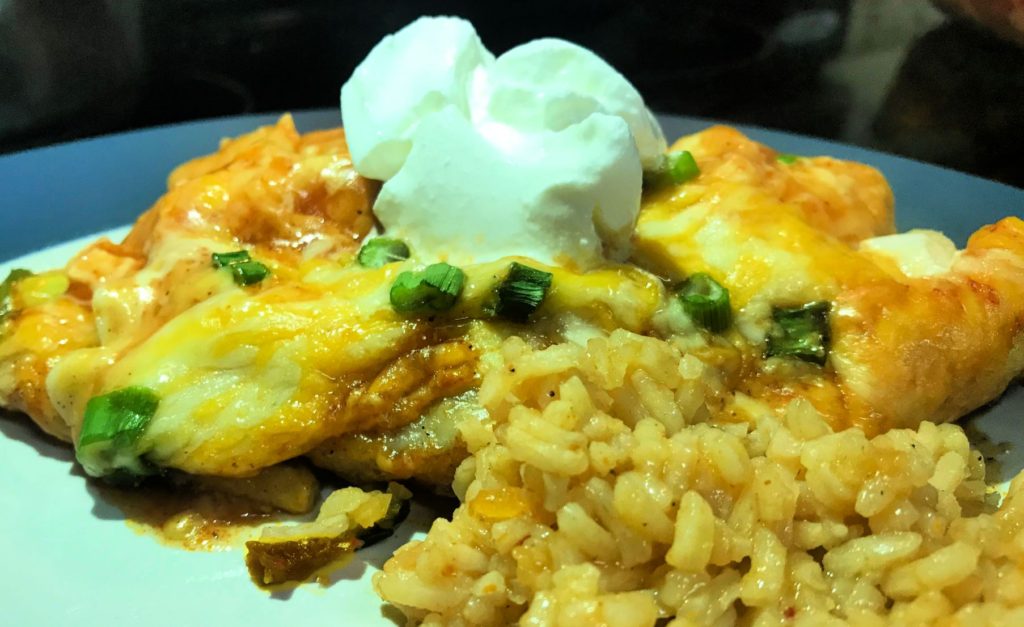
This beef enchilada recipe is super easy. These enchiladas look like they would take a lot of time to make, but you will be surprised at how simple this recipe is. Filled with seasoned beef, onions, green chilies, and cheese and covered with red enchilada sauce, this dish is a family favorite.

Top it with sour cream, diced green onions, pico de gallo, salsa, diced avocado, or any of your other favorite taco toppings. Serve it with Mexican rice, beans, or chips with cheese dip. Nothing is as good as homemade Mexican food. It’s the best!

Cheesy Beef Enchiladas
Easy Dinner Recipe

Ingredients:

  • 1 pound ground beef
  • 3/4 white onion diced
  • 1 4.5 oz. can chopped green chilies
  • 2 1/2 cups red enchilada sauce
  • 1/4 cup water
  • 1 envelope taco seasoning
  • 8 – 10 soft taco sized tortillas corn or flour
  • 16 oz. Mexican style cheese shredded
  • 8 oz. sour cream (optional topping)
  • 3 green onions diced (optional topping)

Instructions

Preheat oven to 375 degrees F.

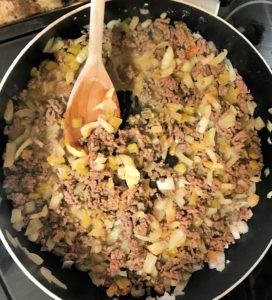
Brown the ground beef and onion in a skillet over medium heat until beef is crumbled up and no longer pink. Drain fat and return skillet to stove top.

Add in the chopped green chilies, taco seasoning, and water. Stir until combined and the water is absorbed. Remove from the heat.

Ground beef enchilada
You can add in the amount of onions you want. Pictured here is almost an entire onion.

Cover the bottom of a 9×13″ casserole or baking dish with enchilada sauce (1/4 – 1/2 of the sauce) to evenly coat the bottom of the dish. Reserve the remaining sauce for later.

Spread red enchilada sauce over the bottom of the dish for beef enchiladas.
Spread red enchilada sauce over the bottom of the dish first.

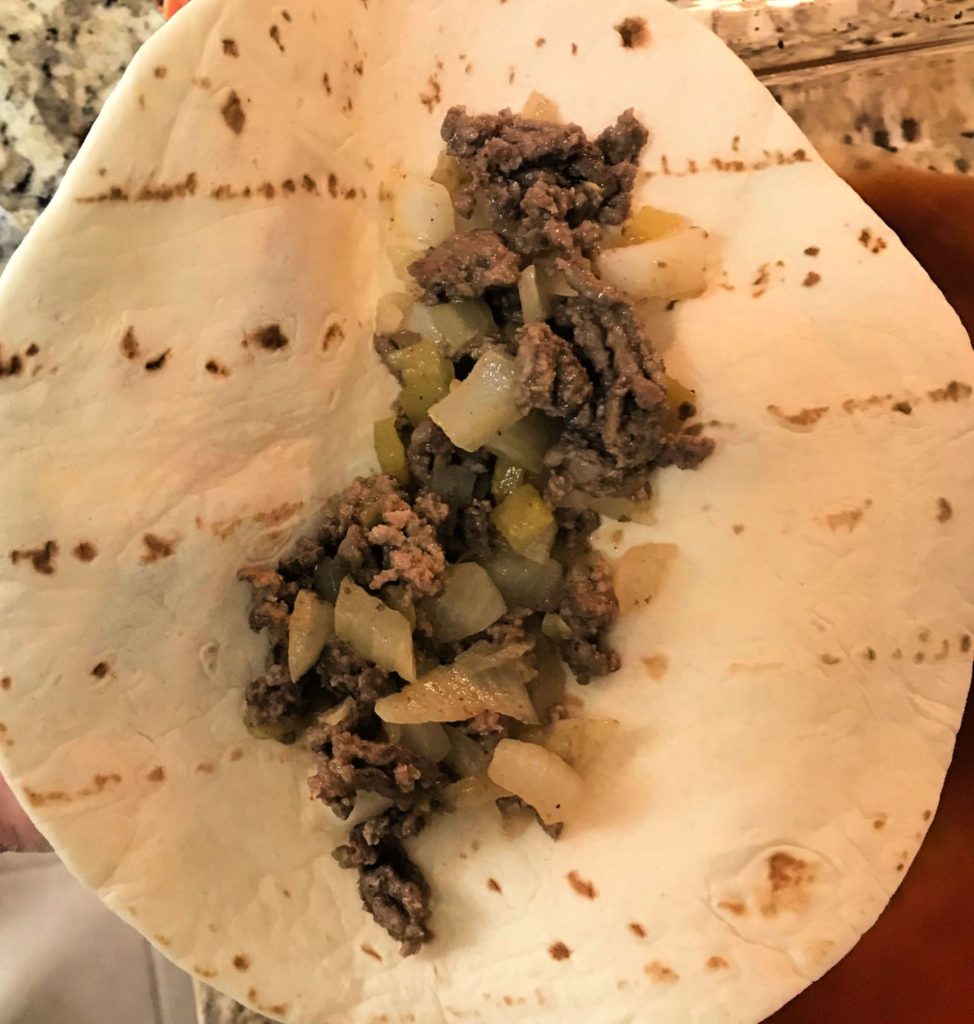
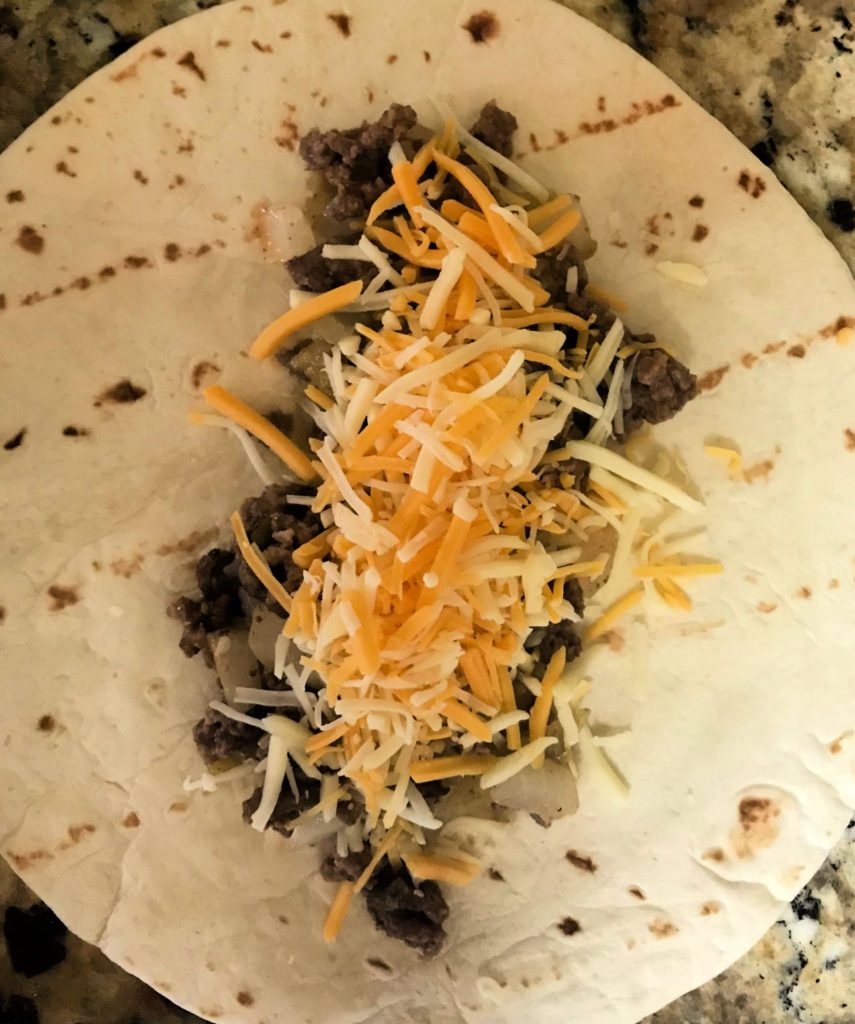
Spoon about 1/3 cup of the ground beef mixture in a straight line in the center of each tortilla.

Spoon beef mixture onto center of the tortilla for beef enchiladas.
Spoon beef mixture onto the center of the tortilla.

Add about 1/4 cup of the shredded cheese on top of the beef mixture and roll up tightly.

Top beef mixture with cheese for beef enchiladas.
Add about 1/3 cup cheese to cover the ground beef mixture.

Lay the rolled enchiladas seam side down in the casserole dish. Repeat with remaining tortillas, filling up the dish. If you have any beef mixture left over, just sprinkle it over the top of the rolled enchiladas.

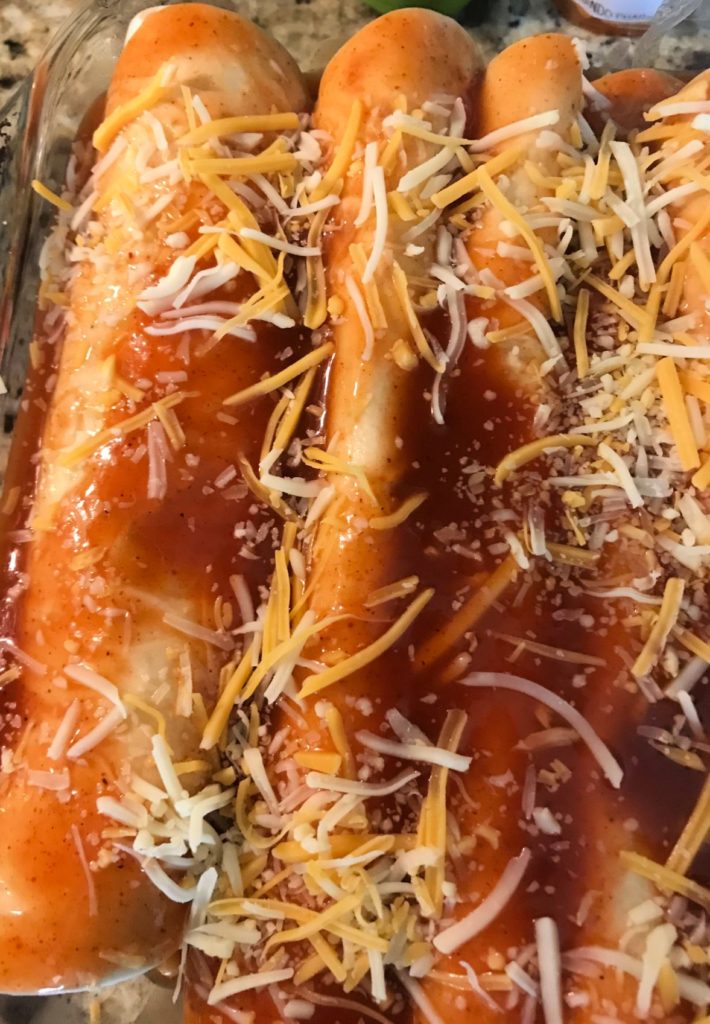
Pour the rest of the enchilada sauce over the top of the tortillas, making sure to spread it evenly to coat each tortilla.

Pour the remaining red enchilada sauce over the beef enchiladas.
Pour the remaining red enchilada sauce on and spread to cover before adding cheese.

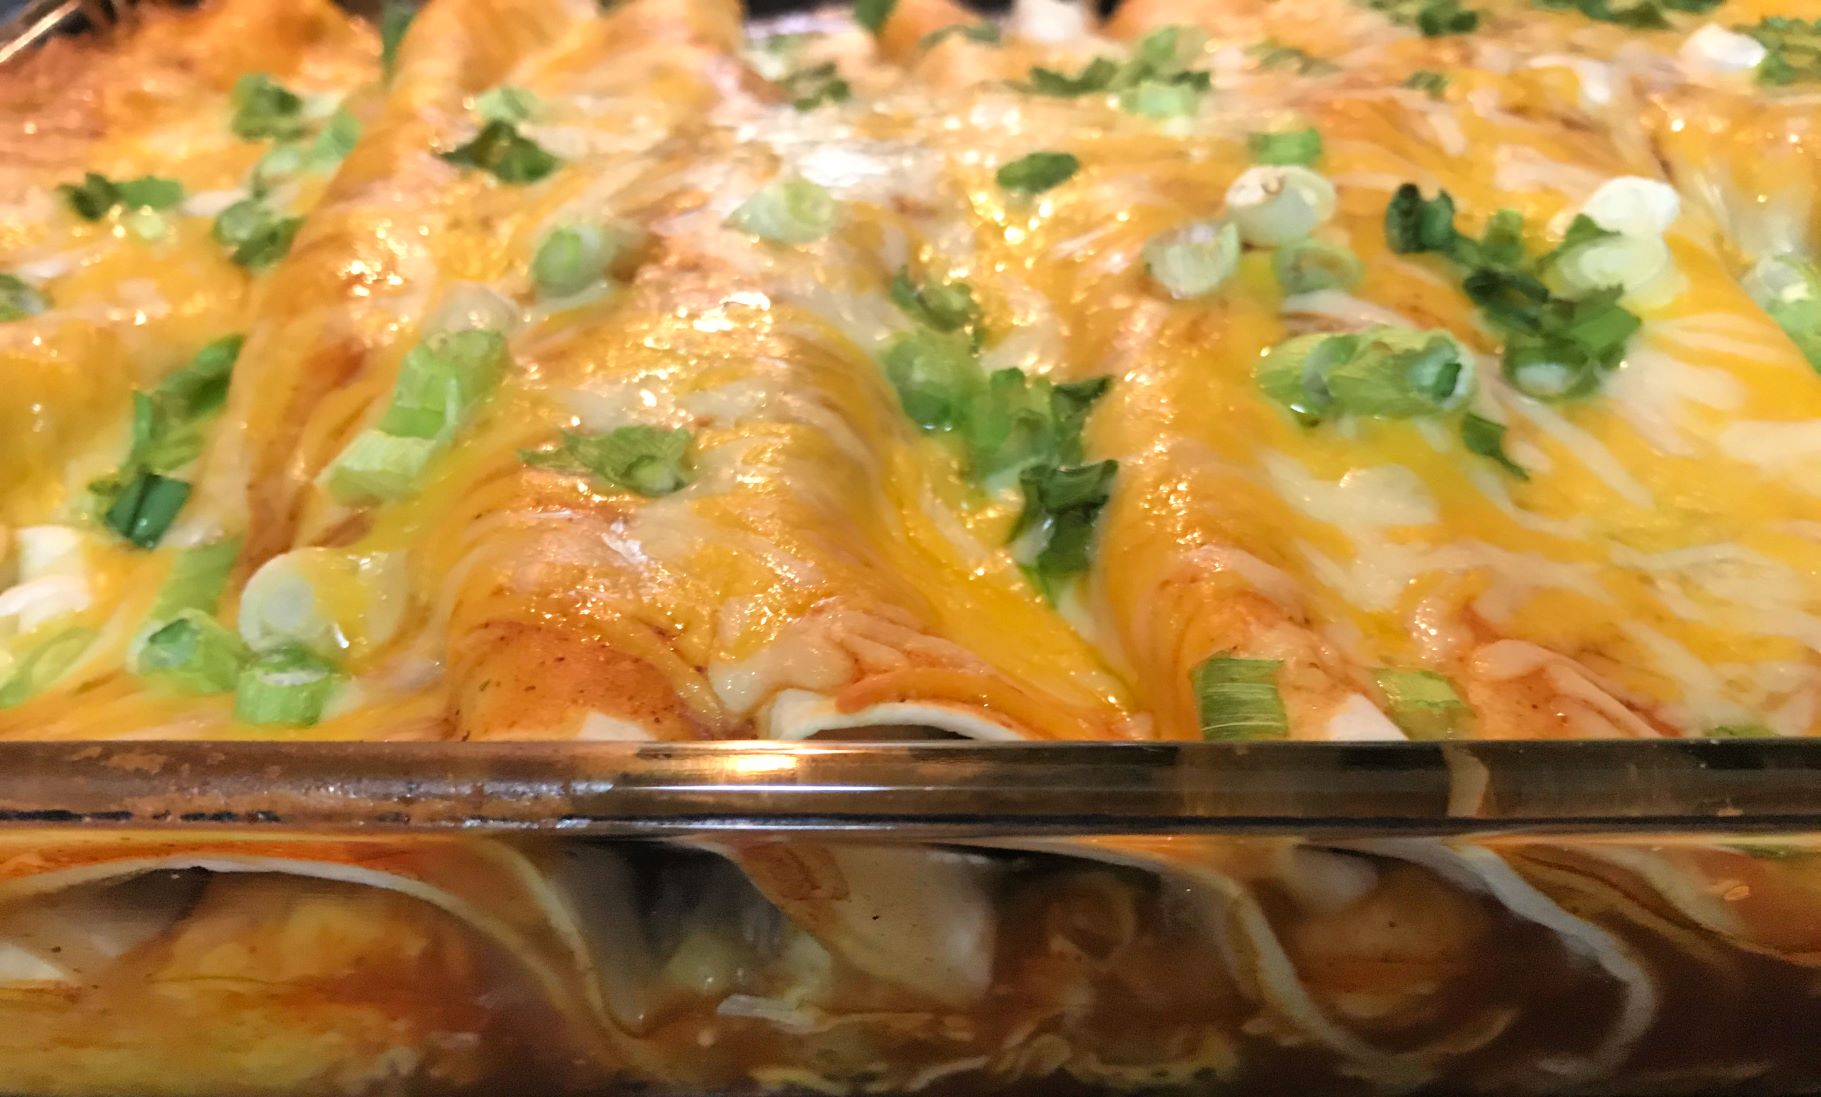
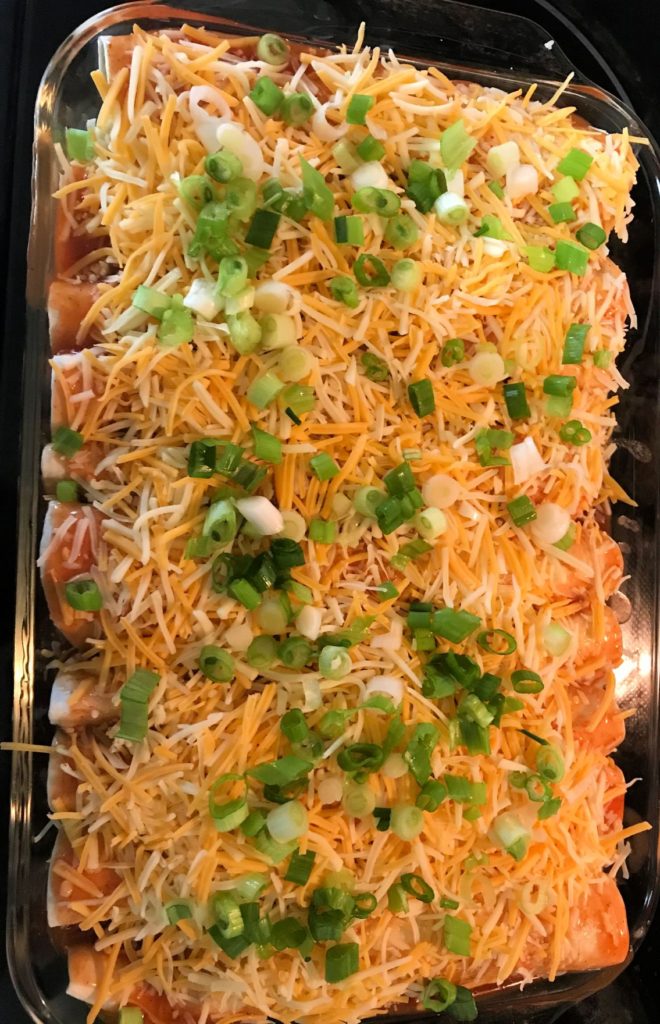
Sprinkle all of the remaining cheese over the top of the tortillas. Top with diced green onions if desired.

Sprinkle cheese and diced green onions on top of beef enchiladas.
I like to sprinkle diced green oinions on top before baking. I think it makes it look fancy. 🙂

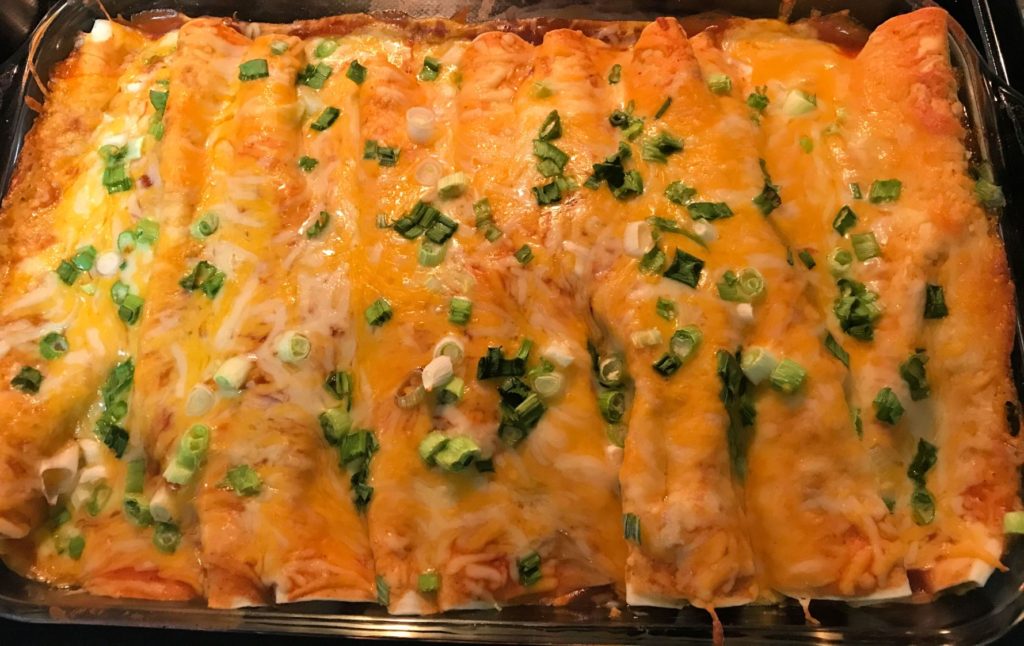
Bake for 25 minutes or until the center is bubbly.

Bake beef enchiladas until cheese is fully melted.
Cheese should be fully melted, and the edges of the tortillas should be crispy.

Top with your favorite toppings and enjoy!

Add sour cream to beef enchiladas.
A dollop of sour cream adds nice flavor.

Easy Beef Enchiladas

Easy and delicious! These enchiladas are filled with seasoned beef, onions, and cheese, then topped with your favorite Mexican toppings.
Prep Time25 minutes
Cook Time25 minutes
Total Time50 minutes
Course: Main Course
Cuisine: Mexican
Servings: 8
Calories: 215kcal
Author: Cindy Baker

Ingredients

  • 1 pound ground beef
  • 3/4 white onion diced
  • 1 4.5 oz. can chopped green chilies
  • 2 1/2 cups red enchilada sauce
  • 1/4 cup water
  • 1 envelope taco seasoning
  • 8 – 10 soft taco sized tortillas corn or flour
  • 16 oz. Mexican style cheese shredded
  • 8 oz. sour cream (optional topping)
  • 3 green onions diced (optional topping)

Instructions

  • Preheat oven to 375 degrees F.
  • Brown the ground beef and onion in a skillet over medium heat until beef is crumbled up and no longer pink. Drain fat and return skillet to stove top.
  • Add in the chopped green chilies, taco seasoning, and water. Stir until combined and the water is absorbed. Remove from the heat.
  • Cover the bottom of a 9×13" casserole or baking dish with enchilada sauce (1/4 – 1/2 of the sauce) to evenly coat the bottom of the dish. Reserve the remaining sauce for later.
  • Spoon about 1/3 cup of the ground beef mixture in a straight line in the center of each tortilla.
  • Add about 1/4 cup of the shredded cheese on top of the beef mixture and roll up tightly.
  • Lay the rolled enchiladas seam side down in the casserole dish. Repeat with remaining tortillas, filling up the dish. If you have any beef mixture left over, just sprinkle it over the top of the rolled enchiladas.
  • Pour the rest of the enchilada sauce over the top of the tortillas, making sure to spread it evenly to coat each tortilla.
  • Sprinkle all of the remaining cheese over the top of the tortillas. Top with diced green onions if desired.
  • Bake for 25 minutes or until the center is bubbly.
  • Top with your favorite toppings and enjoy!

Nutrition

Calories: 215kcal
Slow Cooker Salsa Chicken

This is one of the easiest recipes ever, and yet it is so delicious and can be served in so many different ways. So this week we’re traveling with our taste buds again. This time to Mexico!

This post contains affiliate links, and I may earn commission when you click these links at no additional cost to you. All opinions are my own.

This chicken is so tender and juicy it just falls apart as it soaks in the flavors of salsa and taco seasoning. It is one of those meals that takes only a few minutes to prepare, then you just walk away and let it cook in the slow cooker all afternoon while you do other things.

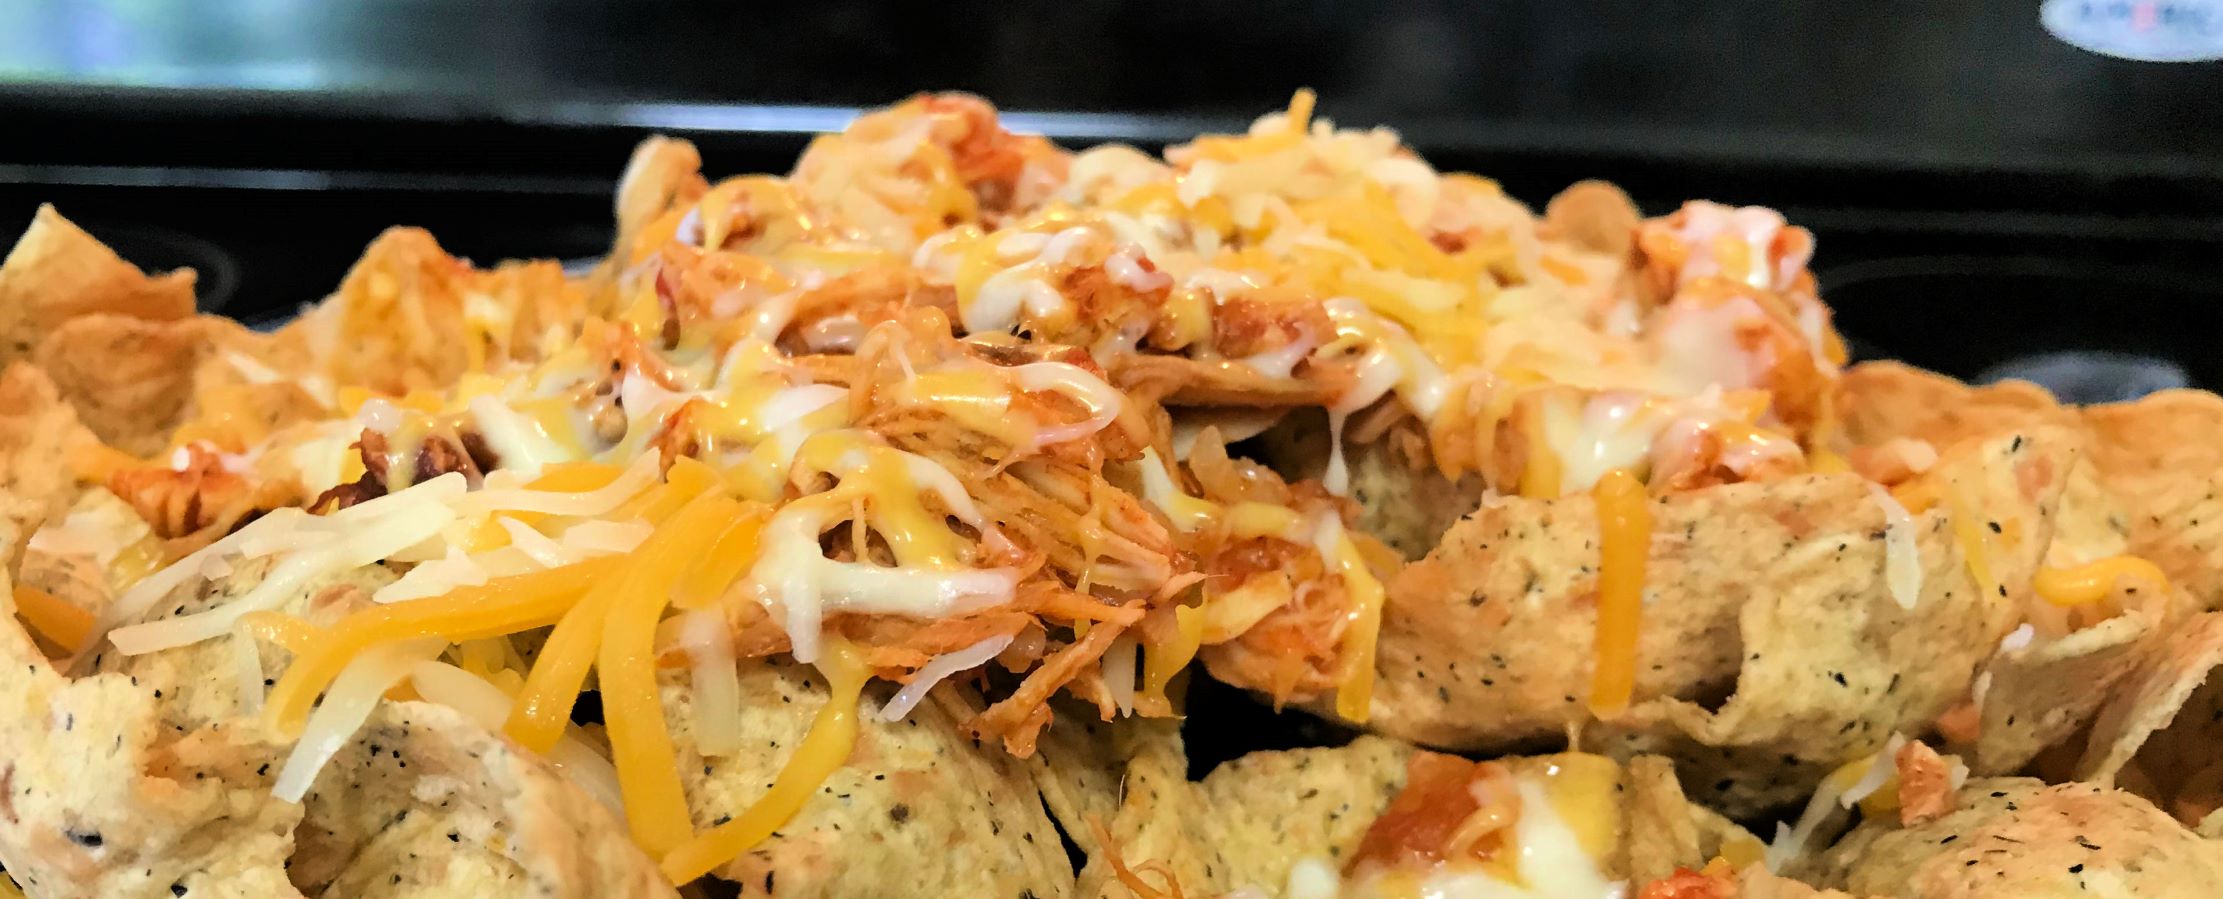
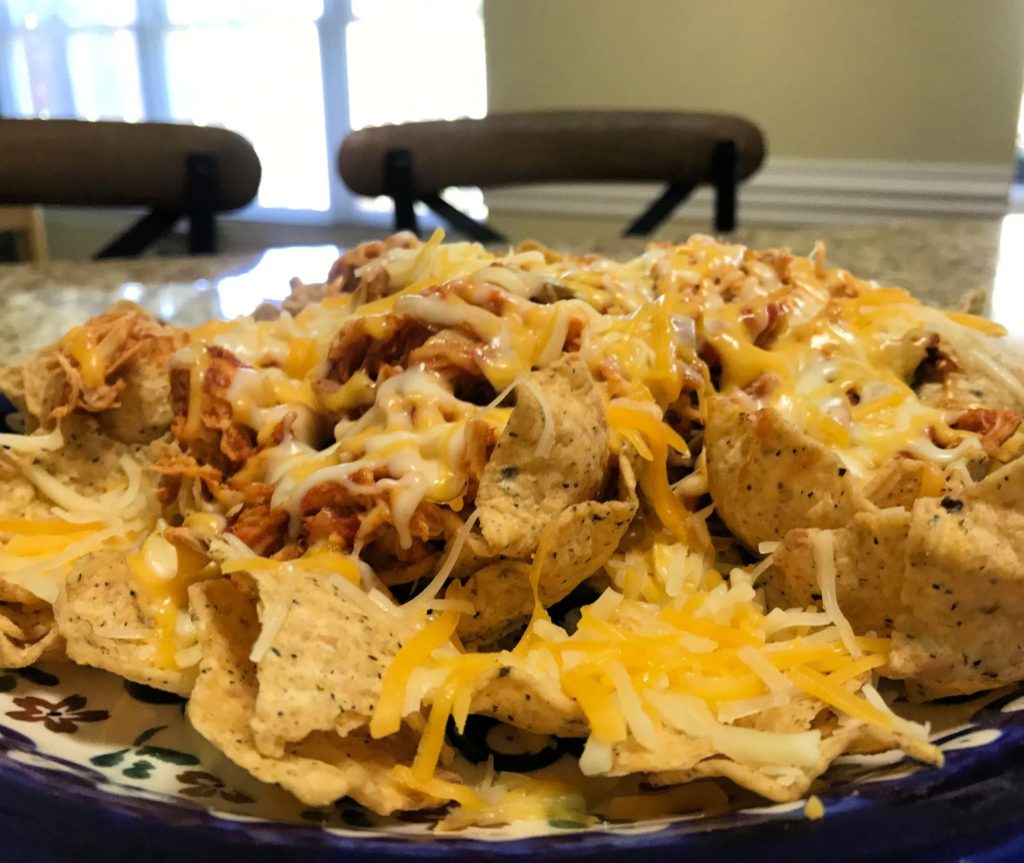
It is easy to shred, because it becomes very tender in the salsa. It can be served over rice with or without cheese, in tacos or lettuce cups, or my favorite: chicken nachos! Spritz a little lime juice on it right before serving, and you have yourself a perfect crowd pleaser for a meal or appetizer. Just in time for Cinco de Mayo too!

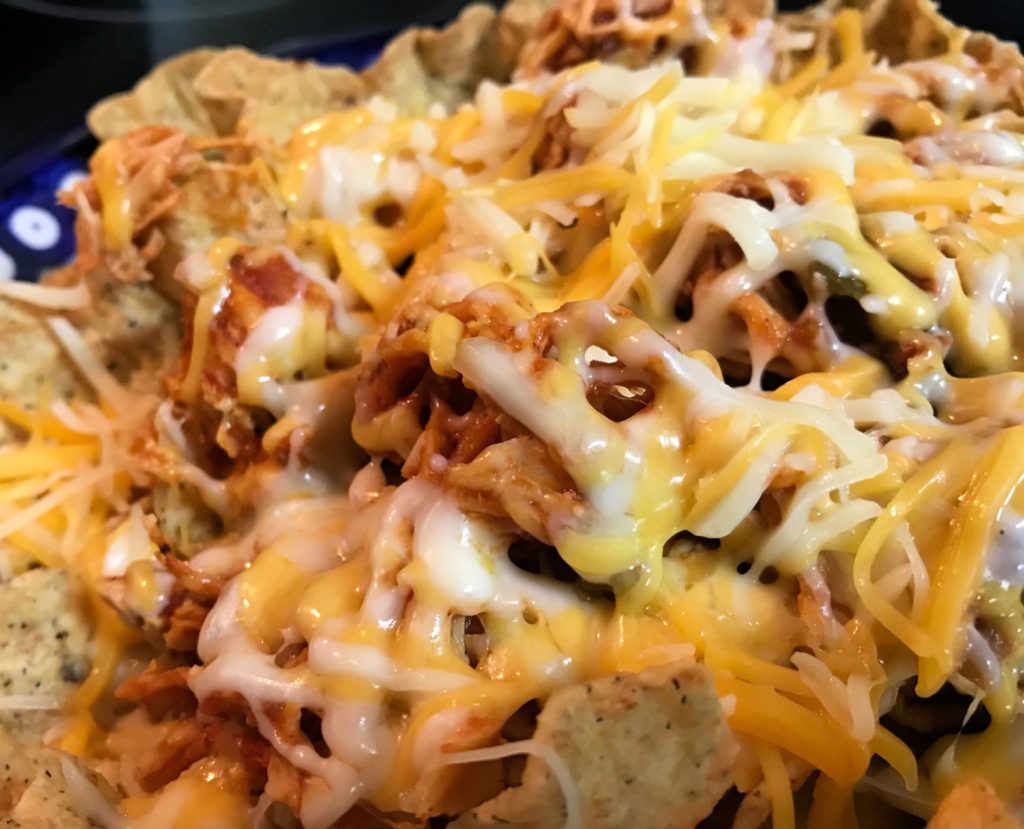
Slow cooker salsa chicken makes great chicken nachos.
Slow cooker salsa chicken makes great chicken nachos!

Here’s How to Make It:

Ingredients

2 – 4 boneless, skinless chicken breasts (I used 2 in my pictures. You may want to adjust the amount of salsa to taste. We like a lot!)

1 envelope taco seasoning (mild or hot)

1 16 oz. jar or larger of chunky salsa

1 cup Mexican style blend shredded cheese for topping

Instructions

1. Place the chicken breasts in the slow cooker.

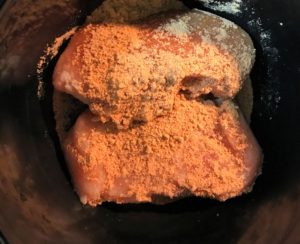
2. Sprinkle taco seasoning over all sides of the chicken.

3. Pour half the jar of salsa over the chicken.

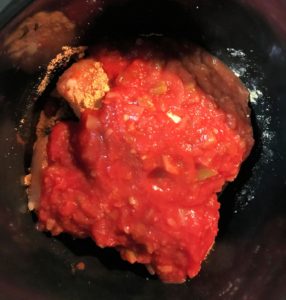
Sprinkle taco seasoning over the chicken breasts.
Sprinkle the taco seasoning over the chicken breasts first.
Then pour half the jar of salsa on top.

4. Cover and cook on high 3 hours (or on low 6 hours).

5. Shred the chicken in the slow cooker.

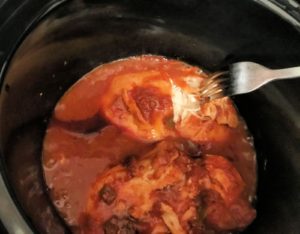
The chicken will fall apart and be easy to shred.
The chicken will be falling apart and very tender, making it shred easily.
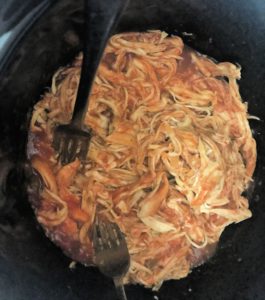
Use two forks to shred the chicken in the slow cooker.
You will not need to remove the chicken to shred it.
Using two forks, you can just shred it right in the slow cooker.

6. Pour the remaining salsa over the chicken and toss to coat. Cook 10 more minutes before serving to heat the salsa.

Serve over rice, in tacos, in lettuce cups, or as a nacho plate. Let me know if you try this and how it turned out. I think you will really like how easy it is.

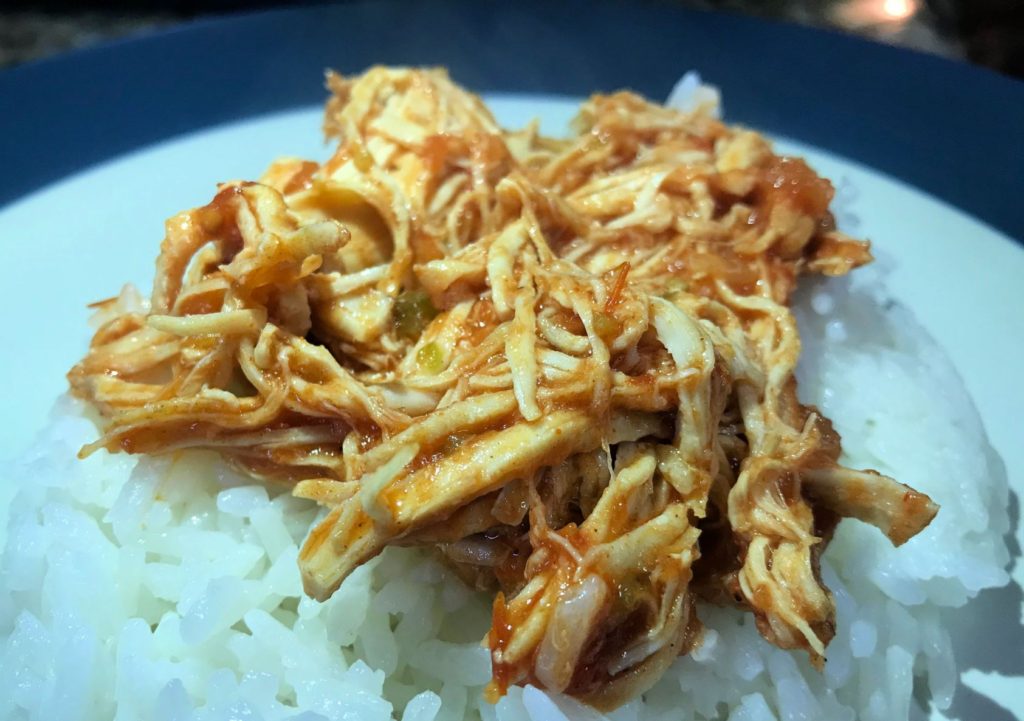
Salsa chicken can be served over rice.
There are so many different ways you can serve salsa chicken.
Salsa chicken makes great chicken nachos
My favorite way to serve salsa chicken is a chicken nacho plate as an appetizer or meal.

Slow Cooker Salsa Chicken

Easy fall apart Mexican chicken you can serve on rice or nachos
Prep Time5 minutes
Cook Time3 hours
After cooking, shred the chicken and pour on remaining salsa and cook 10 more minutes10 minutes
Total Time3 hours 15 minutes
Course: Appetizer, Main Course
Cuisine: Mexican
Keyword: quick, easy, Mexican, slow cooker,chicken recipes,easy dinner recipes
Servings: 6
Calories: 235kcal
Author: Cindy Baker
Cost: $5

Equipment

  • Slow Cooker

Ingredients

  • 2 – 4 boneless skinless chicken breasts
  • 1 envelope Taco seasoning mix
  • 1 16 oz. jar Chunky tomato salsa
  • 1 cup Mexican style blend shredded cheese

Instructions

  • Place the chicken breats in the slow cooker.
  • Sprinkle taco seasoning mix on both sides of the chicken breasts.
  • Pour half of the jar of salsa over the chicken.
  • Cover and cook on high for 3 hours (or on low for 6 hours).
  • Use two forks to shred the chicken in the slow cooker.
  • Pour in the rest of the jar of salsa and toss to coat.
  • Cook 10 more minutes to heat the newly poured salsa.
  • Serve on rice, in tacos, or on nachos with melted cheese.

Nutrition

Calories: 235kcal
Buttermilk Biscuits

If you are from the South like me you probably are a fan of biscuits. Growing up my mom used to make homemade biscuits “from scratch,” and they were so good! She has done it so many times that after awhile she did not even have to look at the recipe any more.

Hot Flaky Homemade Buttermilk Biscuits
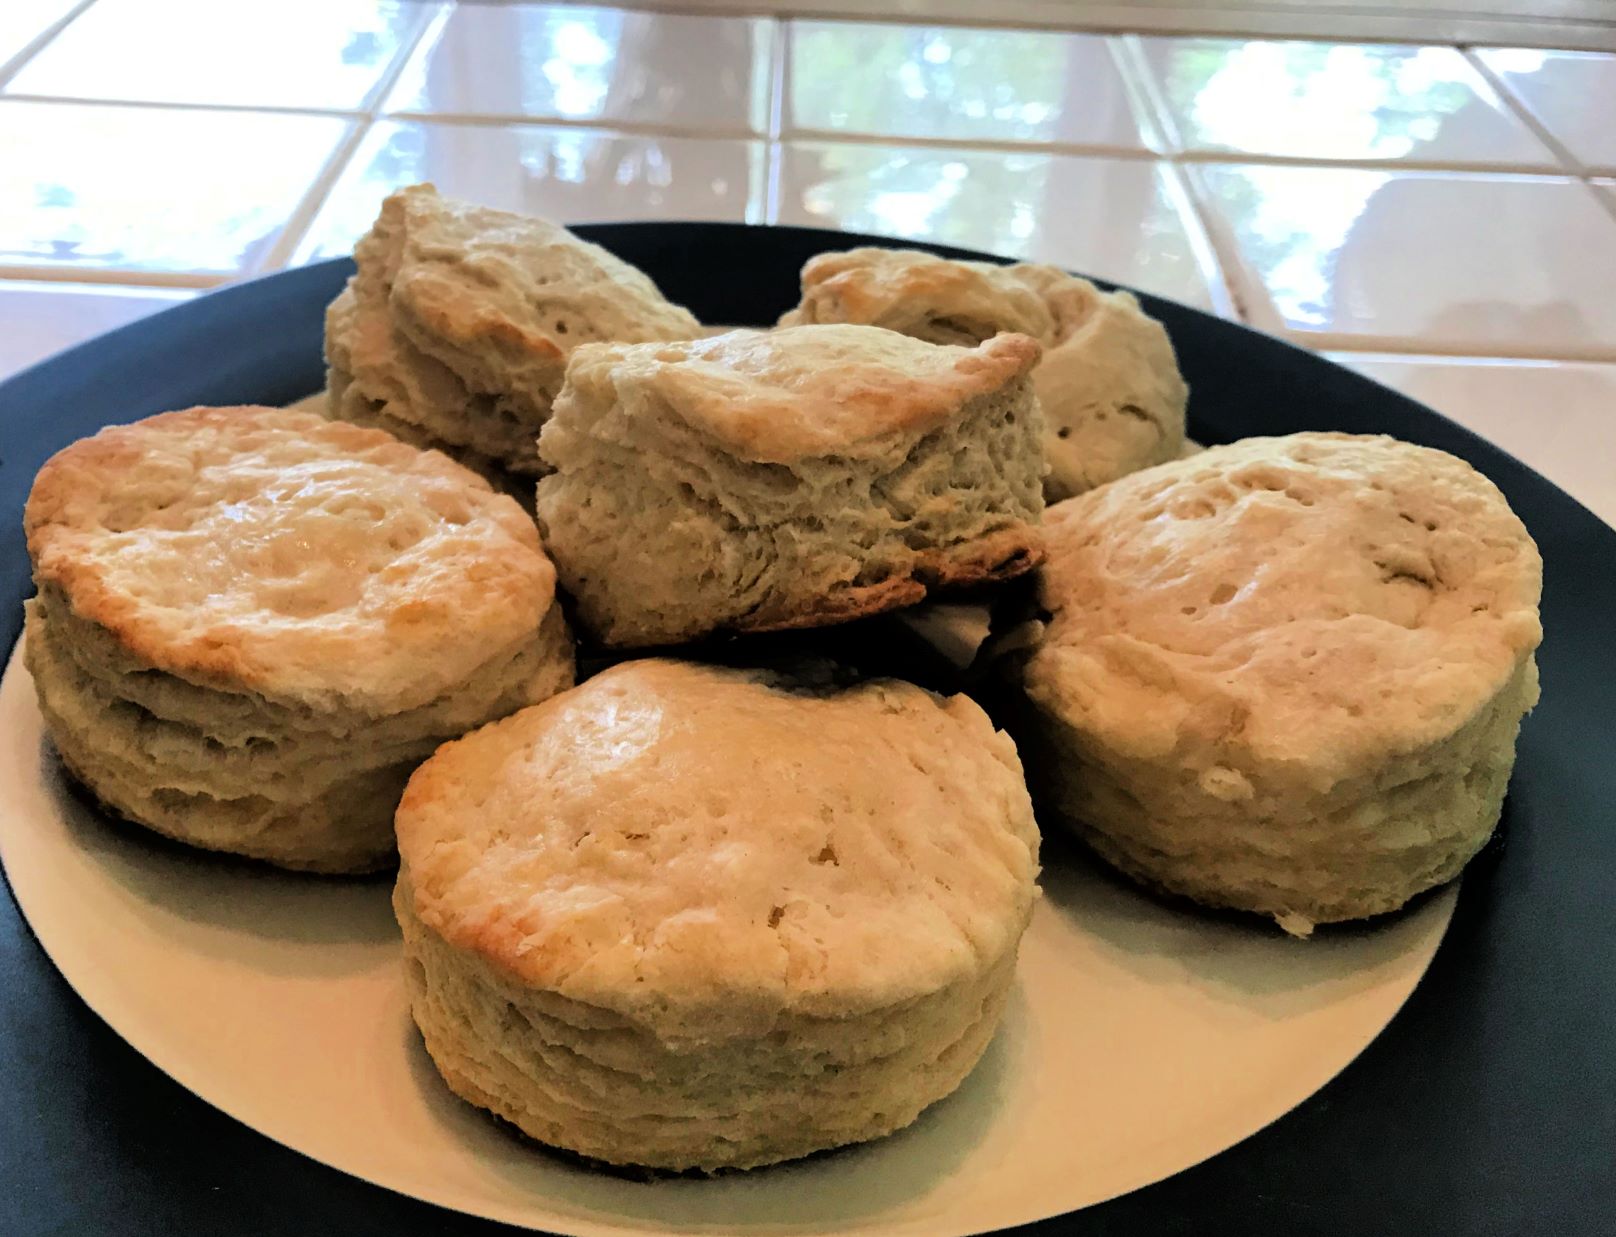
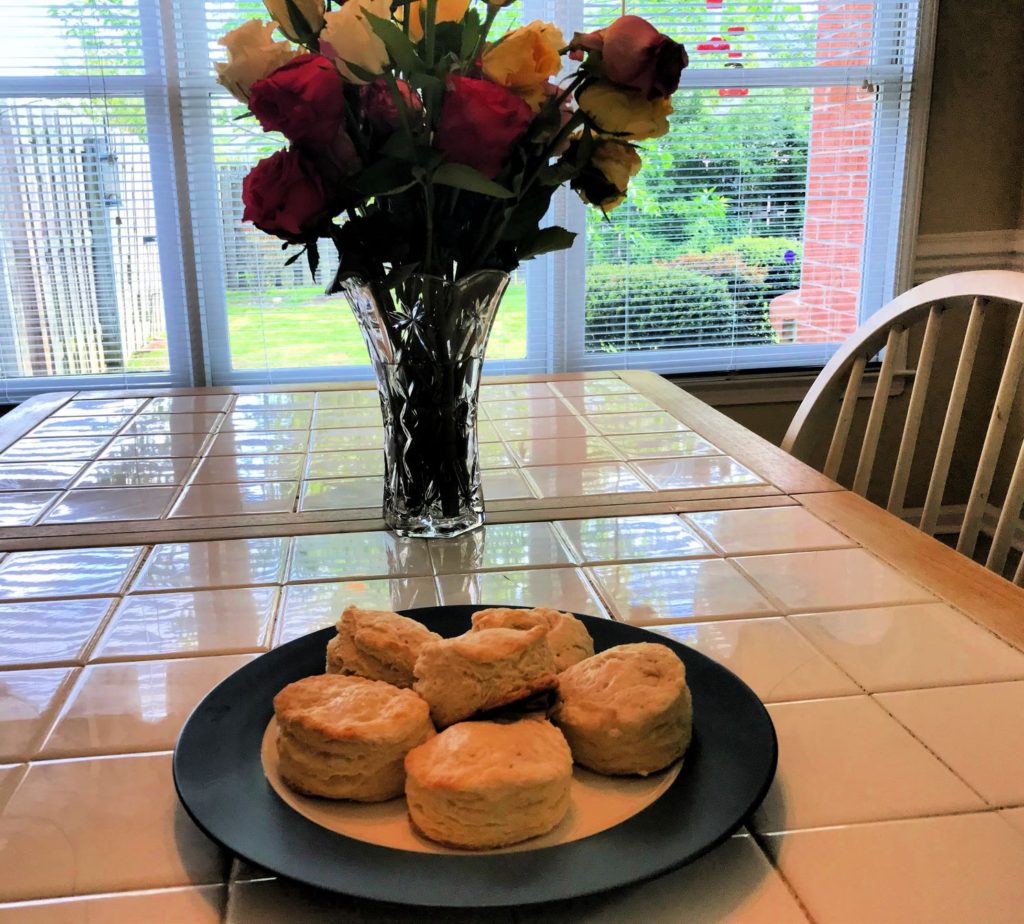
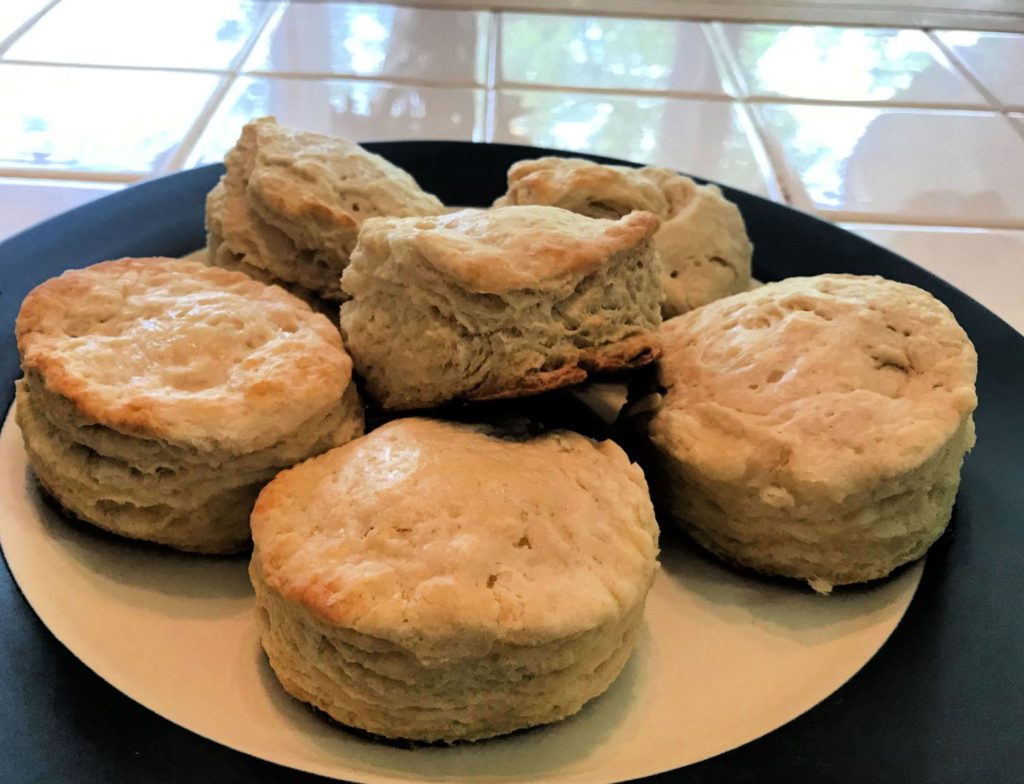
A plate of hot buttermilk biscuits looks good on any table.

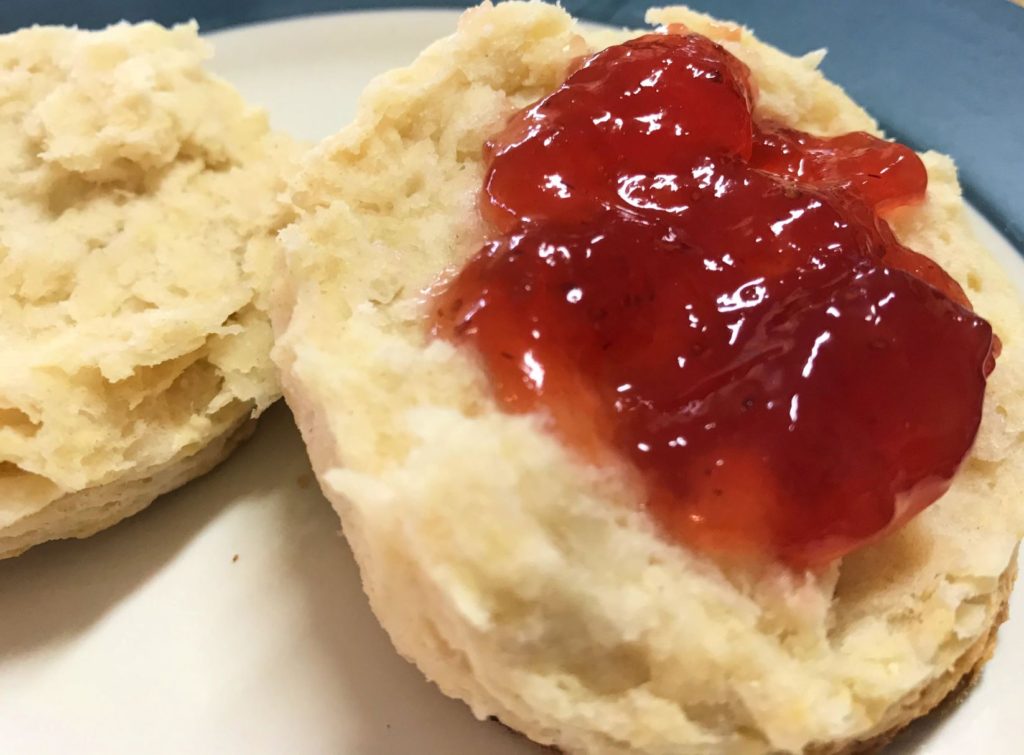
One of my favorite kind of biscuits is homemade buttermilk biscuits. The kind from the can or frozen biscuits are OK if you don’t have time to make your own, but none of those can compare to the fresh goodness of hot, flaky, buttery homemade buttermilk biscuits. Topped with strawberry jam or some good honey ham and your taste buds will be in heaven!

Hot Flaky Homemade Buttermilk Biscuits
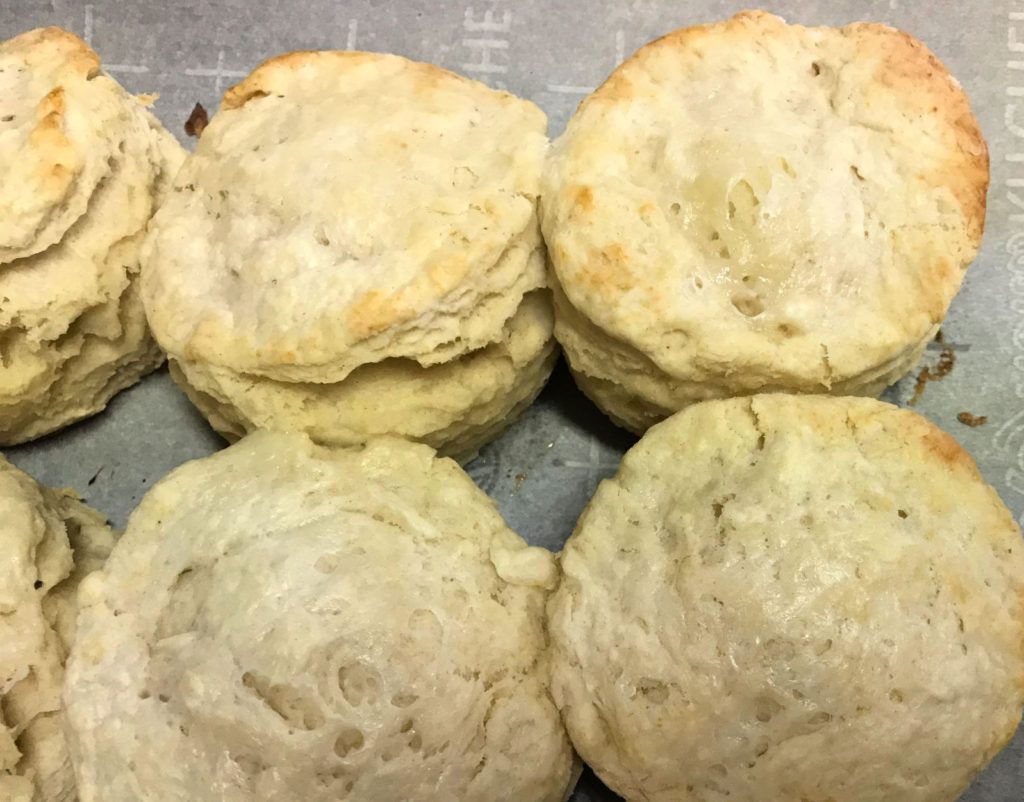
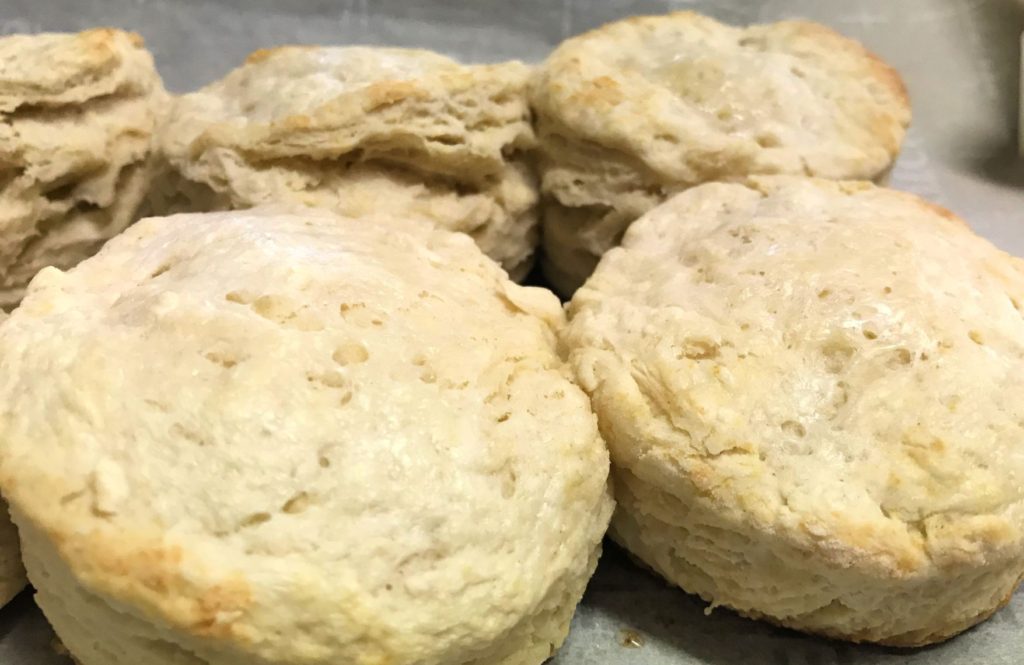
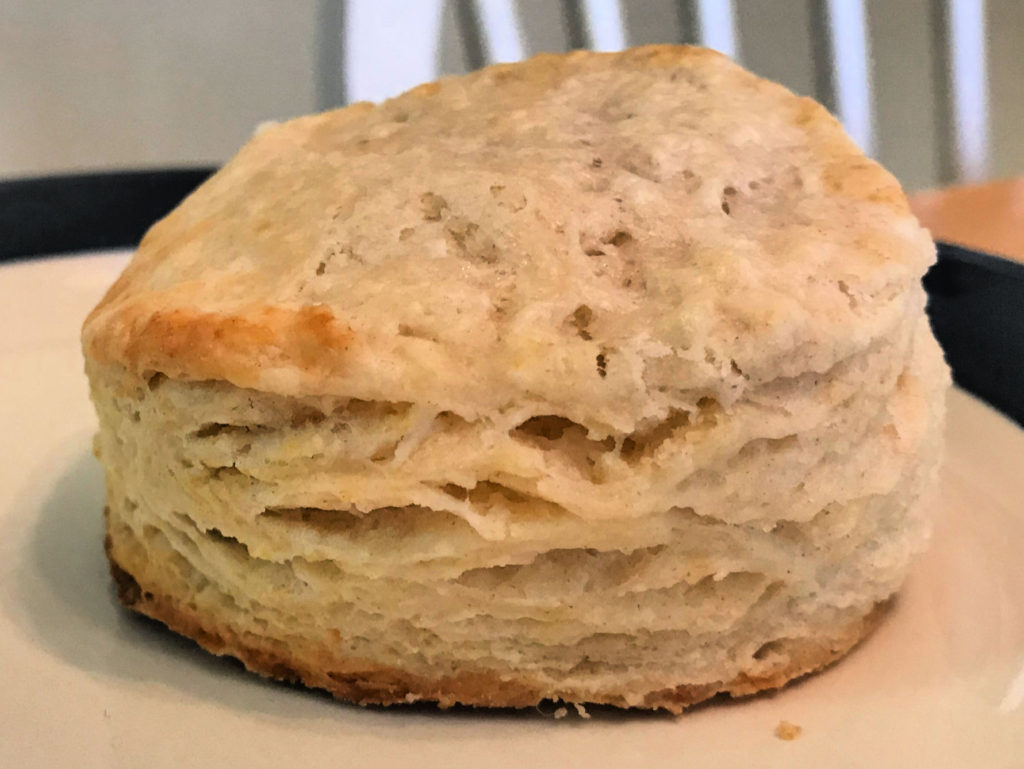
As they bake you can see the hot flaky layers form.

This biscuit recipe is not difficult at all, but it does take about half an hour from start to finish. I made the ones in the pictures on a Saturday morning when we had more time to enjoy our breakfast.

But biscuits are not just great for breakfast. We had biscuits the other night with spicy jumbalya. The biscuit helped cool down some of that hot spice in my mouth, and it made a perfect pairing. Biscuits with shrimp or fried chicken is also good.

Hot Flaky Homemade Buttermilk Biscuits
Buttermilk Biscuits make a great side dish.

A hot biscuit with a little butter and jam and a good cup of coffee in mid afternoon can keep me going until dinner time. Maybe that is why the Brittish like tea and biscuits in the afternoon. Anyway, you will find this recipe fairly easy to follow. I hope you enjoy them!

Hot Flaky Homemade Buttermilk Biscuits
Buttermilk Biscuits with Strawberry Jam

Ingredients

  • 2 cups all-purpose flour, leveled and spooned
  • 1/4 tsp baking soda
  • 1 Tbs baking powder
  • 1 tsp salt
  • 2 tsp sugar
  • 3/4 cup cold buttermilk, plus some extra to brush on top
  • 6 Tbs cold unsalted butter, cubed

Directions

First, preheat the oven to 450 degrees F.

Line a large baking sheet with parchment paper.

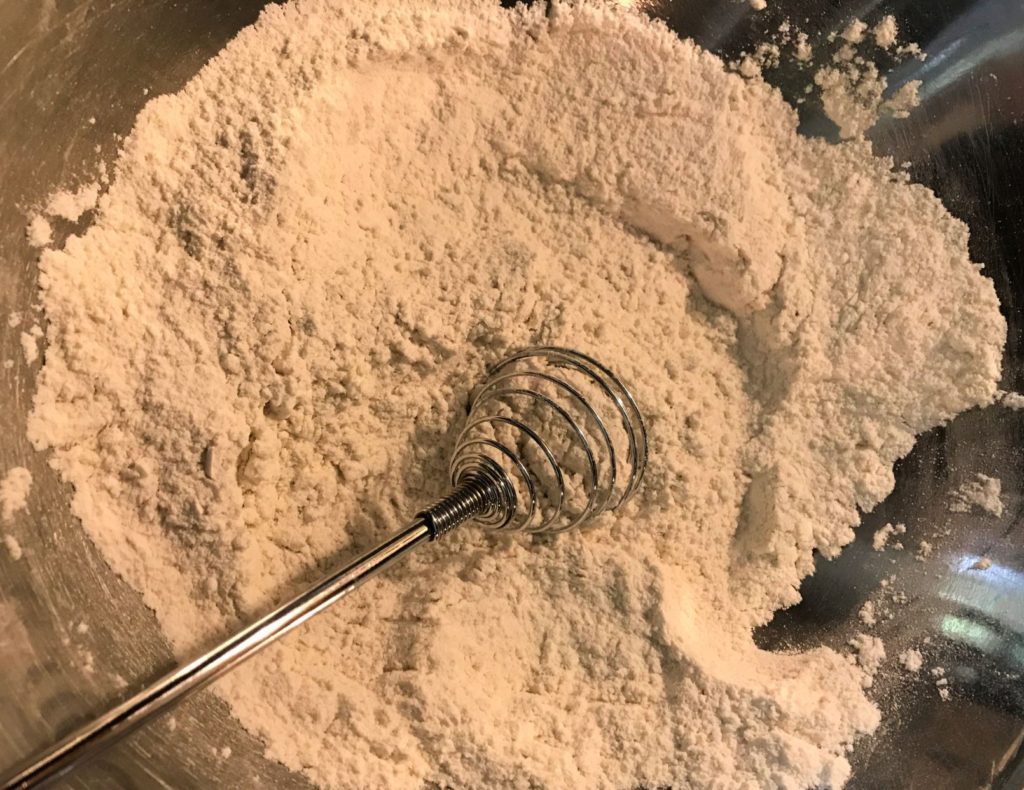
In a large mixing bowl, whisk together the flour with the other dry ingredients.

How to Make Hot Flaky Homemade Buttermilk Biscuits
Using a whisk helps distribute the dry ingredients evenly.

Using a pastry cutter or a fork cut the butter cubes into the flour mixture until the butter is in tiny little balls. A food processor can also be used. Honestly, I just used a fork for the ones pictured in this post and it worked fine. Also the butter should not be left out of the refrigerator. Make sure it is cold and not soft.

Pour the cold buttermilk in and gently stir until a dough starts to form. Just like the butter make sure you do not leave the buttermilk out while you are following the other steps. Make sure it is cold.

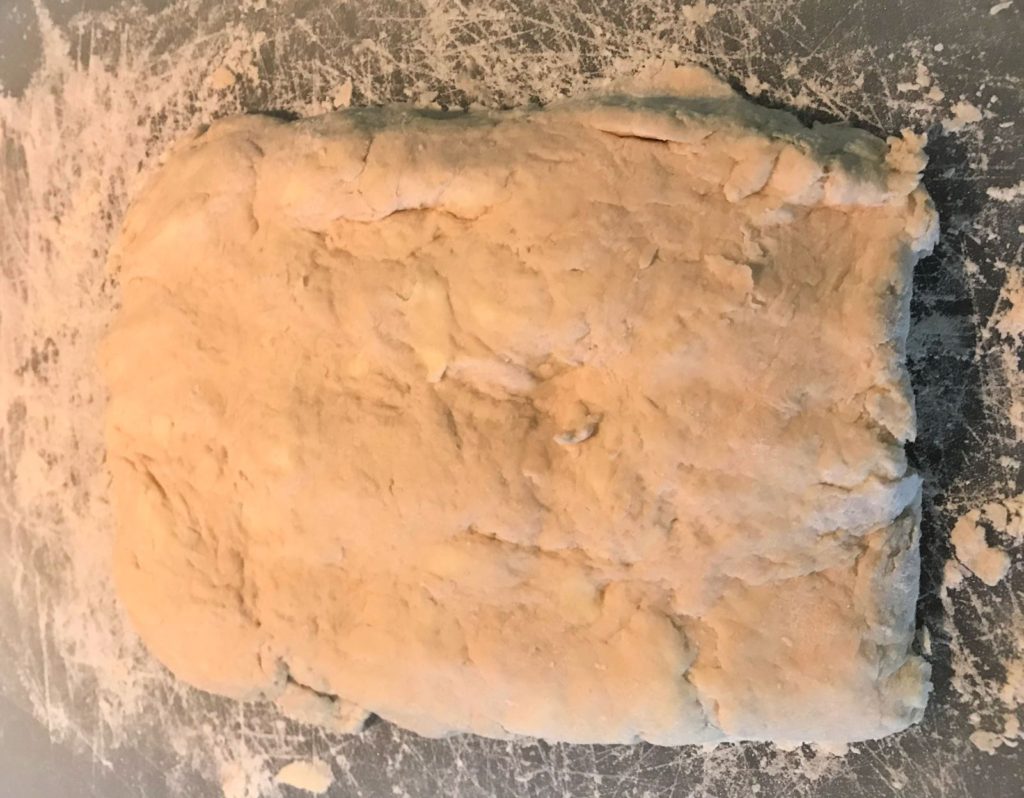
Place the dough on a lightly floured surface and gently work it with your hands to distribute all the ingredients. Pat the dough down down flat (you do not need to use a rolling pin) and fold it in thirds. Turn the dough and flatten again. Repeat this process two more times.

How to Make Hot Flaky Homemade Buttermilk Biscuits
The dough will be thick. Make sure you don’t overwork it.

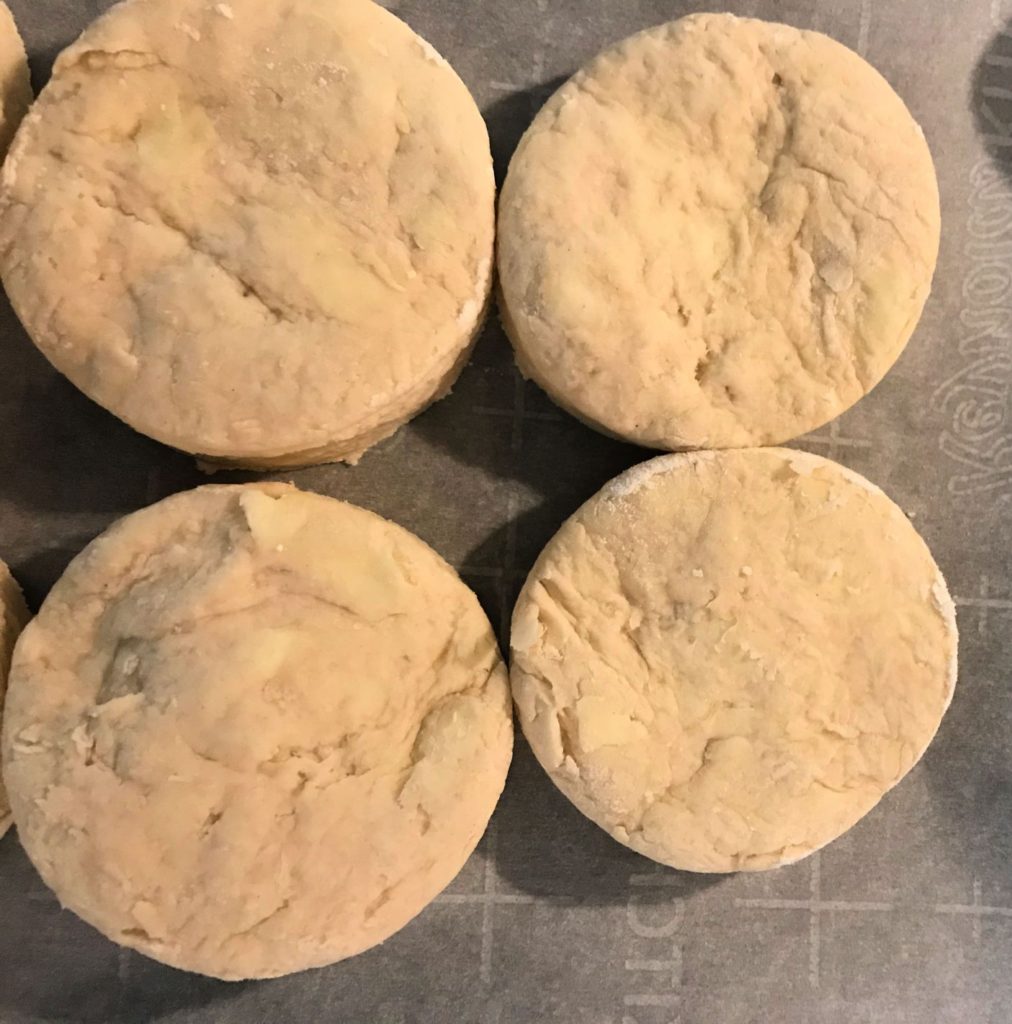
Pat the dough down into a thick rectangle (about 1/2 inch thick – I actually measured mine). Using a floured 2 1/2 inch biscuit cutter, cut the biscuits out of the dough. Gather any scraps and continue flattening and cutting the dough until you have approximately 8 – 12 biscuits. Try to get as many as you can cut the first go around so as to not overwork the dough and make it tough or have too much flour in it.

Line the biscuits up on the baking sheet so that they are touching each other. Brush a little bit of buttermilk on the tops of the biscuits.

How to Make Hot Flaky Homemade Buttermilk Biscuits
Place the cut dough biscuits on the baking sheet to that they are touching each other.

Bake at 450 degrees F for about 15 – 17 minutes or until the biscuits are lightly golden brown on top. Remove the biscuits from the oven and allow them to cool 1 – 2 minutes. Add a little butter and enjoy!

Hot Flaky Homemade Buttermilk Biscuits
Placing them together so that the sides touch helps the dough rise while baking.

Did you try it?

Let me know if you tried this recipe and how it turned out. I did not make this recipe up, but variations of it is found several places on the internet so I don’t know where it originated. If you like it, please share this post and pin it. Thanks for spreading the love!

Hot Flaky Homemade Buttermilk Biscuits
Homemade Flaky Buttermilk Biscuit

Buttermilk Biscuits

Easy and Delicious Hot Flaky Buttery Buttermilk Biscuits from Scratch make a yummy breakfast or side dish. Put a slice of ham in between two halves or top with jam. These will be a hit with any meal!
Prep Time15 minutes
Cook Time15 minutes
Total Time30 minutes
Course: Breakfast, Side Dish
Cuisine: American
Servings: 8 biscuits
Calories: 95kcal

Ingredients

  • 2 cups all-purpose flour leveled and spooned
  • 1/4 tsp baking soda
  • 1 Tbs baking powder
  • 1 tsp salt
  • 2 tsp sugar
  • 3/4 cup buttermilk very cold, plus more for brushing on top
  • 6 Tbs cold unsalted butter cubed

Instructions

  • Preheat oven to 450 degrees F.
  • Line a large baking sheet with parchment paper.
  • In a large mixing bowl, whisk together the flour and other dry ingredients until well combined.
  • Cut in the cold butter cubes until the butter is only small pieces. If you do not have a pastry cutter a fork will work.
  • Pour the cold buttermilk into the mixture and gently stir it until a dough starts to form.
  • Place the dough onto a lightly floured surface and gently work together with your hands until all ingredients are mixed. You do not need to use a rolling pin. Pat the dough flat and fold it in thirds. Repeat this process two more times.
  • Pat the dough into a thick rectangle (about 1/2 inch thick). Using a floured 2 1/2 inch biscuit cutter, cut out the biscuits in the dough.
  • Continue gathering scraps and patting it back down and cutting until you have 8-12 biscuits. Try to cut as many as you can the first time so as not to overwork the dough.
  • Place biscuits on baking sheet so that they are touching each other. Brush a little buttermilk on the top of each biscuit.
  • Bake at 450 degrees for about 15 – 17 minutes or until lightly golden brown on top. Remove from the oven and allow to cool for 1 – 2 minutes. Enjoy!
Nutrition

Calories: 95kcal
Grilled Bratwurst
Travel to Germany
A few of my souveniers from Germany

I love Germany. I lived in the Bavaria region of Germany for four years before I was married. I was working with American students who parents were stationed in the U.S. Army there, and I enjoyed being close to many tourist areas. So you will be hearing a lot more about Germany as soon as I can sort out all those pictures I took (those were the days before smart phone cameras and cloud storage).

Welcome!
Image from Unsplash

Usually when we travel one of the fun things to do is to experience some of the local cuisine. Heck, just going out to eat in general is one of the best parts of traveling. Along with weinerschnitzel and apple strudel, when I think of German food I always think of bratwurst first. There are street vendors in almost every little village selling bratwurst, and most restaurants have it on their menu as well.

This post contains affiliate links, and I may earn a commission if you click on those links at no additional cost to you. All opinions are my own.

Grilled Bratwurst is a great choice for summer cookouts.

Germans are very proud of their country’s many different types of sausages, and some recipes in certain areas of Germany are actually closely guarded secrets. If you travel through Germany, you’ll find that every region has their own particular style of preparing bratwurst. There are variations on size, shape, ingredients, cooking methods, and how it is served. In fact, there are over 45 different versions of bratwurst sausage in Germany! So go put on your best lederhosen and grab your beer stein. We’re going to Germany for bratwurst!
The bear actually looks good in lederhosen.

Bratwurst Trivia Question #1: Where does the name Bratwurst come from?

The German word for fry is braten, but the word Bratwurst actually comes from the word Brat. Brat refers to the meat mixture that makes up the sausage. It means finely chopped meat. Wurst in German means sausage. Now you know.

Bratwurst Trivia Question #2: Who invented the Bratwurst?

Both the people of Franconia (Franken) and the people of Thuringen claim to have invented the Bratwurst. The oldest evidence of the Bratwurst in Thuringen is in 1404, and in Franconia the oldest record is from the year 1313 in one of my favorite German cities: Nurnberg. Heinrich Hollerl, a Bratwurst Researcher (yes, it is a thing), discovered that Bratwurst actually had its origins with the Celtics and the Franconians just developed it further. Now you can impress all your friends with your vast bratwurst knowledge at your next cookout.

So What is Bratwurst?

Originating in Germany in the 14th century, bratwurst (in German the ‘w’ is pronounced like our ‘v’) and what is called Rostbratwurst is a sausage made of finely minced pork and veal or sometimes beef and seasoned with caraway, nutmeg, ginger, or other spices. It is usually grilled then served with sweet German mustard and a piece of bread or hard roll. It can also be sliced and used in various recipes.

Should I buy raw or pre-cooked bratwurst?

Some bratwurst sausages are sold pre-cooked, which means you only have to brown them in a pan or on the grill before serving. Make sure you check with the butcher at your deli to know if it is pre-cooked or not. It is important to know this before you try to prepare them for eating.

But those of us who like to channel our inner European and live on the edge go for cooking the raw ones. Raw bratwurst in the store will be pink in color. Grilling the raw ones requires some skill and care because they must be fully cooked on the inside but not burned or charred on the outside. This is not easy to do. Some people recommend cooking them in hot (but not boiling) water for a few minutes before putting them on the grill or in the pan. But we usually don’t do that.

How do you Cook Bratwurst?

Besides grilling there are lots of different ways to cook bratwurst. Bratwurst sausages can be roasted, boiled, or steamed as well. Brown them in a skillet, add a small amount of water or broth, then cover the pan to let them steam. We like to grill raw bratwurst on our charcoal grill.

On the Grill

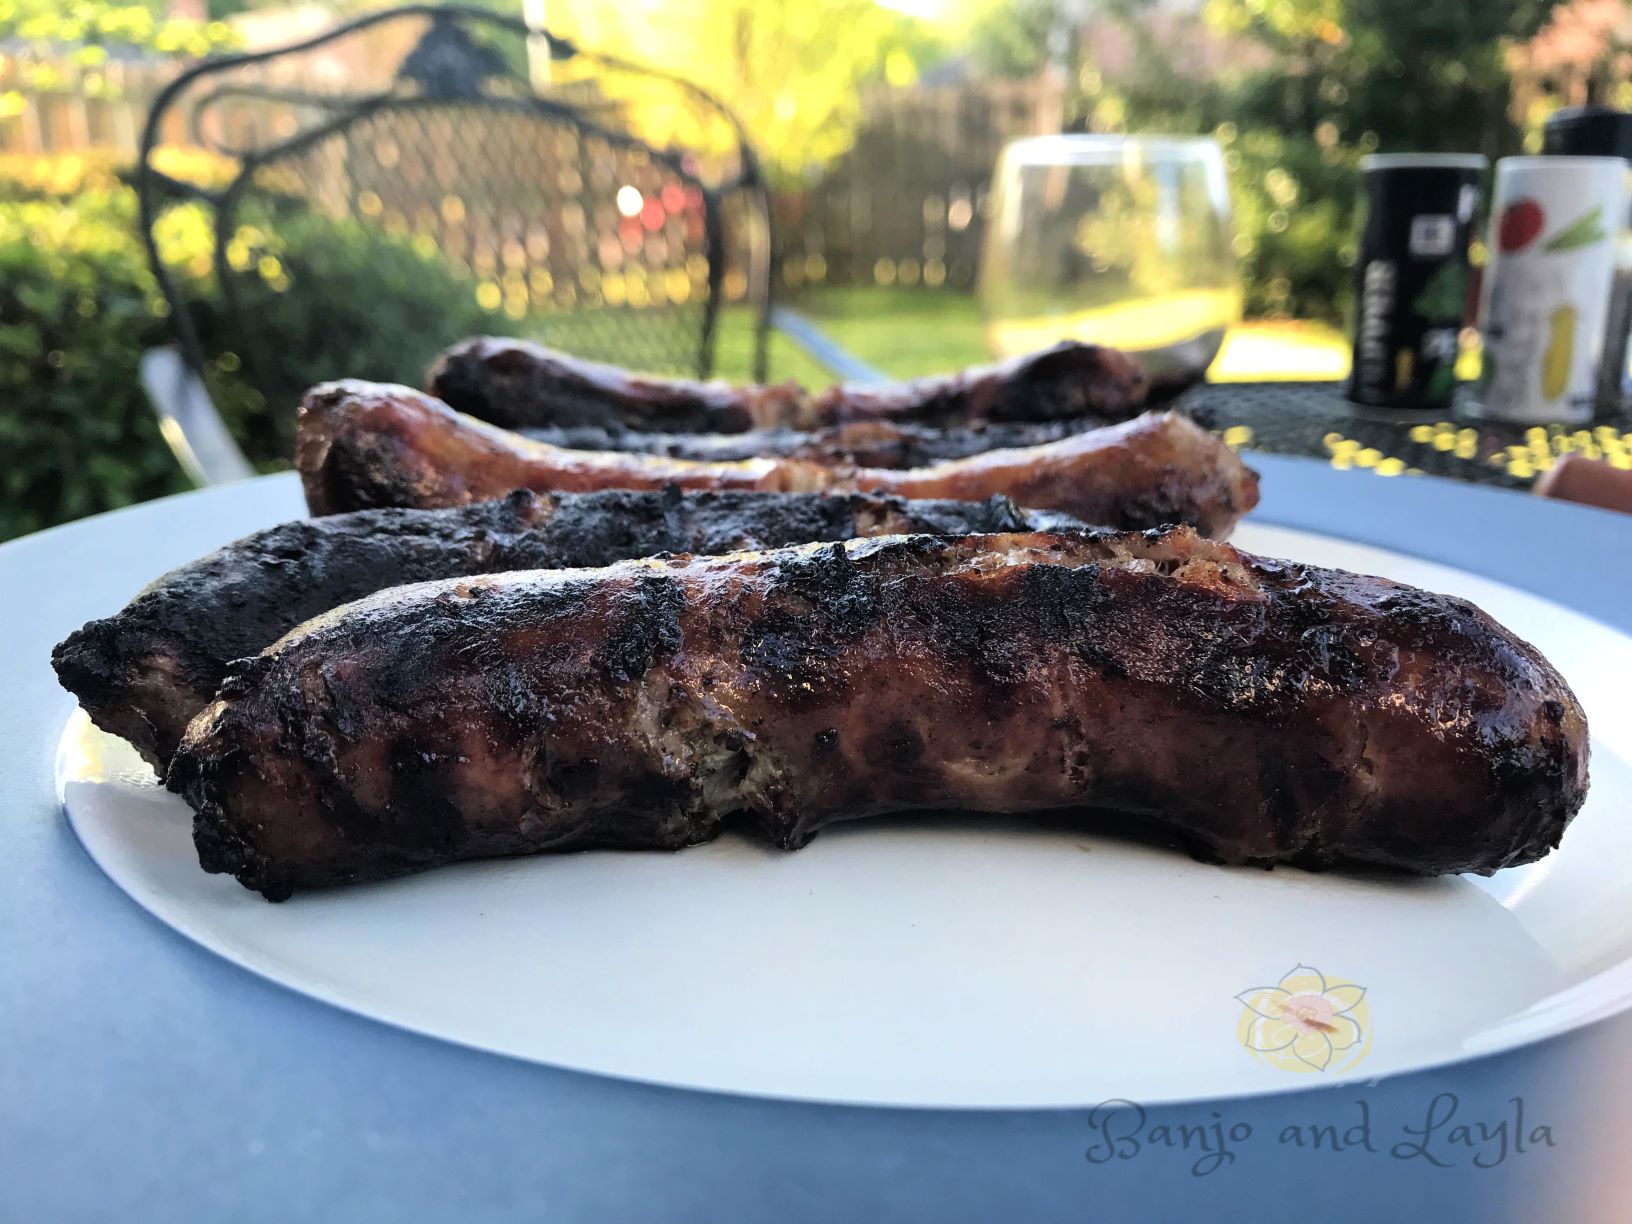
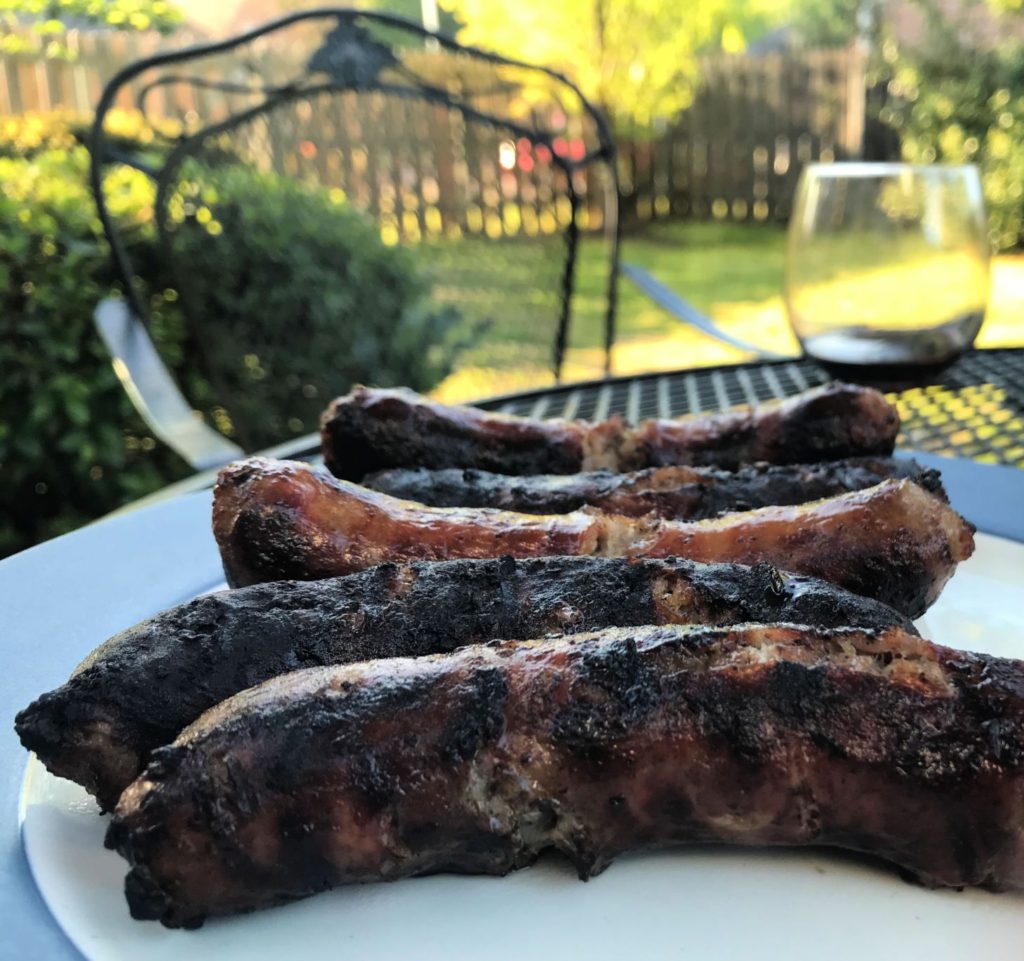
Since my husband is the Grill Master, as I like to call him, he knows a few tricks to grill them perfectly every time. He cuts a few slits in the sausage first, taking care not to cut all the way through. Two or three slits is enough, as you don’t want to let too much juice out. He also says it is important to turn them frequently, especially if they are not over low heat. You can spritz a little water or beer on them occassionally to cool the skin and prevent burning. You will also want to make sure you do not char the outside too much, as that can pose some health risks. After you remove the bratwurst from the heat it will actually continue to cook on the inside a few minutes longer, so make sure to let it rest a few minutes before eating. You might also like my post on how to cook the perfect steak on the grill every time.

Brats With Beer and Onions

Bratwurst is not just for Oktoberfest or SuperBowl parties. It is awesome any time of the year. Another one of my favorite bratwurst recipes involves grilling the brats in a pan. It is super easy. You just slice some yellow onions in thick slices and cook them in a pan in a little butter with some caraway seeds. You can add sliced peppers too if you’d like. Add the bratwurst in and a bottle of pale ale beer or apple cider. Reduce the heat and simmer about 30 minutes, turning the brats occassionally. Add a little salt if desired.

Finish the brats by browning them in the pan with the oinions and liquid removed or on the grill. Add the onions back in and serve brats on a warm crusty bun with grainy mustard (this is the kind they always had in Germany). Some people enjoy sauerkraut with it also, but just the smell of sauerkraut turns my stomach, so I’ll pass on the kraut please. German potato salad might be a better choice.

Hobo Packet Brats

Another easy but delicious way to cook bratwurst is to slice it up and brown it in a pan a little first, then place it in a heavy duty foil bag or packet along with some sliced red potatoes, mushrooms, onions, and carrots. Sprinkle with a packet of onion soup mix (my secret weapon) and a little soy sauce. Seal it up and place it on the grill for an impressive looking cookout dish.

Bratwurst in German Culture

In Germany they have a saying: Alles hat ein Ende nur die Wurst hat zwei. This means “everything has an ending, but the sausage has two.” OK. Not sure I’ll be adding that to my list of proverbs, but it does show you how important sausage is to the German culture.

While reading about bratwurst sausages, I learned that brats are also a very big deal in Wisconsin. Are any of you readers from Wisconsin? I would love to read about your favorite ways to prepare bratwurst as we “travel” to Germany through our tastebuds. Leave your comments below. Prost!

The “Grill Master” of the Baker house shows us to how to grill German Bratwurst.

I Recommend: The travel book I relied on the most when I lived in Germany was called “Day Trips in Germany.” I highly recommend it.