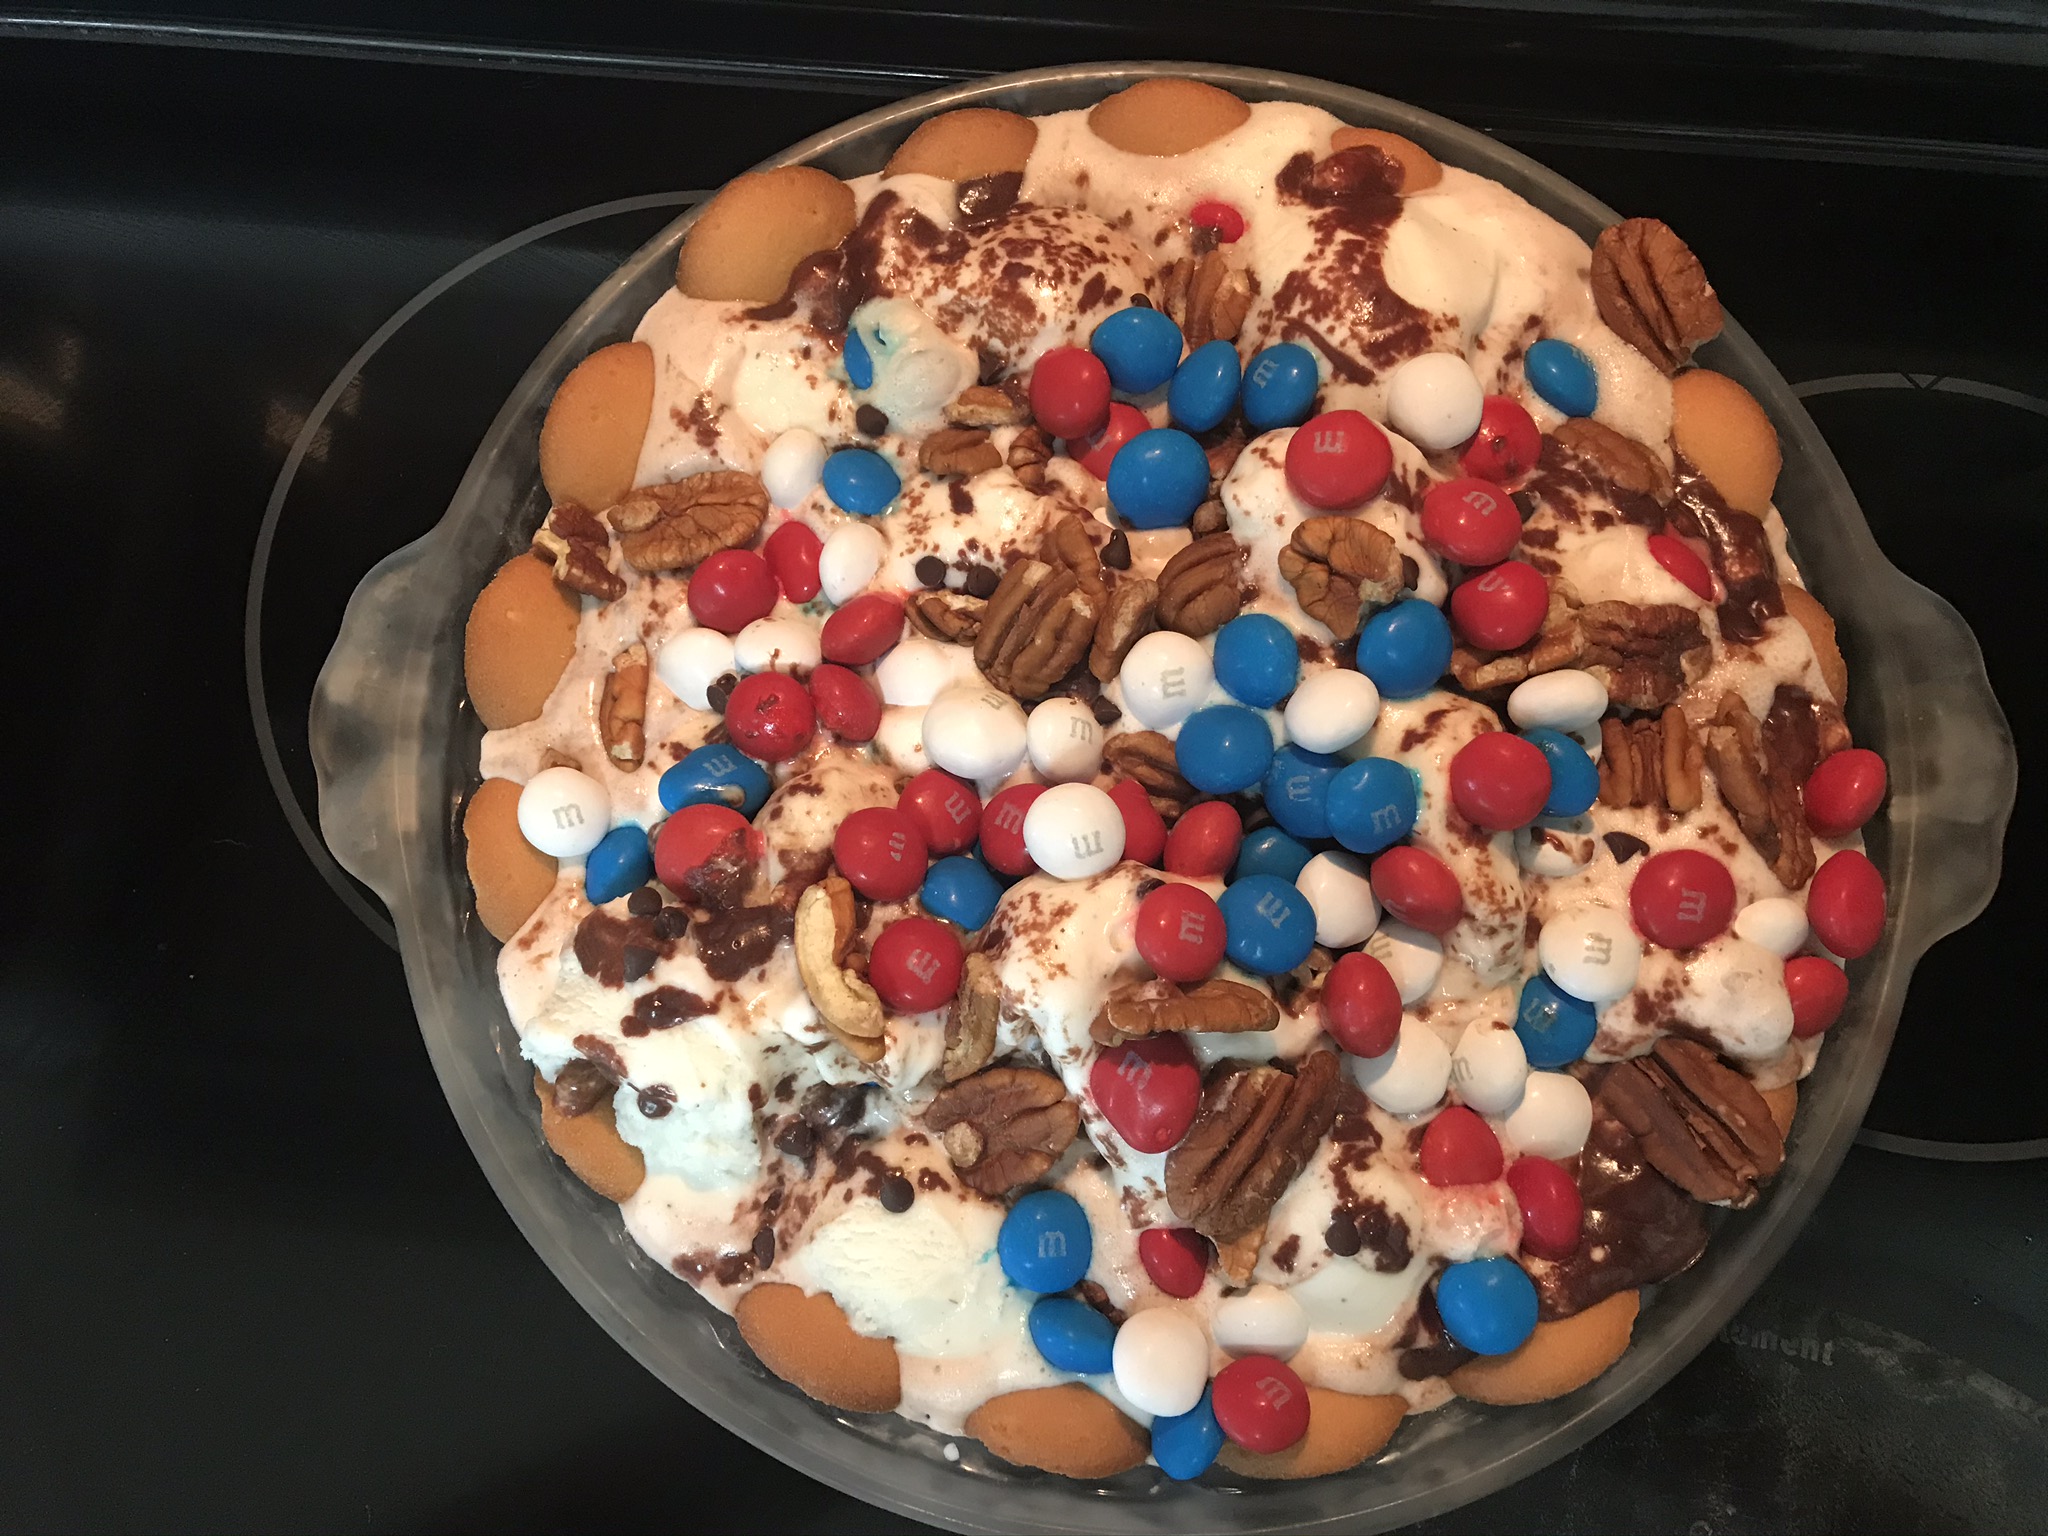
Want to impress your friends at your July 4 cookout or party this year? Try this Fourth of July Ice Cream Pie! Think crunchy cookie crust with thick scoops of ice cream on top. But the best part is that a melted chocolate marshmallow mixture is poured on top before refreezing. And what makes it so festive is the sprinkling of red, white, and blue M&M’s on top! So easy, and you will bring your pie pan home empty, because everyone will want to try a slice.
Ingredients
1/2 box vanilla wafers
vanilla ice cream
1 cup semi-sweet chocolate chips
1 cup mini marshmallows
1 cup evaporated milk
1/4 cup chopped pecans (optional)
red, white, and blue M&M candies
Instructions
1. Make crust
Place a layer of vanilla wafers in the bottom and on the sides of a pie pan.
2. Make the sauce
Over low heat melt chocolate chips, marshmallows, and evaporated milk.
3. Make the pie
Arrange scoops of ice cream over the vanilla wafers in the pie pan and pour sauce over the top.
4. Add the toppings
Sprinkle nuts (optional) and M&M’s over the top. Refreeze for about 30 minutes.
A crunchy cookie crust layered with scoops of ice cream then topped with a delicious melted chocolate marshmallow mixture and sprinkled with red, white, and blue M&Ms on top! Yummy!
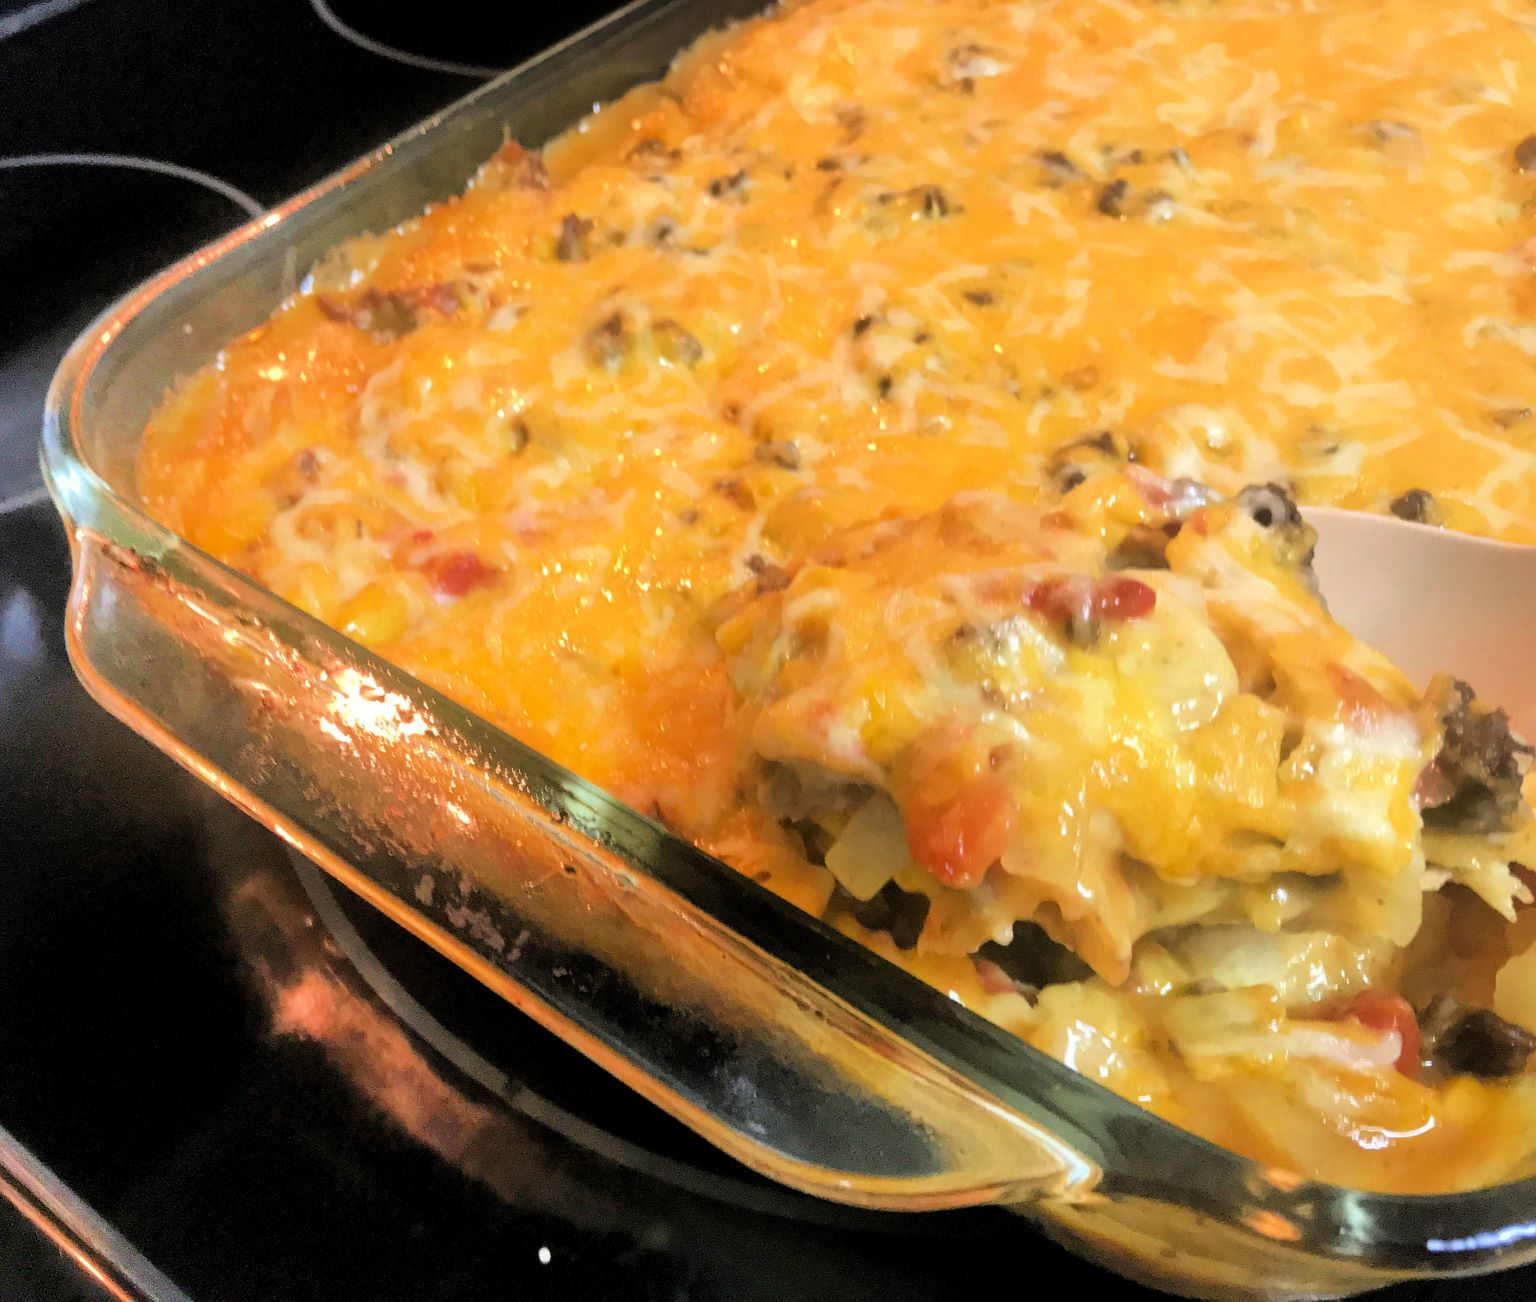
This recipe is super easy, and everyone always seems to love it. Pieces of corn tortillas are layered in between a creamy meat, onion, and tomato mixture and topped with shredded cheese. What’s not to love?
Ingredients
1 lb. ground beef
1 chopped onion
1 can Ro-Tel tomatoes
1 can whole kernel corn
1 can cream of mushroom soup
1 1/2 cans cheddar cheese soup
1 pkg. (about 12) corn tortillas
1 16 oz. pkg. Mexican-style Blend Shredded Cheese
Instructions
1. Brown Meat.
Brown meat and saute onion, then drain.
2. Mix in Other Ingredients.
Stir into the browned meat tomatoes, corn, and soups, then heat.
3. Layer tortillas with meat mixture.
Tear tortillas into bite-sized pieces and layer some on the bottom of a 9×13 casserole dish. Add a layer of the meat mixture on top of the tortillas then add some shredded cheese. Repeat until all the meat mixture is gone (2 – 3 layers). Leave the top layer of shredded cheese off until the last 15 minutes of baking.
4. Bake
Bake at 350 degrees F for 30 minutes. Remove from oven and spread a layer of shredded cheese on top, then bake 15 more minutes.
5. Serve
Serve warm with a dollop of sour cream.
Variations:
To make this casserole healthier, substitute ground turkey for beef and use low sodium soups and low fat cheese.
To add more protein add ranch style beans instead of corn.
To make it spicier add one envelope of taco seasoning.
1pkgcorn tortillasyellow or white (about 12 tortillas)
116 oz. pkg. Mexican Style Blend Shredded Cheese
Instructions
Brown meat and saute onion then drain.
Mix in tomatoes, corn, and soups and heat.
Tear tortillas into bite-sized pieces and layer pieces on the bottom of a 9×13 casserole dish.
Add a layer of the meat mixture then top with some of the shredded cheese.
Continue layering tortilla pieces, meat mixture and cheese (2 – 3 layers). Leave the top layer of cheese off the top until the last 15 min utes of baking.
Bake at 350 degrees F for 30 minutes, then take out of the oven and add a top layer of shredded cheese and bake for 15 more minutes.
Serve warm with a dollop of sour cream.
Video
Nutrition
Serving: 1g | Calories: 288kcal
Serve warm with sour cream
Did you try it? Let me know how it turned out in the comments below, and please rate my recipe. If you like it, please give me 5 stars!
One Day Itinerary for Exploring Some of the Best Attractions in Atlanta
Travel and tourism attractions are starting to open back up again, but it seems like most folks are staying in country for their travel. Although some of the attractions on this list are still closed due to the coronavirus, you might find this list handy in the future. If you ever find that you have only one day to spend in the city of Atlanta, here is my suggested itinerary.
This post contains some affiliate links, and if you purchase anything through these links I may receive commission at no additional cost to you. I only include products and services that I use or believe in.
Check Hotels.com for some of the best hotel deals in Atlanta.
Morning
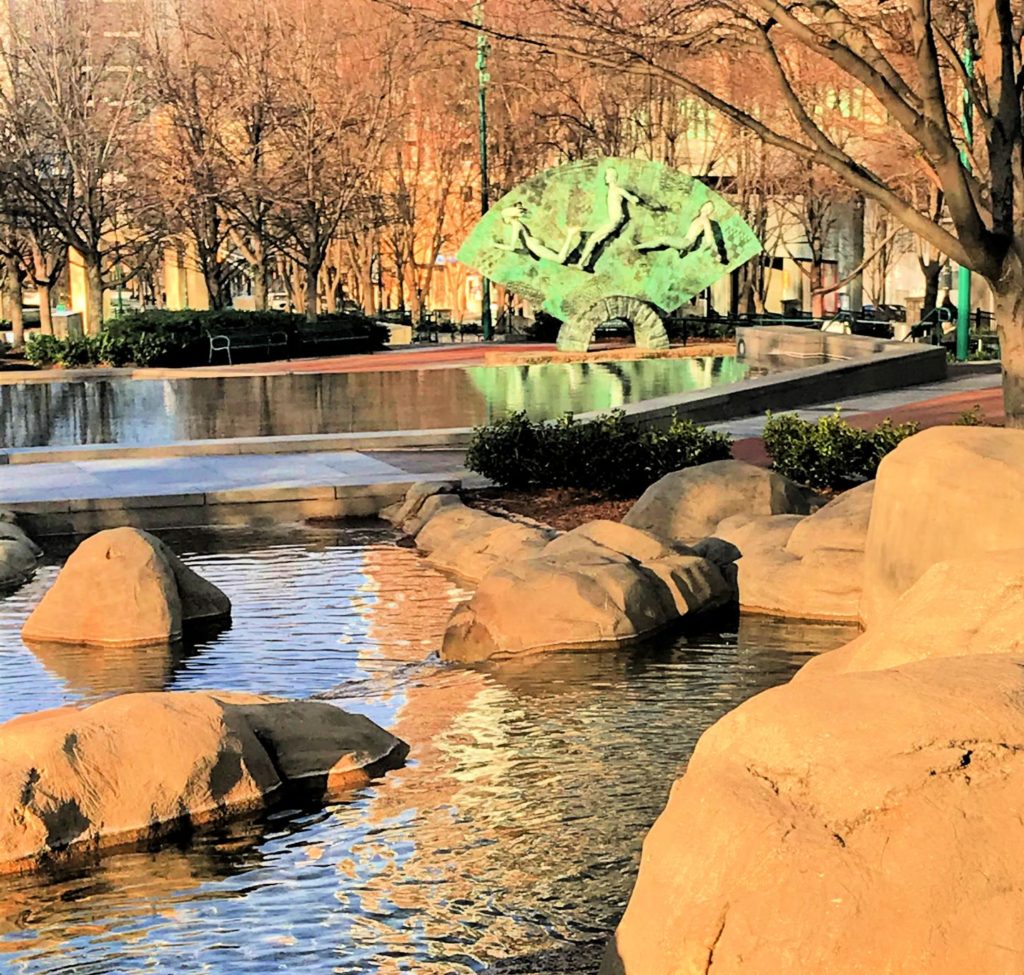
Centennial Olympic Park
I made Richard get in this picture. He looks so thrilled! Centennial Olympic Park
First, spend about 45 minutes exploring Centennial Olympic Park. Most of the other attractions do not open until 9:00 or 10:00 in the morning, so early morning is a good time to enjoy this free 22-acre green space that was the main gathering site during the 1996 Summer Olympic Games in Atlanta.
Memorial to Olympic Swimmers and Divers
It is right in the middle of Atlanta’s downtown district, so it is a great place to start. You are within walking distance of several major attractions, so you can just leave your car in one spot.
Centennial Olympic Park in Atlanta
COVID Update: Currently, as I write this in June 2020 the Visitor’s Information Center, Fountain of Rings, and the Playgrounds are closed until further notice due to COVID. However, we visited in the winter and never went in the Visitor Center or fountains anyway. It was still fun!
Georgia Aquarium
Georgia Aquarium
Next, head over to the Georgia Aquarium (estimated time 2 – 3 hours). It is a 3-minute walk from Centennial Olympic Park, and you can get there right when it opens.
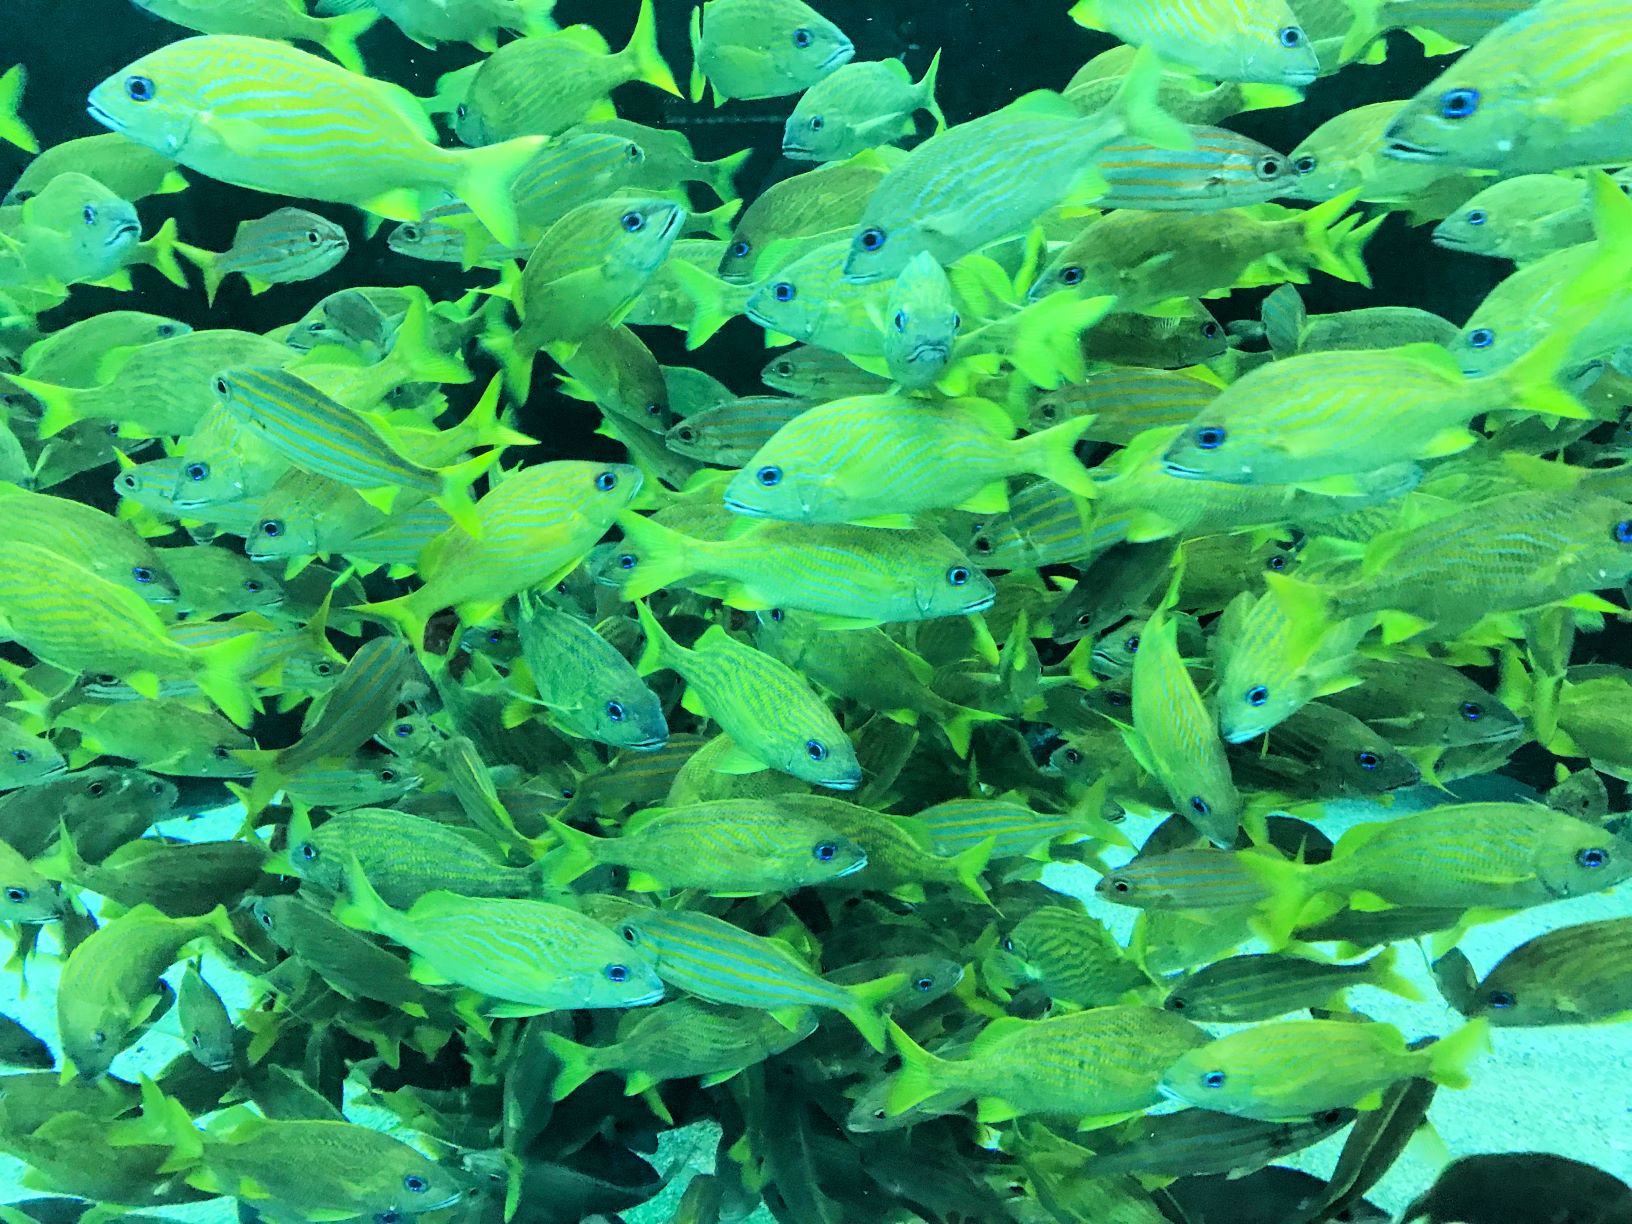
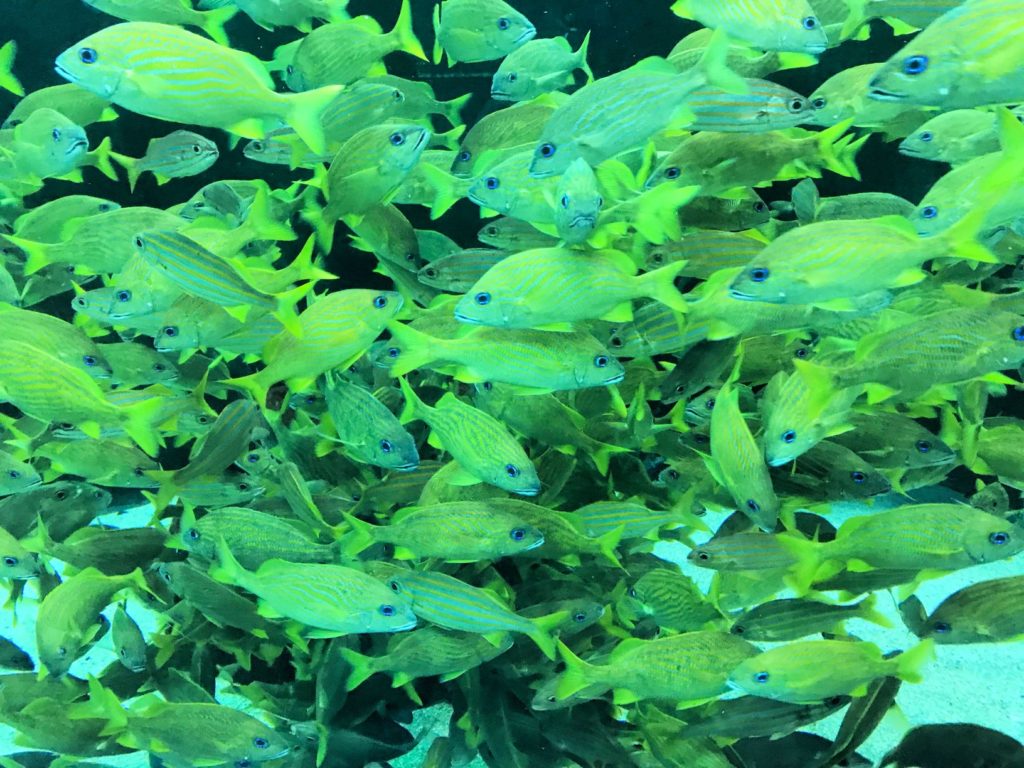
Atlanta’s aquarium is the largest in the Western hemisphere. It is the home of tens of thousands of water creatures with 500 species from around the world and over 60 different habitats. There are lots of different interesting special exhibits as well.
There were so many different kinds of fish at the Georgia Aquarium!
Their largest exhibit is actually 284 feet long, 126 feet wide, and 30 feet in depth at the maximum depth. It holds 6.3 million gallons of water! My favorite part if where you can walk through a tunnel and look up and see sharks swimming over your head through the glass. It is something you don’t want to miss!
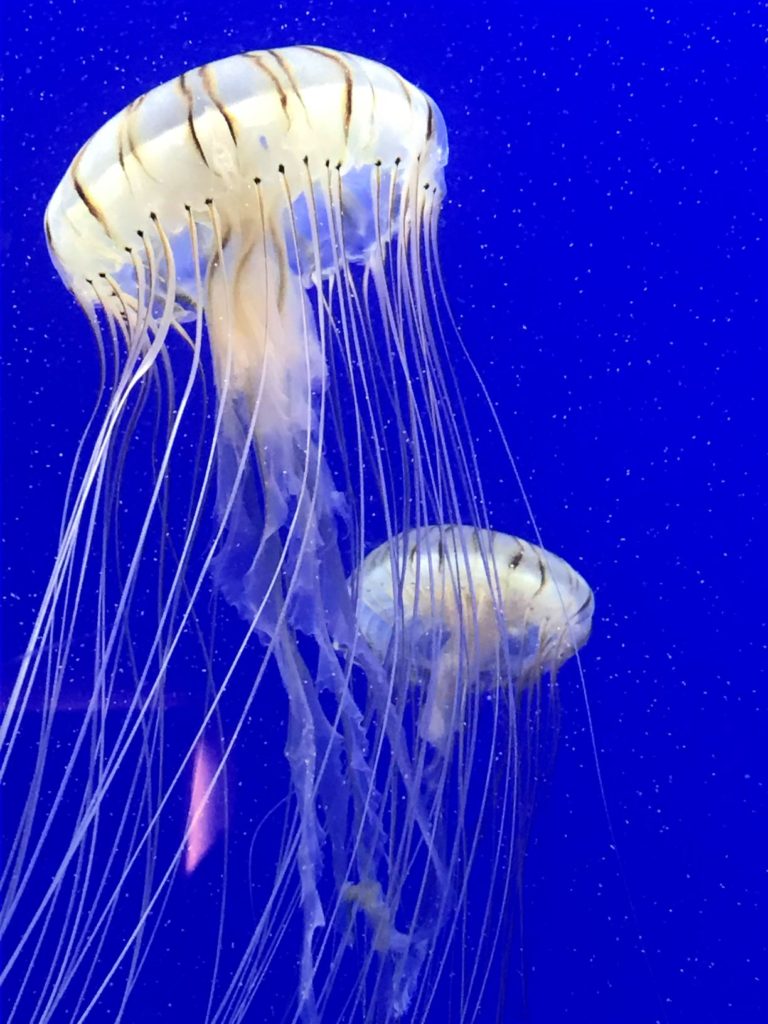
Jellyfish in the Georgia Aquarium
COVID Update: The aquarium is open, but tickets can only be purchased online in advance of your visit. They have established time blocks with limited capacity. Temperatures will be scanned upon entry, and visitors are encouraged to wear masks.
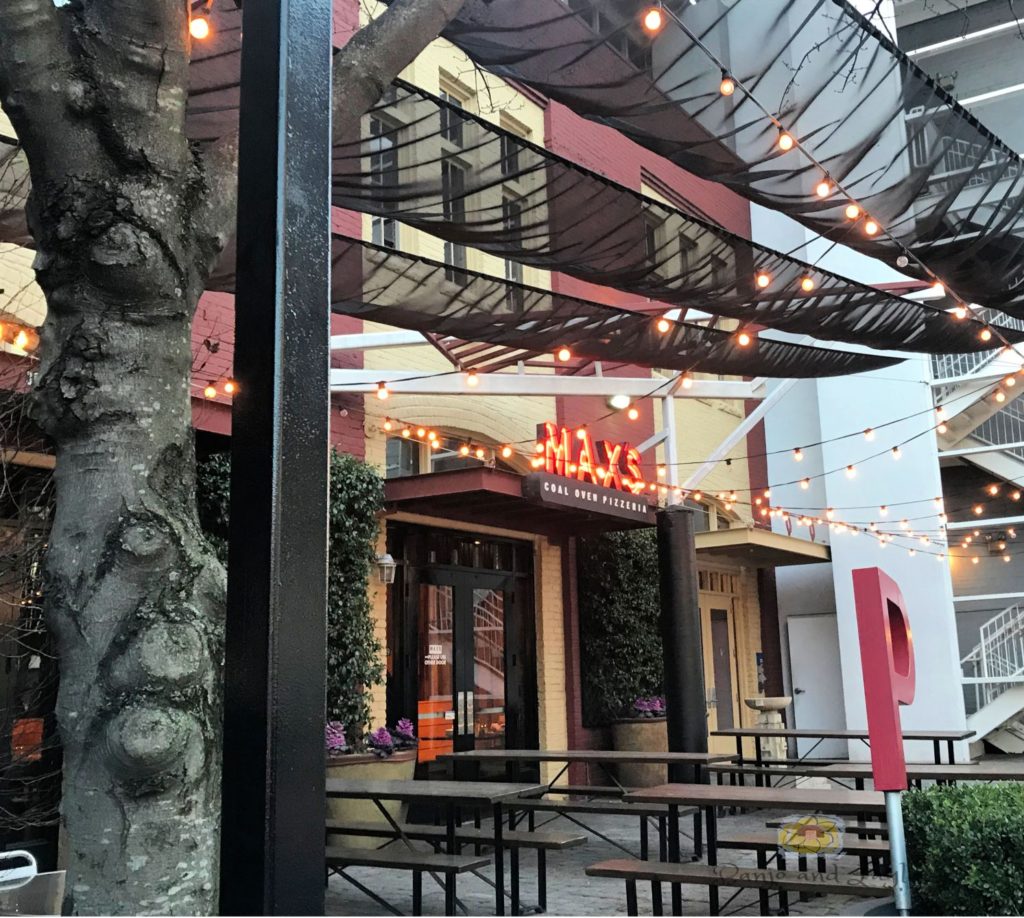
For lunch I suggest walking across the street to Max’s Coal Oven Pizzeria.The pizza at Max’s was delicious!
Insider Tip: If you plan on visiting more than one attraction that costs to get in, I suggest that you purchase an Atlanta CityPASS. You can save up to 50% on combined prices for admission to popular attractions. Shop now on CityPASS.com.
Afternoon
World of Coca-Cola
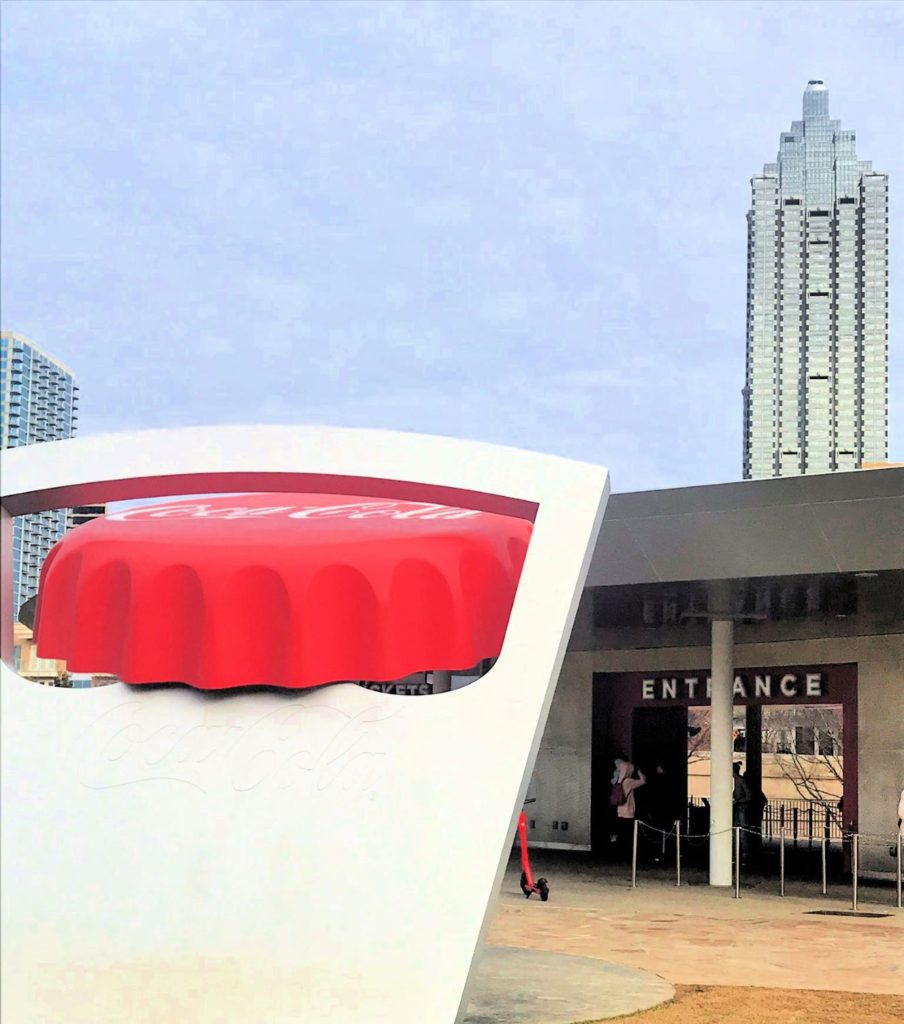
World of Coca -Cola in Atlanta
Head to the World of Coca-Cola (estimated time 2 hours) where you will learn everything you ever wanted to know and more about the famous soft drink. There are some really interesting exhibits, retro ads, and a cool replica of the actual bottling process.
There is a really fun short film in the theater there called “Moments of Happiness” that celebrates some of life’s most memorable moments experienced by different people of all ages and cultures.
World of Coca-Cola’s Entrance
In the loft you can see a lot of different historical and international artifacts that represent more than 125 years of Coca-Cola memories. Then there is the Vault, where the famous Coca-Cola secret formula is secured. You learn about the origins of this secret formula, which is one of business’s closely guarded and best kept trade secrets ever, how competitors tried to copy their success, how the owners kept the formula secret throughout the years, and how all this secrecy gave birth to tons of myths and legends.
COVID Update: World of Coca Cola is closed at this time but plans are for it to reopen July 15, 2020.
CNN Tour
CNN Headquarters in Atlanta gives behind-the-scenes tours.
There are several options for your afternoon after the Coca-Cola museum. One is to take an Inside CNN Atlanta Tour (estimated time 50 minutes). Reservations must be made in advance, but this will make it easier for you to time your day.
CNN’s World Headquarters is in Atlanta.In the lobby of the CNN Headquarters.
The CNN Tour is a 50 minute guided walking tour through the halls of CNN Center where you get an exclusive, behind-the-scenes inside look at how a live broadcast is produced. You get an in-depth look at how the world’s largest news operation operates in the world headquarters of CNN. Even if you usually watch a different news channel it is interesting to see how things work behind-the-scenes.
COVID Update: Currently all tours are temporarily suspended, and the CNN store is temporarily closed.
College Football Hall of Fame
The Chick-fil-A College Football Hall of Fame is another option that is within walking distance from the aquarium and Coca-Cola museum. It celebrates all of the best things about college football. There are three floors with five themed galleries. One wall three floors high is covered with 750 college football helmets. There are over 50 interactive exhibits, including a 47-yard football field!
So if college football is your thing, you will probably want to fit this attraction in to your day in Atlanta for sure.
COVID Update: Reopening July 1 (with precautions).
Martin Luther King Jr. National Historic Site
Another option is the Martin Luther King Jr. National Historic Site. You will have to drive there, but there is free parking. You could also take a MARTA bus. The Sweet Auburn district of Atlanta is the birthplace of Dr. Martin Luther King Jr., and the visitor’s center there tells the story of Dr. King and a lot of what happened during the civil rights movement. The restored King birth home is there as well as Ebenezer Baptist Church, where three generations of the King family preached. You can also see Dr. King’s burial site, and there are usually special exhibits going on as well. Estimated time is 1 1/2 hours.
COVID Update: Temporarily closed.
Jimmy Carter Presidential Library & Museum
Located next to the Carter Center, the Jimmy Carter Library and Museum has a replica of the Oval Office and President carter’s Nobel Peace Prize. There are often traveling exhibits there as well. Estimated time is about 2 hours. You will also need to drive there, but the parking there is free also. There is also a 1.5 mile pedestrian and bike path between these two attractions called the Carter-King Peace Trail if you want to see both and walk in between.
COVID Update: All in-person public events are canceled for now, but their Facebook page has information about virtual events.
Evening
SunDial Restaurant Bar & View
Have dinner in the SunDial Restaurant atop the Westin Peachtree Plaza, which is the tallest hotel in the western hemisphere, and take in a view of the city. (Estimated time: 2 hours)
COVID Update: Closed until further notice.
Atlanta Braves Game
If you want a more casual evening between April and October, try to catch an Atlanta Braves game in Truist Park (formerly Suntrust Park). You can also take a tour of Truist Park where you can see the broadcast booth, the dugout, the clubhouse (only when the team is out of town), the press box, and even the luxury suites.
If you are a true Braves fan visit the Battery Atlanta before and after the game at Truist Park, where you can taste some of the finest food and wine at various restaurants where some of Atlanta’s best chefs are found.
COVID Update: Games: 2020 regular season will begin at the end of July. Truist Park tours are currently suspended indefinitely.
Do you have any other to add to the list? If you only have one day to spend in Atlanta pick your top 4 must-see attractions and schedule your fun. Drop a comment below and let me know how you like this list.
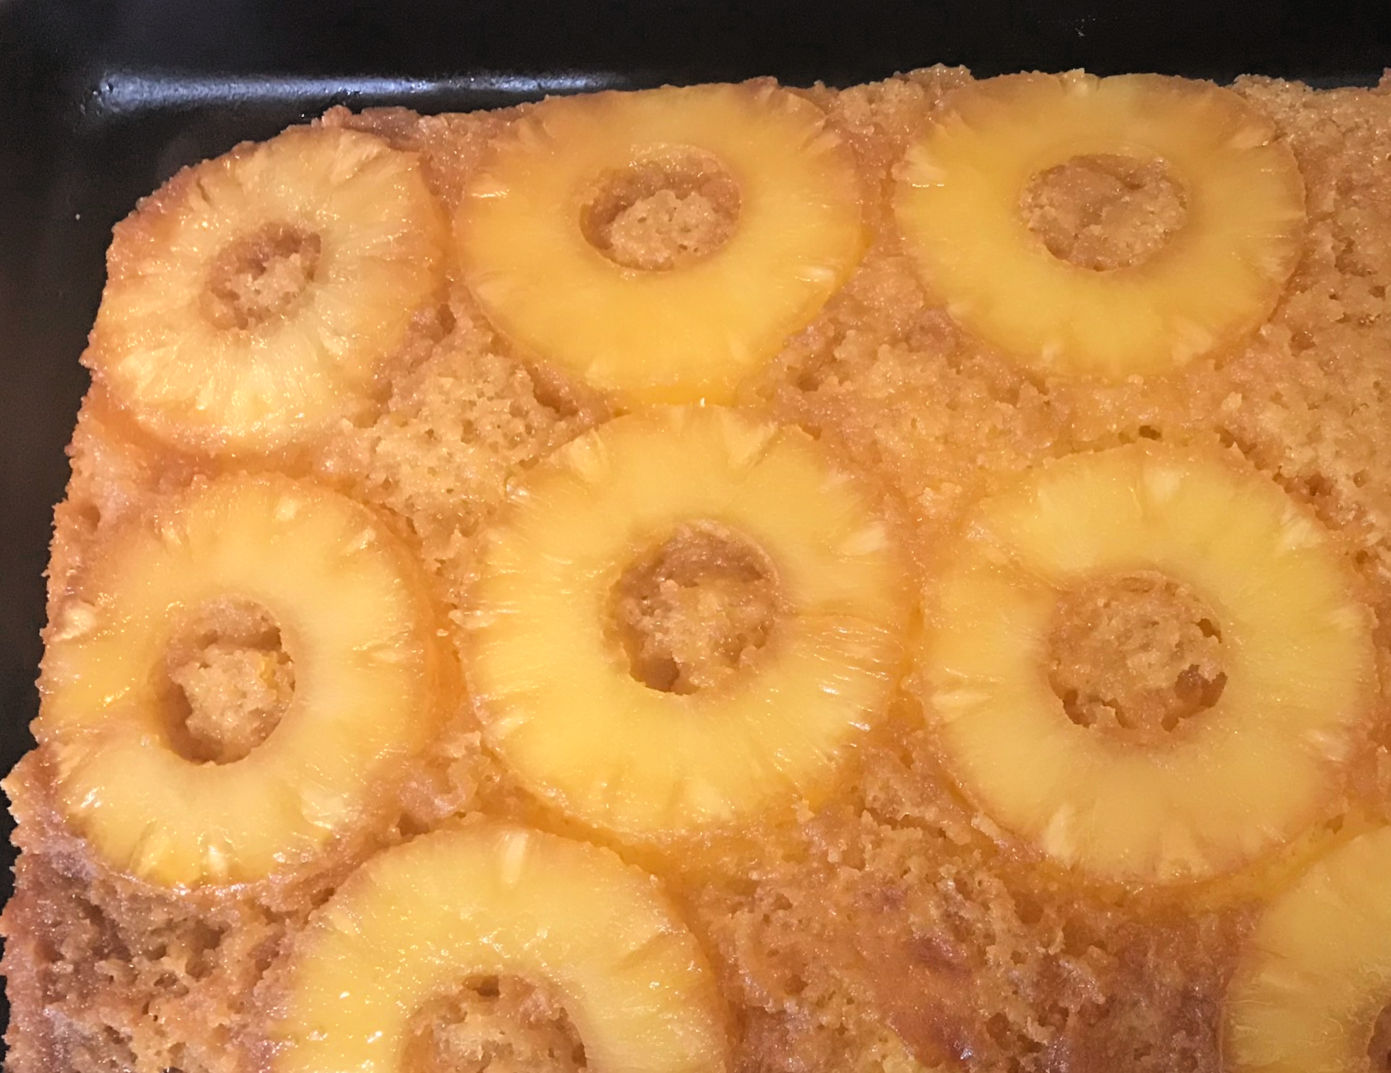
Tomorrow is Father’s Day, and I just made one of my dad’s favorite cakes: Pineapple Upside Down Cake. This cake has been a favorite for generations. Your mom’s mom probably made this cake, and the recipe just keeps getting passed down. My apologies if this looks like other recipes out there, but this is the way my mom made it growing up and it is the best way I know.
The combination of the pineapple fruit taste with the sweetness of the brown sugar and the buttery moist cake makes this an irresistable dessert. It looks impressive with its festive colors too.
This recipe is super easy, because it uses a boxed cake mix. With this secret shortcut you can have it ready to pop in the oven in less than 15 minutes. Once baked just put a pan on top and flip it over to reveal the gooey pineapple goodness that was hiding underneath.
The traditional cake has cherries in the hole of each pinapple slice, but I always make it without the cherries. It is a matter of preference.
The brown sugar and pineapples are on top when you flip it upside down.
The steps are very simple. Here is how to make pinapple upside down cake:
Ingredients
1/4 cup butter
1 cup packed brown sugar (light or dark)
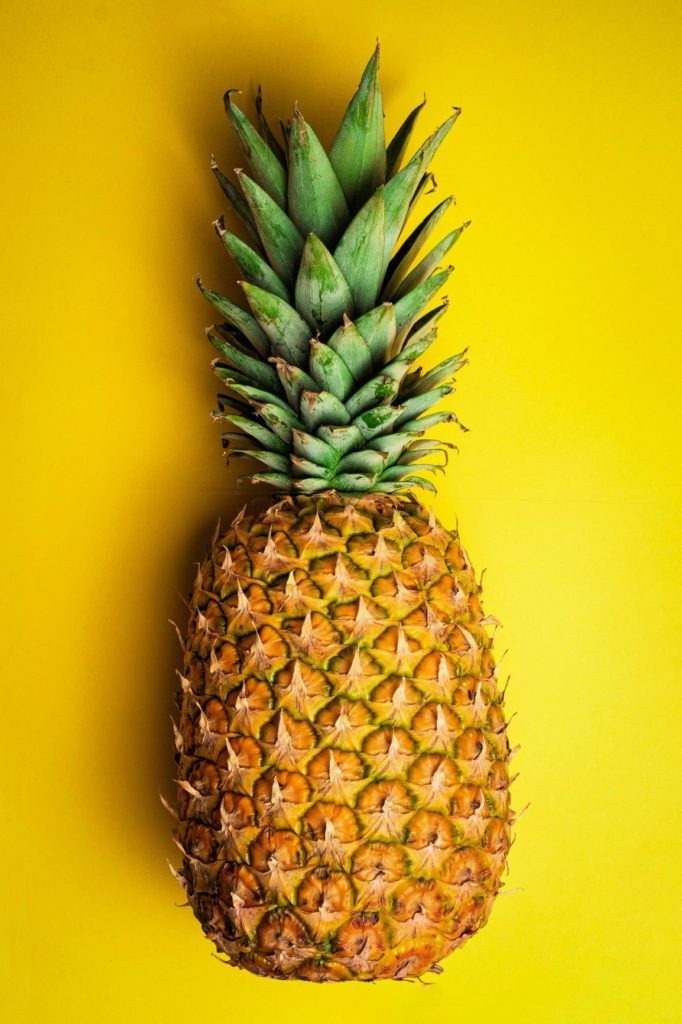
1 can (20 oz.) pinapple slices in juice (drained, juice reserved)
1 box moist yellow cake mix
vegetable oil and eggs called for on cake mix box
1 jar (6 oz. ) maraschino cherries with no stems, drained (optional)
Instructions
1. Heat oven and prepare pan.
Heat oven to 350 degrees (325 degrees F for dark or nonstick pan). Place butter in a 13 x 9-inch baking dish, and place the dish in the oven. Remove when the butter is melted. Sprinkle the brown sugar evenly over the melted butter in the dish. Arrange pineapple slices on the brown sugar.
Optional: Place a cherry in the center of each pineapple slice, arranging any extra cherries around the slices.
2. Make cake batter.
Add enough water to the reserved pinapple juice to equal 1 cup liquid. Make the cake batter as directed on the box, substituting the pinapple juice mixture for the water. Pour cake batter over the pinapple slices and cherries.
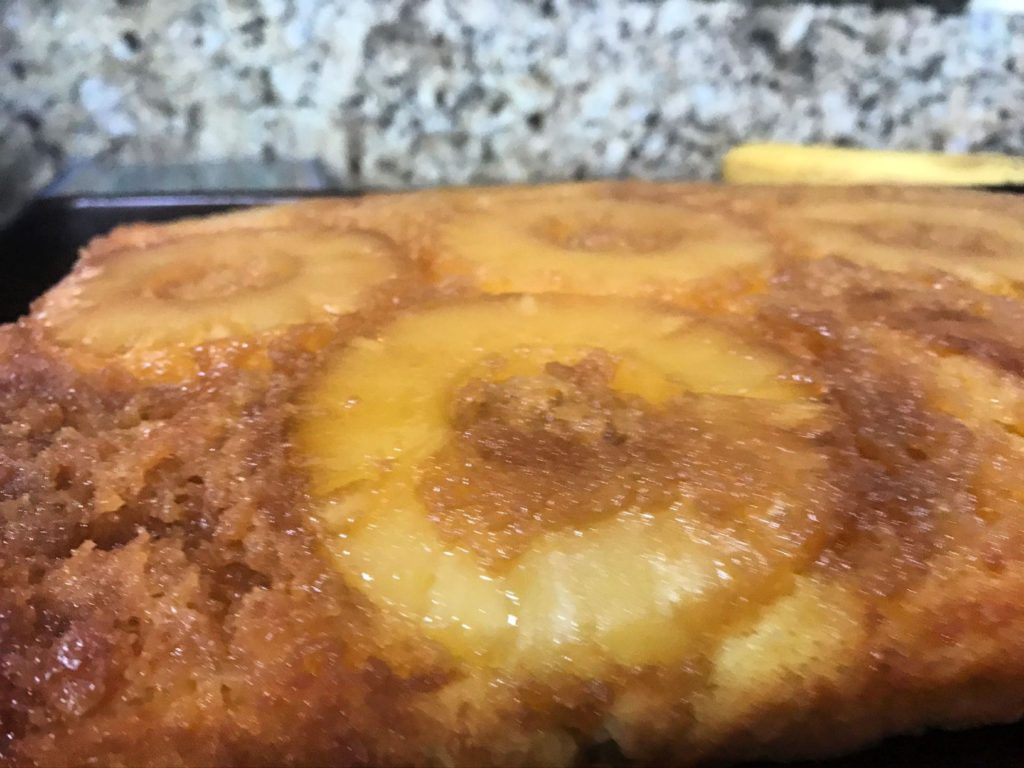
3. Bake the cake then flip it over.
Bake 40 – 45 minutes or until a toothpick inserted in the center comes out clean. Ovens vary, so keep an eye on it. Immediately run a knife around the side of the pan to loosen the cake. Place a heatproof serving plate or baking pan upside down on the dish. While holding both together tightly, flip the dish and pan over together so that the serving plate is on the bottom. Leave the baking dish over the serving plate a few minutes to make sure the brown sugar topping drips down over the cake. Remove pan carefully. Cool 30 minutes. Serve warm or cool.
Store cake covered in the refrigerator.
Tip: Try serving with a spoonful of Cool Whip or other whipped topping.
https://youtu.be/2gBxirXDoys
Three simple steps to make a delicious pineapple upside-down cake!
The combination of the pineapple fruit taste with the sweetness of the brown sugar and the buttery moist cake makes this an irresistable dessert. It looks impressive with its festive colors too. And this short-cut style recipe makes it ready to pop in the oven in 15 minutes!
Prep Time15 minutesmins
Cook Time45 minutesmins
Resting Time30 minutesmins
Total Time1 hourhr30 minutesmins
Course: Dessert
Cuisine: American
Keyword: easy desserts, fruit desserts, pineapple, pineapple upside-down cake
Servings: 12servings
Calories: 367kcal
Ingredients
1/4cupbutter
1cupbrown sugar
1can (20 oz.)pineapple slices in juicedrained, juice reserved
Heat oven to 350 degrees (325 degrees F for dark or nonstick pan). Place butter in a 13 x 9-inch baking dish, and place the dish in the oven. Remove when the butter is melted. Sprinkle the brown sugar evenly over the melted butter in the dish. Arrange pineapple slices on the brown sugar. Optional: Place a cherry in the center of each pineapple slice, arranging any extra cherries around the slices.
Add enough water to the reserved pinapple juice to equal 1 cup liquid. Make the cake batter as directed on the box, substituting the pinapple juice mixture for the water. Pour cake batter over the pinapple slices and cherries.
Bake 40 – 45 minutes or until a toothpick inserted in the center comes out clean. Ovens vary, so keep an eye on it. Immediately run a knife around the side of the pan to loosen the cake. Place a heatproof serving plate or baking pan upside down on the dish. While holding both together tightly, flip the dish and pan over together so that the serving plate is on the bottom. Leave the baking dish over the serving plate a few minutes to make sure the brown sugar topping drips down over the cake. Remove pan carefully. Cool 30 minutes. Serve warm or cool.Store cake covered in the refrigerator.
Garden of the Gods Park is a registered National Natural Landmark and is definitely on my must-see list in Colorado Springs. You can walk around among 300 foot towering sandstone rock formations against a backdrop of the majestic snow-capped Pikes Peak and some brilliant blue skies. Great photo opportunities!
The Visitor and Nature Center and museum is the most visited attraction in the region and currently has all new interactive exhibits. You can learn how the amazing red rocks got there with the new Geo-Trekker theater experience, which is shown every 20 minutes.
We ate lunch on the terrace overlooking Pikes Peak, and I am told that this is one of Colorado’s most photographed views!
You can see Pikes Peak in the Background!Big Sky Country!Perfect Date for Couples!
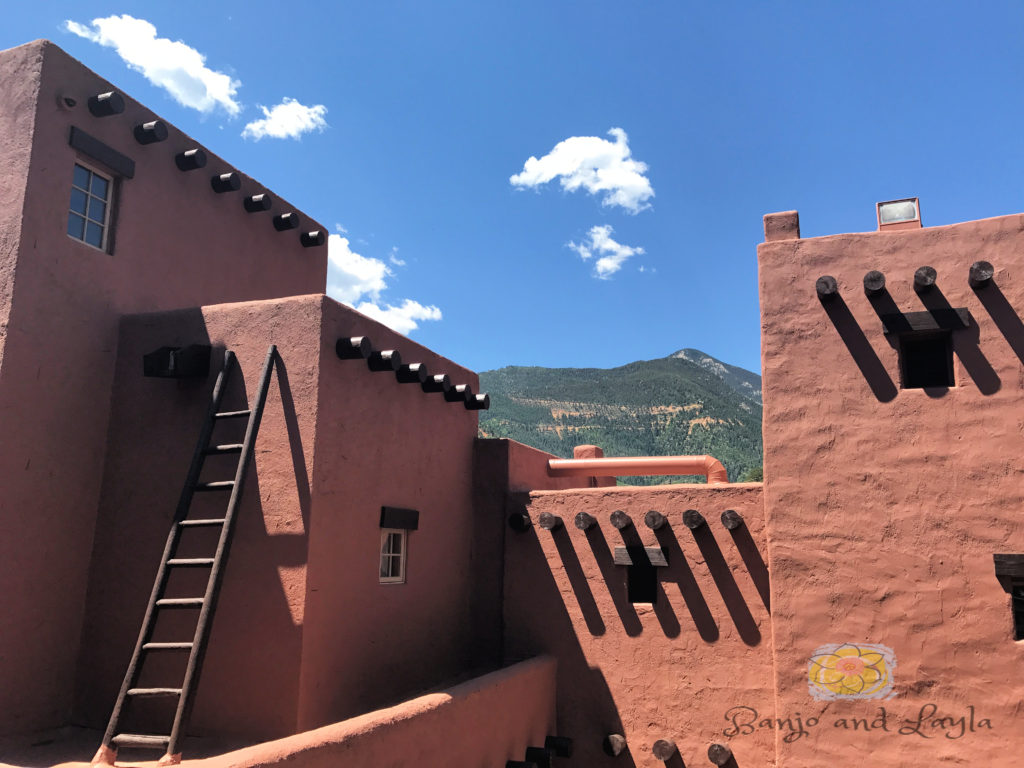
2. Manitou Springs Cliff Dwellings
Manitou Springs Cliff Dwellings
Another cool thing to see in Colorado Springs is the Manitou Springs Cliff Dwellings, which are made up of Anasazi ruins that date back 800 to 1000 years old!
According to the museum, the 40 room site was originally located in McElmo Canyon, which is in the southwest corner of Colorado near Mesa Verde and Dolores. The process of relocating these cliff dwellings began in 1904 and was completed in 1907 when the preserve was opened to the public.
The buildings reflect the architecture of the Taos Pueblo Indians of New Mexico. These Pueblo Indians are descendants of the Cliff Dwelling Indians belonging to the Anasazi cultural line. The three story pueblo building there was built at the turn of the century and was home to a Native American family of dancers who entertained the tourists for several generations up until the mid 80’s.
Over the years, the pueblo was expanded into museums of pottery and artifacts. There is a pretty cool souvenir shop at the end of the museum that has a lot of native made pottery, jewelry, and artifacts, as well as some Colorado made gifts.
You can walk around inside the buildings, climb in them, touch them, and read the history about each dwelling. It is pretty interesting, even for short-attention span people like me who don’t like to read history. For more information check out their website at https://www.cliffdwellingsmuseum.com/
I was an outdoor recreation major at The University of Tennessee (yes, it is a real major), and I did a summer internship as a Wilderness Backpacking Guide in Colorado. I have always loved mountains – from the Smokies to the BlueRidge to the Rockies and even the Alps. They seem to put everything in focus and make me feel closer to God. And Pikes Peak is one of my favorites.
Pikes Peak, located in the Rocky Mountains west of Colorado Springs, is one of the most famous — and most attainable — 14ers in the country. There are actually 53 mountains in Colorado that achieve a height of 14,000 feet or more. Pikes Peak is 14,115 feet at the summit. It is one of the top 100 mountains in the United States!
There are several ways to do Pikes Peak. Although I did climb it years ago, this past trip we drove up to see the view. Much easier and by far the most popular way to the summit. Driving gave us the freedom to take things at our own pace and stop to take pictures when we wanted. We brought a picnic and enjoyed the hot chocolate at the gift shop at the top. Some other ways to see Pikes Peak are to ride a bike (this makes me tired just typing that), hike, or take a guided tour. Find out more info. here: https://www.pikes-peak.com/about-pikes-peak/
Pike’s Peak is one of the top 100 mountains!Met a friend at the Pike’s Peak gift shopBig Foot Crossing – really?You can still look cool in front of the sign even if you drive up!
What’s your favorite thing to do in Colorado Springs?
Leave a comment below. If you want to get notified of new posts be sure to sign up for my newsletter from the home page.
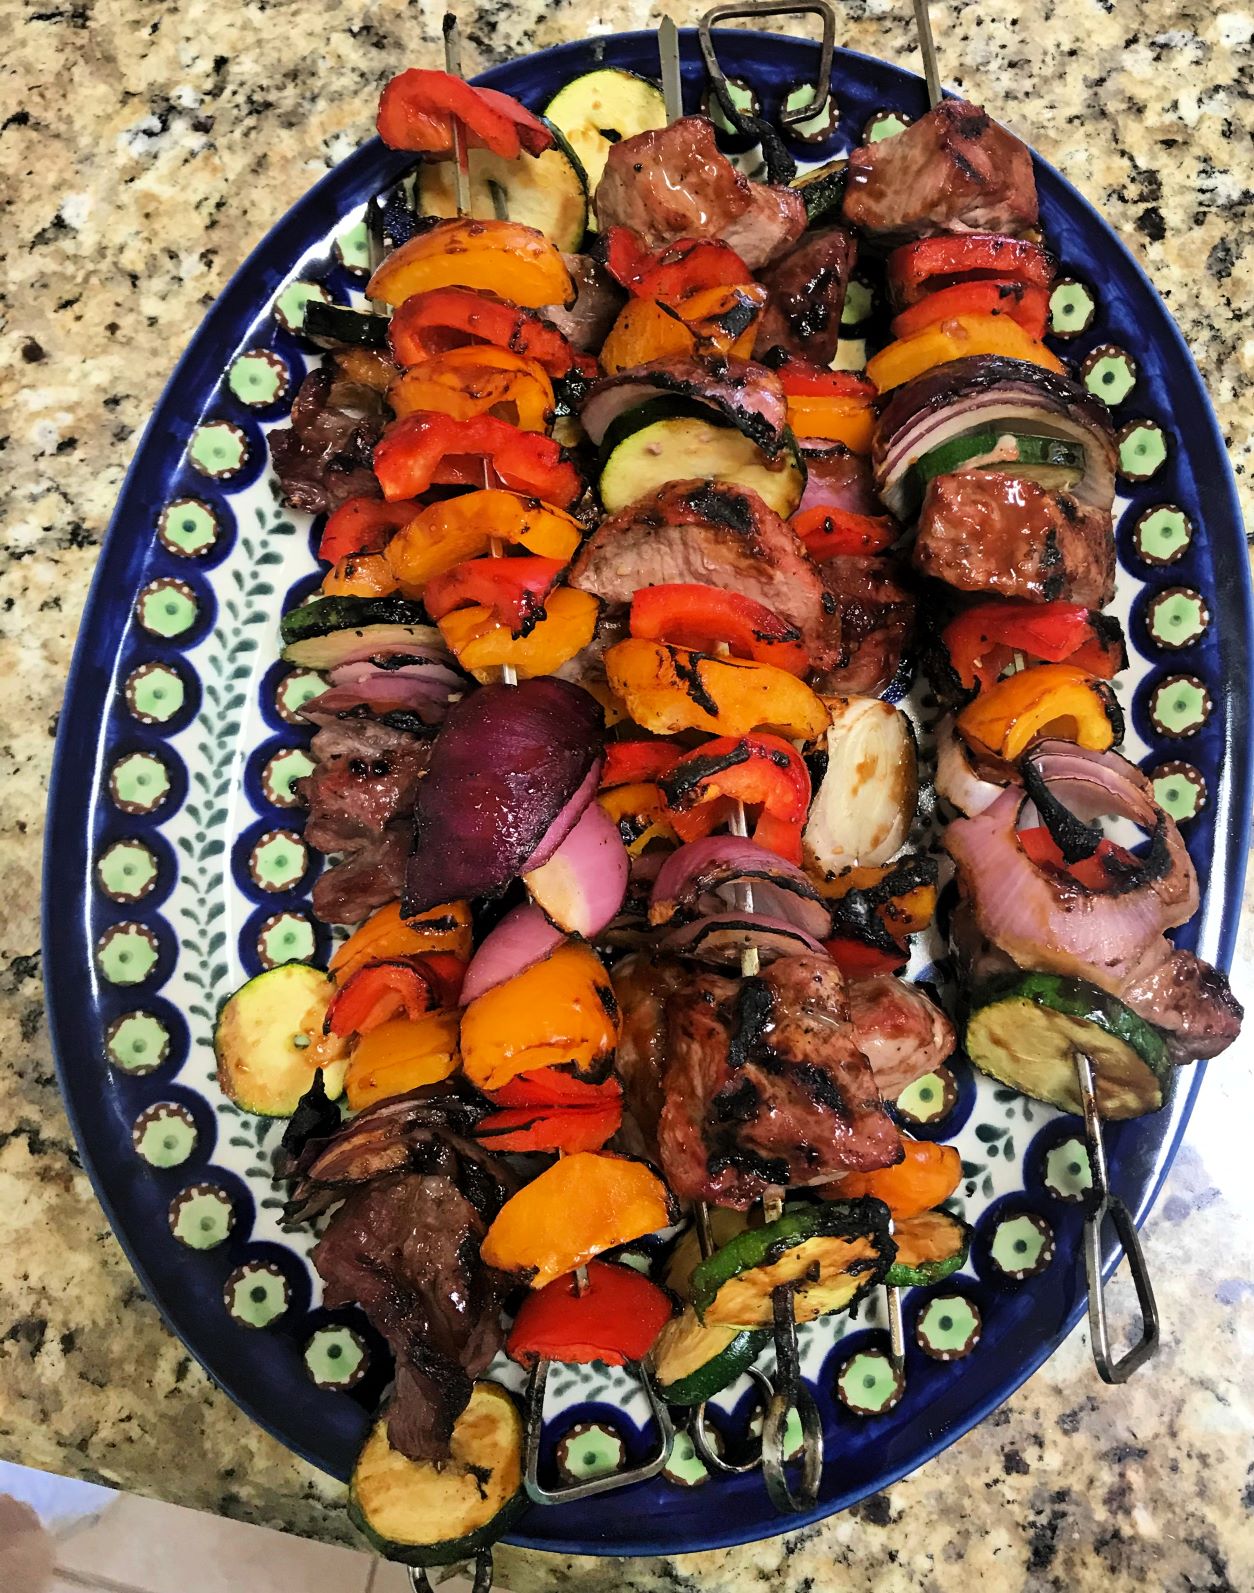
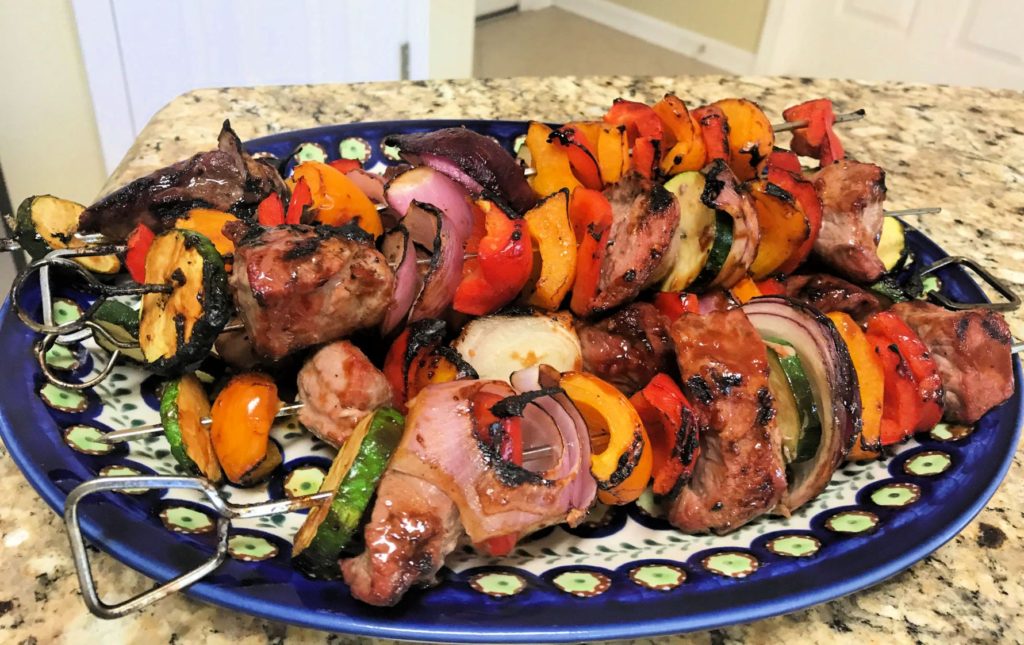
Do you love steak? Summer is in full swing, and it is time to fire up that grill. Steak kabobs are a fun way to grill steak that everyone loves. Juicy tender pieces of beef, marinaded for extra flavor and threaded in between layers of colorful fresh veggies look great on the plate and taste delicious. Served with wild rice they have easily become one of our favorite recipes.
Beef Kabobs: An Easy Flavorful Steak Recipe. Try it tonight!
This post may contain affiliate links, and I may earn commission if you click on the links at no additional cost to you.
Beef or steak kabobs are all about the marinade. Ingredients like Worcestershire and soy sauce bring out the best steak flavor when grilling. Marinating it for several hours is best, because it really allows the flavors to soak into the meat, leaving you with that juicy flavor we want in a steak. However, sometimes when in a hurry we have just brushed the marinade on after the kabobs are on the grill and it still tastes great.
This recipe is super easy and does not take as long as it looks. I purchase pre-cut meat sometimes, and that really cuts down on prep time. Beef kabobs are great for cookouts and parties or just for your family at home. Plan on two skewers per person, and you will always have enough. They taste great as leftovers as well!
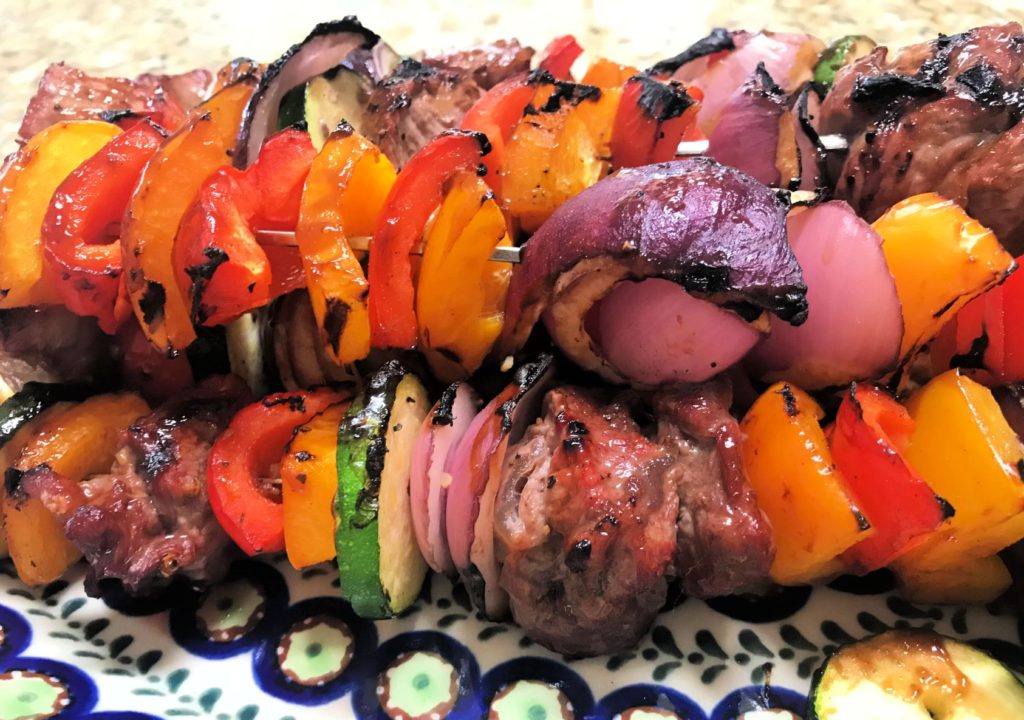
Grilled Steak Kabobs are a hit every time!
Ingredients Needed:
Olive oil
Sirloin Steak – New York strip or top sirloin (not petite) works best. These thick lean cuts have great flavor without excess fat. They will be very tender after being marinaded and cooked properly.
Fresh vegetables – In the picture I used red and yellow peppers, red onion, and zuchinni, but you can use any veggie you like. Mushrooms and tomatoes work well also.
Soy sauce
Garlic Powder
Lemon juice
Worcestershire sauce
Brown sugar
Ground ginger
Cornstarch
Honey (optional) – I don’t use it, as I think the brown sugar provides enough sweetness.
Water
Salt and Pepper
How to Make Steak Kebabs
1. Make the Marinade
Combine the water, Worcestershire, olive oil, soy sauce, lemon juice, ginger, brown sugar, honey (optional) and garlic powder in a saucepan over medium heat. Cook about 1 minute until nearly heated through.
Mix cornstarch and 1/4 cup water together in a cup or small bowl and stir until dissolved. Add to the saucepan. Cook and stir sauce until thickened, about 6 minutes. Allow the marinade to completely cool before using it.
2. Marinate the Steak
Cut the meat into uniform sizes if possible so that the pieces cook evenly. The best way I’ve found to marinate meat, especially if it’s cut up into small pieces is to place the steak into a gallon size resealable bag and pour the marinade over the meat. Seal the bag tightly while pressing out excess air. Use your hands to sort of rub the marinade over the steak through the bag to make sure all parts are covered. Warning: Make sure that the marinade has completely cooled before you pour it into the bag!
Allow the meat to marinate in the refrigerator 3 – 6 hours. This is not something you want to marinate over night. If you soak it much longer than 6 hours it gets a little mushy. The acidity of the marinade starts to break the meat down, and you don’t want that.
3. Preheat Grill and Prep Food
Preheat the grill to about 425 degrees. We love our Charbroil charcoal grill. Pour a little oil on some paper towels and use them to clean the grill grates before they get too hot.
Cut up the vegetables into large pieces, toss with oil, then sprinkle with garlic powder, salt and pepper, or your seasoning of choice.
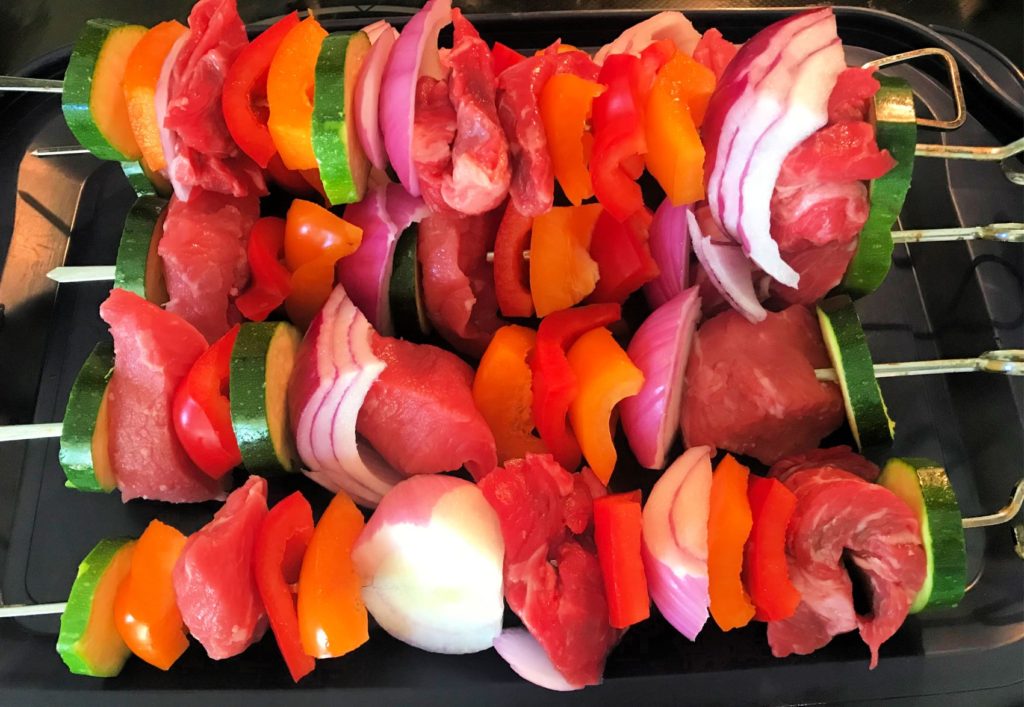
Thread each skewer with even layers of steak and vegetables. I put three steak pieces on each kabob. I use reusable metal skewers, but if you use bamboo ones make sure you soak them in water for at least 30 minutes before using or they will burn. When threading the skewers, leave a little space for the heat to circulate. This will allow your vegetables to soften up a little and cook evenly.
I try to put at least three peices of meat on each skewer.
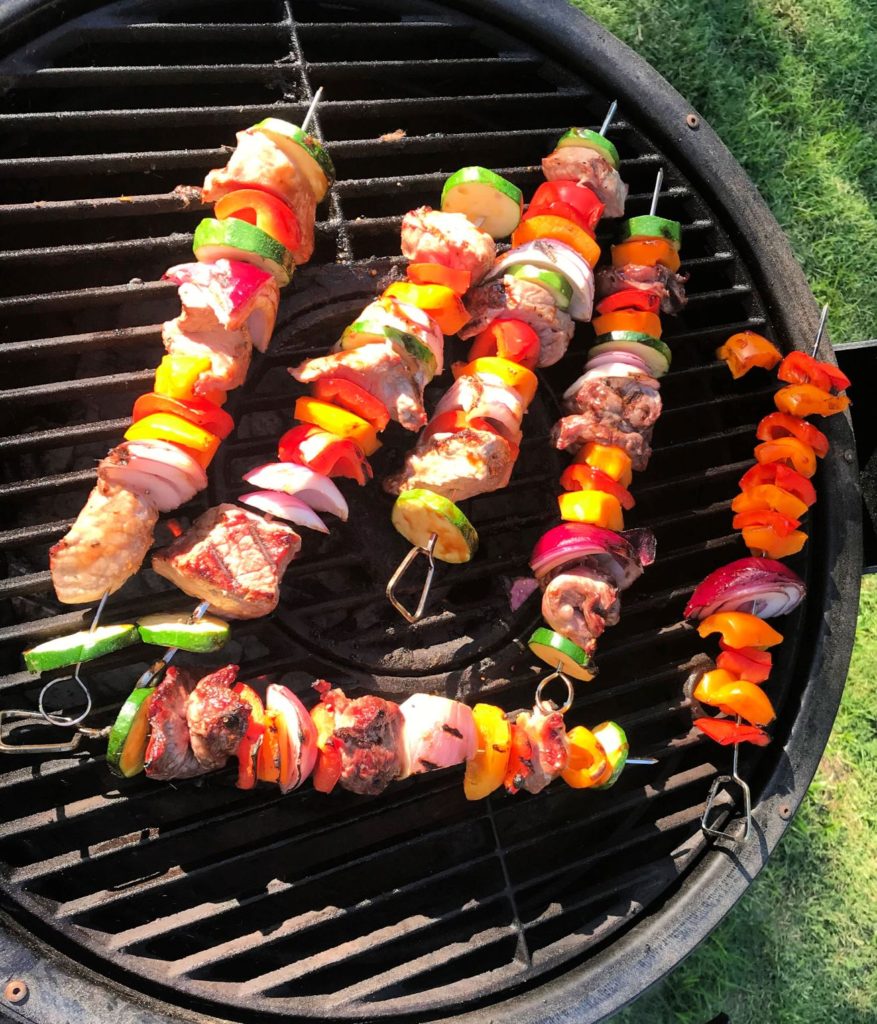
4. Cook the Kabobs
You can brush the grill grates lightly with oil if you want to keep the kabobs from burning, but we find that there is usually enough oil left on the grates from cleaning them that you don’t need to add any more.
Place the kabobs on the grill and cook until the center of the steak is about 140 – 145 degrees for medium doneness, a little more if you want them more done. Brush a little left over marinade on the entire kabob in the beginning stages of cooking. Turn the kabobs occasionally for even grilling. Grilling time will be about 9 minutes.
Don’t overcook them! Keep in mind that grill times vary. Factors such as how close the flames are and the wind make a difference, so keep a close eye on them and don’t leave the grill. No one wants to eat dried up steak!
Don’t overcook the steak!
5. Serve steak kabobs warm.
Serve the steak kabobs warm with a side of wild rice. They do not need any additional seasoning such as salt and pepper before serving as the flavors of the marinade are just enough.
Can I Cook Beef Kabobs in the Oven?
You can cook steak kabobs in the oven, but in my opinion they will have much better flavor if you cook them on the grill. But if you have run out of charcoal or it is pouring down rain, just line a baking sheet with foil, spray it with non-stick spray and cook the kabobs in the oven on 425 degrees for about 10 – 13 minutes. Use a meat thermometer if you are not sure about doneness, and turn them once half way through.
Juicy marinaded pieces of sirloin steak threaded on a skewer in between seasoned veggies and cooked on the grill or in the oven. Great for cookouts or any time!
1Tbspminced garlic(+ garlic powder to season veggies)
1 1/4 cupwater
5tsppacked brown sugar
1Tbsphoney(optional)
1/2tspground ginger
2Tbspcornstarch
1 3/4lbsTop sirloin steak(thick), cutinto 1 1/4 inch pieces
1red onioncut into 1 1/4 inch pieces
2bell peppersmixed colors, cut into pieces
1zuchinicut into 1 1/4 inch pieces
salt and pepper
Instructions
Make the Marinade:Combine the water, Worcestershire, olive oil, soy sauce, lemon juice, ginger, brown sugar, honey (optional) and garlic powder in a saucepan over medium heat. Cook about 1 minute until nearly heated through. Mix cornstarch and 1/4 cup water together in a cup or small bowl and stir until dissolved. Add to the saucepan. Cook and stir sauce until thickened, about 6 minutes. Allow the marinade to completely cool before using it.
Marinate the Steak:Cut the meat into uniform sizes if possible so that the pieces cook evenly. Place the steak into a gallon size resealable bag and pour the marinade over the meat. Seal the bag tightly while pressing out excess air. Use your hands to sort of rub the marinade over the steak through the bag to make sure all parts are covered. Warning: Make sure that the marinade has completely cooled before you pour it into the bag!Allow the meat to marinate in the refrigerator 3 – 6 hours (no more than 6 hours).
Preheat Grill and Prep Food:Preheat the grill to about 425 degrees. We love our Charbroil charcoal grill. Pour a little oil on some paper towels and use them to clean the grill grates before they get too hot. Cut up the vegetables into large pieces, toss with oil, then sprinkle with garlic powder, salt and pepper, or your seasoning of choice. Thread each skewer with even layers of steak and vegetables leaving some space in between. I put three steak pieces on each kabob. NOTE: If you are using bamboo skewers make sure you soak them in water for at least 30 minutes or they will burn.
Cook the Kabobs:Brush the grill grates lightly with oil.Place the kabobs on the grill and cook until the center of the steak is about 140 – 145 degrees for medium doneness, a little more if you want them more done. Brush a little left over marinade on the entire kabob in the beginning stages of cooking. Turn the kabobs occasionally for even grilling. Grilling time will be about 9 minutes. Don't overcook them!
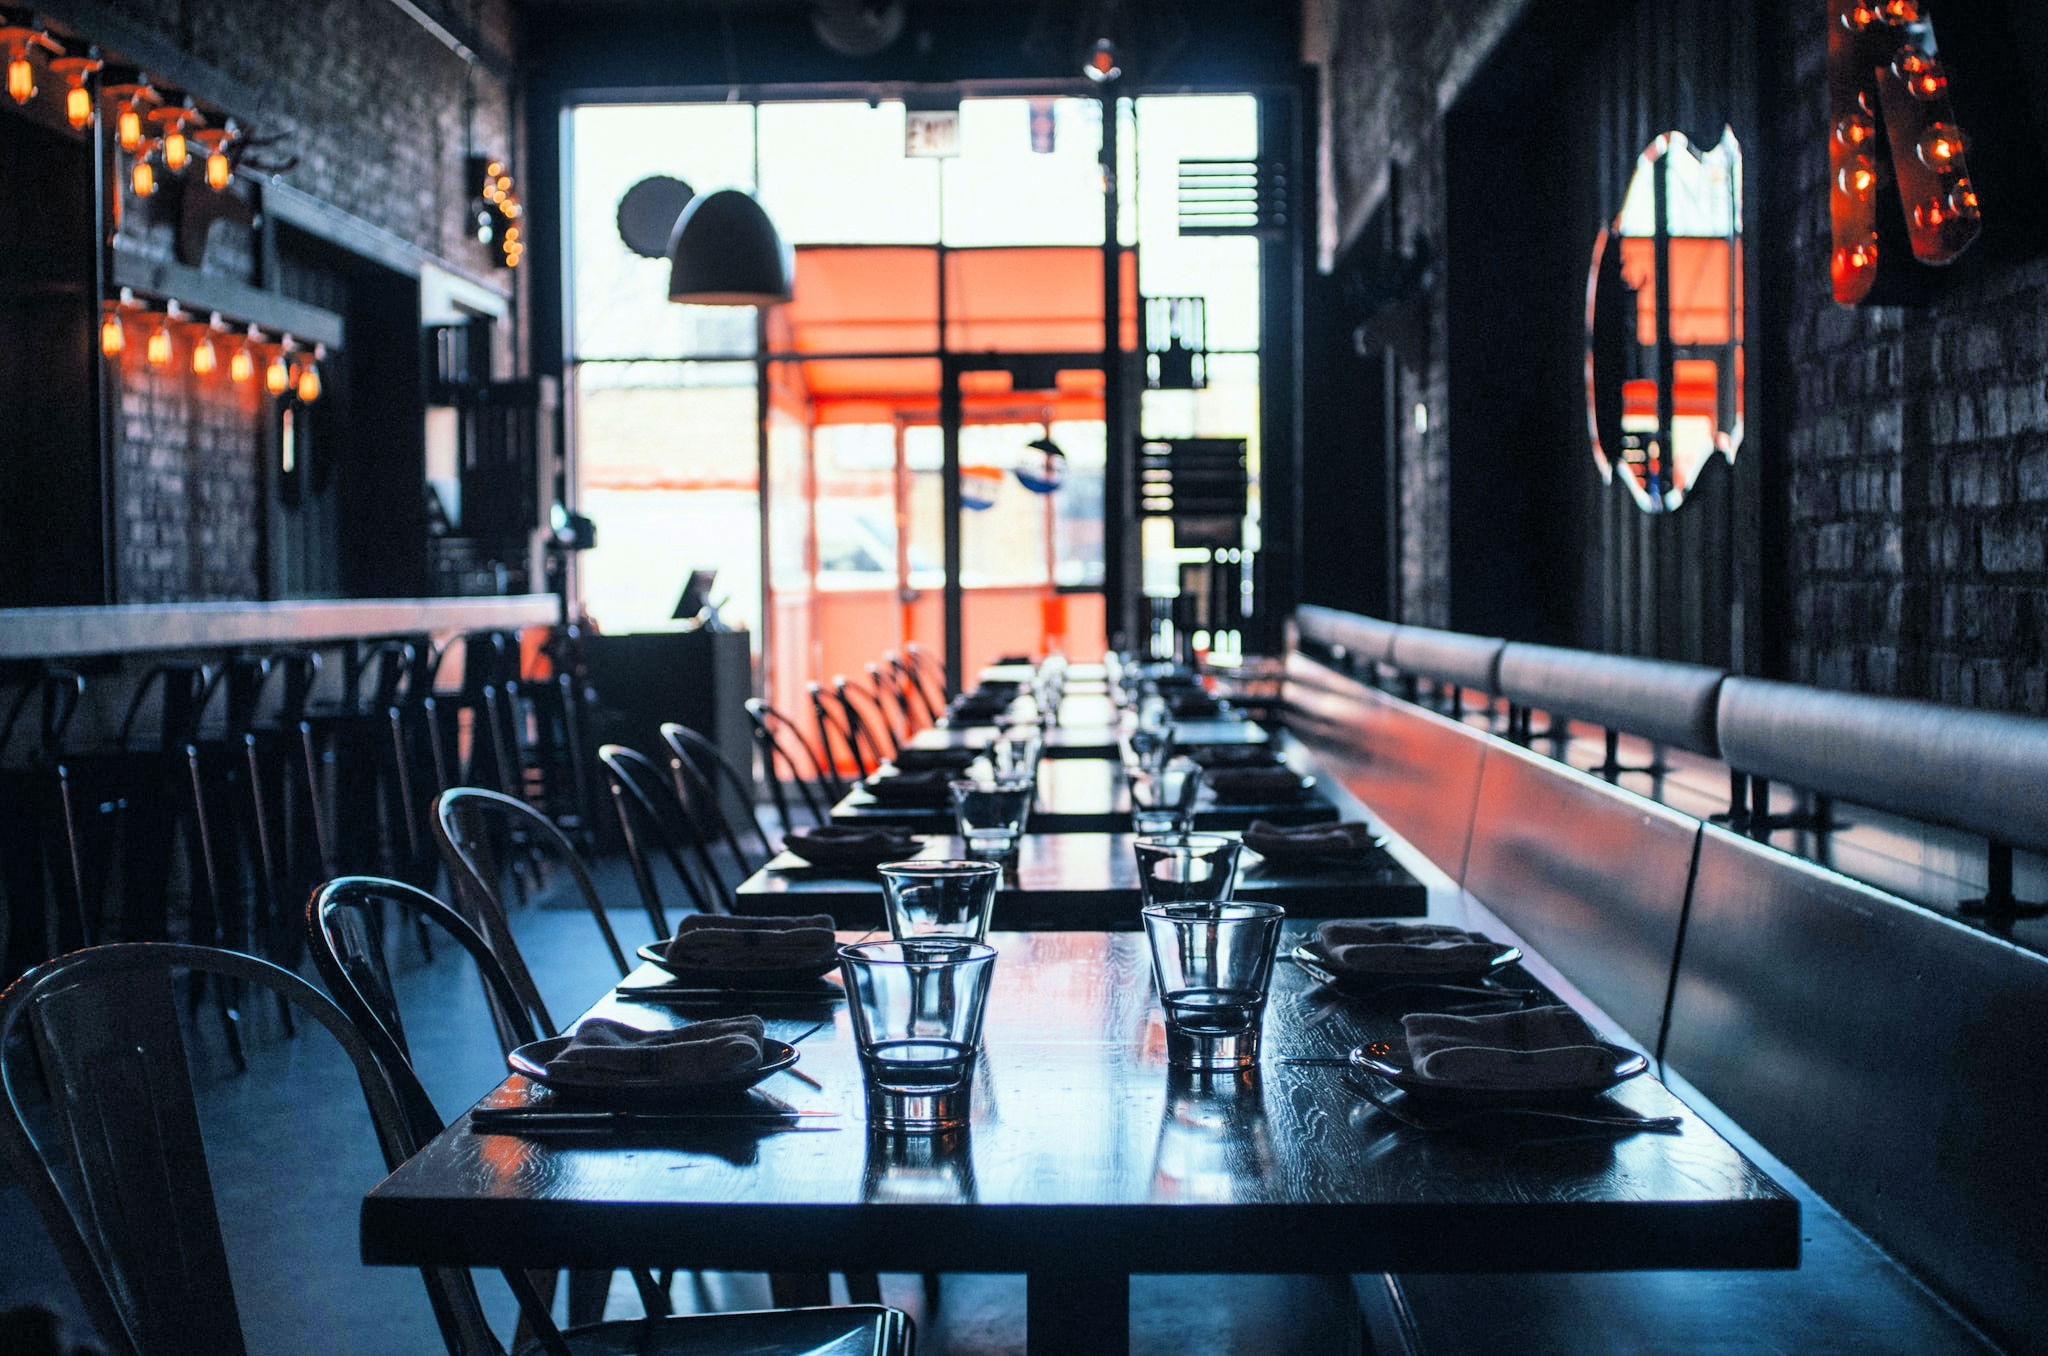
I don’t know about you but when it comes to food two things have happened for me during this pandemic: (1) I have been cooking more and have started trying to eat healthier and lose some weight. And (2) I am tired of being in the house and miss going out to eat.
But here’s the thing about going out to eat – I almost never make healthy menu choices at a restaurant. It’s like I go into this alternate universe and think that I deserve whatever I want because someone else is cooking it. And let’s face it, that is part of the fun of going out to eat. When you are in a restaurant someone else is cooking and cleaning, and they are serving things you would not normally have at home (cheesecake, or fried cheese sticks anyone?). And that bread, what?! Anyway, I digress.
Eating out is a great treat once in a while, but a restaurant’s aim is to make food look, smell, and taste great so that they can make money. Nutrition may get pushed aside in favor of butter, rich sauces, creamy dressings, and sugar. The fat, calories, sugar, and sodium can really add up quickly if you eat out regularly.
But there is good news! You can still enjoy going out to eat and also eat healthy foods. You can both eat healthy and socialize in a restaurant with just a few small changes. Here are my 10 best tips for eating out while also sticking to a healthy diet.
1. Plan Ahead
Sometimes eating out is something we decide to do on the spur of the moment, usually when I forgot to thaw something out the night before or when I am just too tired to think about cooking (in other words hangry). But if you are able to plan ahead for your dinner or social activity at a restaurant that will make eating healthy much easier.
First, you can preview the menu online. Nowadays many restaurants even have nutrition information available online as well. Besides the menu choices you may learn other helpful things about the restaurant through their website. Information such as where their food comes from, how they prepare it, and the restaurant’s overall philosophy can be eye opening. That way when you arrive at the restaurant you will already have a plan in mind and won’t be as distracted by the menu pictures or appetizer specials.
Next, try to order first when possible. Other people can subconsciously influence your decisions without you really noticing. That way your “plan” will not get sidetracked when you hear what others are ordering. Try to stick to your original plan, and don’t change your mind when you get there.
The sight and smell of certain foods can make it more difficult to stick to your plan, especially if you are hungry. But picking out what you will order before you arrive makes it easier to avoid making snap decisions you might regret later.
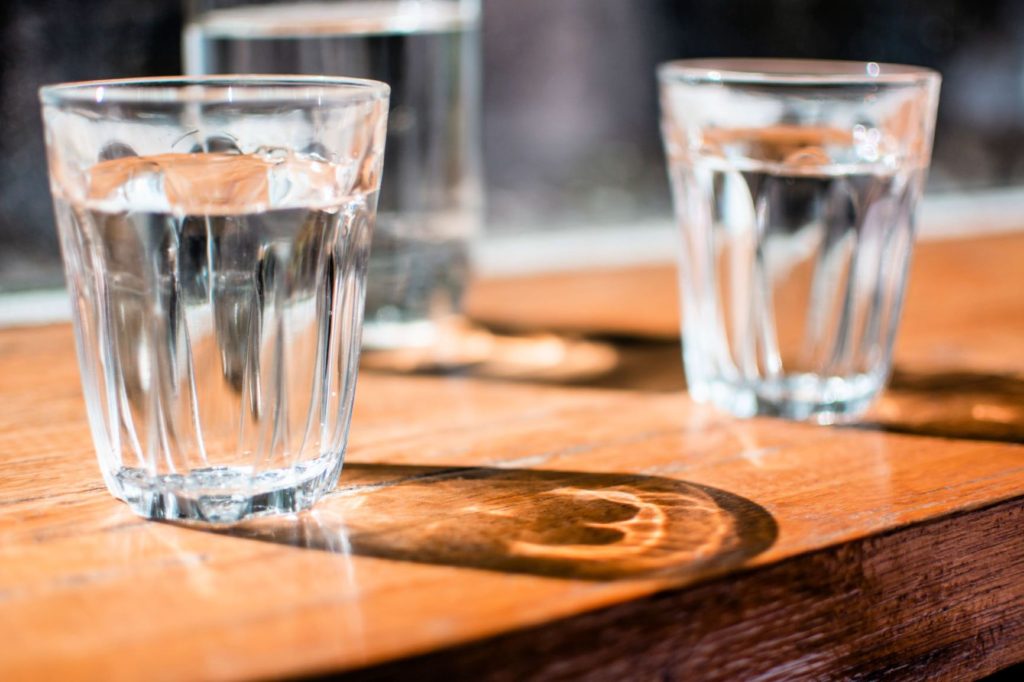
2. Make sure you are drinking enough water.
Drink plenty of water before, during, and after your meal.
This may sound like a weird tip for healthy eating at a restaurant, but staying hydrated can keep you from feeling as hungry. In fact, sometimes when we think our brain is telling us that we are hungry we are actually thirsty, not hungry.
I have been trying to drink more water and less caffeine lately, and it is making a difference. When you are in a restaurant order a glass of water and keep it filled. Drink lots of water before, during, and after your meal. Make sure you are hydrated, then your mind will not trick you into eating more food when it was really water your body needed.
One study showed that people on a diet who drank 500 ml (about 16 oz.) of water half an hour before a meal ate fewer calories and lost more weight than those who didn’t.
The next time you feel hungry at home try drinking a couple of glasses of water. Then wait about 15 minutes before you eat anything. You will either not feel hungry anymore or not as hungry. If it works at home it will work out at a restaurant too.
3. Have a snack before you go.
Have you ever gone to the grocery store hungry? What’s worse is going shopping on payday while hungry. You end up coming home with all sort of things that were not on your grocery list. Well, the same principle applies when you go out to eat or to a party or other social gathering where there is food. If you are super hungry when you get there you will want to eat everything in sight.
Before you go out to eat try eating a healthy snack at home first. Choose a snack that is rich in fiber, protein, and healthy fats. Try a hard boiled egg, a handful of nuts, veggies, yoghurt, or half of a protein shake. That way you are not getting that sinking feeling on the way to the restaurant and end up ordering every unhealthy thing that sounds good when you get there.
If you know you are going to eat at a favorite restaurant for dinner, eat a lighter lunch that day then a snack right before you go.
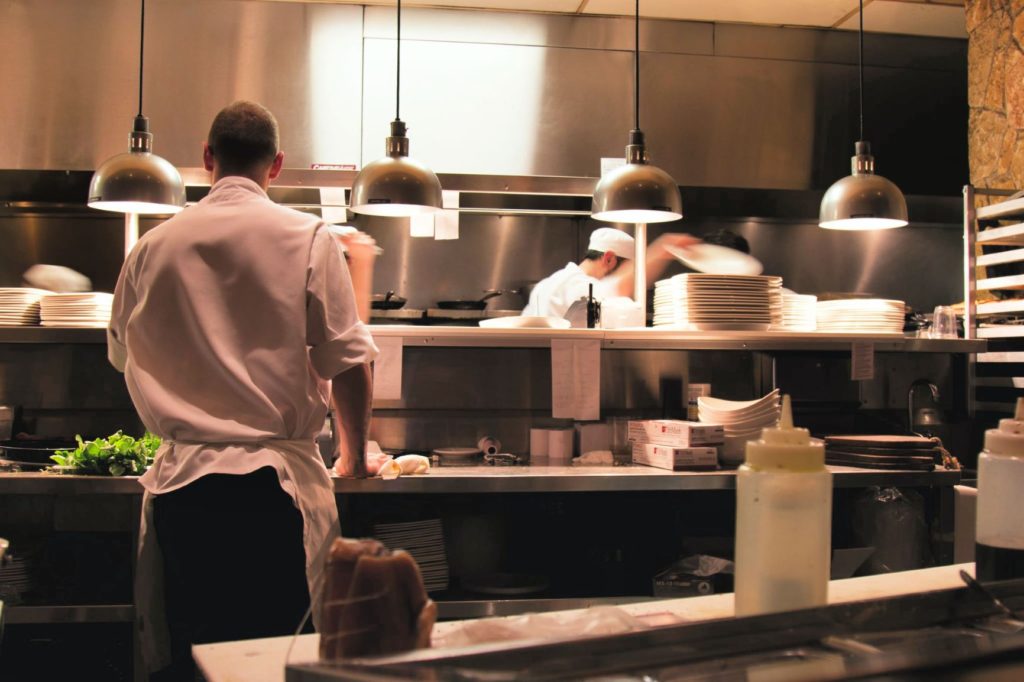
4. Ask how the food is prepared.
Don’t be afraid to ask your server how the food is prepared and make substitutions if needed.
Don’t be afraid to ask questions of the staff at a restaurant. Their job is to make sure you have a good experience. Ask your server how the food is prepared. Sometimes even when a dish sounds healthy it can have many hidden salt, oils, sauces, and even sugar that is not obvious from the menu. Once you have this knowledge you can request substitutions or adjustments for how you want the meal to be prepared.
Instead of frying, opt for steaming, broiling, baking, or roasting. Foods described on the menu as creamy, pan-fried, crispy, crunchy, or sauteed will usually have more fat and calories. Ask for a small amount of olive oil to be used instead of fattening oils.
You can also ask for dressings, sauces and seasonings on the side so that you can control the amount you want to use. Cream sauces should be kept to a minimum, so look carefully at a dish’s ingredients or ask your server exactly how it is prepared.
5. Manage your portions.
Watch portion sizes and limit heavy cream sauces.
Keep your portions small. Restaurants typically serve bigger portions than what would be considered a normal serving size, sometimes as much as four times more than what most healthy adults need in one sitting. It is usually more than what you would eat at home too. And by all means skip the all-you-can-eat buffets!
Ask for half portions or ask for a box with your meal. I like to ask for a box as soon as I place my order. Before you eat any of your food, box up half of it to take home for later. Or try splitting a meal with a friend. And be careful. In some places even half may be too much. Sometimes an appetizer portion or a side dish is all that you need.
Do you belong to the “clean plate club?” Maybe you grew up in a family environment where you were taught to clean your plate before you could be excused from the table or you were encouraged to eat everything on the plate because leaving food was wasteful (cue the “there are starving children in other parts of the world” line). I get it. But it is okay to just immediately divide your meal into what you’ll eat at the restaurant and everything else that goes in the box. You will make your co-workers jealous when they see you with leftover”restaurant food” the next day at lunch.
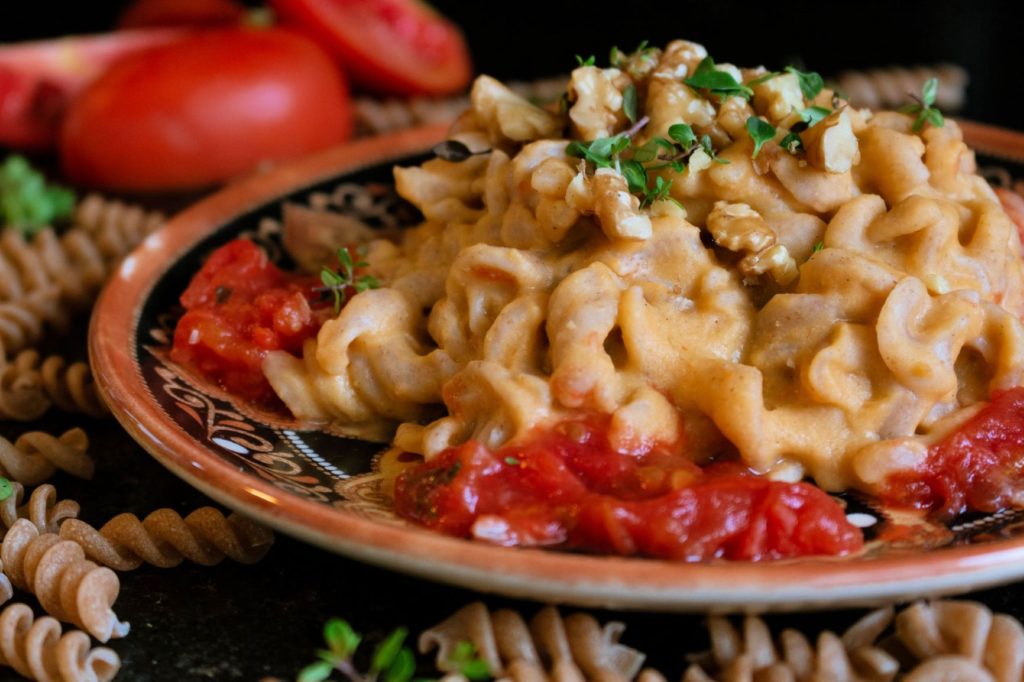
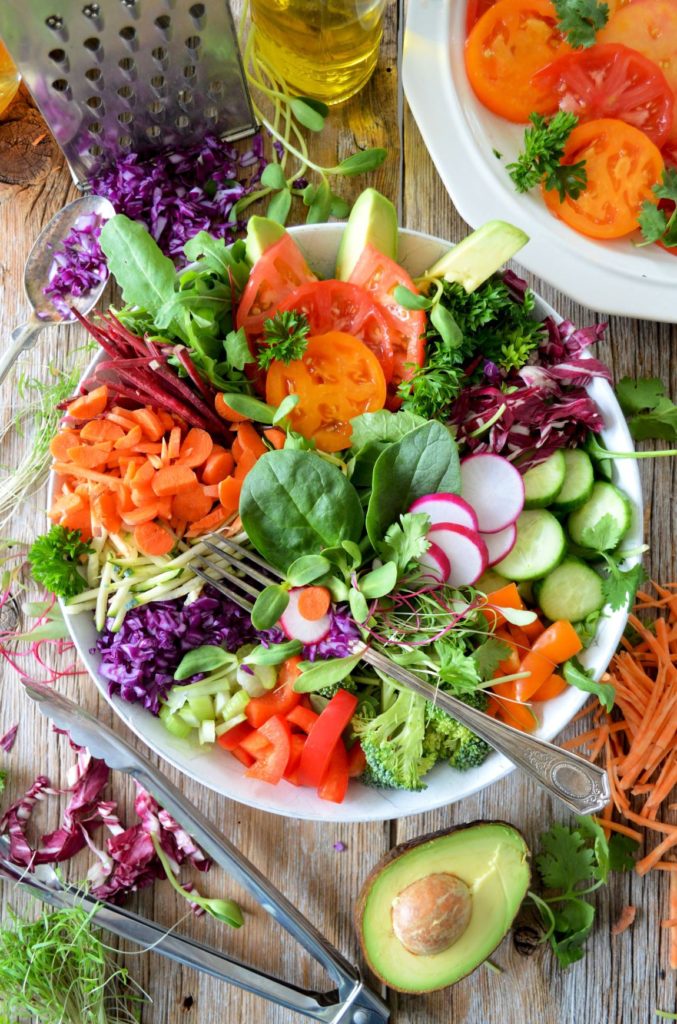
6. Eat more vegetables.
Vegetables have fiber that makes us feel full longer,
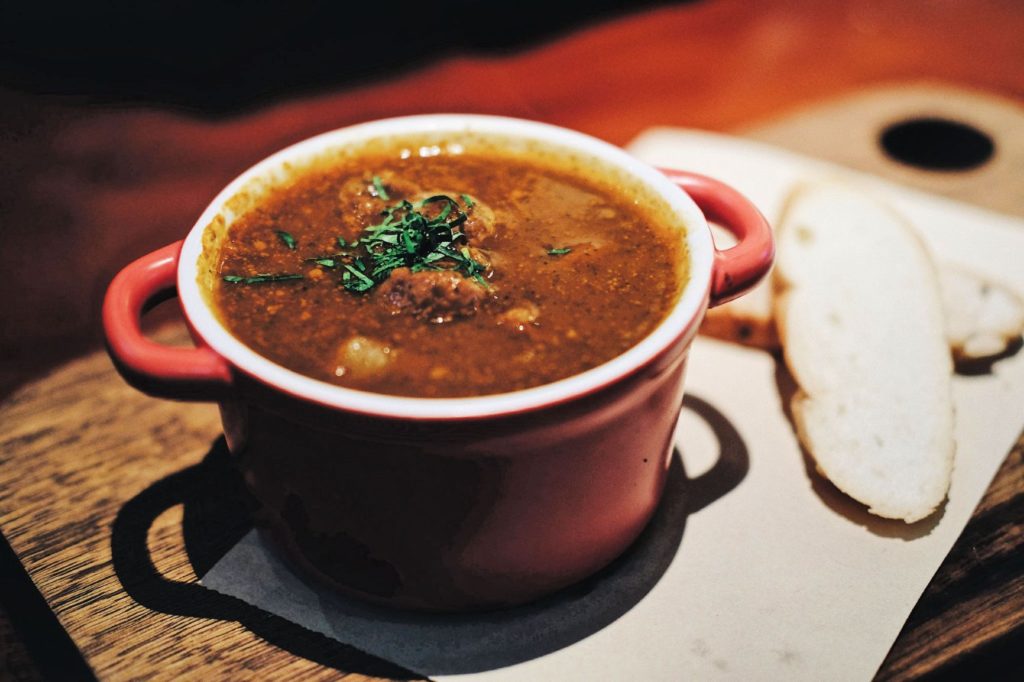
I am trying to learn to eat more vegetables at home, but this is especially important in restaurants. Besides all the vitamins, the fiber in vegetables keeps us full longer. This keeps your blood sugar more even and can prevent you from overeating. Try ordering a hearty vegetable soup like minestrone for an appetizer. Order a vegetable and salad instead of potatoes or pasta as a side dish. Ask for extra veggie toppings on wraps, pizzas, burgers, and sandwiches.
Find something on the menu that’s rich in vegetables and protein. This is the best combination for good blood sugar balance, which regulates your hunger hormones, how full you feel, your energy level, and your digestion. The U.S. government’s dietary guidelines say that half of our plate should be made up of fruits and vegetables daily.
Skip the bread basket and try ordering a salad or broth based vegetable soup first. Eating the salad first gives you the fiber to make you feel full and also helps you stave off the bread basket temptation. Make sure to ask for the dressing on the side, and opt for olive oil based salad dressings instead of the creamy ones.
Order a broth based soup before your meal comes to keep from overeating.
For example, I love ranch dressing, but just two tablespoons of it adds an extra 140 caloriesand 16 grams of fat to my meal. Yikes! A serving of salad dressing is about two tablespoons, but most restaurants tend to double that in order to coat everything in the salad and boost the flavor.
But be careful with salads. Restaurants like to add tasty toppings such as croutons, cheese, seeds, nuts, and dried cranberries that can end up having more calories than if you ate a bowl of pasta. Just ask for all toppings to be served on the side. That way you can pick and choose what you want to add and how much.
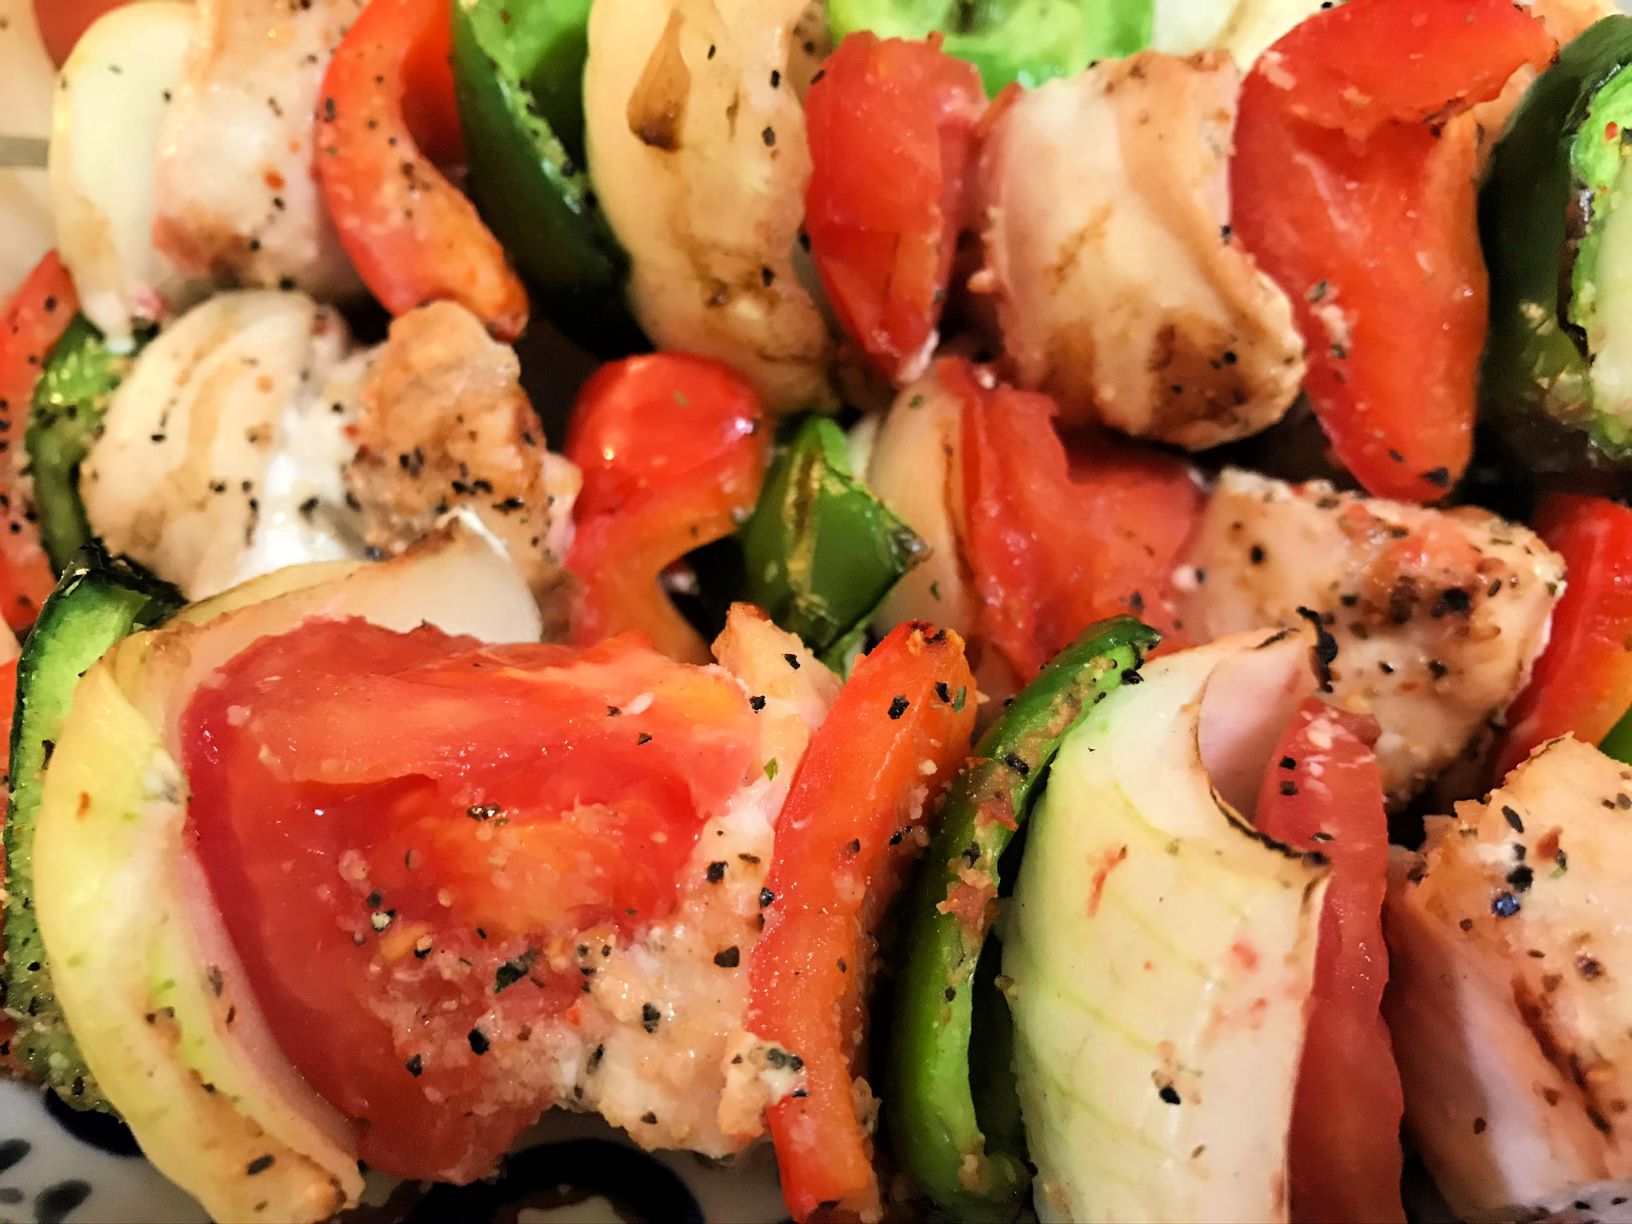
Instead of focusing on what you can’t have, focus on what healthy foods you can add to your plate. Lean meat, veggies, whole grains, and fruits can be delicious options if prepared properly. Think about choices like a chicken and vegetable kabob.
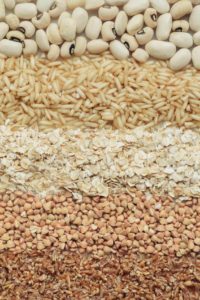
7. Go for whole grains.
Whole grains increase metabolism.
If given a choice, look for dishes made with whole grains such as brown rice, oats, barley, or quinoa. Whole wheat or whole grain buns, tortilla wraps, pasta, or pizza crust are better choices than those made with white flour. Studies have shown that whole grains actually increase metabolism, which helps you lose weight.
8. Watch your beverages.
The best choice for a beverage is always water, but if that is not enough for you make sure your alcoholic drinks are not mixed with syrups and sugar. Limit or avoid soda and sweet tea, as they are full of pure sugar. I do not always follow this advice, but make it simple and order water. It is free and you have more calories left for your food.
9. Skip dessert
Wait! Hear me out. Restaurant desserts look and sound so good on the menu, but they can sometimes have as much or more calories than your your entire meal! If it fits in your diet, and you have a healthy relationship with food then maybe you can split dessert with someone else.
If you feel that you must have something extra after dinner try skipping dessert and ordering coffee instead. Or wait until you get home and choose a lower calorie sherbet or yoghurt at home.
10. Take your time.
Have you ever heard of mindful eating? Recently I have started logging my meals, and it has forced me to stop and be aware of what all I am putting in my mouth. So many times we just wolf our food down without even stopping to really taste it or think about how much we are eating.
Instead, try pausing in between bites. Each time you take a bite of food, casually put your fork down on the plate and rest until you have fully chewed your food and swallowed. I know it sounds weird, but it makes sense. Chewing your food thoroughly and eating more slowly helps you eat less and makes you feel full more quickly.
Pausing helps you pace yourself. Your digestive system takes about 20 minutes to send the signal to your brain that you are full. If you eat until you feel full, then you were probably actually full 15 – 20 minutes earlier. This mind-body awareness keeps you in the moment spending time with others and positively impacts your eating behavior.
Really try to enjoy your food one bite at a time. You can’t truly taste your food if you are eating too quickly. Fast eaters tend to also be overeaters. If you eat slowly and mindfully, you will eat less and still be satisfied.
Enjoy your restaurant experience!
If you like dining out, don’t think you have to stop just because you want to get healthier. With these tips and a little planning, you can order meals that you love that are also nutritious. Remember you always have a choice. You do not have to choose health over taste. Keep your heart and body healthy by making good lifestyle choices work wherever you are. Bon appetit!
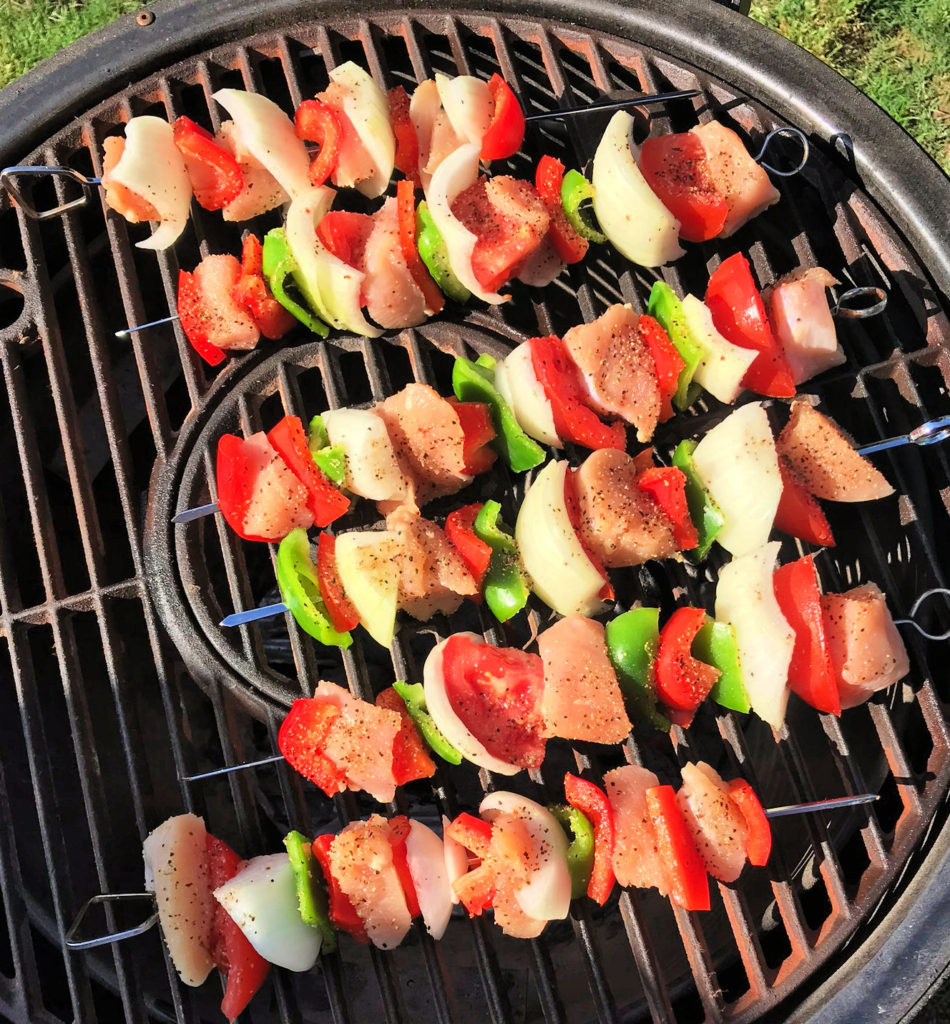
We like to use our charcoal grill in the warm weather as much as possible, and chicken shish kabobs are one of my favorite things to grill. Growing up this meal was one of my dad’s specialties on the grill. What made it so great was the special sauce he made to drizzle on top (he got mad when we called it gravy and insisted it was not gravy but sauce). I have never quite perfected this special sauce, but if you want to try it it consists of a little oil, flour, and white cooking wine. I just forgo the sauce with mine. I could never make it as good as Dad does.
This post contains affiliate links, and I may earn commission when you click on the links at no additional cost to you.
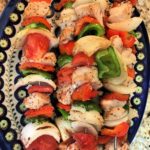
Juicy chicken seasoned with Garlic Pepper and threaded with a colorful stack of veggies, these yummy Grilled Chicken Kabobs can be prepped ahead of time or put together at the last minute. Memorial Day weekend has come and gone, which means we are officially into the throngs of summer. And summer means it’s time for cookouts, ice cream, and watermelon.
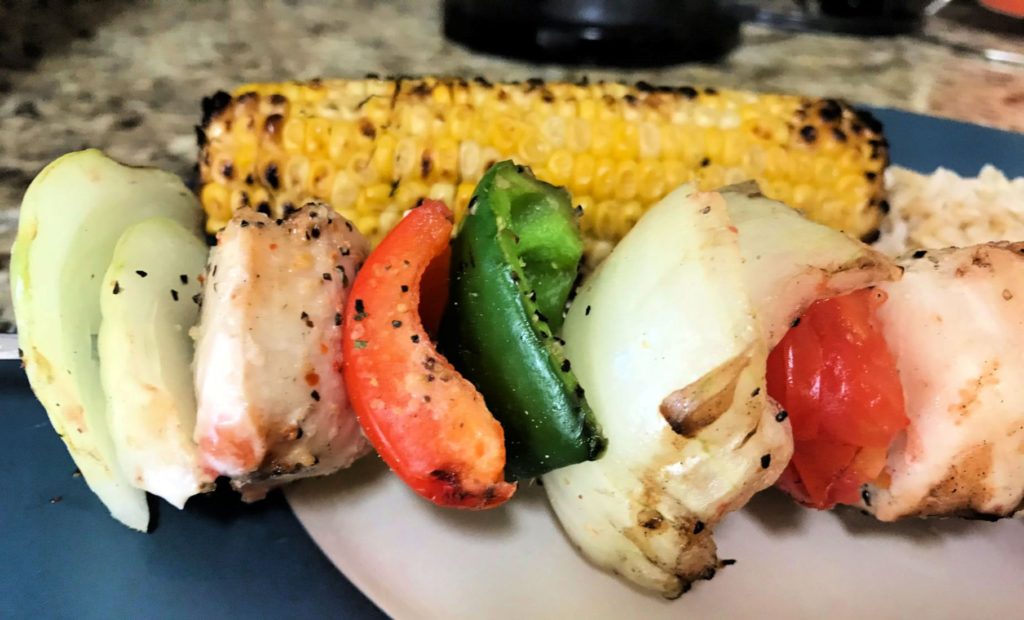
Just like grilled steak or bratwurst, whenever we think of grilling something I turn to these Grilled Chicken Kabobs more often than not. They are easy to make and are so healthy and delicious. Serve them with grilled corn on the cob and wild rice, and they make a complete meal. The appealing colorful presentation makes them perfect for entertaining guests at a party or cookout.
Grilled Chicken Kabobs looks so good on the plate!
(By the way, here in Memphis we never call a cookout a BBQ like you Northerners do. BBQ is a food here and one that Memphis is known for like no other, but that’s a whole other blog post for another time.)
Everyone loves these Grilled Chicken Kabobs. They’re fast and healthy and can be changed up depending on what you have on hand in your kitchen. I’ve suggested certain vegetables, but you can use several different kinds of veggies and choose your own favorite seasoning.
I promise these chicken kabobs will not disappoint. Chicken must be cooked all the way through, but it is easy to overcook chicken. I cannot stand chicken that is too dry or tough, so if you are like me you will love this juicy Grilled Chicken Kabob recipe with chicken cooked just right.
So fire up your grill or oven. Here are the easy steps for cooking Grilled Chicken Kabobs.
Ingredients
Boneless skinless chicken breasts: You can purchased fresh (my preference) or frozen chicken, but frozen chicken will need to be completely thawed before using or it won’t cook evenly. If the label says the chicken has already been brined, you can skip the brining step below.
Vegetables: I like to use different colored bell peppers, yellow onion, and tomato, but you can add anything else such as zuchini or mushrooms.
Oil: Since you will be grilling over high-heat, I recommend regular olive (not extra-virgin). It has a higher smoking point.
Kosher Salt: Used in the brine and to season chicken
Seasonings: I used California style Garlic Pepper seasoning, but go ahead and substitute any dry seasoning blend you like. Garlic powder, Steak seasoning, and Paprika work well too.
You will also need:
Skewers: Either reusable metal skewers (this is what I use) or wooden skewers. Keep in mind that wood burns, so if you choose to use wooden skewers make sure you soak them in water at least 15 minutes before using to prevent burning.
Grill: Time to fire up the charcoal or gas grill! We love our charcoal grill. Or if you prefer to cook the chicken indoors, you can use a grill pan instead.
More great grilling ideas
How to Cook Grilled Chicken Kabobs
Step 1: Brine the chicken
If your chicken did not come pre-brined from the store, you will want to take this short simple step first to assure that the juices are locked in and the chicken doesn’t dry out on the grill.
First, soak the chicken breasts in lukewarm salt water for at least 15 minutes. Then rinse the chicken off with some cold water, pat the chicken breasts dry with paper towels, and cut the chicken up into bite sized pieces.
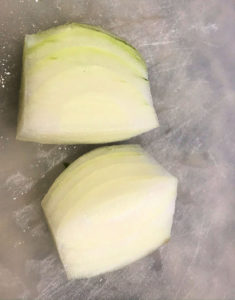
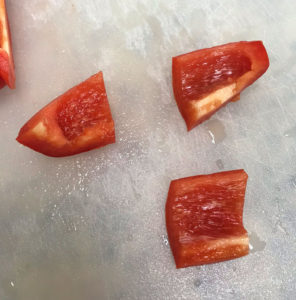
Next, cut the vegetables into about 1 inch pieces.
Cut large chunkc of onion then separate them some.
Don’t cut your vegetables too small, or they will be hard to thread on the skewer.
I did not marinate the chicken in this recipe, but if you don’t want to use dry seasonings only you can marinate the chicken in Italian salad dressing for 30 minutes. Just be careful to not burn the chicken as the oil in salad dressing burns easily.
Step 2: Season the chicken and vegetables
Drizzle the chicken and vegetables with olive oil, sprinkle on your desired dry seasonings (I used garlic pepper seasoning), and toss well in a bowl until everything is coated.
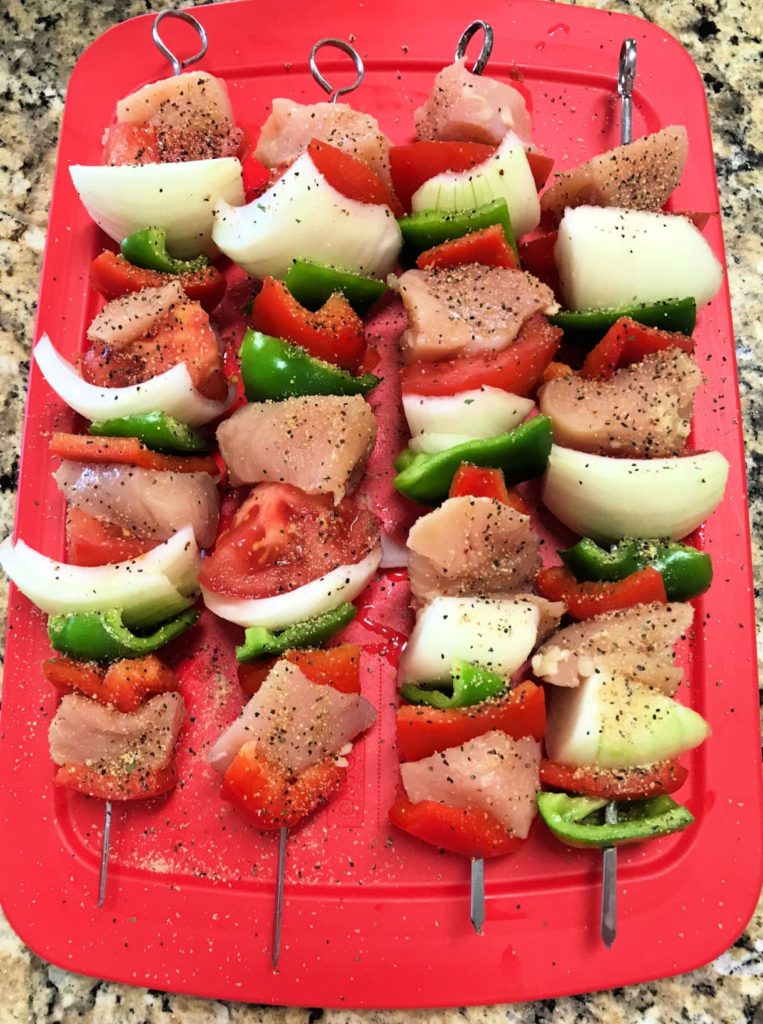
I add a little more seasoning on top after I’ve threaded everything onto the skewer.
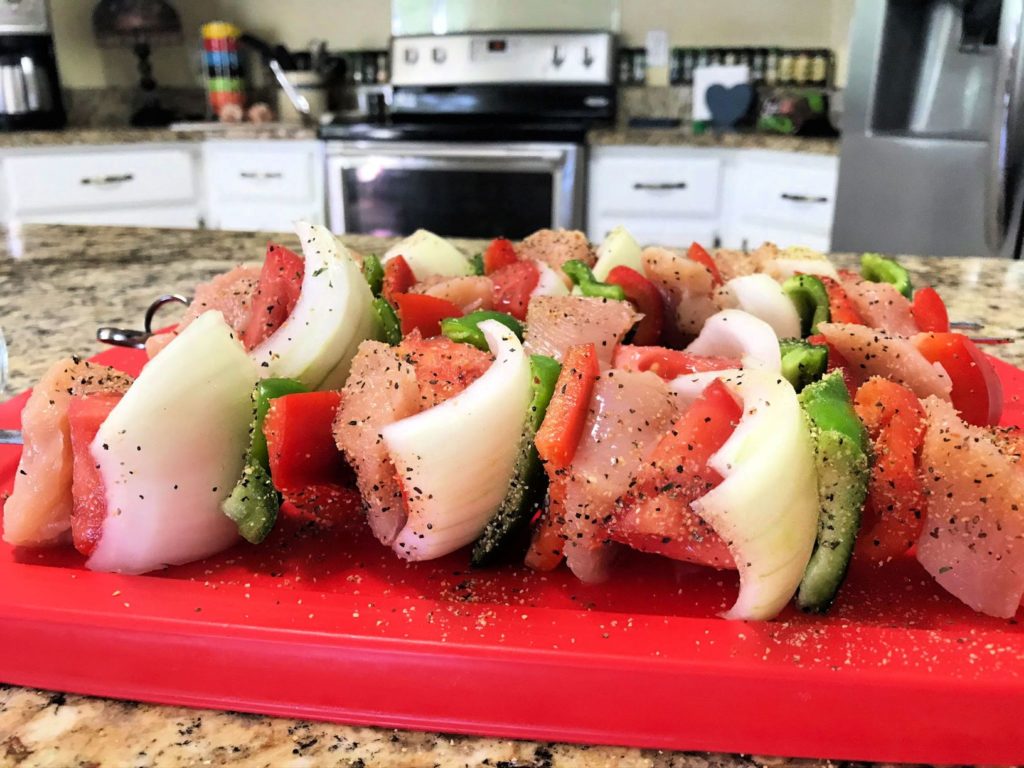
Step 3: Thread the Skewers and Heat Grill
Heat your grill up to medium-high heat. Thread the chicken and vegetables onto the skewers. I used a pattern of chicken, tomato, onion, red pepper, then green pepper, and repeated this pattern until the end of the skewer.
Make sure you do not jam things too close together on your skewer. They will cook better if a little air can get in between the pieces.
Leave a little space in between pieces on the skewer and follow a pattern.
Step 4: Grill
On 350 degrees F, cook the chicken and vegetable skewers for about 6 or 7 minutes then turn and cook the other side 7 minutes. You can turn them more than once if needed. To keep the chicken from drying out we will occasionally spritz a little water on them as they are cooking, but make sure you don’t put the charcoal out! If you are using the oven, cook them about 25 minutes on 450 degrees turning once halfway through.
Cook until the chicken is golden brown and cooked all the way through. Do not overcook!
Your chicken should be golden brown and cooked all the way through. It may take a little practice to find that perfect balance between cooking the chicken enough but not overcooking it and drying it out. No one wants undercooked or overcooked chicken. The chicken is cooked when it reaches an internal temperature of 165 degrees F on an instant read meat thermometer and the juices run clear when a piece of chicken is cut.
Transfer the skewers to a clean plate and cover them loosely with aluminum foil to keep them warm. They are best served right away while the chicken is still warm and juicy. Garnish with fresh lemon wedges and a sprinkling of parsley if desired. Serve them with grilled or boiled corn on the cob and wild rice.
Grilled chicken kabobs make an easy healthy meal.
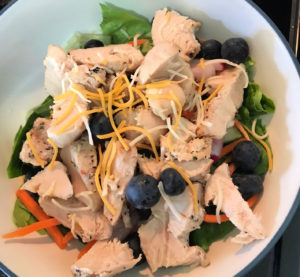
Refrigerate leftovers for up to three days. I cut up the vegetables and used them in chili then put the leftover grilled chicken on top of salad.
Use leftover grilled chicken on top of a salad.
Let me know if you try these and what seasoning you used. Please rate this recipe and share it with others. Happy grilling!
Brine the chicken: If your chicken did not come pre-brined from the store, you will want to take this short simple step first to assure that the juices are locked in and the chicken doesn't dry out on the grill.First, soak the chicken breasts in lukewarm salt water for at least 15 minutes. Then rinse the chicken off with some cold water, pat the chicken breasts dry with paper towels, and cut the chicken up into bite sized pieces. Next, cut the vegetables into about 1 inch pieces.
Seasn the chicken and vegetables: Drizzle the chicken and vegetables with olive oil, sprinkle on your desired dry seasonings (I used garlic pepper seasoning), and toss well in a bowl until everything is coated.
Thread the Skewers and Heat the Grill: Heat your grill up to medium-high heat. Thread the chicken and vegetables onto the skewers. I used a pattern of chicken, tomato, onion, red pepper, then green pepper, and repeated this pattern until the end of the skewer.Make sure you do not jam things too close together on your skewer. They will cook better if a little air can get in between the pieces.
On 350 degrees F, cook the chicken and vegetable skewers for about 6 or 7 minutes then turn and cook the other side 7 minutes. You can turn them more than once if needed. To keep the chicken from drying out we will occasionally spritz a little water on them as they are cooking, but make sure you don't put the charcoal out! If you are using the oven, cook them about 25 minutes on 450 degrees turning once halfway through. Your chicken should be golden brown and cooked all the way through. It may take a little practice to find that perfect balance between cooking the chicken enough but not overcooking it and drying it out. No one wants undercooked or overcooked chicken. The chicken is cooked when it reaches an internal temperature of 165 degrees F on an instant read meat thermometer and the juices run clear when a piece of chicken is cut.
Transfer the skewers to a clean plate and cover them loosely with aluminum foil to keep them warm. They are best served right away while the chicken is still warm and juicy. Garnish with fresh lemon wedges and a sprinkling of parsely if desired. Serve them with grilled or boiled corn on the cob and wild rice.
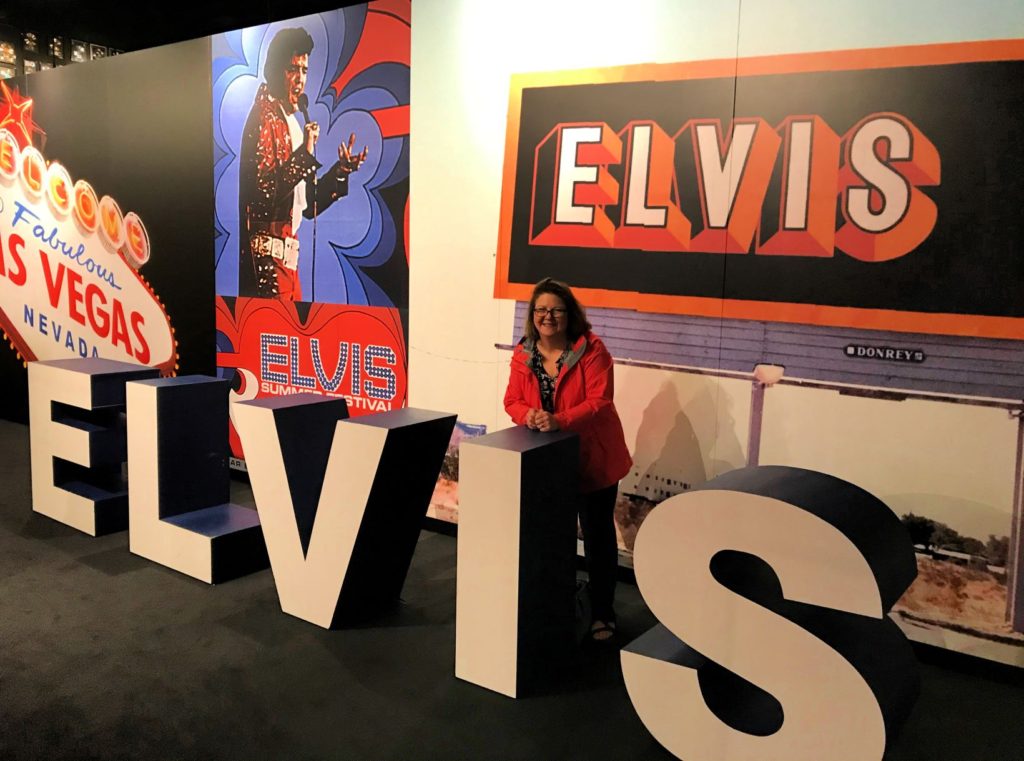
Yay! The gates of Graceland are open again! I consider Memphis my hometown. I grew up here, went to high school here then came back here again after living a few other places. And I am ashamed to say that I never visited Graceland until recently. It seemed to be a place that tourists visited, but native Memphians only went if they were hosting out of town visitors. Friends who had been in the past did not seem too impressed, so I was not motivated to go. But boy, was I missing out! Things have changed.
Thank you to David Beckwith of the Beckwith Company for the complimentary tickets in exchange for this blog post!
A few years ago Elvis Presley Enterprise completely rebuilt and enlarged the tourist area, and it is now a definite must-see if you visit Memphis. Elvis Presley is known as the King of Rock and Roll, so for many seeing Graceland is on their bucket list. Over half a million people visit Graceland each year. I wondered if it was going to be a cheesy tourist trap, but despite there being some souvenir shops it did not feel overly touristy at all.
Try one of Elvis’s favorite sandwiches: Peanut Butter and Banana
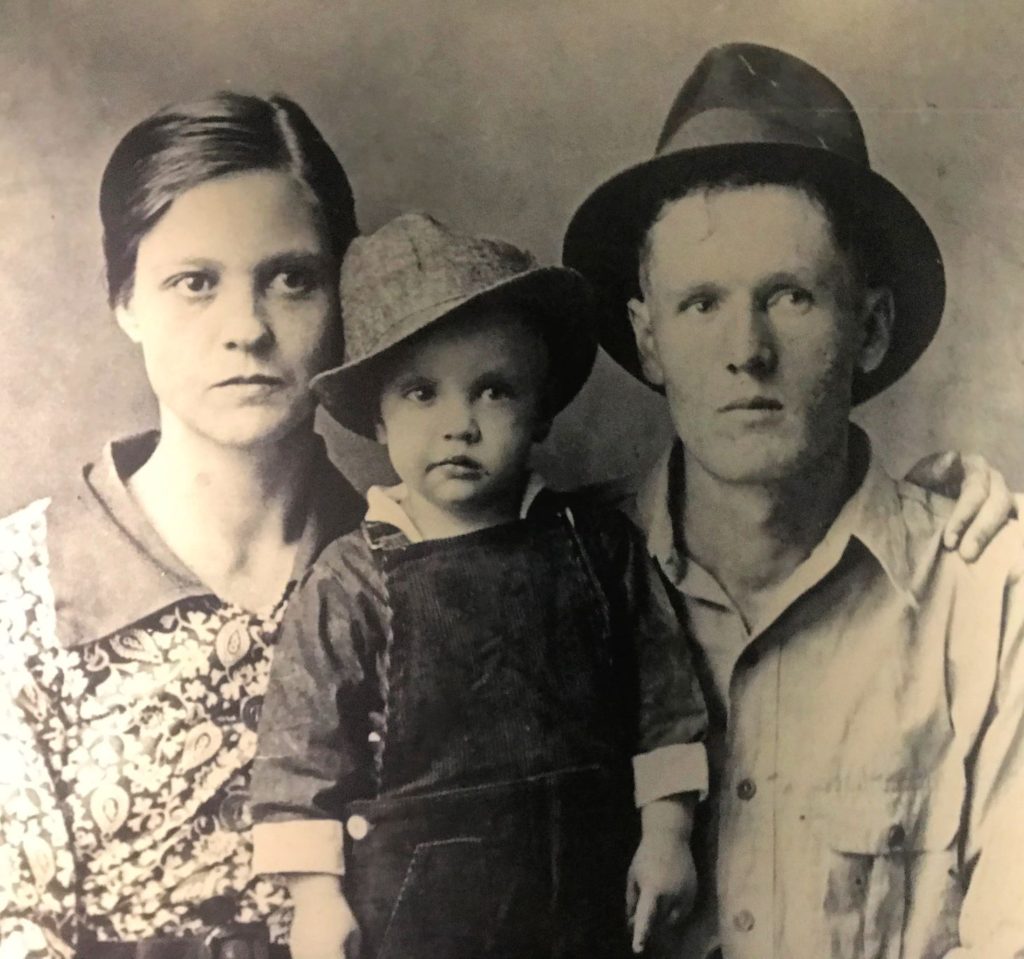
Living in Memphis means that I’ve heard of lots of stories about Elvis from people who knew him personally. My husband’s mother went to school with Elvis and said he was always talking about how much money he would make someday. Well, his ambition sure paid off! I have always been a fan of his music, but you will appreciate it even more when you hear the back story to his songs and success.
My friend Denise told me that her dad, Ray Harris (nicknamed Ace) owned a car dealership with Elvis’s dad. Elvis loved cars and was always hanging around the car shop. So whenever my friend would come visit her dad there, Elvis would pick her up and carry her around and play with her.
She said he would always head over to the Cats Drug Store and sit in his flatbed and sing. Her dad spent time with the Presley family in the mansion some. In fact, he was the one who provided the Cadillacs for the burial service, and he was actually with Elvis’s dad, Vernon, when Elvis died. So this put to rest the rumors that Elvis had not died but was alive and well in Hawaii. It turns out that Al Strada, who looked a lot like Elvis, was actually who people were sighting.
My friend Denise sings in the church choir with me and has a beautiful voice. Back in the day she looked a lot like one of Elvis’s singers named Cathy Westmoreland. Cathy was leaving, and my friend was told she could fill in and that the “audition” was just a formality. But then Elvis died the week before she was to audition.
She describes Elvis as a “very sweet man, very kind.” She tells the story of how one time Elvis was at the car dealer and a customer, an African American lady, was walking around and around his car looking it over. He told her, “You can’t have that one, because it’s mine. But go pick out another one you like.” He bought this total stranger a car. When word got out the car dealer was flooded with people who were hoping they would run into Elvis there so he could buy them a car too!
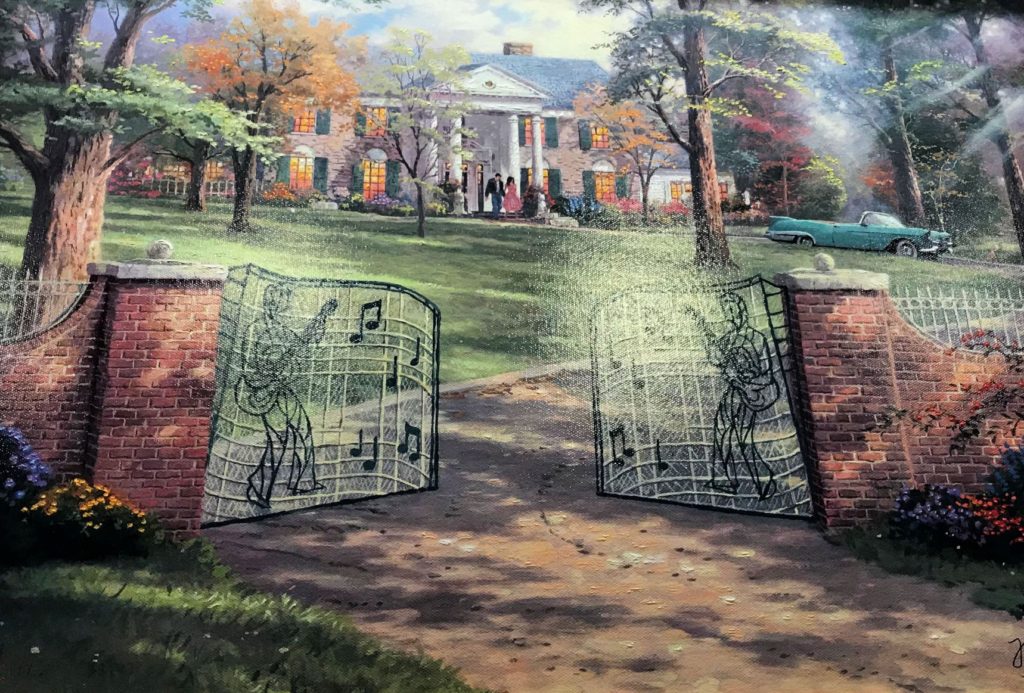
Painting of the Gates of Graceland
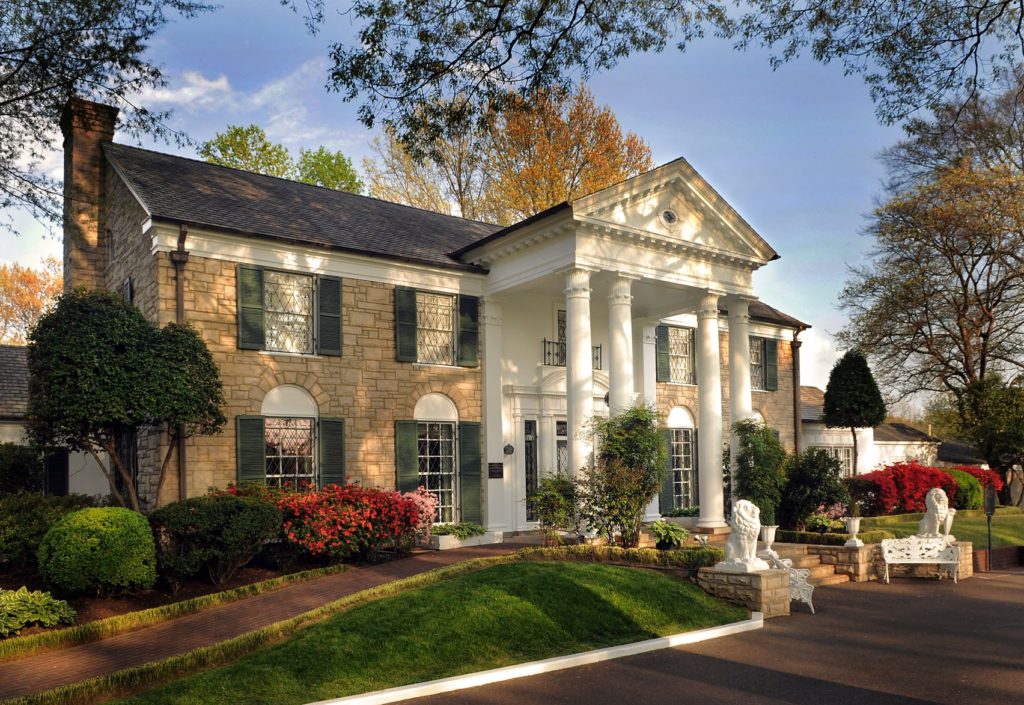
Elvis’s Graceland is so much more than a big old house. It was the private retreat of the true King of Rock ‘n Roll. It was where his family actually grew up and spent their time together. You can explore his life and legacy by viewing his home and estate while listening to and reading about his fascinating history in the various museum experiences.
There are several different tour options available. And you are in luck, because they are back open now and it will be less crowded due to reduced capacity (25%) during their re-opening. They are doing everything they can to protect the health and safety of their guests, and you can enjoy more space on your tour now due to social distancing protocols. However, you are highly encouraged to buy your tickets in advance, since they are allowing fewer guests in at a time.
The area of town where Graceland is located has changed over the years and is now not considered a great part of town. Unfortunately like many large cities we have our fair share of crime. But I was pleasantly surprised at the secure gated parking lot. There is a fee for parking, but there is ample space. It is a very safe and secure attraction that you can feel confident visiting.
Your ticket will be for a specific tour time, and if you want to see everything you need to allow about 4 hours. We went in March right before the coronavirus lockdown, so it was unusually not crowded at all. I would imagine that the summer months and Elvis week would be the most crowded times.
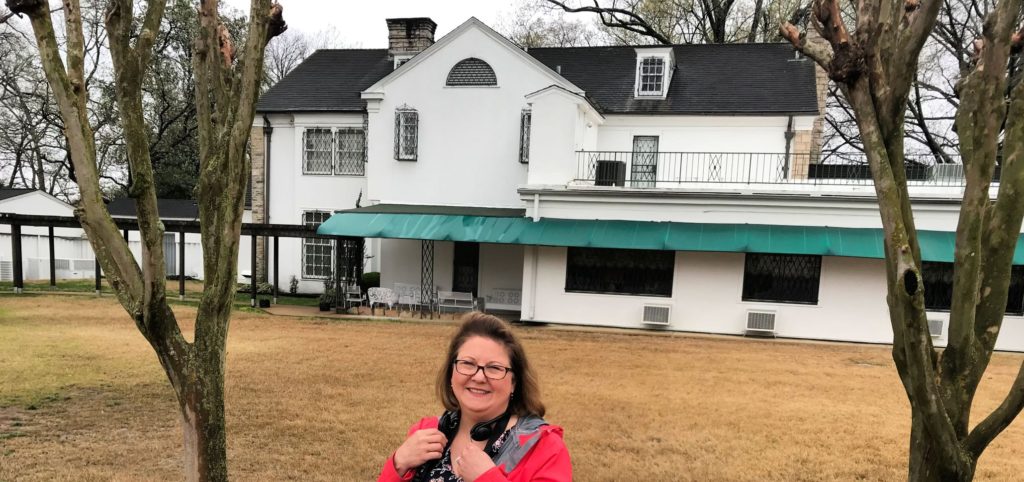
Your tour starts with a short video that was really interesting. Then you will board a shuttle bus to go across the street to the Mansion. You are given an iPad and headphones (all cleaned) which allows you to explore the personal side of Elvis Presley with an interactive tour of the Graceland Mansion, hosted by John Stamos and featuring commentary and stories by Elvis and his daughter, Lisa Marie.
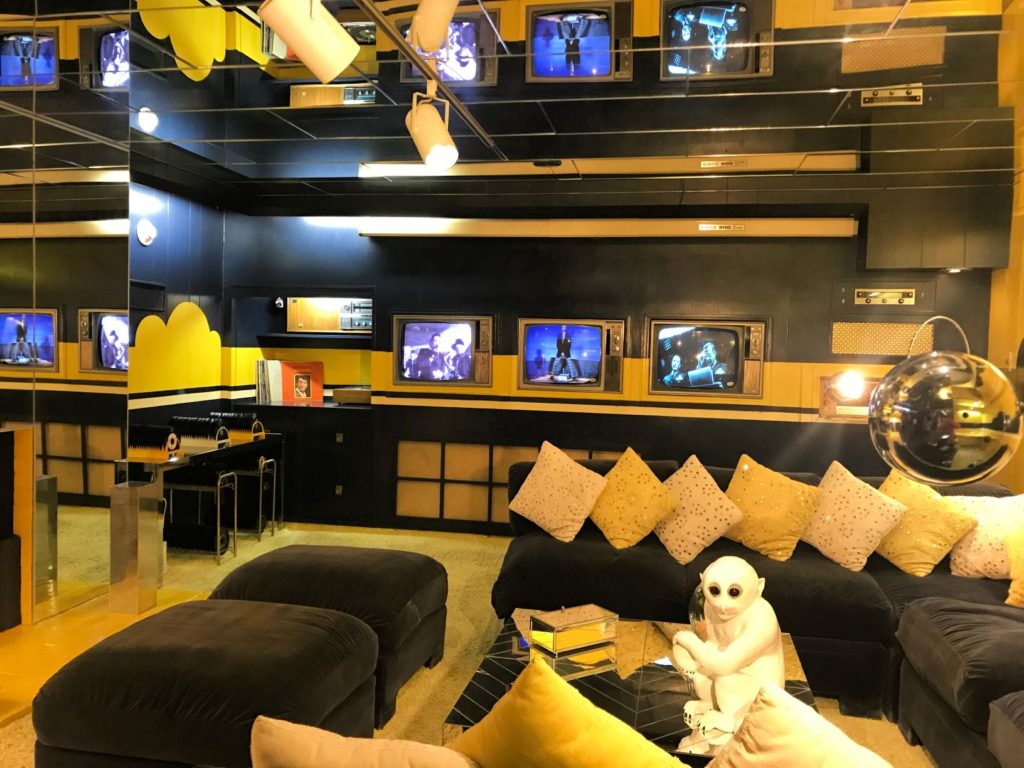
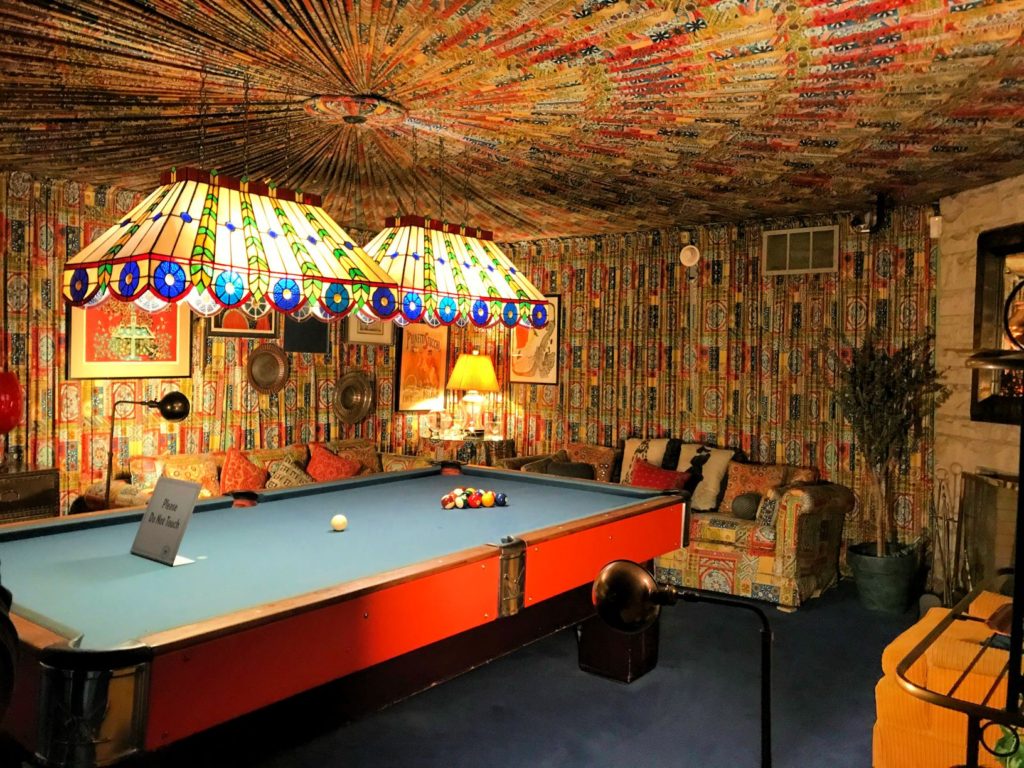
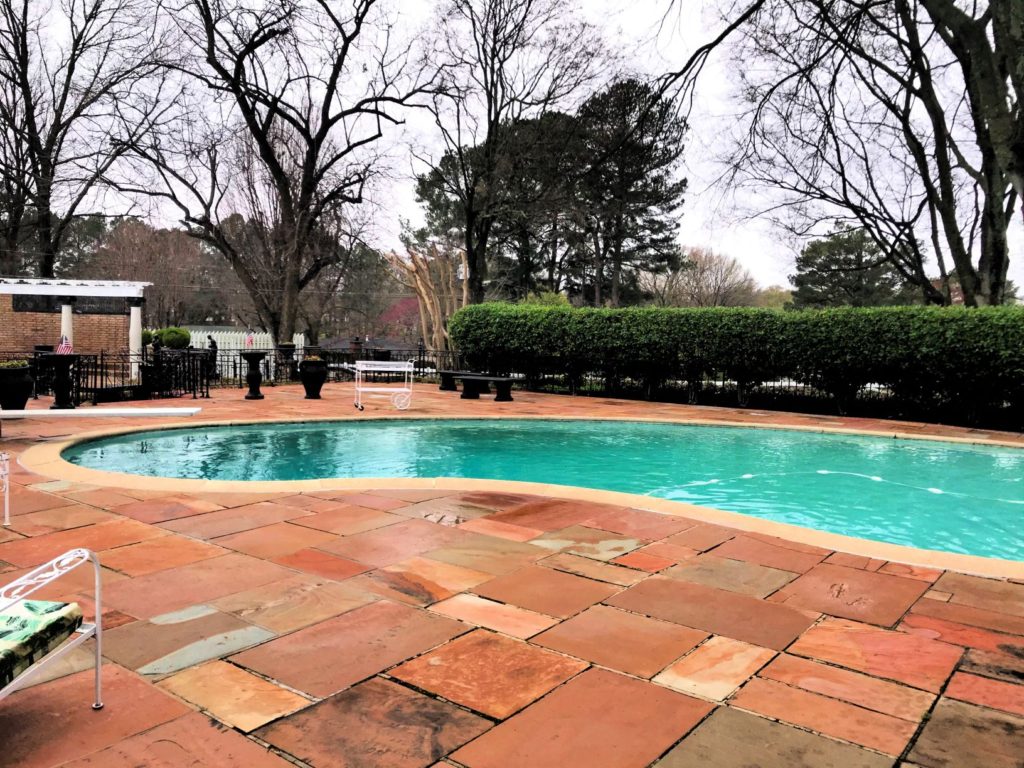
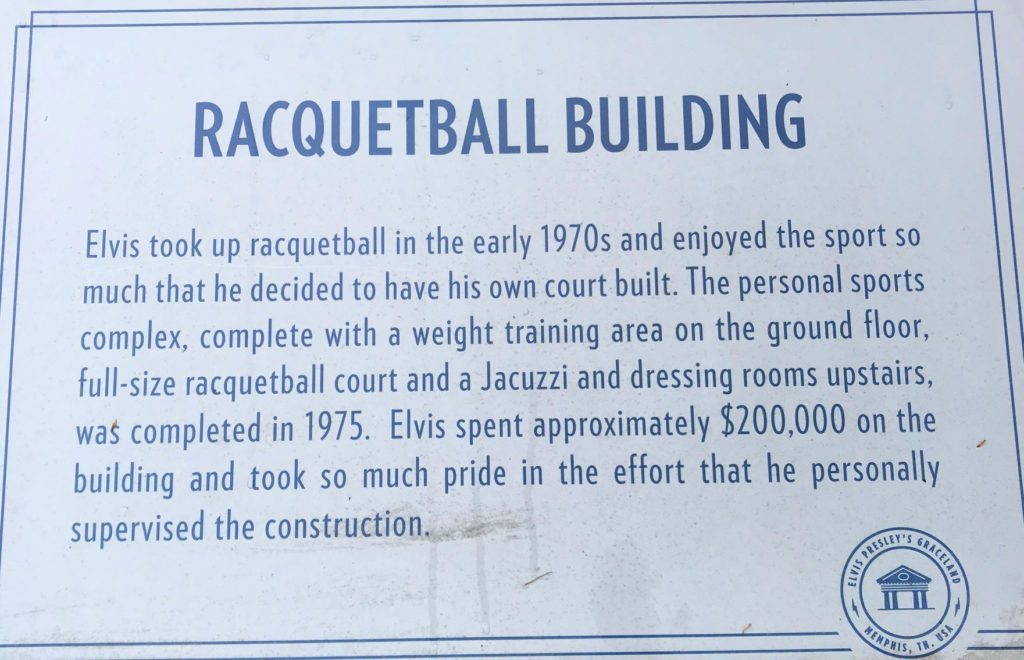
The mansion is not enourmous by today’s standards, but you will not be disappointed. As outlined on their website, the tour of Graceland Mansion includes the living room, his parents’ bedroom, the kitchen, TV room, pool room, the famous Jungle Room, his father’s office, the newly-enhanced Trophy Building, the Racquetball Building – newly-restored to how it looked in 1977, and Meditation Garden. Elvis purchased his home when he was only 22, and every item in the home is an original from when Elvis lived there.
Dining Room at Graceland MansionLiving Room at Graceland MansionTV Room at Graceland Mansion I’m not sure I’d be comfortable watching TV with that creepy little monkey in the room, but hey that’s just me.The Pool Room at Graceland Mansion Look at the multi colored fabric all over the walls and ceiling. So 70’s!
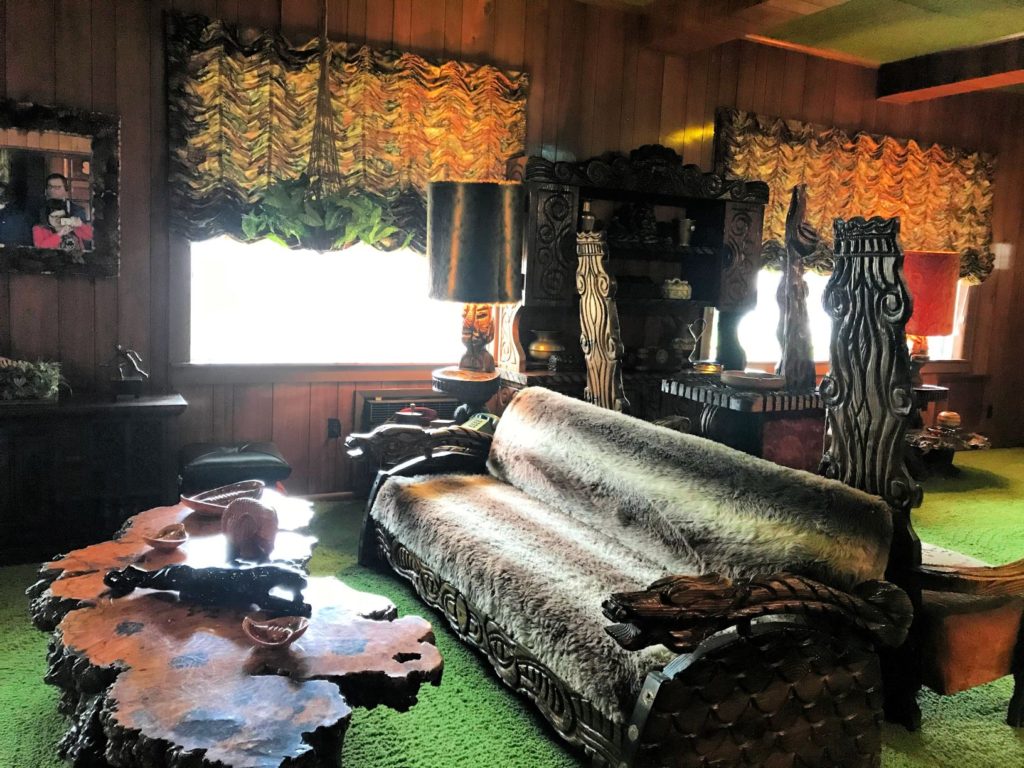
One of my favorite rooms to see was the famous “Jungle Room” mentioned in Marc Cohn’s song “Walking in Memphis.” The room started out as a practical joke. Elvis bought all the strange furniture to annoy his dad. But then he decided to keep it, because the room has character. There is even green shag carpeting on the ceiling! That is one part of the 70’s I do not miss. They put shag carpet absolutely everywhere.
Jungle Room at Graceland Mansion
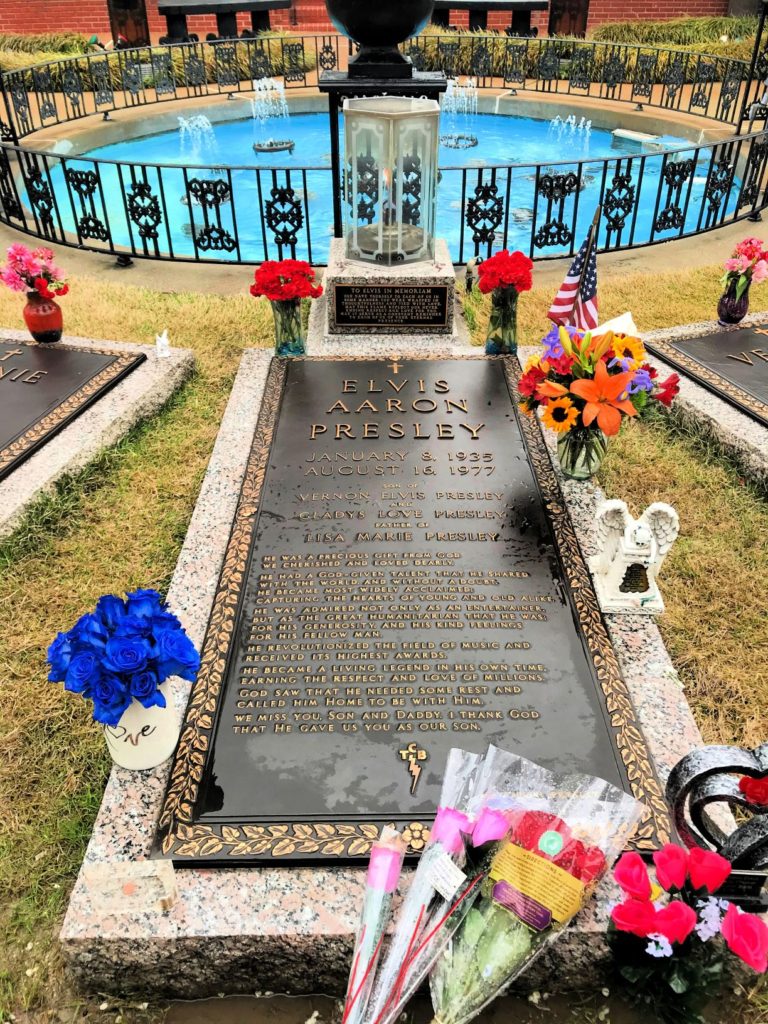
The rest of the 14 acre estate is interesting as well. You see his dad’s office, the swimming pool, the horses, and what is called Meditation Garden where the family graves lie. It is all really an emotional journey through Elvis’s life, and when you get to his grave it makes you pause and think.
In front of Vernon Presley’s office at GracelandElvis’s Swimming Pool at GracelandElvis’s Racquetball Building is restored to how he had it when he lived at Graceland.Beautiful Stained Glass in Meditation Garden at GracelandBurial Place of Elvis Presley
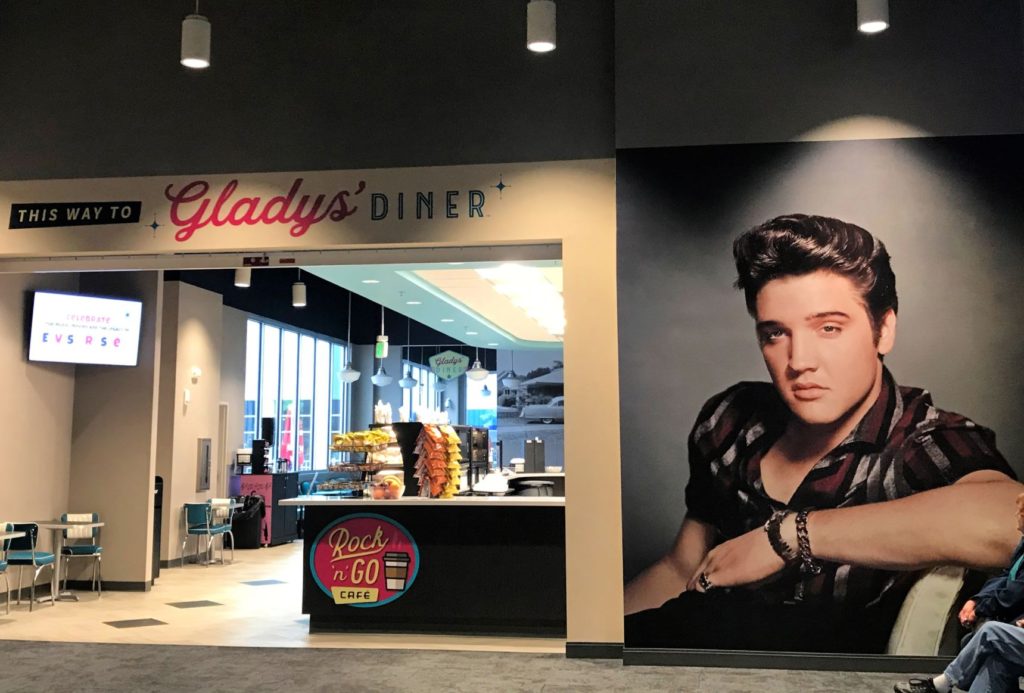
Elvis Presley’s Memphis
Across the street from the mansion (the side the ticket office is on) lies what is called Elvis Presley’s Memphis. This state-of-the-art entertainment and exhibit complex is over 200,000-square-feet in size and allows you to chronologically follow Elvis’s life and music.
You will be surrounded by all sorts of things Elvis loved and experience the sights and sounds of the city that inspired him. Elvis’s roots are in Memphis, and it is interesting to learn about the city that influenced his life and career. There is no official tour for this part, so you can spread out and tour at your own pace however you want.
Below are some of the exhibits you will encounter:
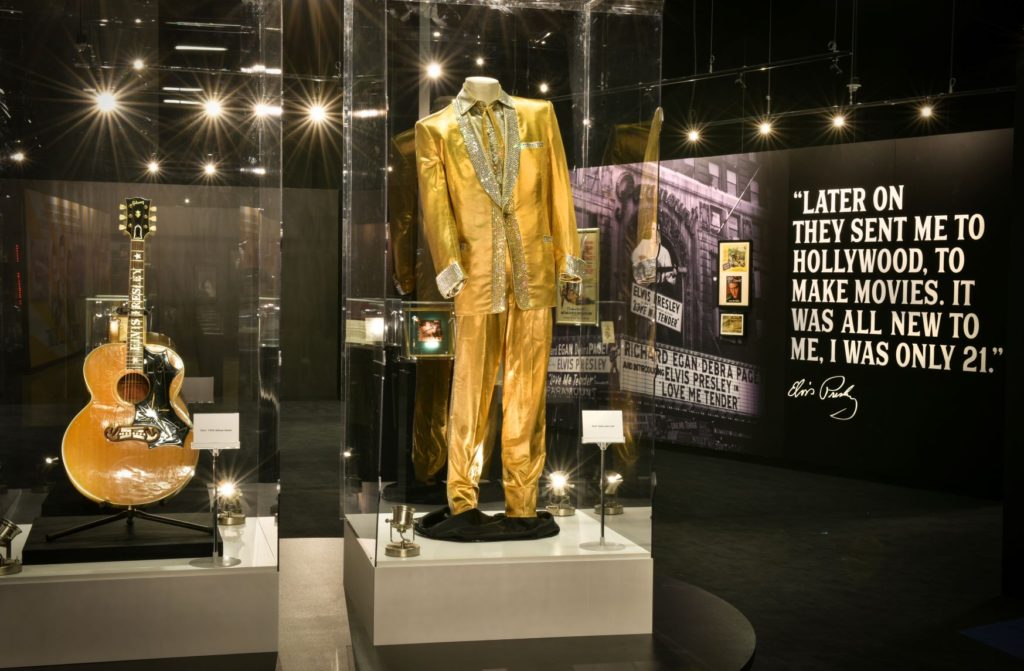
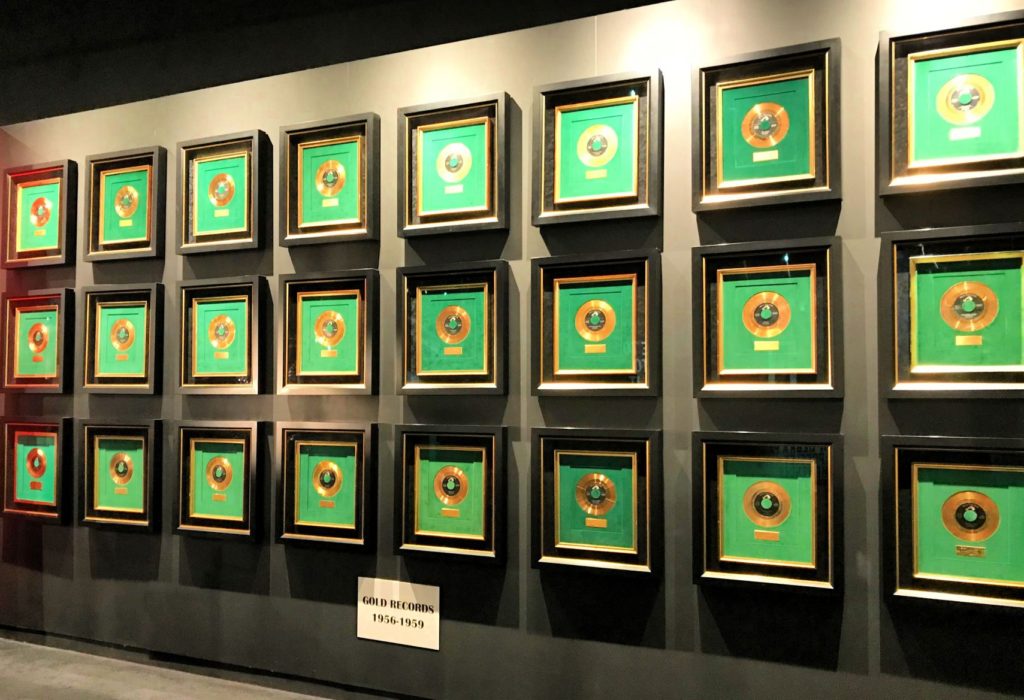
Elvis the Entertainer Career Museum
Here you will find hundreds of artifacts and incredible photos from significant events in Elvis’s life, as you tour the extensive Graceland Archives. Included in this exhibit is his amazing collection of gold and platinum records, his spectacularly dazzling jumpsuits with his signature Elvis flare, and other clothing, memorabilia from his movies, and more! This museum is the world’s largest and most comprehensive Elvis museum in the world. There was so much to see from practically all aspects of his life. Elvis truly started a music and pop culture revolution.
A video on their website shows a lady putting on white gloves to pick up one of Elvis’s jeweled belts. Made of real gold and silver and covered in jewels, it weighs 20 pounds! She also introduces us to an enormous 16 carat diamond ring with the initials TCB (Taking Care of Business). And there is always his famous tiger suit. So flamboyant and extravagant. No one knew how to take care of business like Elvis did!
Viva Las Vegas!Some of Elvis’s Many Gold Records There is another display in this building with a 40 foot tall wall filled with his records and awards, many of which were awarded after his death.
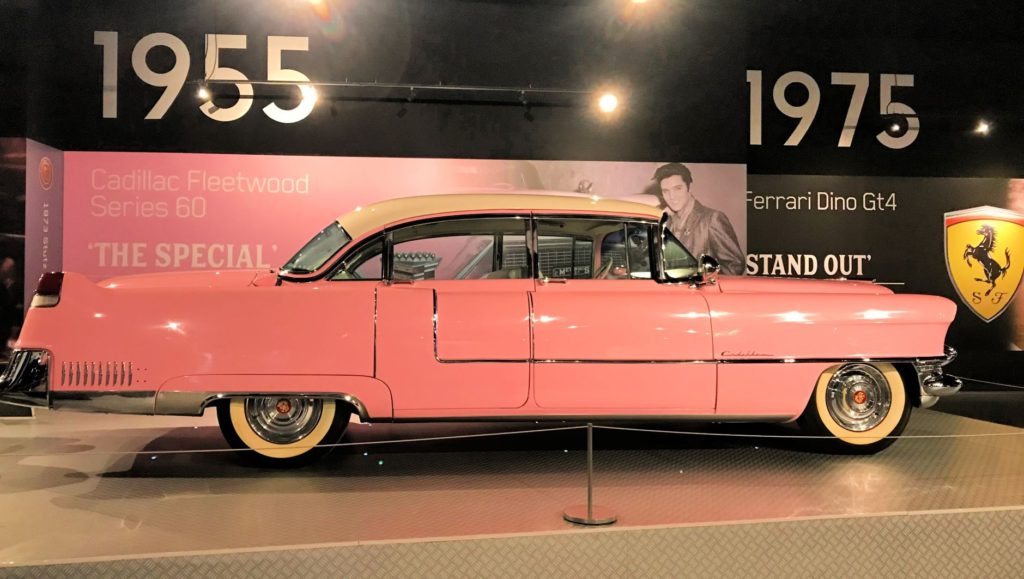
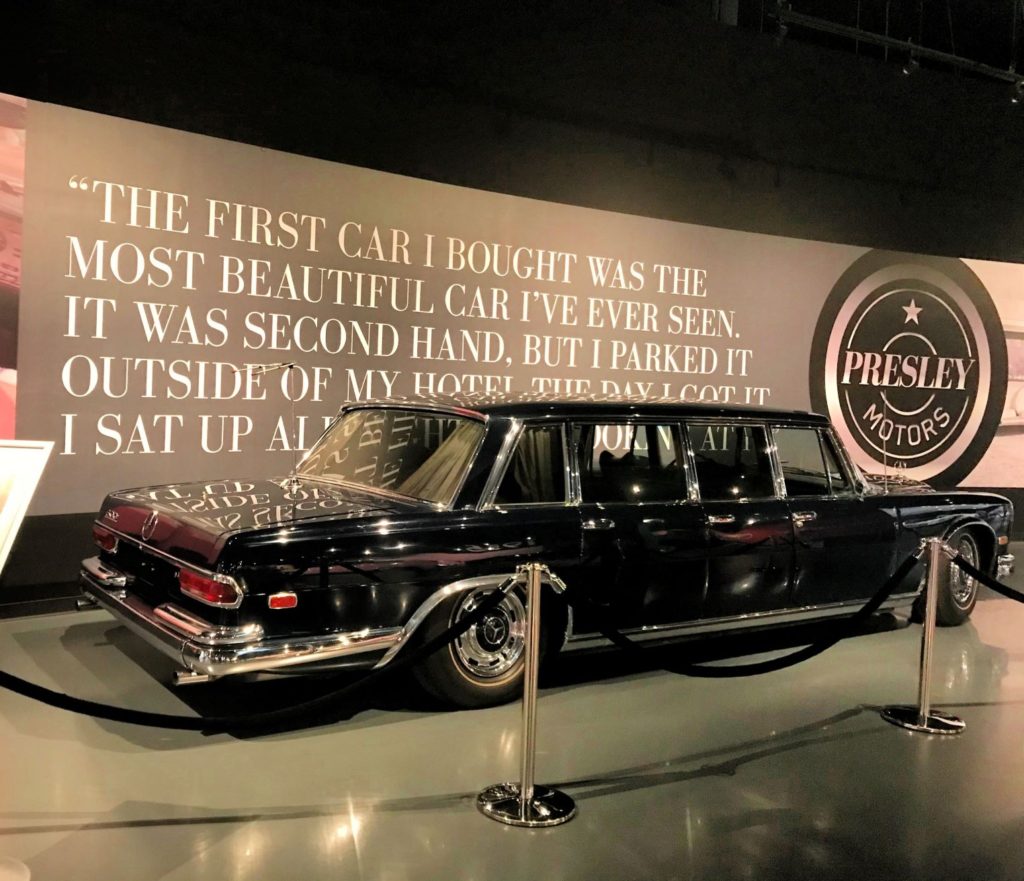
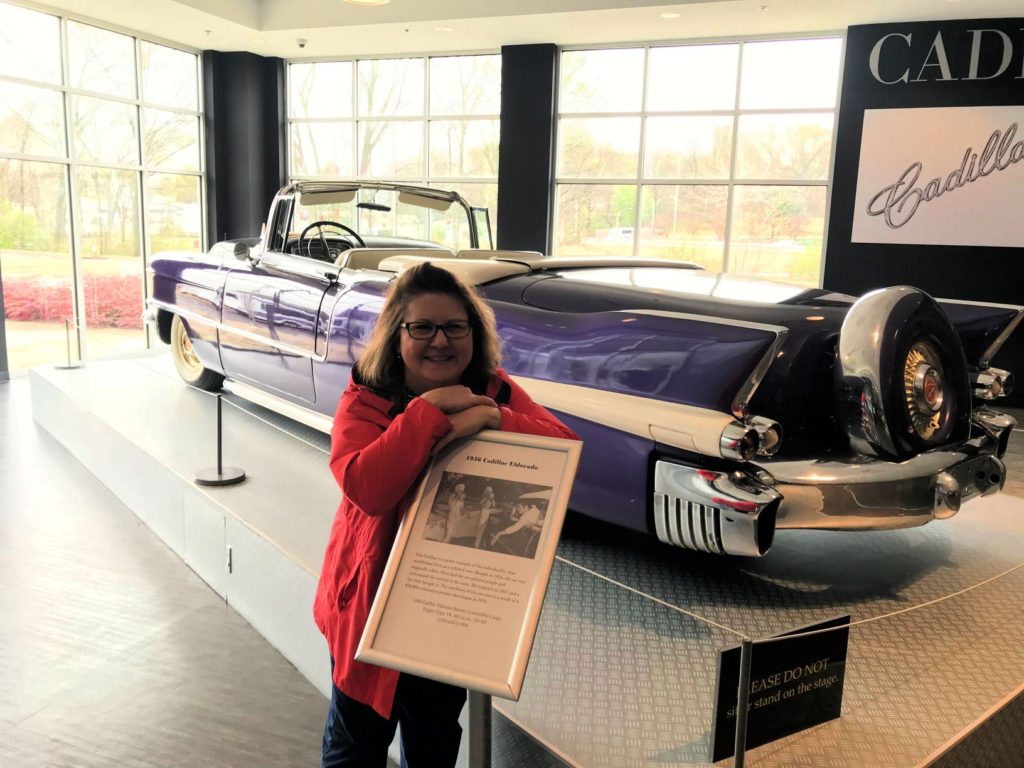
Presley Motors Automobile Museum
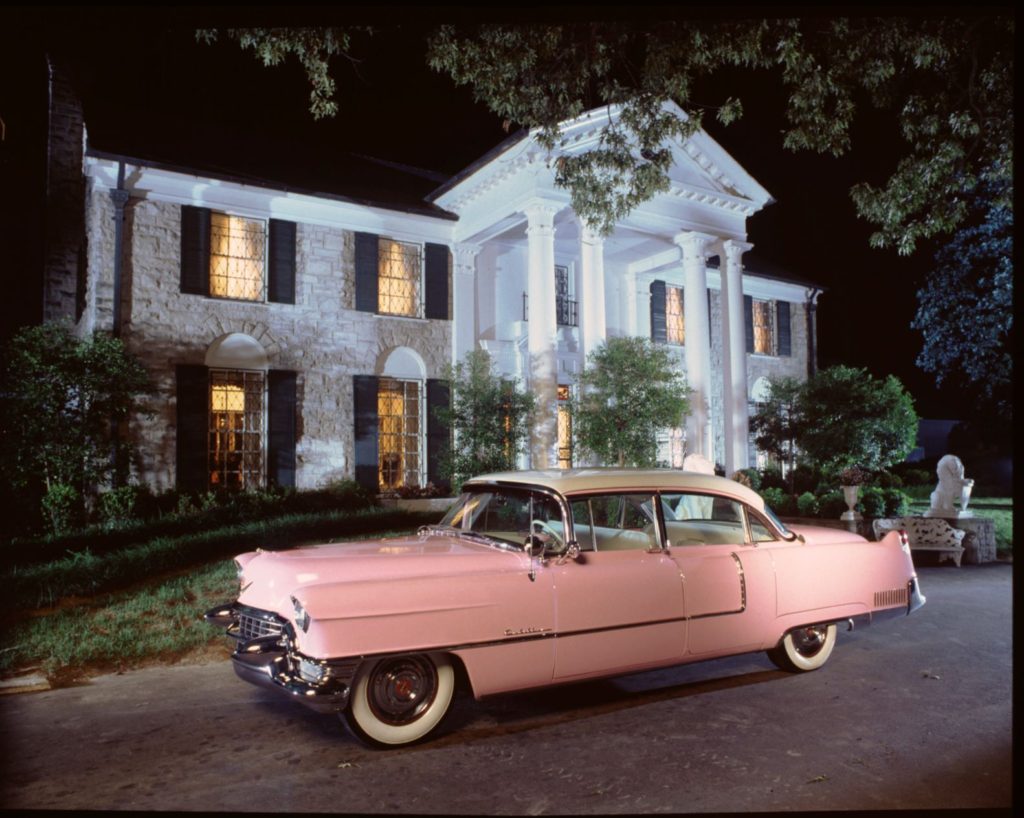
If you love cars, make sure you include this exhibit on your ticket. It is amazing! Elvis loved cars, and in this exhibit you can walk around and see some of Elvis’ favorite automobiles, including his iconic Pink Cadillac, 1973 Stutz Blackhawk, 1956 Cadillac Eldorado, 1975 Dino Ferrari, Mercedes Benz limousine, Rolls Royce sedans and more. I had no idea he was so into cars!
Elvis’s Pink CadillacElvis loved cars!One of Elvis’s Famous Cadillacs Do I make a good car model or what?Elvis had some pretty cool race cars too.
Elvis Discovery Exhibits
There are several huge buildings with themed discovery showcase spaces that give you a peak into several important parts of Elvis’s life and what influenced him as a person and a performer.
Elvis Discovery Exhibits include:
Presley Cycles Exhibit
X’s & O’s: Elvis and His Love of Football – New!
Icons: The Influence of Elvis Presley Exhibit
Elvis’ Tupelo Exhibit
Hollywood Backlot
Private Presley Exhibit
Archives Experience
Lisa Marie: Growing Up Presley Exhibit
X’s & O’s: Elvis and His Love of Football – NEW
Who’s ready for some football? Elvis loved football! Whenever he had the chance he was either out playing a game of touch football or watching a game on TV. This exhibit inside the Haberdashery celebrates Elvis’s favorite sport and has several items that are on display for the first time ever at Graceland. You get to see some of his handwritten plays, sports equipment, pictures, and more.
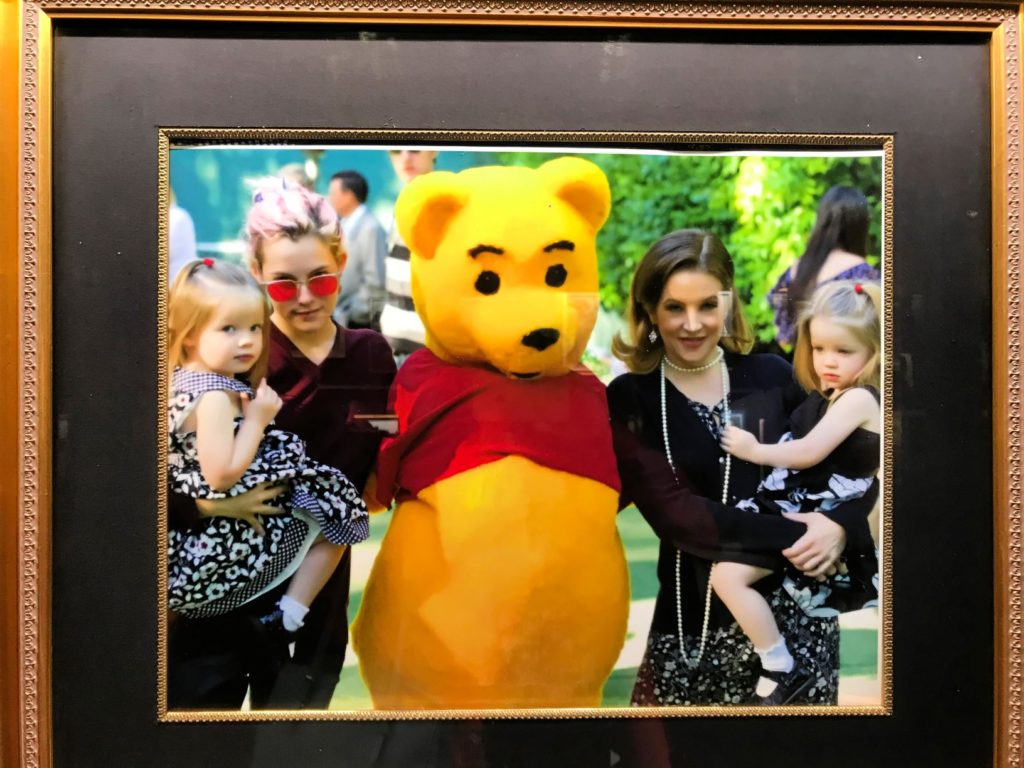
Lisa Marie: Growing Up Presley
I really enjoyed this exhibit, which is located inside the Haberdashery. It is all about Lisa Marie Presley. There are personal items from her childhood including her record player, roller skates and clothing, and some interesting things from her musical career. The exhibit looks at Lisa as a daughter and mother as well as her charity work and career. It gives visitors a glimpse into how she continues to carry on her dad’s legacy at Graceland. I found it very interesting.
I love this picture!
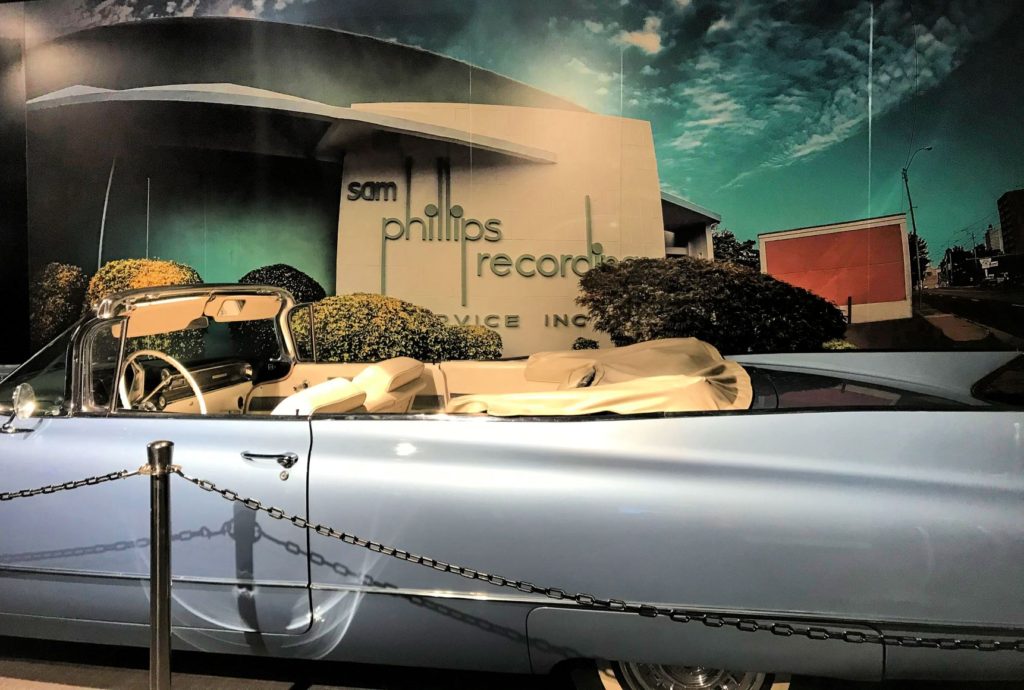
Hollywood Backlot
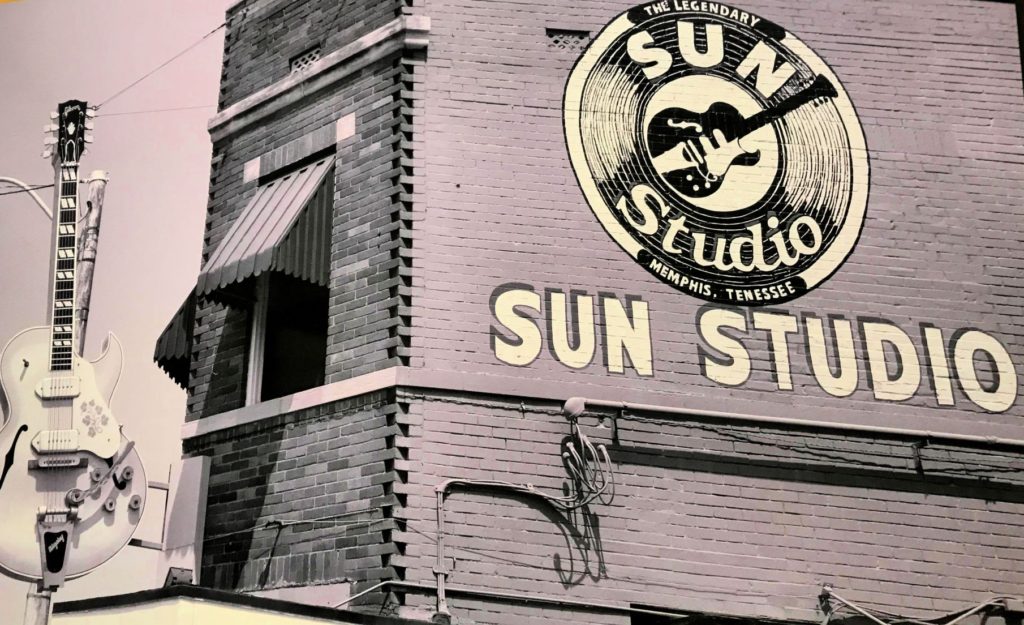
This is where you can see a film set. They have actual sets used in the CMT show “Sun Records.” I found this interesting, because I have a friend who got a part singing in that show which was all about the “Million Dollar Quartet.” The sets include the WHBQ set and the Sun Studio set, and you can also watch scenes from the show that were filmed in these sets. I grew up listening to DJ Rick Dees on WHBQ radio every morning before school.
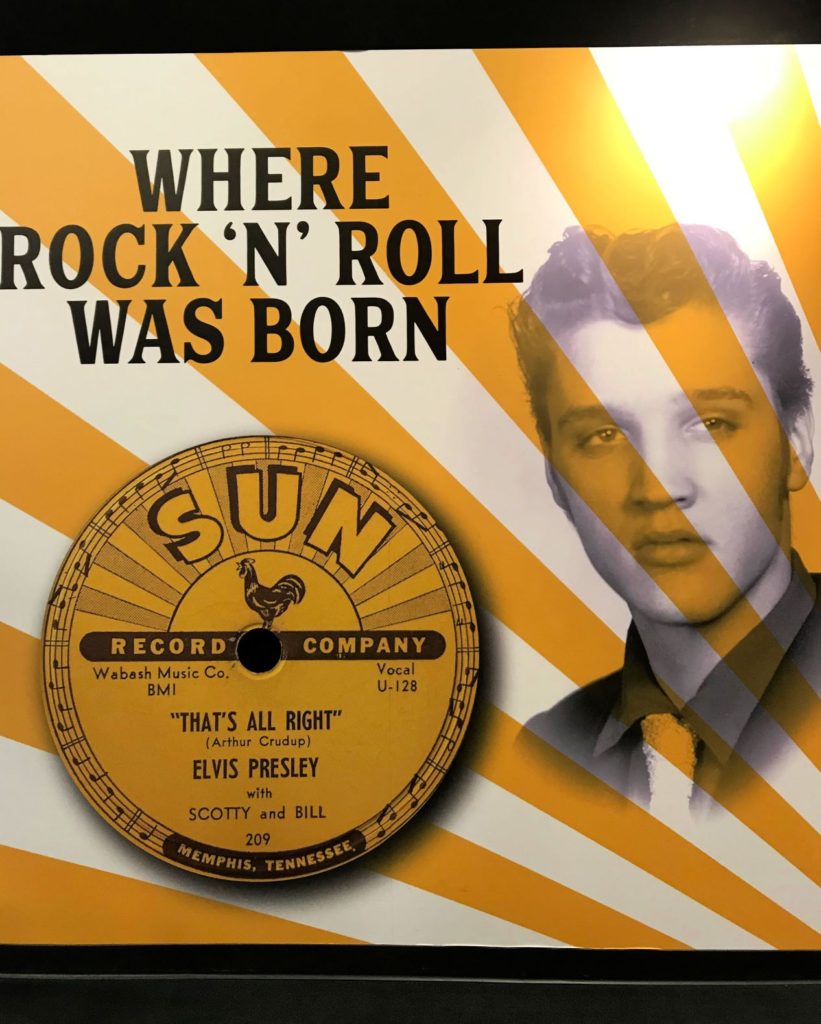
Sam Phillips Recording Studio SetSun Records as Part of Elvis ExhibitThe Famous Sun Studio in Memphis
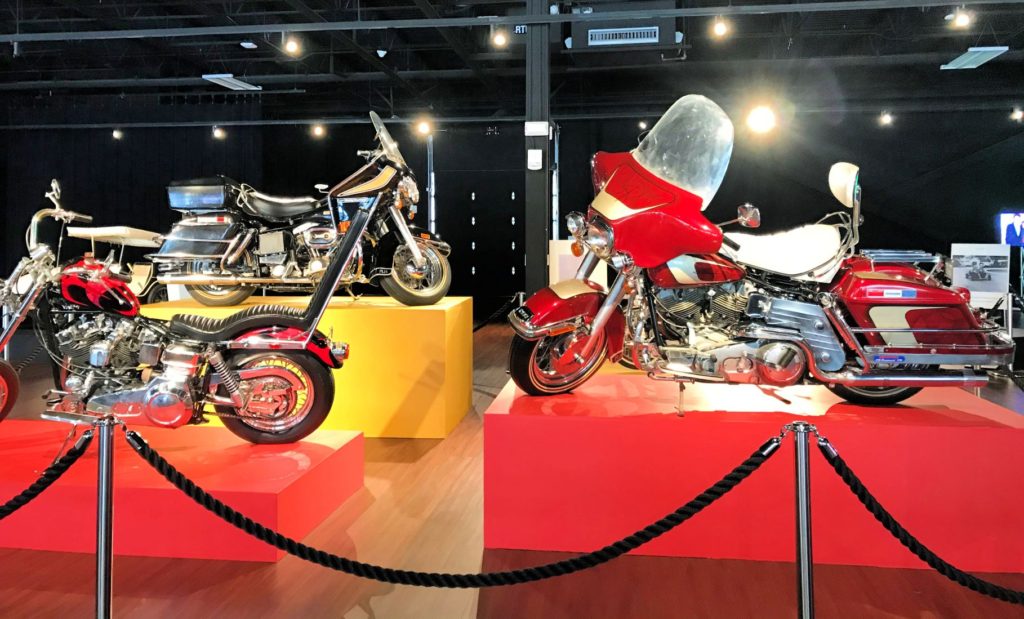
Presley Cycles
In addition to cars, Elvis had lots of motorcycles. In this exhibit they have his motorcycles and even his John Deere tractor on display! And for the first time on display at Graceland you can see Elvis’s ski boats.
Some of Elvis’s Motorcycles
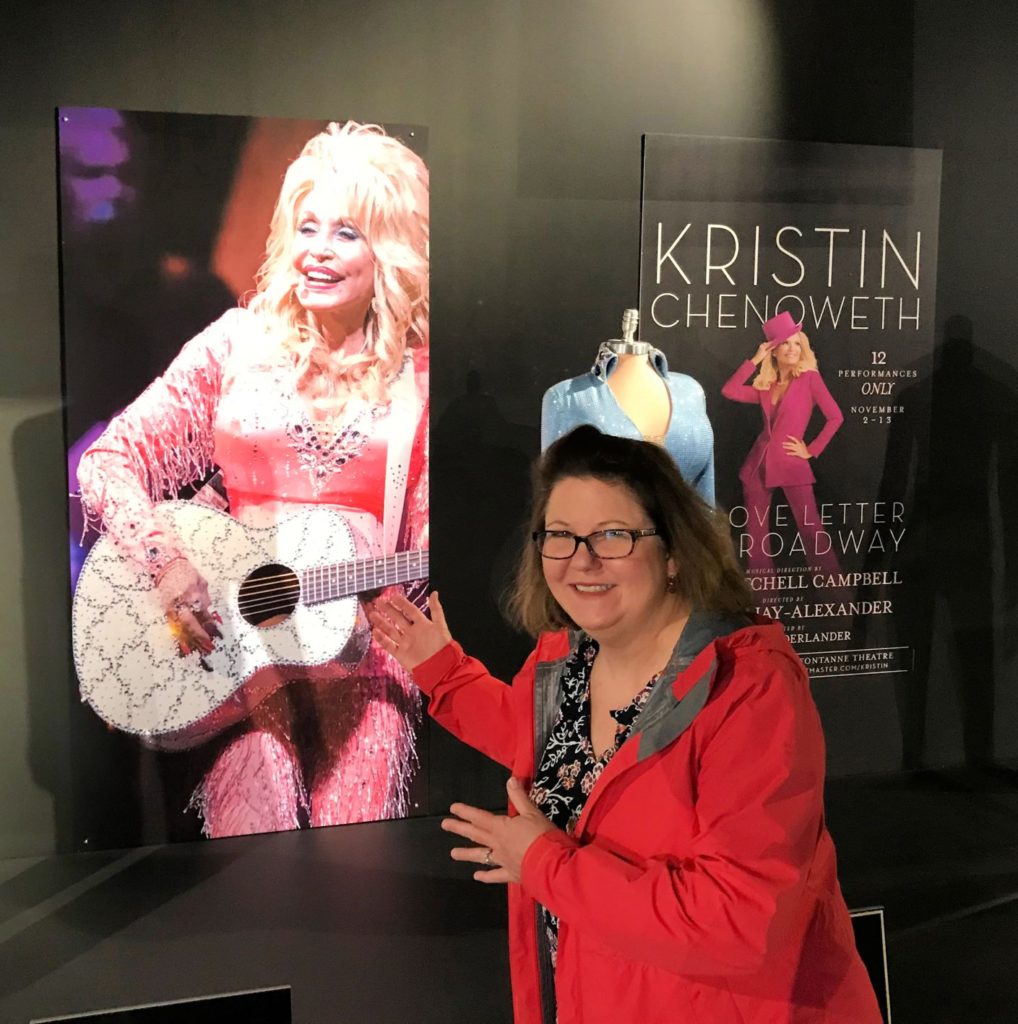
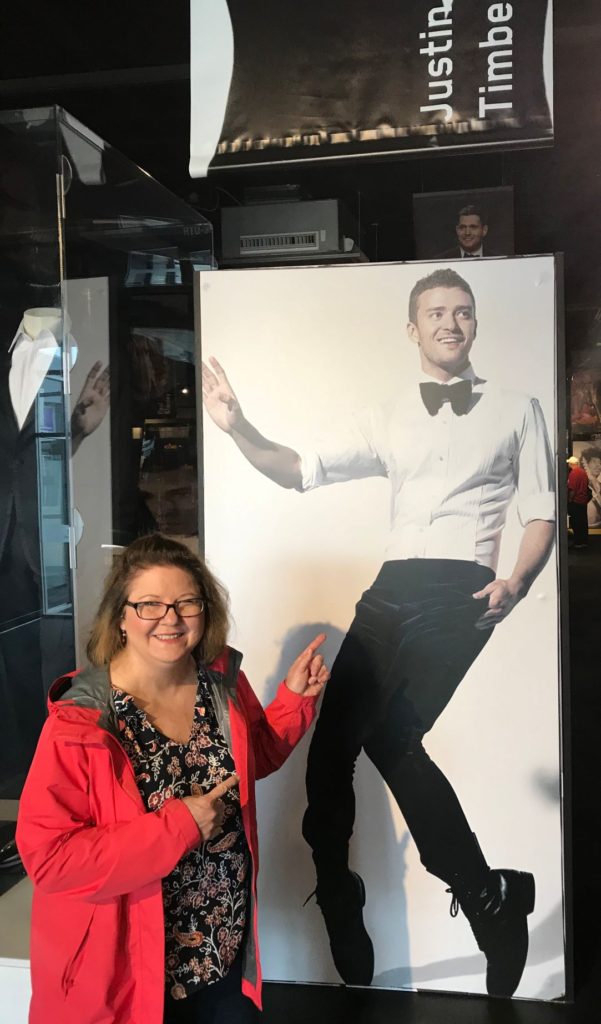
Icons: The Influence of Elvis Presley
This exhibit was awesome! Elvis was a true music pioneer whose influence paved the way for many of today’s artists and celebrities. This exhibit has items from 25 artists, including Bruce Springsteen, Jimi Hendrix, Elton John and Dolly Parton. It was like a huge music museum from all your favorite artists. I was not aware this new exhibit existed, so it was fun for me to explore. There are so many music artists who were influenced by the music of Elvis!
I love Dolly Parton.Justin Timberlake is from Memphis!
Elvis’s Tupelo Exhibit
Tupelo, Mississippi, not too far from Memphis, is known as the birthplace of Elvis. This exhibit has some interesting childhood photos and rare artifacts from Elvis’s early days. You can see the Presley family’s clothing, personal photos and receipts from their early days in Tupelo.
From Elvis Tupelo Exhibit at Graceland
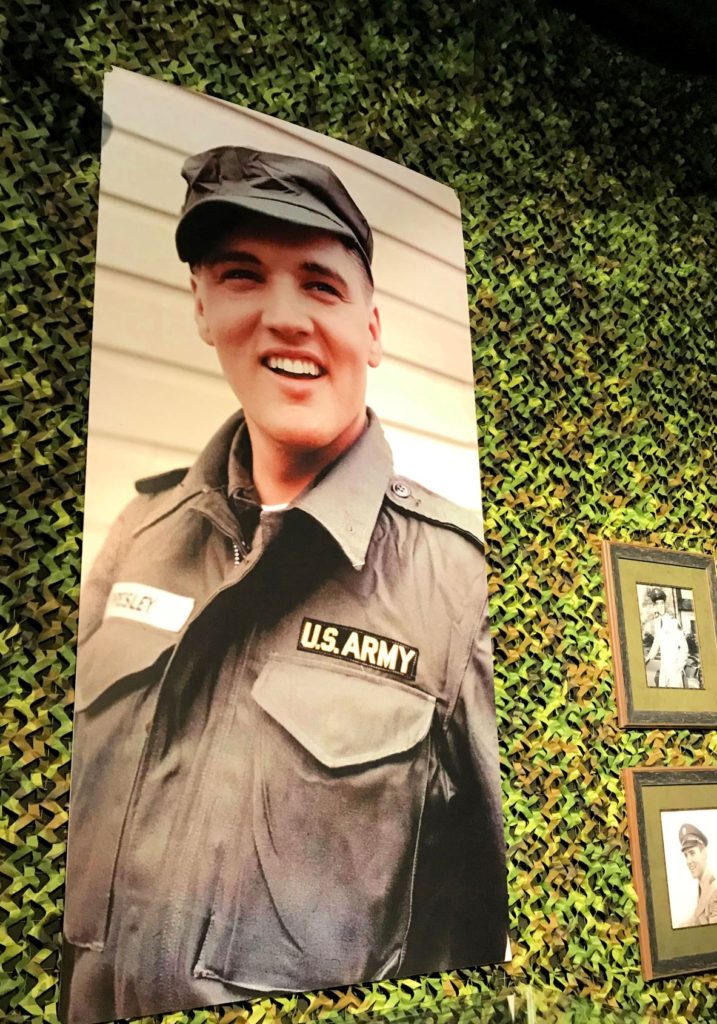
Private Presley: Elvis in the Army
Elvis served in the U.S. Army from 1958 to 1960. In this exhibit, visitors can learn more about Elvis’ service to his country as you walk through his induction and time spent in the service. I was especially interested in his time spent in Germany, because I lived and worked in Germany for four years running a youth program for U.S. children whose parents were stationed there in the Army. Some special artifacts displayed include Elvis’ Army fatigues, dress uniforms, army foot locker, suitcases and more.
Elvis sure made a handsome soldier.
There is also an artifacts section where you can see all sort of things from Elvis’s past.
Elvis’s Custom Jets
A short walk away, and you can climb aboard Elvis’ customized jet, named after his daughter Lisa Marie, that features a living room, conference room, sitting room, and private bedroom, as well as gold-plated seat belts, suede chairs, leather covered tables, 24-karat gold-flecked sinks and more. All on an airplane!
You can also look inside Elvis’ smaller Lockheed Jet Star, customized by Elvis with a yellow and green interior. He loved those 70’s colors, didn’t he?
Elvis’s custom jet named after his daughter
So have I convinced you to visit? With all of the new exhibits it really is much more than a house now. Whether you are a casual Elvis fan or fanatic or neither I encourage you to spend a day at Graceland the next time you are in Memphis.
Note: It is currently best to buy advance tickets.
From their website:
“Due to reduced tour capacities, guests are strongly encouraged to purchase tour tickets in advance to ensure they receive their preferred tour time. In addition, purchasing in advance allows you to skip the ticketing lines and proceed directly to your tour at your assigned tour time.”
Maybe you want to check out Elvis Week August 8 -16, 2020 which has lots of special activities for Elvis fans. Book early though! Christmas at Graceland is November 19, 2020 – January 8, 2021. This is another time there are extra special events planned. And of course there is always January 7-10, 2020. This will be a big Elvis Birthday Celebration.
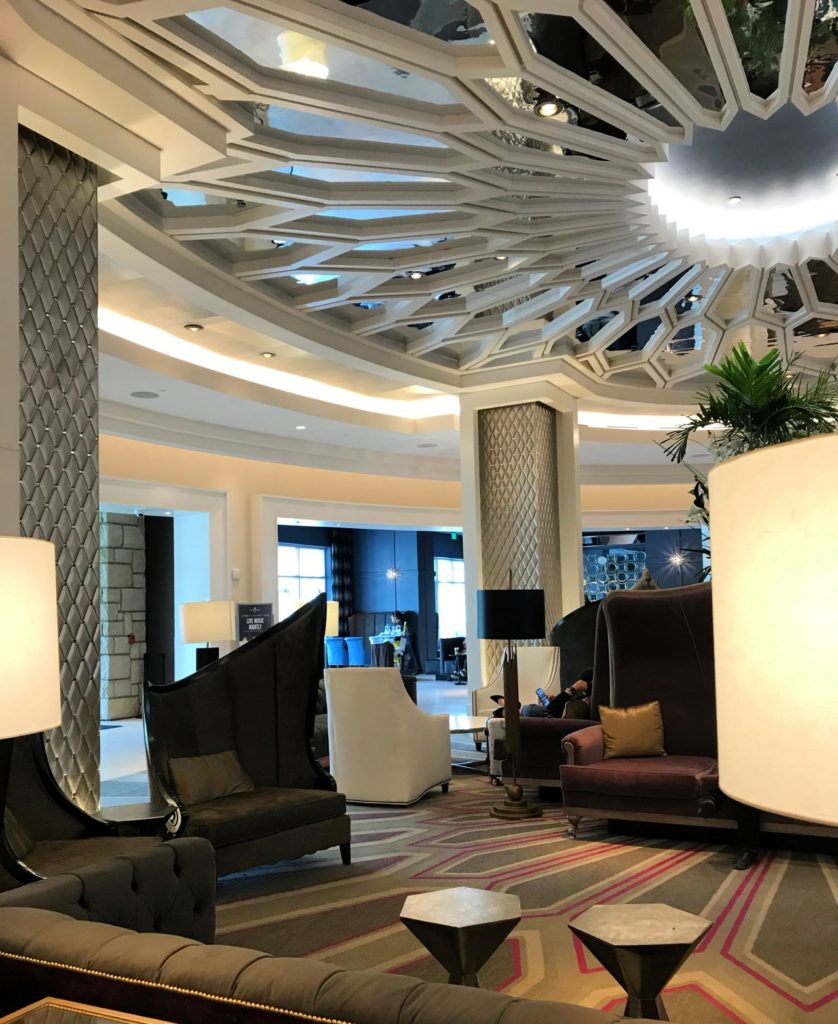
The Guest House at Graceland is very close to the property and has 450 rooms, two restaurants, spaces for meetings and special events and a 464-seat theater for live performances and movies. I have not stayed there before, but I did tour the lobby and eat at one of the restaurants. It was very nice. There are many decorative touches that are obviously uniquely Elvis.
Lobby of Guesthouse
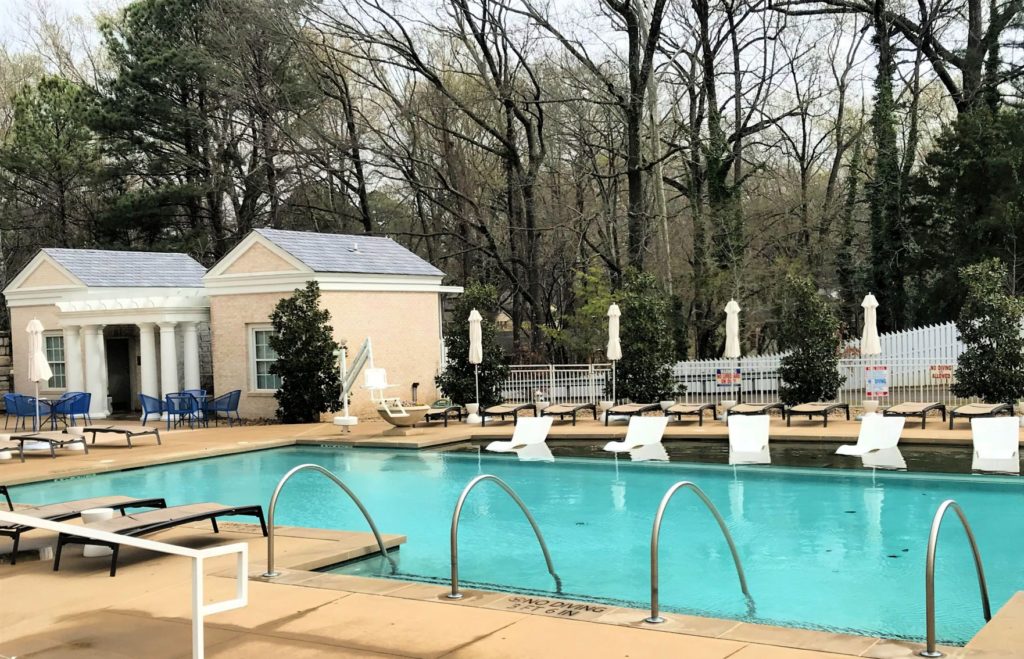
Guesthouse Pool
Fancy Stairs in the Guesthouse at Graceland
Guesthouse at Graceland
Wherever you stay or whenever you come to Graceland, make sure to come back to this post and leave a comment below. Please share this post with others, and I just want to say, “Thank you. Thank you very much!”
Summer time or holidays is usually when we think of picnics. But any time that is not too cold is the perefct time to plan a picnic. Maybe you want to know how to plan a picnic for a group or how to host a company picnic. Or maybe you just want to know how to plan a picnic with friends or how to plan a picnic date. No matter the reason, there are lots of picnic tips and tricks to make your job easier.
Here are some of my best tips for making your picnics some of your greatest memories. Here’s to hosting a perfect picnic!
1. Pick the best spot.
The right spot is important for the perfect picnic.
Look for a secluded level place on the ground with lots of soft grass, no rocks, and natural shade. If the weather is warm, make sure you are directly under a tree to get the best shade all day.
If you have children do not set up right next to a playground, as it will be noisy and difficult for you to keep an eye on your kiddos while you are also preparing food. But you will want plenty of open space for them to run around.
Staying at home? You can set up an awesome picnic right in your backyard. You can even have a picnic indoors on cold or rainy days if you are creative and flexible. With the right planning picnics can be fun anywhere! It’s about the people, the food, and the experience.
2. Bring the Best Blanket.
Bring a soft waterproof blanket for picnics.
If you are going to be sitting on the ground make sure your blanket is soft and has good cushioning. It needs to be one that is washable or waterproof, because let’s face it, picnics might get messy sometimes. You might even want to put a plastic sheet down first if the ground is damp.
I like to bring old throw pillows in case I want to take an after-picnic nap or have soft seating. You may also want to bring easy to carry folding chairs. This extra large picnic blanket is water resistant and rolls up with a carrying handle so you can carry it like a tote. It’s cute too!
If you are going to be eating at a picnic table in a park try using a fitted sheet for a table cloth. It keeps the table cloth from catching wind and tipping everything over.
3. Pack your food right.
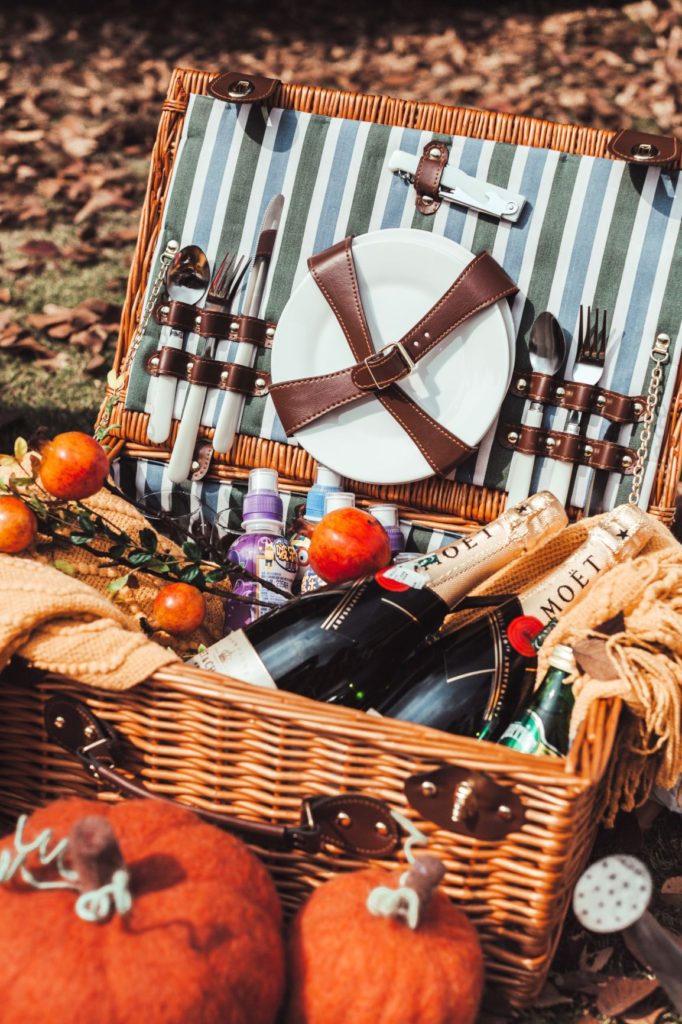
Picnic baskets or totes with compartments to hold things are best.
We have a cute wicker picnic basket, but we hardly ever use it. Instead we use a small cooler with wheels that has a handle and cup holders on the top. Insulated lunch bags with pockets and compartments work great for food.
Make sure to chill your food thoroughly in the refrigerator before putting it in the cooler. The cooler won’t make the food any cooler if it is not already cold. Pack perishables right next to ice packs, and don’t let fruits or lettuce touch the ice or they might get damaged or have “freezer burn.”
Go ahead and fill your cooler all the way up with ice. This will keep food cooler than a half empty cooler. And make sure to put things back in the cooler when you are not using them. Food should not be left outdoors for more than one hour.
I try not to bring glass, but if I do bring glass, I wrap it in a small towel for padding then use the towel for cleanup later. When it comes to food, I try to prepare things ahead of time and bring only what we will eat in storage containers.
Bring screw top wine bottles and canned soft drinks or tea instead of having to deal with ice and so many cups.
Try this trick: Use cupcake papers to keep bugs out of your drink. You can turn them upside down over your drink and poke a straw through the middle. A ready made lid!
4. You will need a flat surface to rest your food on.
Trays to put your food on work great for picnics.
Don’t forget to bring something like a tray, small folding table, or other flat surface to put your food on. We use our cooler cup holders on the lid for drinks. I love this foldable portable small wine and snack table. Perfect for a picnic! And how cool are these wine glass holders that are on stakes in the ground. So clever! If you really want a posh picnic try this picnic backpack. It comes complete with a waterproof blanket and the whole cutlery set for four. Very elegant!
You might also want to bring a small cutting board, a knife, napkins, paper towels, a garbage bag, some disinfectant wipes, and bug spray. You might want to bring a cup or jar to put utensils in so that they don’t end up on the ground.
5. Pack food in Mason jars.
One cute idea is to pack your salads, side dishes, and condiments in lidded Mason jars. This gives your picnic a little country flare and keeps food from spilling. The jars are also easy to transport in your picnic basket or tote. You can purchase a 6-pack of Mason jars here at a reasonable price.
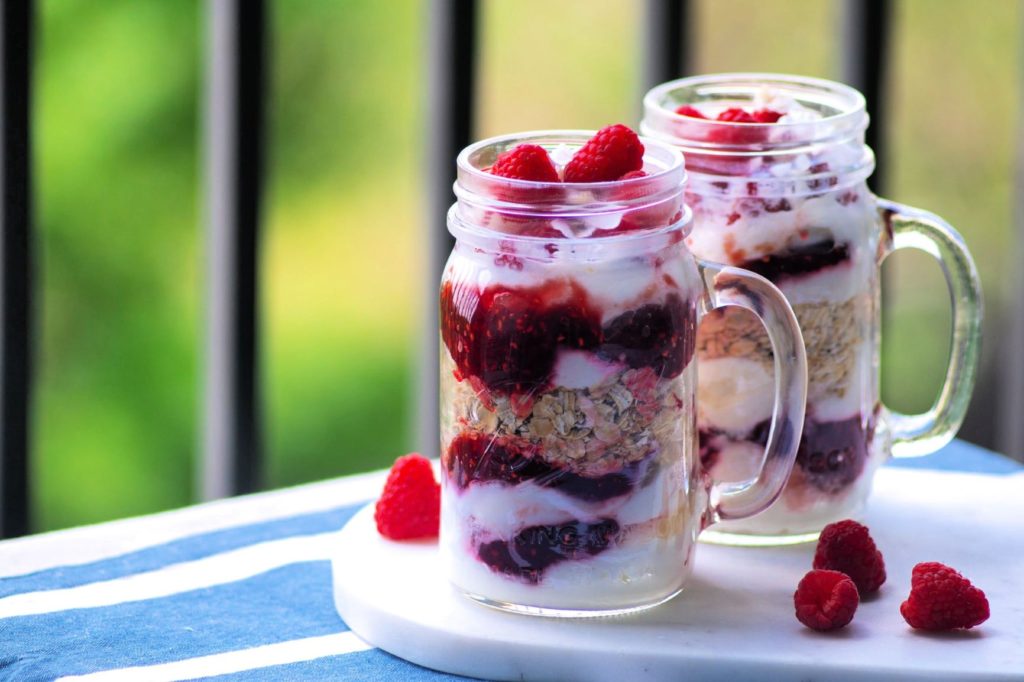
You can even make desserts in a jar by layering crushed graham crackers with pudding and topping it with chocolate chips or layer fruit, yoghurt, and granola.
Layered desserts in a Mason jar work great for picnics.
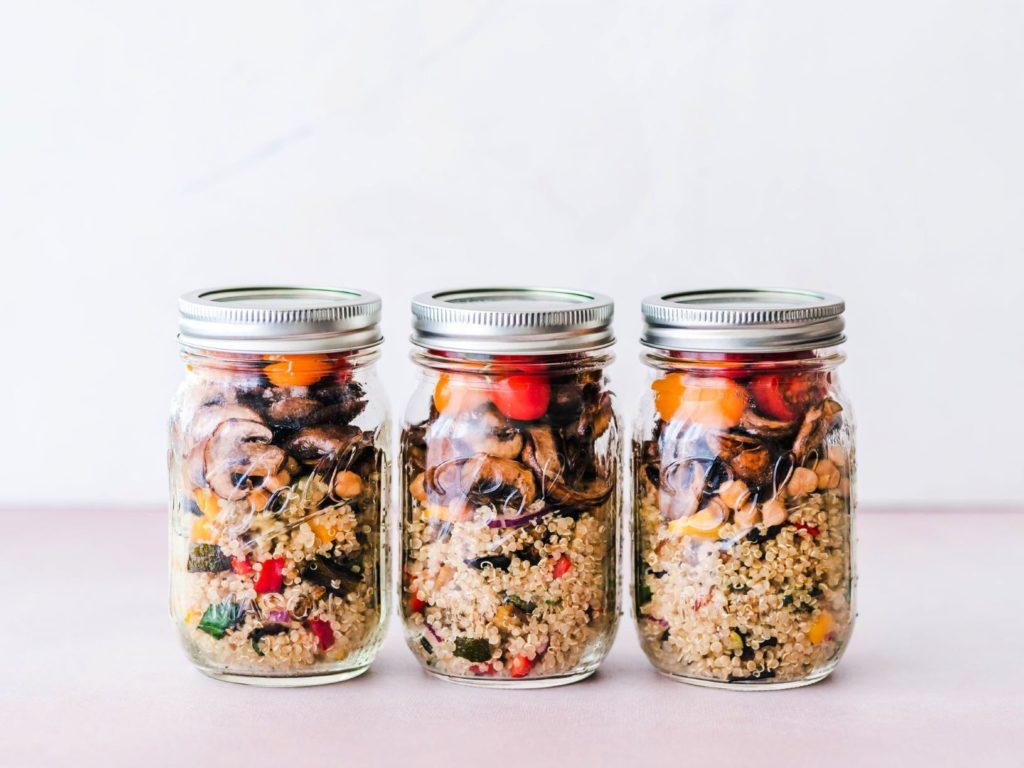
Salads are great in these jars, because the dressing goes in first and marinates things at the bottom. So you want to put in your hardier ingredients like feta cheese or chickpeas on that bottom layer and the more delicate ingredients at the top. Flip it over and dump it in to a bowl when serving, and the dressing will get drizzled over the top of the salad. Pasta salads or couscous works well too.
Pack salads and side dishes in Mason jars for picnics.
6. Get creative with your food choices.
Half the fun of picnics is that you oftentimes eat certain foods on picnics that you normally wouldn’t at home. Start your own traditions and bring a favorite recipe every time you have a picnic. Make sure to try my easy deviled eggs and creamy pimento cheese spread.
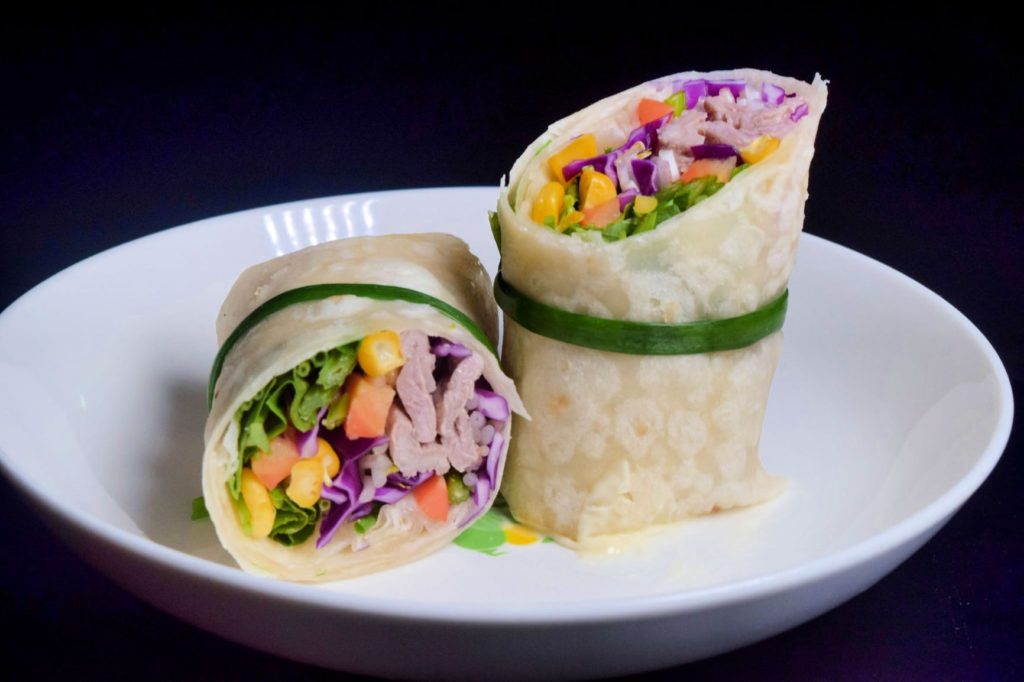
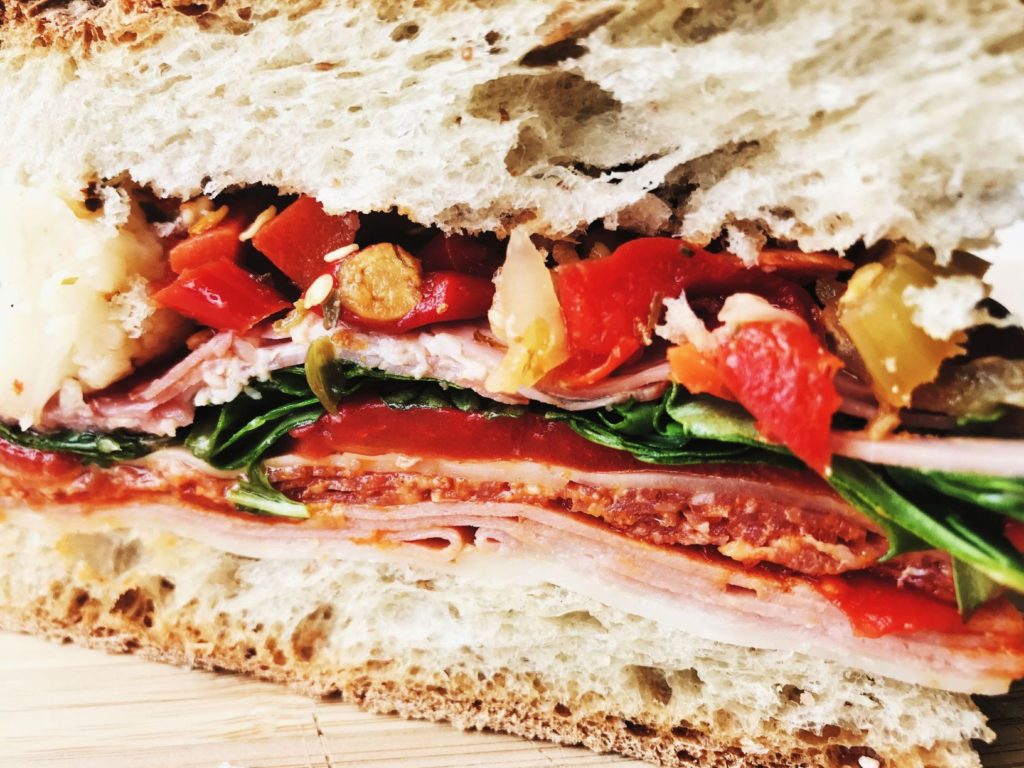
Tie sandwich wraps with a rubber band or spinach tie.
Try wrapping sandwiches in parchment paper then tie them together with string. No one wants to pull their sandwich out of a sandwich bag and have everything fall out of it. Keep sauces and dressings separate, so the bread won’t get soggy. Then add it right before eating. Use a hardy French baguette instead of sandwich sliced bread to keep it fresh and crispy.
Use hardier breads like French baguettes for picnic sandwiches.
Slice apples before you go, then put the slices back together into the shape of an apple again to keep the slices fresh and prevent them from turning brown. Put a rubber band around them to keep them together. You can also spritz a small amount of lemon juice on them to keep them fresh before putting them together.
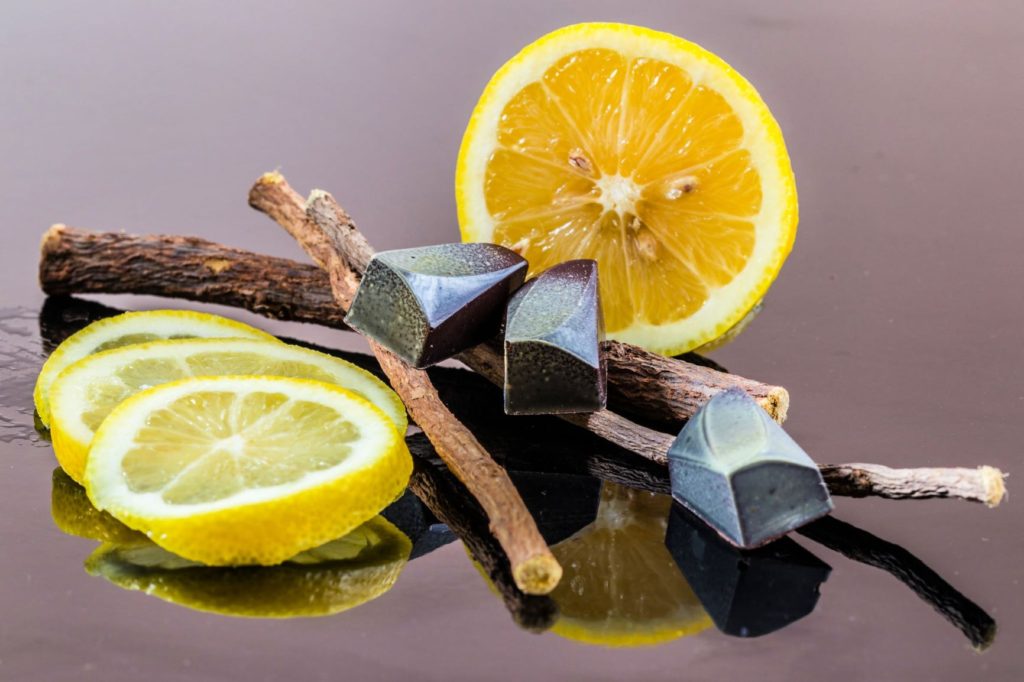
7. Keep the flies away.
Flies do not like lemon or cloves.
I hate flies even though here in the South they are just a part of life in the summer. But nothing ruins people’s appetites at a picnic more than having flies light all over the food.
Here’s an easy trick to keep those pests away. Flies hate the smell of lemon and the smell of cloves (really I asked them), so take a lemon and cut it in half then stick cloves in each lemon half. Put the lemons in decorative bowls and place the bowls throughout the food areas. This should help keep the flies away!
Now you are ready to plan the prefect picnic. Have fun, take some cute photos, and enjoy your picnic! Do you have any other picnic tips, tricks, or hacks? Please leave a comment below and share this article. Now I’m hungry! 🙂