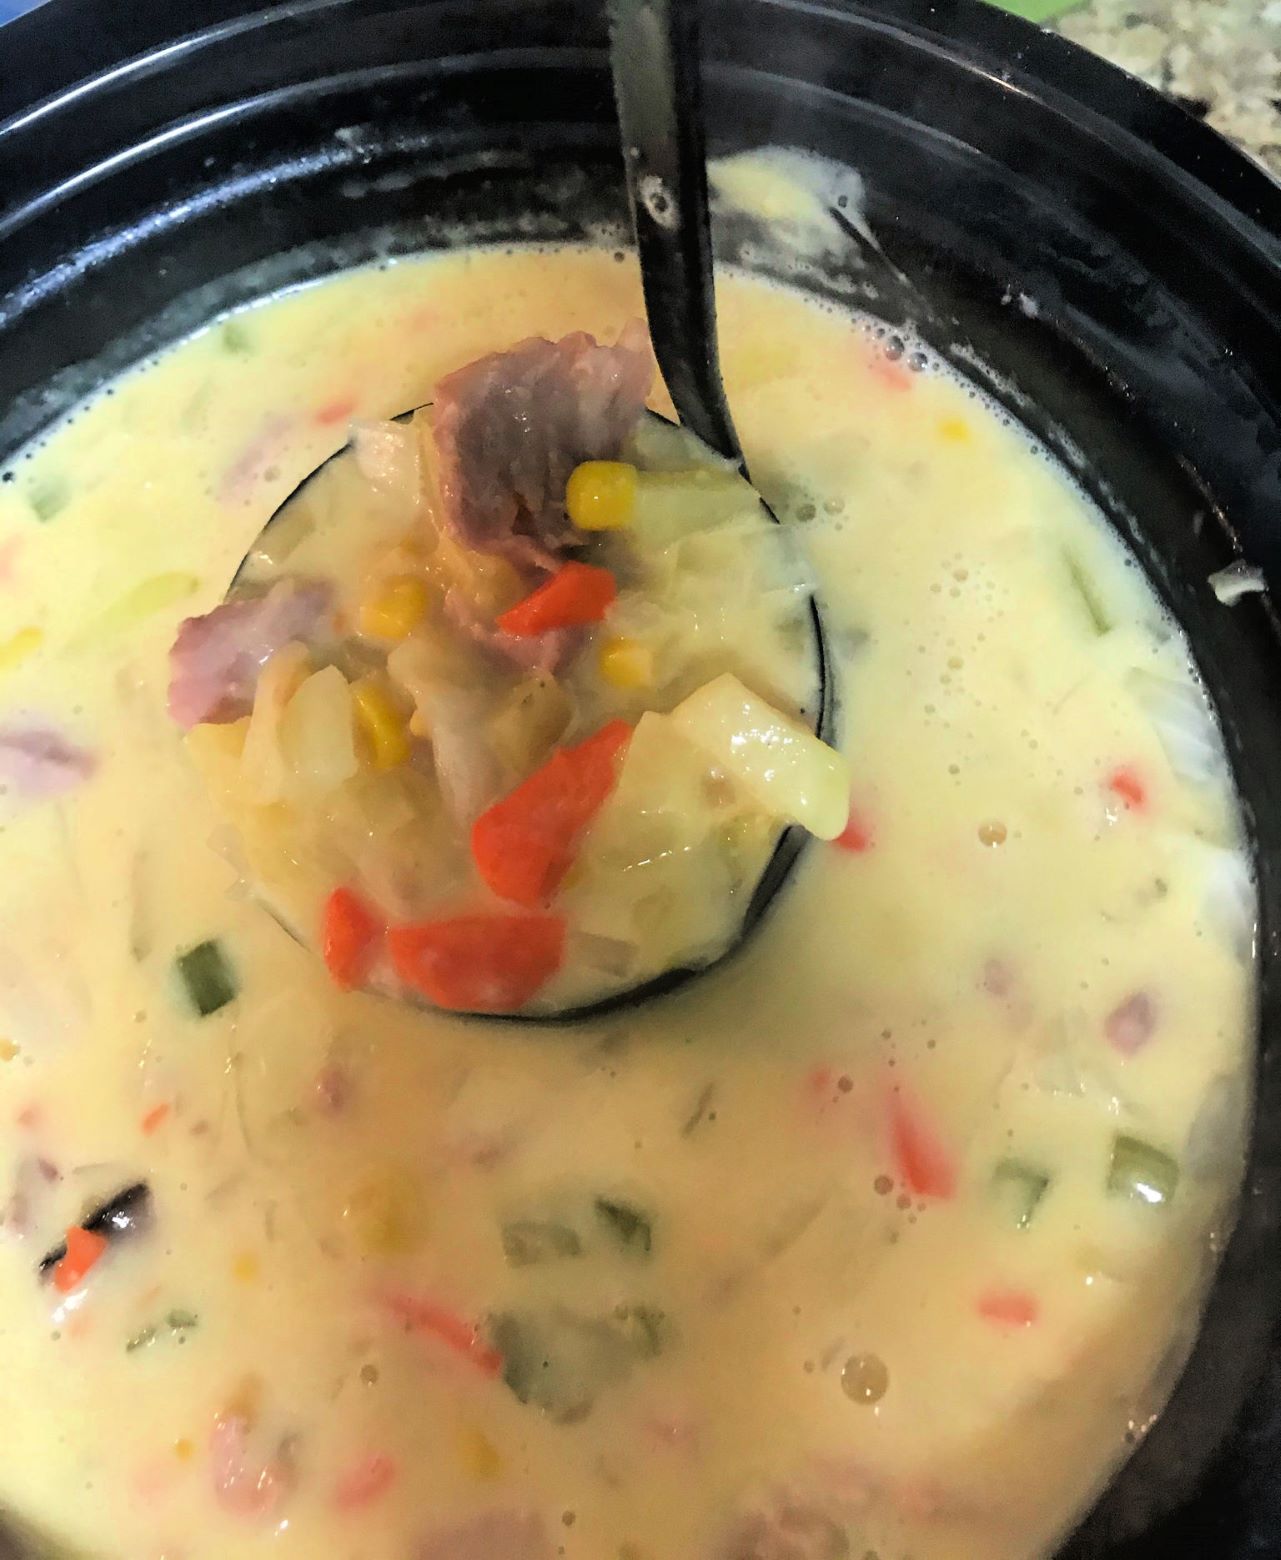
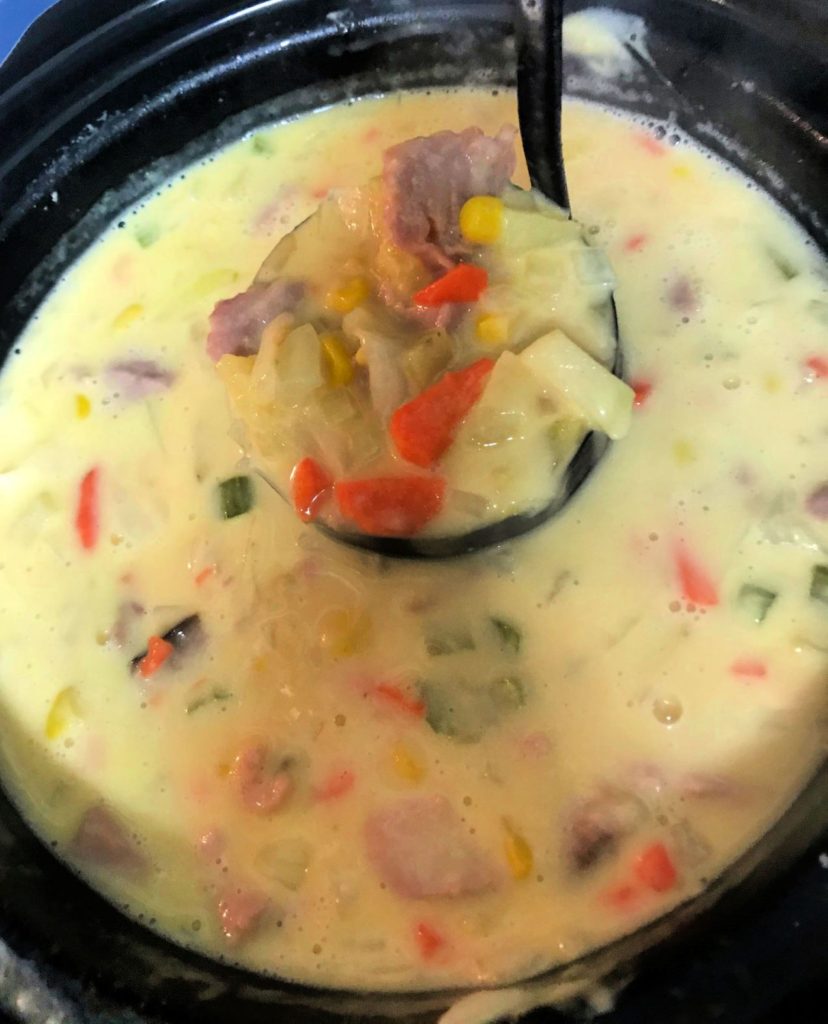
Looking for something to do with all of your leftover holiday ham? Try this creamy cheddar ham and potato soup. Seasoned with a ham bone, this hearty soup is chock full of seasoned veggies and leftover ham. The recipe makes a lot (my slow cooker is one of the smaller ones, but it was full to the brim), but this soup will not last long around your house.
This recipe for cheddar ham and potato soup serves at least 7 people.
Homemade soup is great any time of the year but especially in the winter or on rainy days. That’s why using leftover holiday ham is perfect for this recipe. I used leftover Honey Baked Ham in this picture. If you choose this make sure to cook off any of the sugary coating or skin. Otherwise, your soup will taste sweet instead of salty.
Cheddar Ham and Potato Soup is perfect on a cold day!
Let me know if you try it. I made this recipe up using bits and pieces of other soup recipes I’ve used, so rate my recipe if you like it. Enjoy!
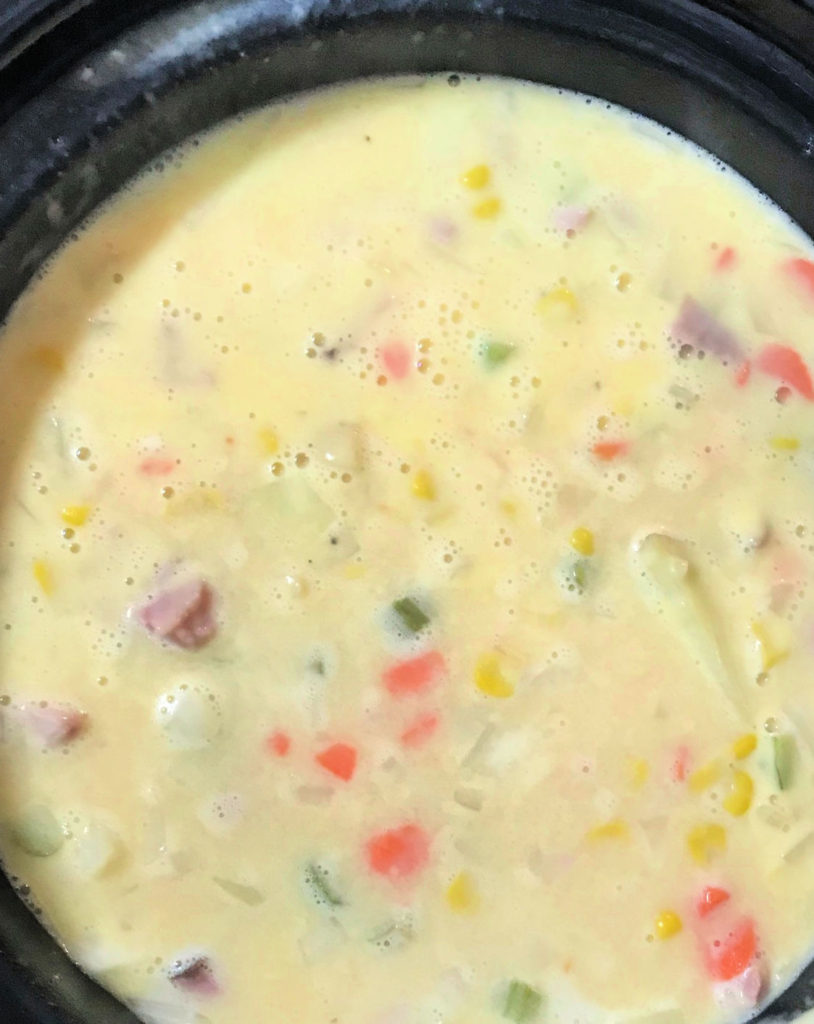
This hearty cheesey soup full of potatoes, veggies, and leftover ham.
Prep Time20 minutesmins
Cook Time3 hourshrs
Total Time3 hourshrs20 minutesmins
Course: dinner, lunch, Main Course
Cuisine: American
Keyword: cheddar ham potato soup, ham, potato soup, recipes for leftover ham, soup recipe
Servings: 7servings
Calories: 330kcal
Author: Cindy Baker
Ingredients
1meaty hambone(optional)
3gold potatoesdiced
2carrotspeeled and diced
2celery stalksdiced
1canwhole kernel corn
1large yellow oniondiced
1 1/2cupsfully cooked hamcubed
2cupsshredded cheddar cheese
2cupswater
1/4cupbutter
1/4cupall-purpose flour
1 1/2cups1% or 2% milk
1tspgarlic powder
1/2tspsalt
1/4 tsppepper
Instructions
In a slow cooker, combine the potatoes, carrots, celery, onion, and water. Place hambone in for extra flavor (optional). Cover and cook on high 2 1/2 hours.
Remove hambone and set aside. If there are any good bits of meat left on the bone you can cut them off and add them to the soup.
In a saucepan on the stove, melt the butter. Stir in the flour until smooth.
Gradually add the milk, stirring constantly.
Add garlic powder, salt, and pepper. Bring to a boil, stirring constantly. Keep stirring and cook until thickened (about 2 minutes).
Stir in cheese until melted. Stir milk/cheese mixture into the potato mixture. Add ham.
Continue to cook in the slow cooker on high for another 20 – 30 minutes or until heated through.
Have you ever wondered how to make homemade chicken pot pie? I love chicken pot pie, but I always thought that it would take a long time to make and be somewhat difficult. Well, I made this recipe for the first time last week, and it was not only easy and simple but so good! This is bound to be one of the most popular and highly rated recipes on my blog. It is absolutely delicious!
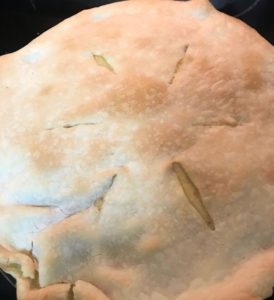
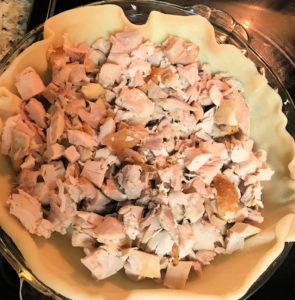
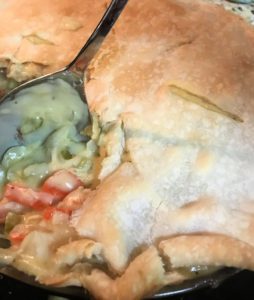
This is a classic homemade Chicken Pot Pie with a twist. I do not like peas, so instead of a canned vegetable mix or frozen peas, I used fresh chopped onion, carrots, and celery. And what saves time and gives it a flaky, buttery crust is using refrigerated pie crusts. The sauce is extra creamy because of a little heavy cream, and using a grocery store rotisserie chicken saves time and gives it a hearty savory taste your family will love. It is a super easy recipe to prepare, even for beginner cooks. Busy families will love this warm delicious popular comfort food!
Flaky, buttery crust makes this chicken pot pie extra delicious!
Ingredients
1 box refrigerated pie crusts (2 per box)
1/3 cup butter
1/3 cup all-purpose flour
1/2 teaspoon salt
1/4 teaspoon pepper
1 3/4 cups chicken broth
1/2 cup heavy cream
1 rotisserie chicken skin removed and meat chopped into small pieces
1 small onion chopped
2 whole carrots peeled and chopped
3 celery stalks chopped
Instructions
Heat oven to 450 degrees F.
Remove skin from chicken and discard. Remove meat and chop into small pieces. Set aside.
In large saucepan melt butter over medium heat.
Add onion, carrots, and celery. Cook 2 minutes, stirring frequently.
Stir in flour, salt, and pepper until well blended.
Gradually stir in chicken broth and cream, cooking and stirring until bubbly and thickened.
Remove from the heat.
The filling for this chicken pot pie is thick and creamy.
Line a pie pan with one pie crust and pour in the chicken pieces.
Rotisserie chicken works great for this chicken pot pie recipe.
Pour hot creamy mixture on top of the chicken.
Top with second crust; seal edge and flute sides. Cut slits in several places in the top crust to let steam out.
Bake 30 – 40 minutes or until crust is golden brown. During the last 15 – 20 minutes of baking, cover the edges of the crust with strips of aluminum foil to prevent the edges from browning too much. Let stand 5 minutes before serving.
Chicken Pot Pie is the perfect comfort food!
A Few Tips To Help You Out:
The edges of the crust burn easily, so during the last 15 minutes of baking make a pie crust shield out of aluminum foil and place it all around the pie like a collar. This protects the edges from over-browning.
Add a little sage or poultry seasoning to the sauce for extra flavor.
I used a standard 9-inch glass pie plate.
Make sure you cook the sauce until it thickens. If it is too runny like soup then it will make the bottom crust soggy and possibly leak.
You don’t have to use rotisserie chicken. But the chicken needs to be cooked before you put it in the crust. Leftover chicken or Thanksgiving turkey works great too!
You can make the filling ahead of time and refrigerate it up to 1 day, but if you do make sure to heat it a little on the stove before you pour it into the pie.
You can also freeze the filling and the chicken for up to 1 month. Cool it off first by placing it uncovered in the refrigerator for about half an hour. Pour it into a gallon-sized freezer bag and leave a little room at the top. When you are ready to use it just thaw the mixture overnight in the refrigerator then heat it before pouring it into the pie.
Easy chicken pot pie recipe using refrigerated pie crusts
Prep Time20 minutesmins
Cook Time40 minutesmins
Total Time1 hourhr
Course: dinner, lunch, Main Course
Cuisine: American
Keyword: chicken pot pie, chicken recipes, easy dinner recipes, pie, Pie Crust
Servings: 6servings
Calories: 216kcal
Author: Cindy Baker
Ingredients
1boxrefrigerated pie crusts(2 per box)
1/3 cupbutter
1/3cupall-purpose flour
1/2teaspoonsalt
1/4teaspoonpepper
1 3/4 cupschicken broth
1/2cupheavy cream
1rotisserie chickenskin removed and meat chopped into small pieces
1small onionchopped
2whole carrotspeeled and chopped
3celery stalkschopped
Instructions
Heat oven to 450 degrees F.
Remove skin from chicken and discard. Remove meat and chop into small pieces. Set aside.
In large saucepan melt butter over medium heat.
Add onion, carrots, and celery. Cook 2 minutes, stirring frequently.
Stir in flour, salt and pepper until well blended.
Gradually stir in chicken broth and cream, cooking and stirring until bubbly and thickened.
Remove from the heat.
Line a pie pan with one pie crust and pour in the chicken pieces.
Pour hot creamy mixture on top of the chicken.
Top with second crust; seal edge anbd flute sides. Cut slits in several places in the top crust to let steam out.
Bake 30 – 40 minutes or until crust is golden brown. During the last 15 – 20 minutes of baking, cover the edges of the crust with strips of aluminum foil to prevent the edges from browning too much. Let stand 5 minutes before serving.
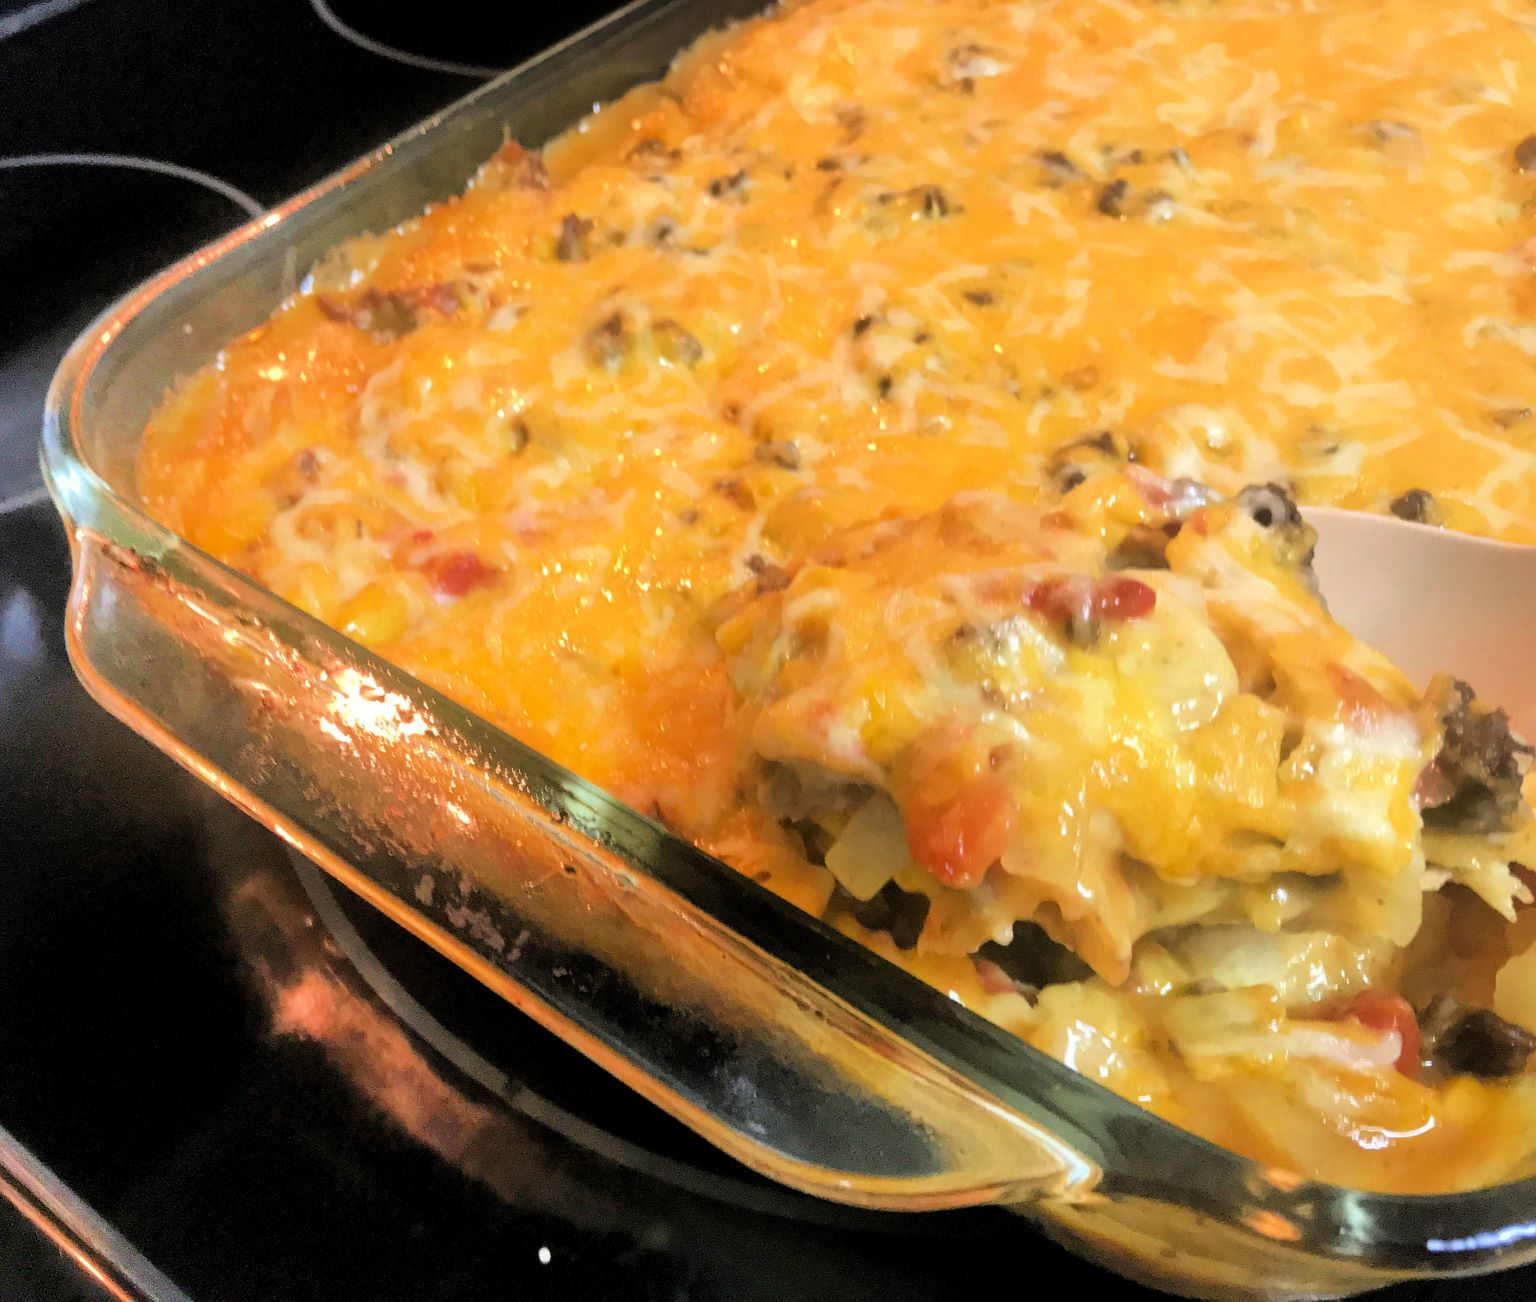
This recipe is super easy, and everyone always seems to love it. Pieces of corn tortillas are layered in between a creamy meat, onion, and tomato mixture and topped with shredded cheese. What’s not to love?
Ingredients
1 lb. ground beef
1 chopped onion
1 can Ro-Tel tomatoes
1 can whole kernel corn
1 can cream of mushroom soup
1 1/2 cans cheddar cheese soup
1 pkg. (about 12) corn tortillas
1 16 oz. pkg. Mexican-style Blend Shredded Cheese
Instructions
1. Brown Meat.
Brown meat and saute onion, then drain.
2. Mix in Other Ingredients.
Stir into the browned meat tomatoes, corn, and soups, then heat.
3. Layer tortillas with meat mixture.
Tear tortillas into bite-sized pieces and layer some on the bottom of a 9×13 casserole dish. Add a layer of the meat mixture on top of the tortillas then add some shredded cheese. Repeat until all the meat mixture is gone (2 – 3 layers). Leave the top layer of shredded cheese off until the last 15 minutes of baking.
4. Bake
Bake at 350 degrees F for 30 minutes. Remove from oven and spread a layer of shredded cheese on top, then bake 15 more minutes.
5. Serve
Serve warm with a dollop of sour cream.
Variations:
To make this casserole healthier, substitute ground turkey for beef and use low sodium soups and low fat cheese.
To add more protein add ranch style beans instead of corn.
To make it spicier add one envelope of taco seasoning.
1pkgcorn tortillasyellow or white (about 12 tortillas)
116 oz. pkg. Mexican Style Blend Shredded Cheese
Instructions
Brown meat and saute onion then drain.
Mix in tomatoes, corn, and soups and heat.
Tear tortillas into bite-sized pieces and layer pieces on the bottom of a 9×13 casserole dish.
Add a layer of the meat mixture then top with some of the shredded cheese.
Continue layering tortilla pieces, meat mixture and cheese (2 – 3 layers). Leave the top layer of cheese off the top until the last 15 min utes of baking.
Bake at 350 degrees F for 30 minutes, then take out of the oven and add a top layer of shredded cheese and bake for 15 more minutes.
Serve warm with a dollop of sour cream.
Video
Nutrition
Serving: 1g | Calories: 288kcal
Serve warm with sour cream
Did you try it? Let me know how it turned out in the comments below, and please rate my recipe. If you like it, please give me 5 stars!
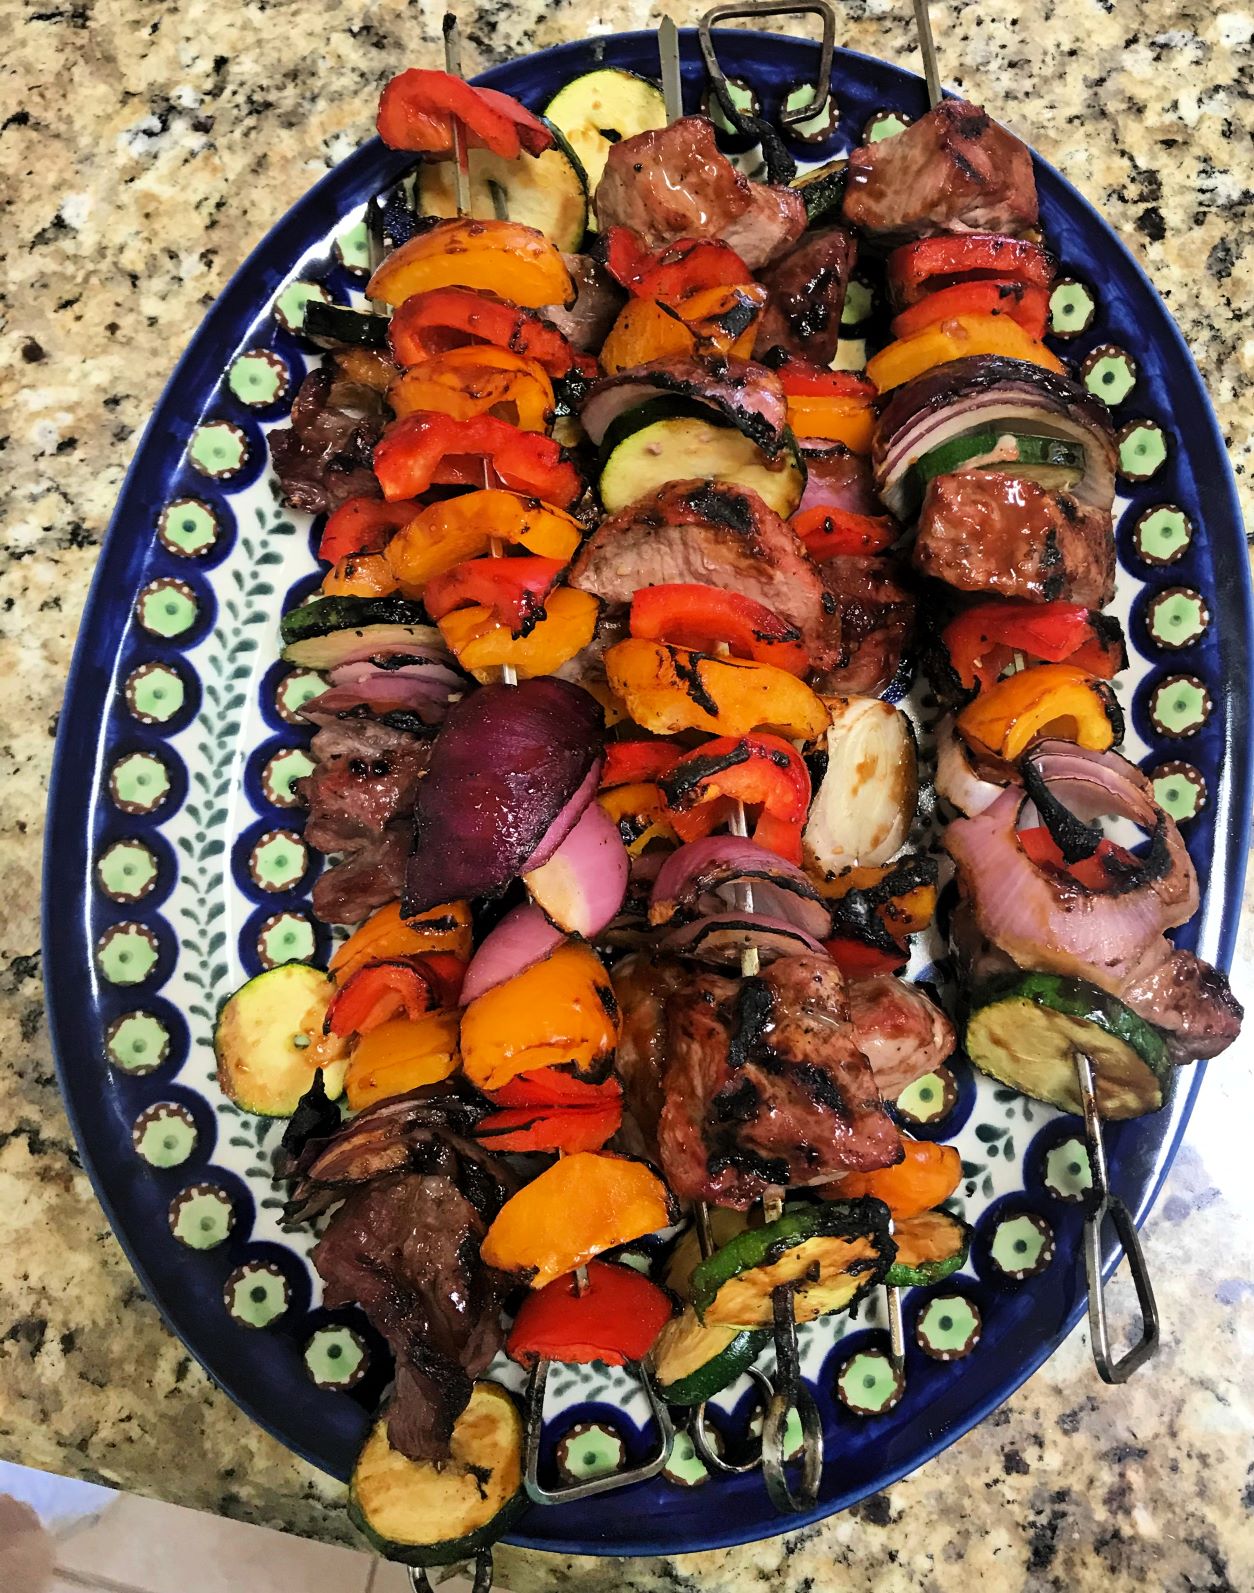
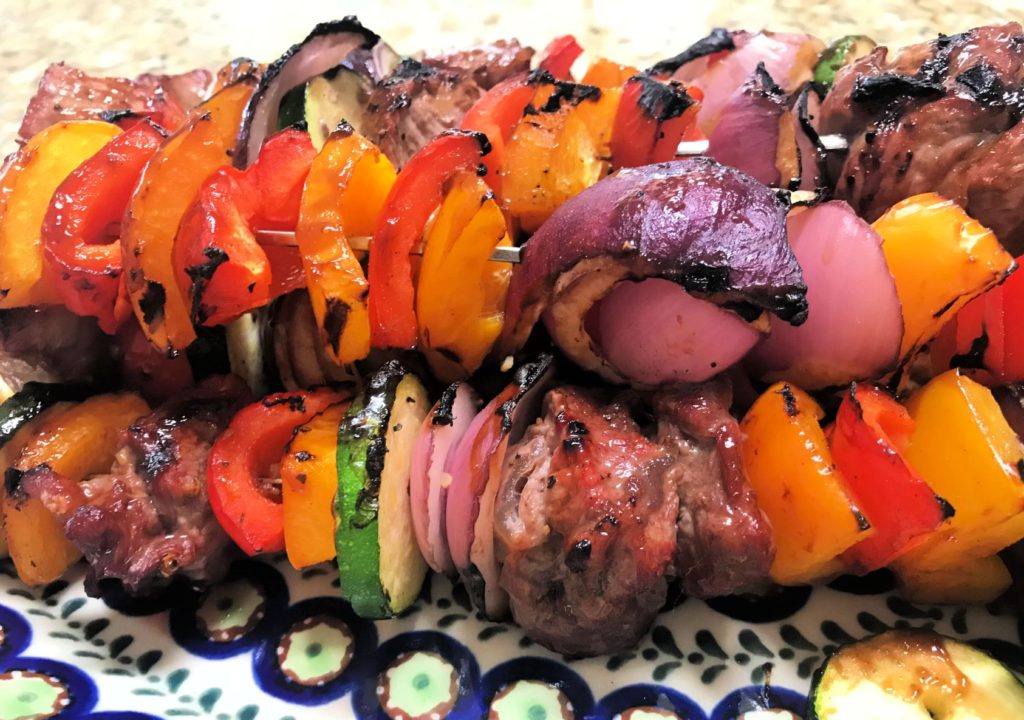
Do you love steak? Summer is in full swing, and it is time to fire up that grill. Steak kabobs are a fun way to grill steak that everyone loves. Juicy tender pieces of beef, marinaded for extra flavor and threaded in between layers of colorful fresh veggies look great on the plate and taste delicious. Served with wild rice they have easily become one of our favorite recipes.
Beef Kabobs: An Easy Flavorful Steak Recipe. Try it tonight!
This post may contain affiliate links, and I may earn commission if you click on the links at no additional cost to you.
Beef or steak kabobs are all about the marinade. Ingredients like Worcestershire and soy sauce bring out the best steak flavor when grilling. Marinating it for several hours is best, because it really allows the flavors to soak into the meat, leaving you with that juicy flavor we want in a steak. However, sometimes when in a hurry we have just brushed the marinade on after the kabobs are on the grill and it still tastes great.
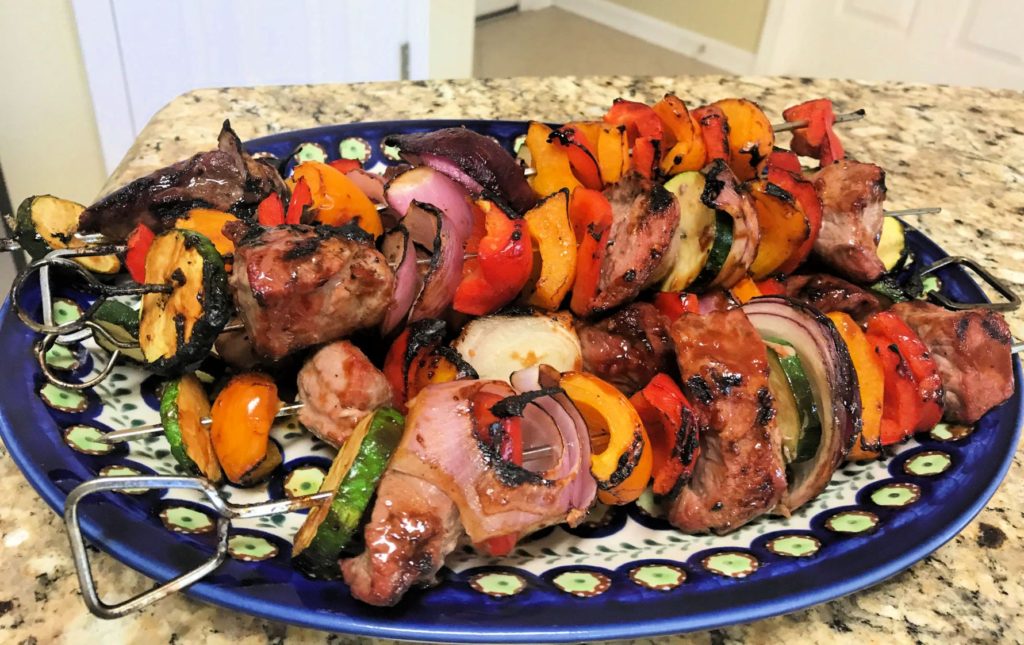
This recipe is super easy and does not take as long as it looks. I purchase pre-cut meat sometimes, and that really cuts down on prep time. Beef kabobs are great for cookouts and parties or just for your family at home. Plan on two skewers per person, and you will always have enough. They taste great as leftovers as well!
Grilled Steak Kabobs are a hit every time!
Ingredients Needed:
Olive oil
Sirloin Steak – New York strip or top sirloin (not petite) works best. These thick lean cuts have great flavor without excess fat. They will be very tender after being marinaded and cooked properly.
Fresh vegetables – In the picture I used red and yellow peppers, red onion, and zuchinni, but you can use any veggie you like. Mushrooms and tomatoes work well also.
Soy sauce
Garlic Powder
Lemon juice
Worcestershire sauce
Brown sugar
Ground ginger
Cornstarch
Honey (optional) – I don’t use it, as I think the brown sugar provides enough sweetness.
Water
Salt and Pepper
How to Make Steak Kebabs
1. Make the Marinade
Combine the water, Worcestershire, olive oil, soy sauce, lemon juice, ginger, brown sugar, honey (optional) and garlic powder in a saucepan over medium heat. Cook about 1 minute until nearly heated through.
Mix cornstarch and 1/4 cup water together in a cup or small bowl and stir until dissolved. Add to the saucepan. Cook and stir sauce until thickened, about 6 minutes. Allow the marinade to completely cool before using it.
2. Marinate the Steak
Cut the meat into uniform sizes if possible so that the pieces cook evenly. The best way I’ve found to marinate meat, especially if it’s cut up into small pieces is to place the steak into a gallon size resealable bag and pour the marinade over the meat. Seal the bag tightly while pressing out excess air. Use your hands to sort of rub the marinade over the steak through the bag to make sure all parts are covered. Warning: Make sure that the marinade has completely cooled before you pour it into the bag!
Allow the meat to marinate in the refrigerator 3 – 6 hours. This is not something you want to marinate over night. If you soak it much longer than 6 hours it gets a little mushy. The acidity of the marinade starts to break the meat down, and you don’t want that.
3. Preheat Grill and Prep Food
Preheat the grill to about 425 degrees. We love our Charbroil charcoal grill. Pour a little oil on some paper towels and use them to clean the grill grates before they get too hot.
Cut up the vegetables into large pieces, toss with oil, then sprinkle with garlic powder, salt and pepper, or your seasoning of choice.
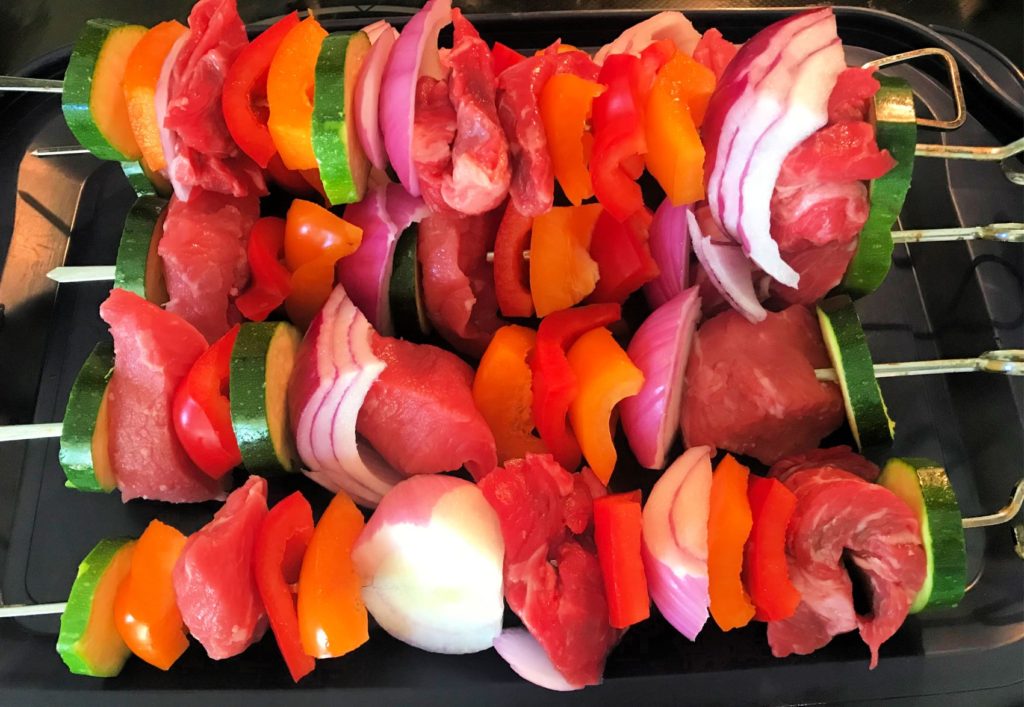
Thread each skewer with even layers of steak and vegetables. I put three steak pieces on each kabob. I use reusable metal skewers, but if you use bamboo ones make sure you soak them in water for at least 30 minutes before using or they will burn. When threading the skewers, leave a little space for the heat to circulate. This will allow your vegetables to soften up a little and cook evenly.
I try to put at least three peices of meat on each skewer.
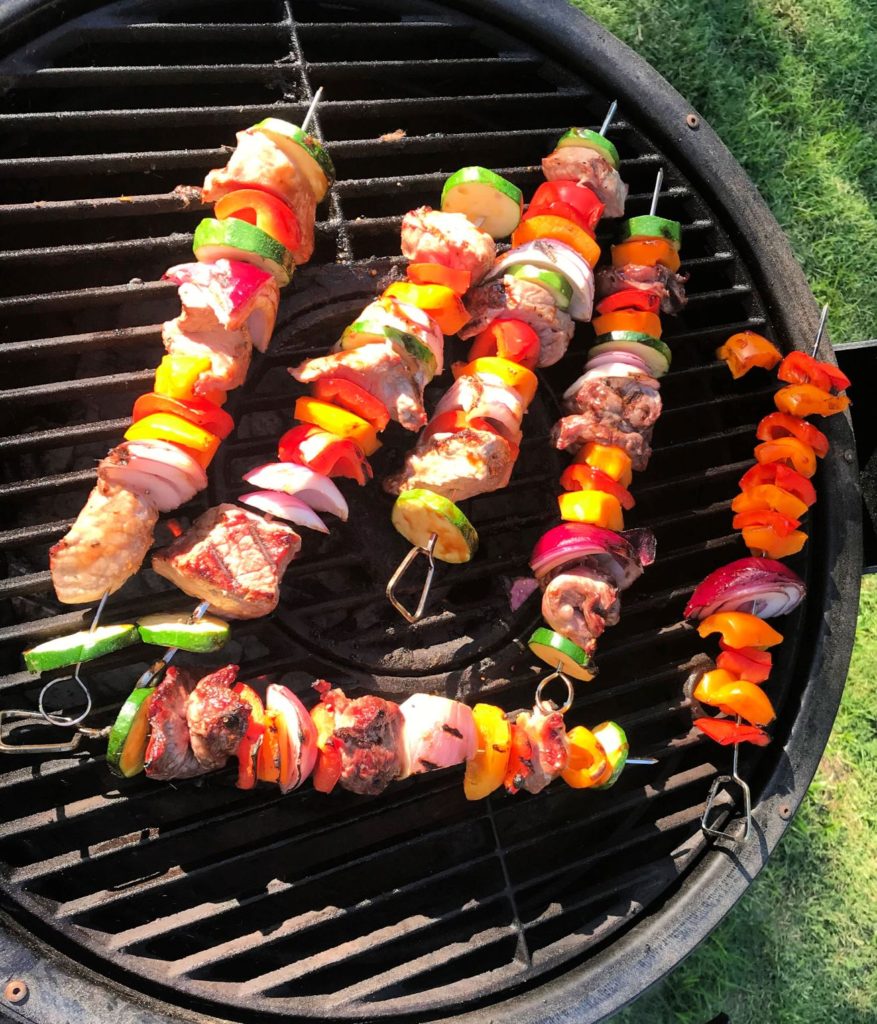
4. Cook the Kabobs
You can brush the grill grates lightly with oil if you want to keep the kabobs from burning, but we find that there is usually enough oil left on the grates from cleaning them that you don’t need to add any more.
Place the kabobs on the grill and cook until the center of the steak is about 140 – 145 degrees for medium doneness, a little more if you want them more done. Brush a little left over marinade on the entire kabob in the beginning stages of cooking. Turn the kabobs occasionally for even grilling. Grilling time will be about 9 minutes.
Don’t overcook them! Keep in mind that grill times vary. Factors such as how close the flames are and the wind make a difference, so keep a close eye on them and don’t leave the grill. No one wants to eat dried up steak!
Don’t overcook the steak!
5. Serve steak kabobs warm.
Serve the steak kabobs warm with a side of wild rice. They do not need any additional seasoning such as salt and pepper before serving as the flavors of the marinade are just enough.
Can I Cook Beef Kabobs in the Oven?
You can cook steak kabobs in the oven, but in my opinion they will have much better flavor if you cook them on the grill. But if you have run out of charcoal or it is pouring down rain, just line a baking sheet with foil, spray it with non-stick spray and cook the kabobs in the oven on 425 degrees for about 10 – 13 minutes. Use a meat thermometer if you are not sure about doneness, and turn them once half way through.
Juicy marinaded pieces of sirloin steak threaded on a skewer in between seasoned veggies and cooked on the grill or in the oven. Great for cookouts or any time!
1Tbspminced garlic(+ garlic powder to season veggies)
1 1/4 cupwater
5tsppacked brown sugar
1Tbsphoney(optional)
1/2tspground ginger
2Tbspcornstarch
1 3/4lbsTop sirloin steak(thick), cutinto 1 1/4 inch pieces
1red onioncut into 1 1/4 inch pieces
2bell peppersmixed colors, cut into pieces
1zuchinicut into 1 1/4 inch pieces
salt and pepper
Instructions
Make the Marinade:Combine the water, Worcestershire, olive oil, soy sauce, lemon juice, ginger, brown sugar, honey (optional) and garlic powder in a saucepan over medium heat. Cook about 1 minute until nearly heated through. Mix cornstarch and 1/4 cup water together in a cup or small bowl and stir until dissolved. Add to the saucepan. Cook and stir sauce until thickened, about 6 minutes. Allow the marinade to completely cool before using it.
Marinate the Steak:Cut the meat into uniform sizes if possible so that the pieces cook evenly. Place the steak into a gallon size resealable bag and pour the marinade over the meat. Seal the bag tightly while pressing out excess air. Use your hands to sort of rub the marinade over the steak through the bag to make sure all parts are covered. Warning: Make sure that the marinade has completely cooled before you pour it into the bag!Allow the meat to marinate in the refrigerator 3 – 6 hours (no more than 6 hours).
Preheat Grill and Prep Food:Preheat the grill to about 425 degrees. We love our Charbroil charcoal grill. Pour a little oil on some paper towels and use them to clean the grill grates before they get too hot. Cut up the vegetables into large pieces, toss with oil, then sprinkle with garlic powder, salt and pepper, or your seasoning of choice. Thread each skewer with even layers of steak and vegetables leaving some space in between. I put three steak pieces on each kabob. NOTE: If you are using bamboo skewers make sure you soak them in water for at least 30 minutes or they will burn.
Cook the Kabobs:Brush the grill grates lightly with oil.Place the kabobs on the grill and cook until the center of the steak is about 140 – 145 degrees for medium doneness, a little more if you want them more done. Brush a little left over marinade on the entire kabob in the beginning stages of cooking. Turn the kabobs occasionally for even grilling. Grilling time will be about 9 minutes. Don't overcook them!
We like to use our charcoal grill in the warm weather as much as possible, and chicken shish kabobs are one of my favorite things to grill. Growing up this meal was one of my dad’s specialties on the grill. What made it so great was the special sauce he made to drizzle on top (he got mad when we called it gravy and insisted it was not gravy but sauce). I have never quite perfected this special sauce, but if you want to try it it consists of a little oil, flour, and white cooking wine. I just forgo the sauce with mine. I could never make it as good as Dad does.
This post contains affiliate links, and I may earn commission when you click on the links at no additional cost to you.
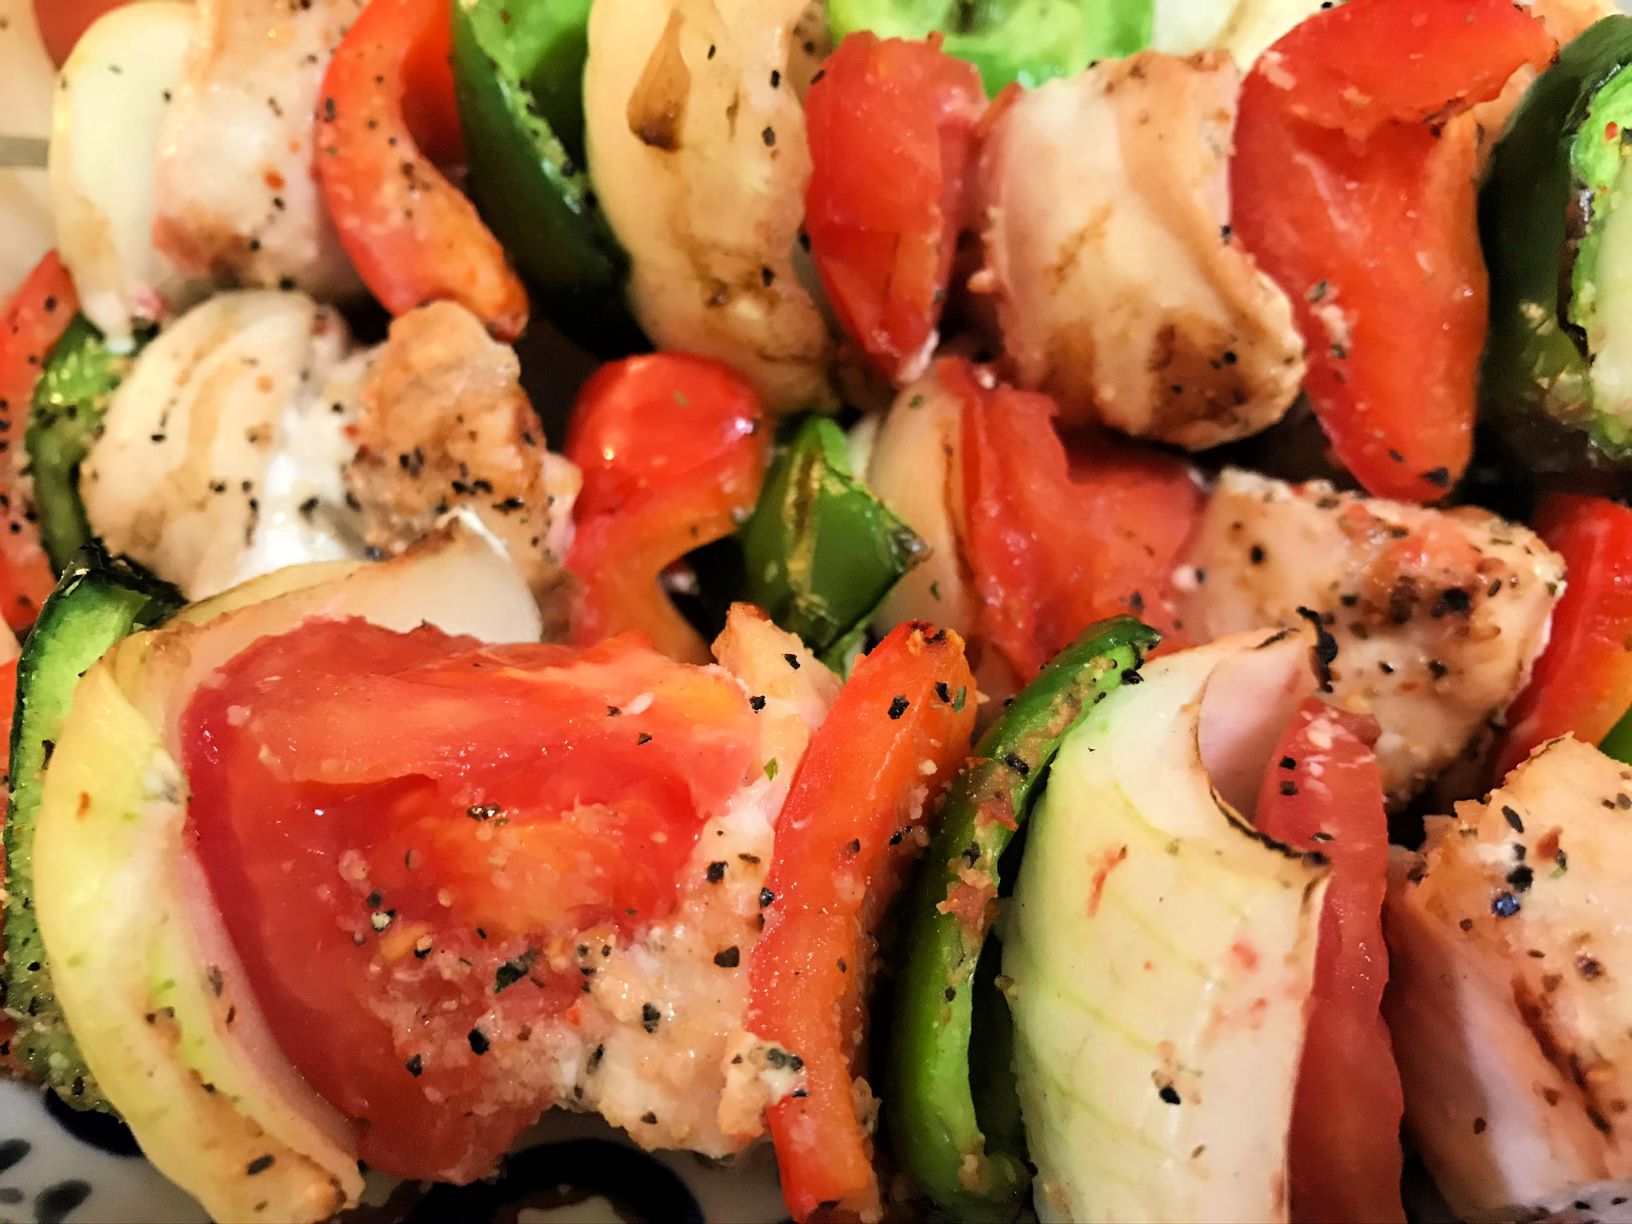
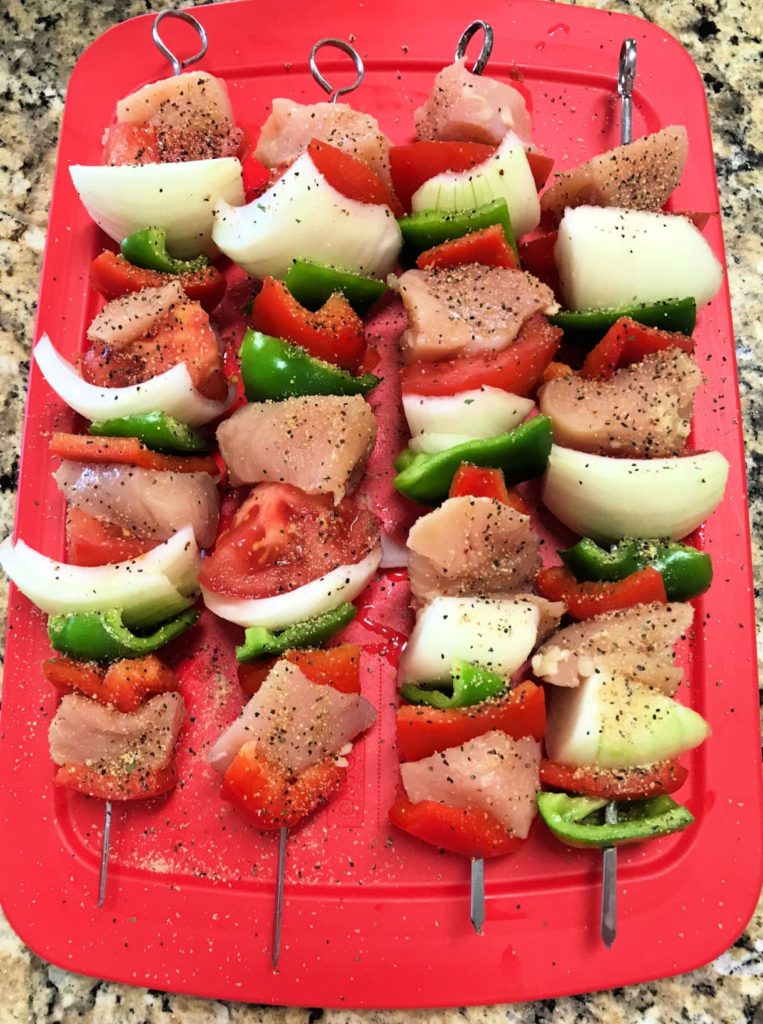
Juicy chicken seasoned with Garlic Pepper and threaded with a colorful stack of veggies, these yummy Grilled Chicken Kabobs can be prepped ahead of time or put together at the last minute. Memorial Day weekend has come and gone, which means we are officially into the throngs of summer. And summer means it’s time for cookouts, ice cream, and watermelon.
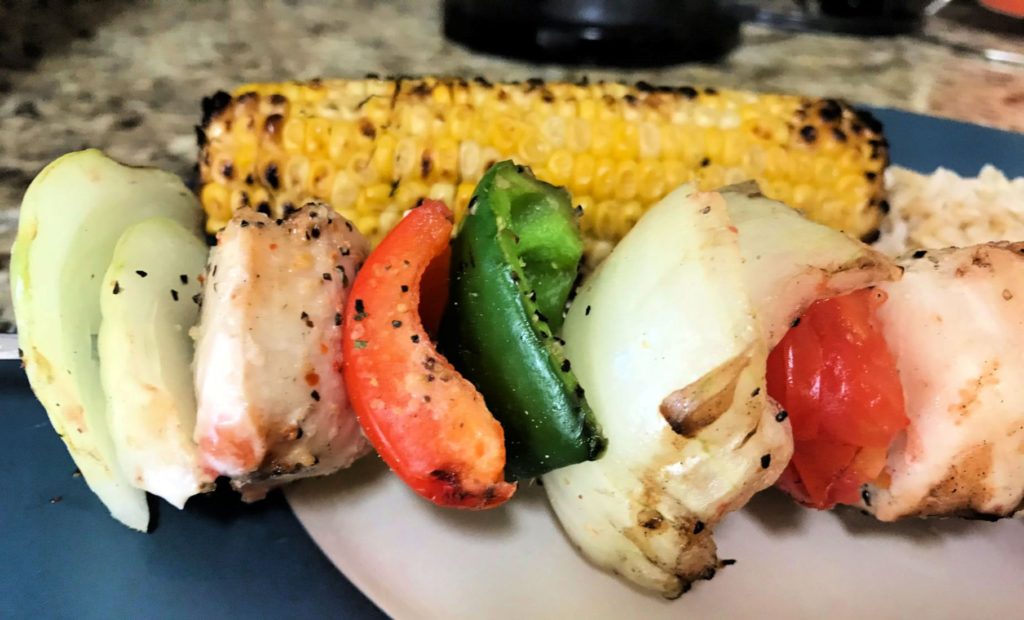
Just like grilled steak or bratwurst, whenever we think of grilling something I turn to these Grilled Chicken Kabobs more often than not. They are easy to make and are so healthy and delicious. Serve them with grilled corn on the cob and wild rice, and they make a complete meal. The appealing colorful presentation makes them perfect for entertaining guests at a party or cookout.
Grilled Chicken Kabobs looks so good on the plate!
(By the way, here in Memphis we never call a cookout a BBQ like you Northerners do. BBQ is a food here and one that Memphis is known for like no other, but that’s a whole other blog post for another time.)
Everyone loves these Grilled Chicken Kabobs. They’re fast and healthy and can be changed up depending on what you have on hand in your kitchen. I’ve suggested certain vegetables, but you can use several different kinds of veggies and choose your own favorite seasoning.
I promise these chicken kabobs will not disappoint. Chicken must be cooked all the way through, but it is easy to overcook chicken. I cannot stand chicken that is too dry or tough, so if you are like me you will love this juicy Grilled Chicken Kabob recipe with chicken cooked just right.
So fire up your grill or oven. Here are the easy steps for cooking Grilled Chicken Kabobs.
Ingredients
Boneless skinless chicken breasts: You can purchased fresh (my preference) or frozen chicken, but frozen chicken will need to be completely thawed before using or it won’t cook evenly. If the label says the chicken has already been brined, you can skip the brining step below.
Vegetables: I like to use different colored bell peppers, yellow onion, and tomato, but you can add anything else such as zuchini or mushrooms.
Oil: Since you will be grilling over high-heat, I recommend regular olive (not extra-virgin). It has a higher smoking point.
Kosher Salt: Used in the brine and to season chicken
Seasonings: I used California style Garlic Pepper seasoning, but go ahead and substitute any dry seasoning blend you like. Garlic powder, Steak seasoning, and Paprika work well too.
You will also need:
Skewers: Either reusable metal skewers (this is what I use) or wooden skewers. Keep in mind that wood burns, so if you choose to use wooden skewers make sure you soak them in water at least 15 minutes before using to prevent burning.
Grill: Time to fire up the charcoal or gas grill! We love our charcoal grill. Or if you prefer to cook the chicken indoors, you can use a grill pan instead.
More great grilling ideas
How to Cook Grilled Chicken Kabobs
Step 1: Brine the chicken
If your chicken did not come pre-brined from the store, you will want to take this short simple step first to assure that the juices are locked in and the chicken doesn’t dry out on the grill.
First, soak the chicken breasts in lukewarm salt water for at least 15 minutes. Then rinse the chicken off with some cold water, pat the chicken breasts dry with paper towels, and cut the chicken up into bite sized pieces.
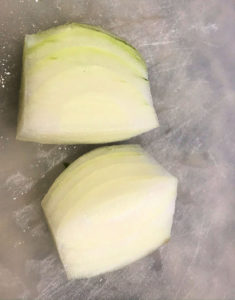
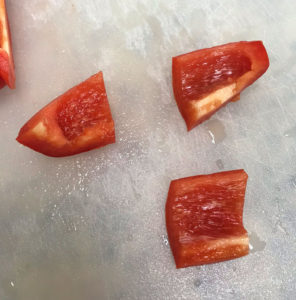
Next, cut the vegetables into about 1 inch pieces.
Cut large chunkc of onion then separate them some.
Don’t cut your vegetables too small, or they will be hard to thread on the skewer.
I did not marinate the chicken in this recipe, but if you don’t want to use dry seasonings only you can marinate the chicken in Italian salad dressing for 30 minutes. Just be careful to not burn the chicken as the oil in salad dressing burns easily.
Step 2: Season the chicken and vegetables
Drizzle the chicken and vegetables with olive oil, sprinkle on your desired dry seasonings (I used garlic pepper seasoning), and toss well in a bowl until everything is coated.
I add a little more seasoning on top after I’ve threaded everything onto the skewer.
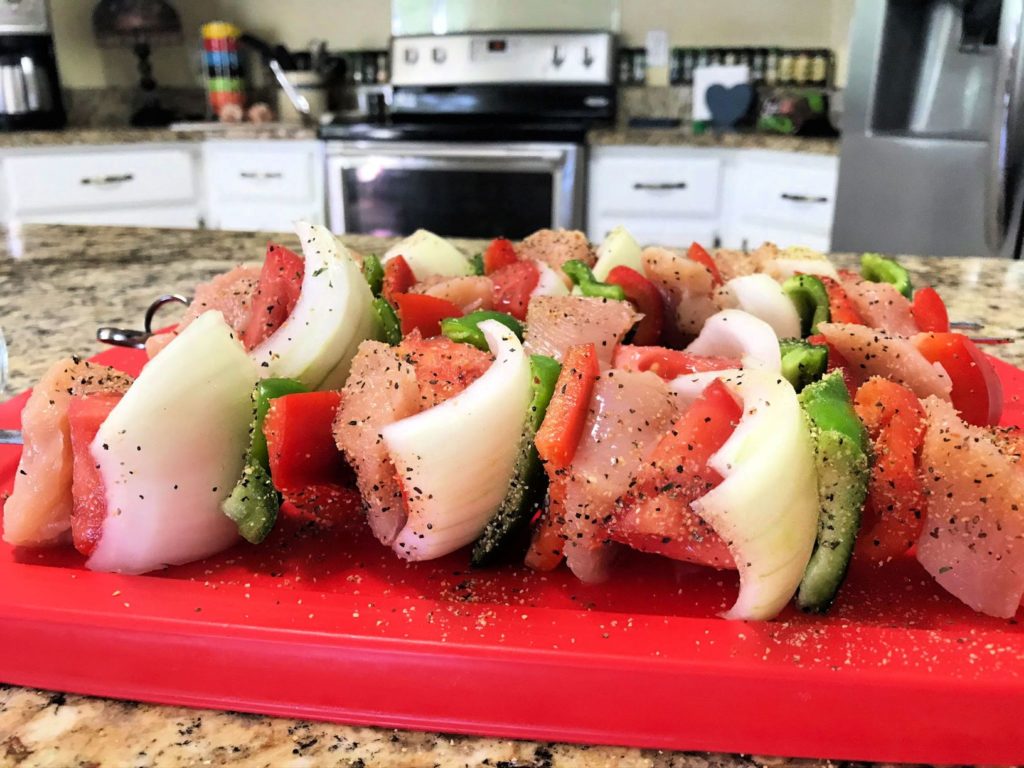
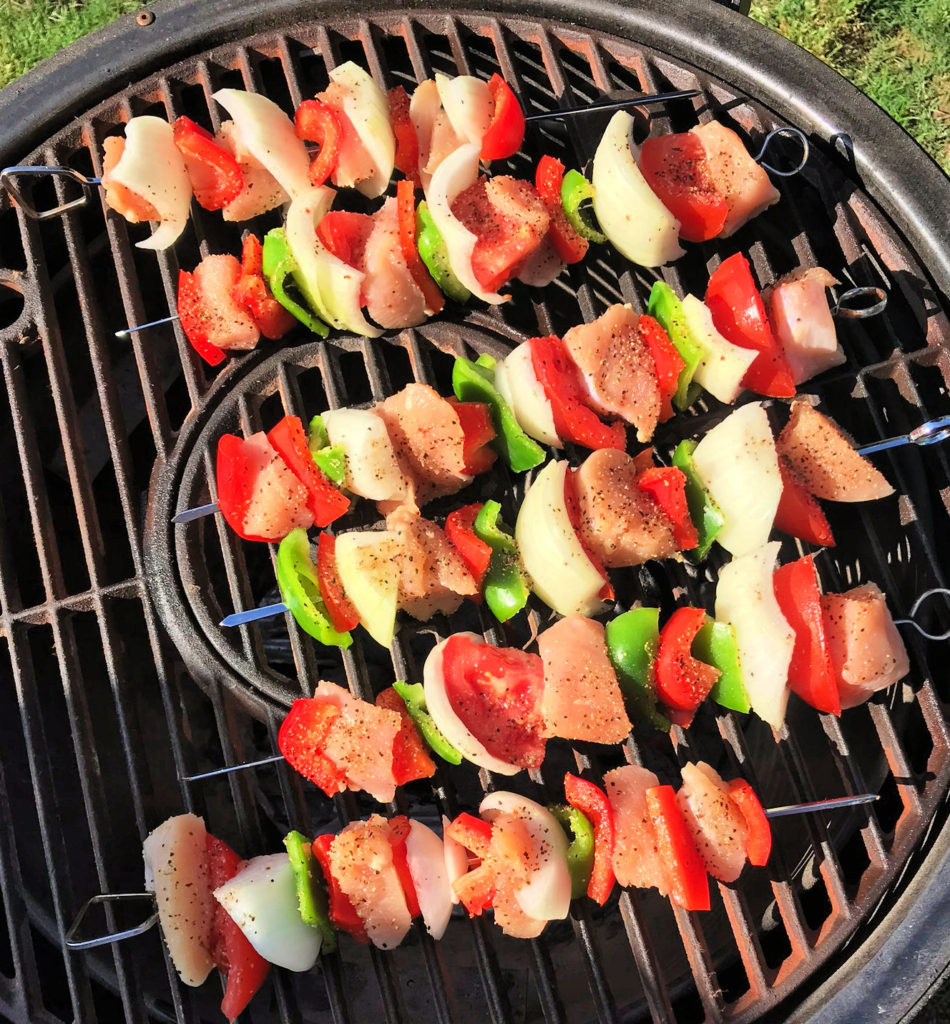
Step 3: Thread the Skewers and Heat Grill
Heat your grill up to medium-high heat. Thread the chicken and vegetables onto the skewers. I used a pattern of chicken, tomato, onion, red pepper, then green pepper, and repeated this pattern until the end of the skewer.
Make sure you do not jam things too close together on your skewer. They will cook better if a little air can get in between the pieces.
Leave a little space in between pieces on the skewer and follow a pattern.
Step 4: Grill
On 350 degrees F, cook the chicken and vegetable skewers for about 6 or 7 minutes then turn and cook the other side 7 minutes. You can turn them more than once if needed. To keep the chicken from drying out we will occasionally spritz a little water on them as they are cooking, but make sure you don’t put the charcoal out! If you are using the oven, cook them about 25 minutes on 450 degrees turning once halfway through.
Cook until the chicken is golden brown and cooked all the way through. Do not overcook!
Your chicken should be golden brown and cooked all the way through. It may take a little practice to find that perfect balance between cooking the chicken enough but not overcooking it and drying it out. No one wants undercooked or overcooked chicken. The chicken is cooked when it reaches an internal temperature of 165 degrees F on an instant read meat thermometer and the juices run clear when a piece of chicken is cut.
Transfer the skewers to a clean plate and cover them loosely with aluminum foil to keep them warm. They are best served right away while the chicken is still warm and juicy. Garnish with fresh lemon wedges and a sprinkling of parsley if desired. Serve them with grilled or boiled corn on the cob and wild rice.
Grilled chicken kabobs make an easy healthy meal.
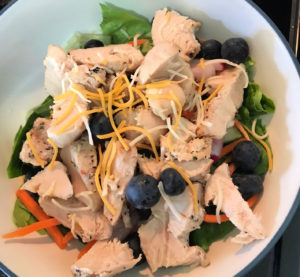
Refrigerate leftovers for up to three days. I cut up the vegetables and used them in chili then put the leftover grilled chicken on top of salad.
Use leftover grilled chicken on top of a salad.
Let me know if you try these and what seasoning you used. Please rate this recipe and share it with others. Happy grilling!
Brine the chicken: If your chicken did not come pre-brined from the store, you will want to take this short simple step first to assure that the juices are locked in and the chicken doesn't dry out on the grill.First, soak the chicken breasts in lukewarm salt water for at least 15 minutes. Then rinse the chicken off with some cold water, pat the chicken breasts dry with paper towels, and cut the chicken up into bite sized pieces. Next, cut the vegetables into about 1 inch pieces.
Seasn the chicken and vegetables: Drizzle the chicken and vegetables with olive oil, sprinkle on your desired dry seasonings (I used garlic pepper seasoning), and toss well in a bowl until everything is coated.
Thread the Skewers and Heat the Grill: Heat your grill up to medium-high heat. Thread the chicken and vegetables onto the skewers. I used a pattern of chicken, tomato, onion, red pepper, then green pepper, and repeated this pattern until the end of the skewer.Make sure you do not jam things too close together on your skewer. They will cook better if a little air can get in between the pieces.
On 350 degrees F, cook the chicken and vegetable skewers for about 6 or 7 minutes then turn and cook the other side 7 minutes. You can turn them more than once if needed. To keep the chicken from drying out we will occasionally spritz a little water on them as they are cooking, but make sure you don't put the charcoal out! If you are using the oven, cook them about 25 minutes on 450 degrees turning once halfway through. Your chicken should be golden brown and cooked all the way through. It may take a little practice to find that perfect balance between cooking the chicken enough but not overcooking it and drying it out. No one wants undercooked or overcooked chicken. The chicken is cooked when it reaches an internal temperature of 165 degrees F on an instant read meat thermometer and the juices run clear when a piece of chicken is cut.
Transfer the skewers to a clean plate and cover them loosely with aluminum foil to keep them warm. They are best served right away while the chicken is still warm and juicy. Garnish with fresh lemon wedges and a sprinkling of parsely if desired. Serve them with grilled or boiled corn on the cob and wild rice.
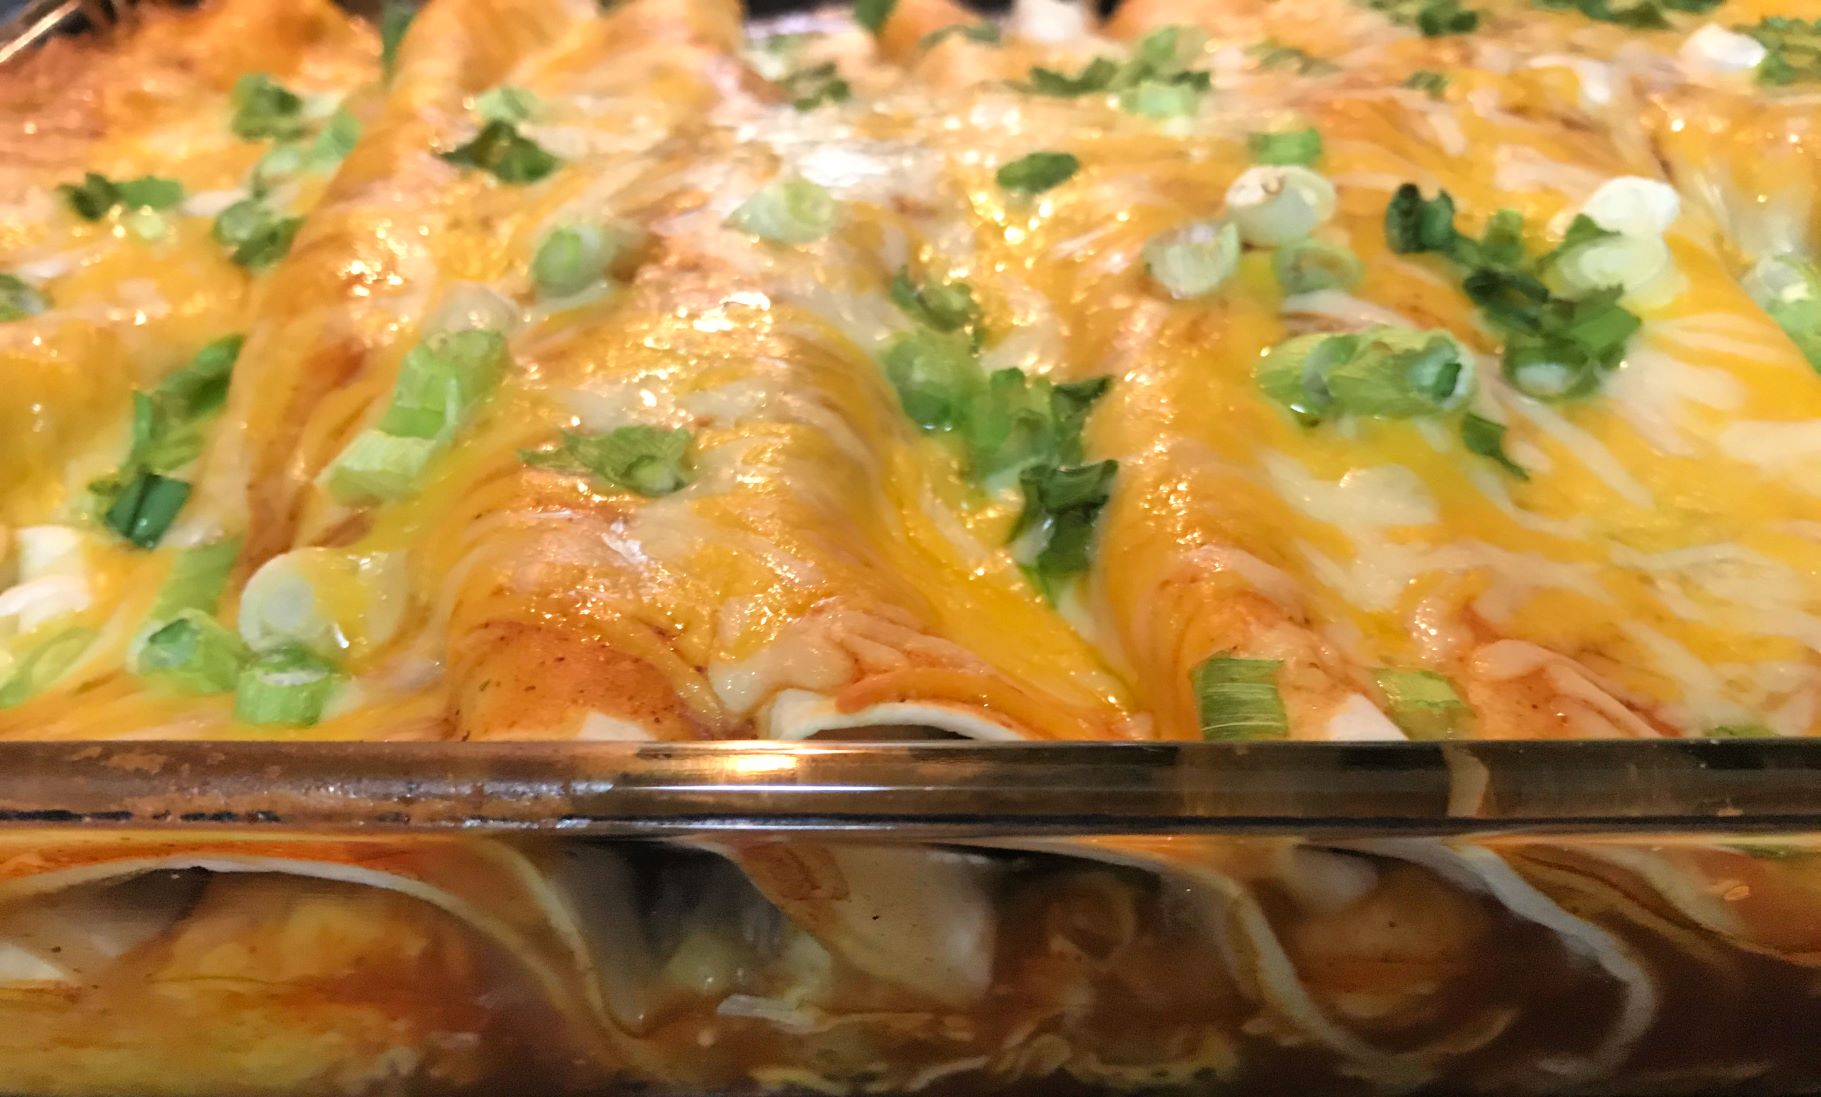
This beef enchilada recipe is super easy. These enchiladas look like they would take a lot of time to make, but you will be surprised at how simple this recipe is. Filled with seasoned beef, onions, green chilies, and cheese and covered with red enchilada sauce, this dish is a family favorite.
Top it with sour cream, diced green onions, pico de gallo, salsa, diced avocado, or any of your other favorite taco toppings. Serve it with Mexican rice, beans, or chips with cheese dip. Nothing is as good as homemade Mexican food. It’s the best!
Easy Dinner Recipe
Ingredients:
1 pound ground beef
3/4 white onion diced
1 4.5 oz. can chopped green chilies
2 1/2 cups red enchilada sauce
1/4 cup water
1 envelope taco seasoning
8 – 10 soft taco sized tortillas corn or flour
16 oz. Mexican style cheese shredded
8 oz. sour cream (optional topping)
3 green onions diced (optional topping)
Instructions
Preheat oven to 375 degrees F.
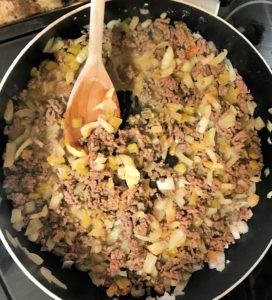
Brown the ground beef and onion in a skillet over medium heat until beef is crumbled up and no longer pink. Drain fat and return skillet to stove top.
Add in the chopped green chilies, taco seasoning, and water. Stir until combined and the water is absorbed. Remove from the heat.
You can add in the amount of onions you want. Pictured here is almost an entire onion.
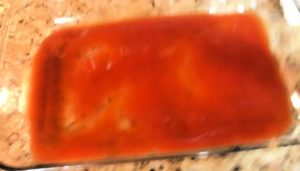
Cover the bottom of a 9×13″ casserole or baking dish with enchilada sauce (1/4 – 1/2 of the sauce) to evenly coat the bottom of the dish. Reserve the remaining sauce for later.
Spread red enchilada sauce over the bottom of the dish first.
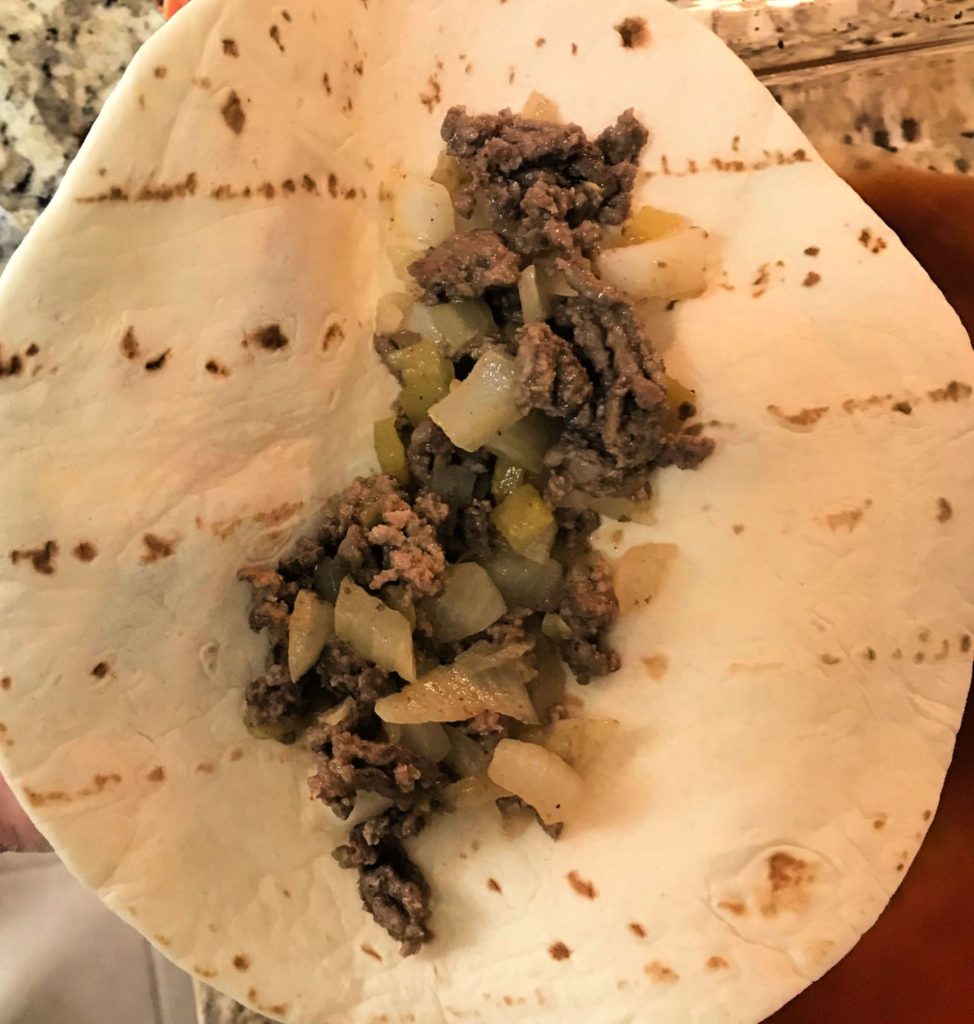
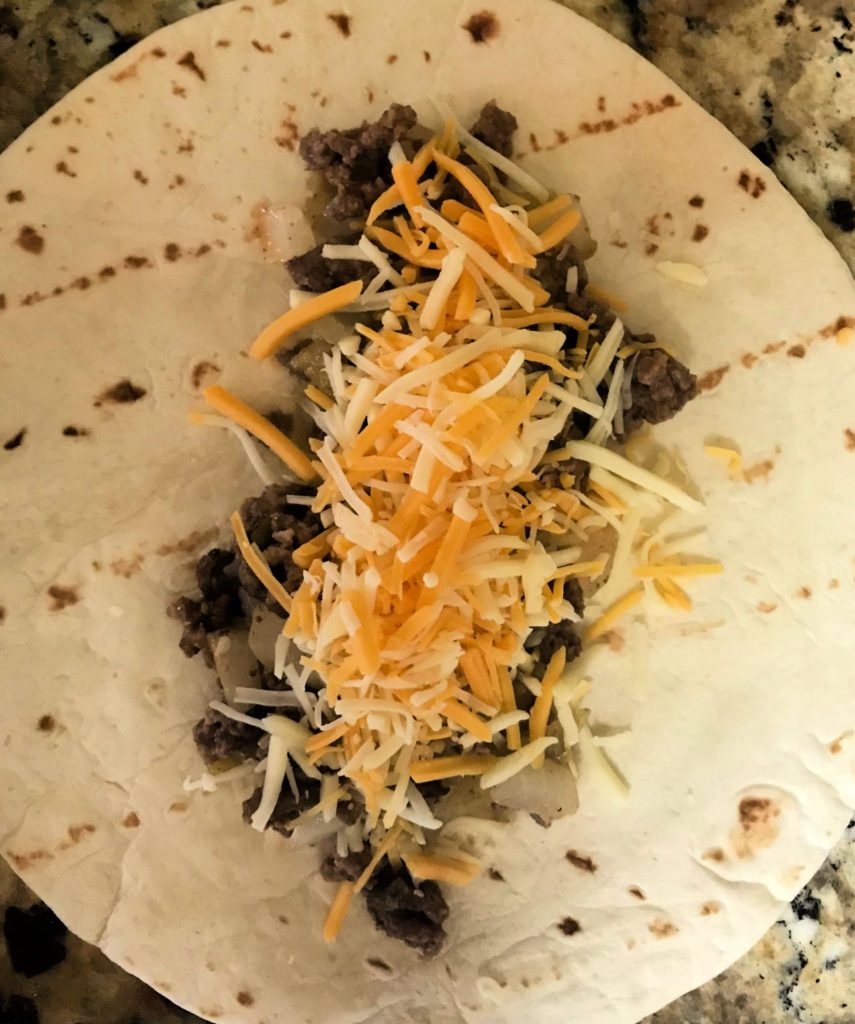
Spoon about 1/3 cup of the ground beef mixture in a straight line in the center of each tortilla.
Spoon beef mixture onto the center of the tortilla.
Add about 1/4 cup of the shredded cheese on top of the beef mixture and roll up tightly.
Add about 1/3 cup cheese to cover the ground beef mixture.
Lay the rolled enchiladas seam side down in the casserole dish. Repeat with remaining tortillas, filling up the dish. If you have any beef mixture left over, just sprinkle it over the top of the rolled enchiladas.
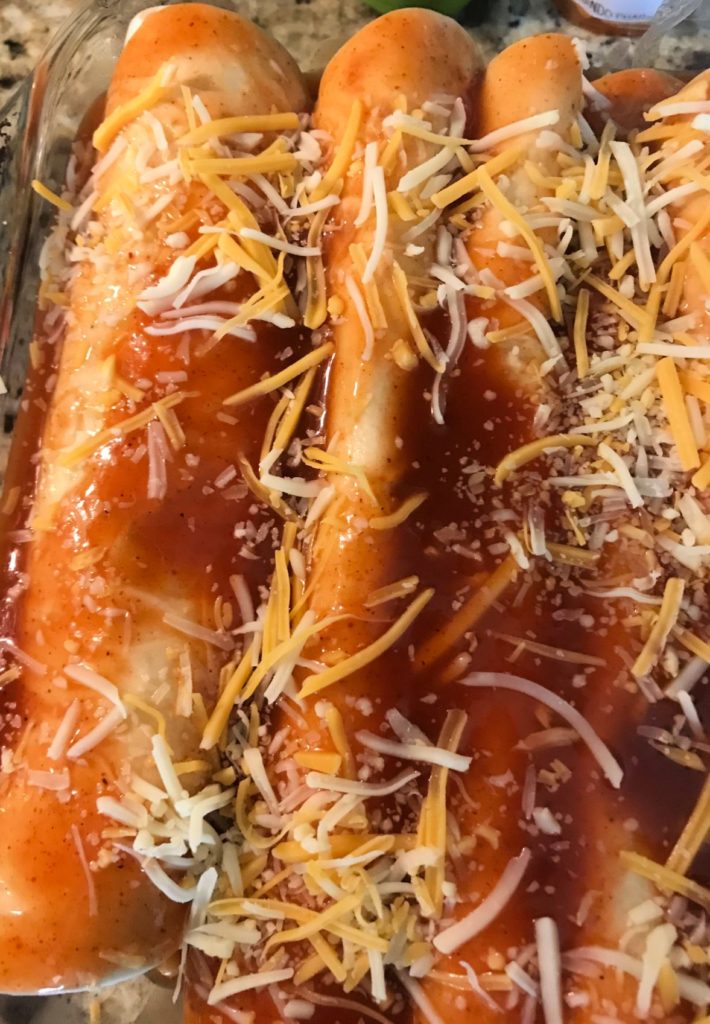
Pour the rest of the enchilada sauce over the top of the tortillas, making sure to spread it evenly to coat each tortilla.
Pour the remaining red enchilada sauce on and spread to cover before adding cheese.
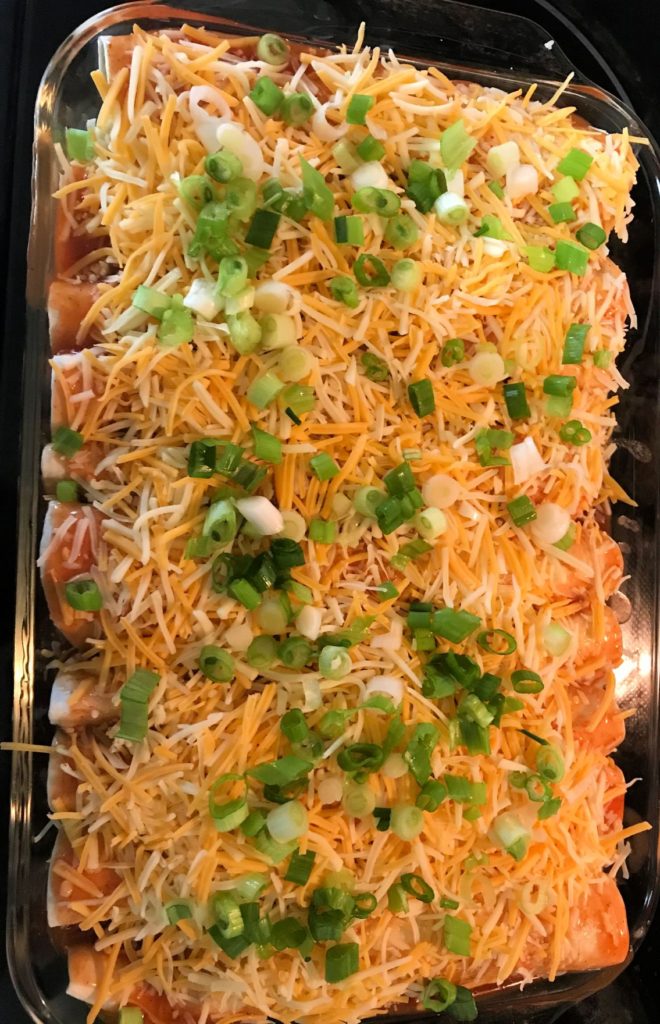
Sprinkle all of the remaining cheese over the top of the tortillas. Top with diced green onions if desired.
I like to sprinkle diced green oinions on top before baking. I think it makes it look fancy. 🙂
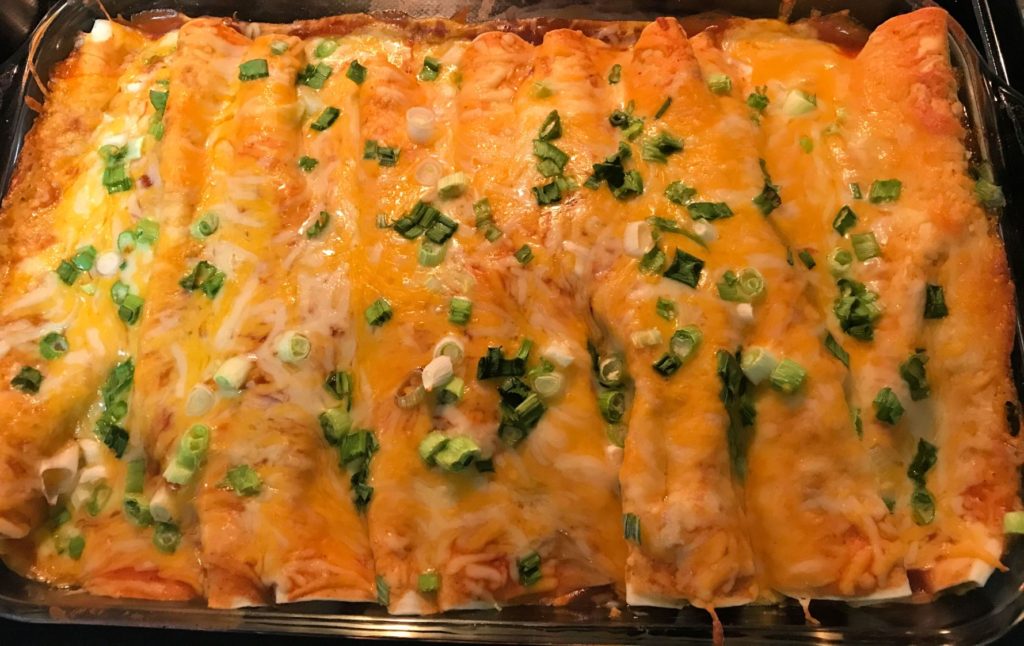
Bake for 25 minutes or until the center is bubbly.
Cheese should be fully melted, and the edges of the tortillas should be crispy.
Easy and delicious! These enchiladas are filled with seasoned beef, onions, and cheese, then topped with your favorite Mexican toppings.
Prep Time25 minutesmins
Cook Time25 minutesmins
Total Time50 minutesmins
Course: Main Course
Cuisine: Mexican
Servings: 8
Calories: 215kcal
Author: Cindy Baker
Ingredients
1poundground beef
3/4 white oniondiced
14.5 oz. canchopped green chilies
2 1/2cupsred enchilada sauce
1/4cupwater
1envelopetaco seasoning
8 – 10soft taco sized tortillascorn or flour
16oz.Mexican style cheeseshredded
8oz.sour cream(optional topping)
3green onionsdiced (optional topping)
Instructions
Preheat oven to 375 degrees F.
Brown the ground beef and onion in a skillet over medium heat until beef is crumbled up and no longer pink. Drain fat and return skillet to stove top.
Add in the chopped green chilies, taco seasoning, and water. Stir until combined and the water is absorbed. Remove from the heat.
Cover the bottom of a 9×13" casserole or baking dish with enchilada sauce (1/4 – 1/2 of the sauce) to evenly coat the bottom of the dish. Reserve the remaining sauce for later.
Spoon about 1/3 cup of the ground beef mixture in a straight line in the center of each tortilla.
Add about 1/4 cup of the shredded cheese on top of the beef mixture and roll up tightly.
Lay the rolled enchiladas seam side down in the casserole dish. Repeat with remaining tortillas, filling up the dish. If you have any beef mixture left over, just sprinkle it over the top of the rolled enchiladas.
Pour the rest of the enchilada sauce over the top of the tortillas, making sure to spread it evenly to coat each tortilla.
Sprinkle all of the remaining cheese over the top of the tortillas. Top with diced green onions if desired.
Bake for 25 minutes or until the center is bubbly.
This is one of the easiest recipes ever, and yet it is so delicious and can be served in so many different ways. So this week we’re traveling with our taste buds again. This time to Mexico!
This post contains affiliate links, and I may earn commission when you click these links at no additional cost to you. All opinions are my own.
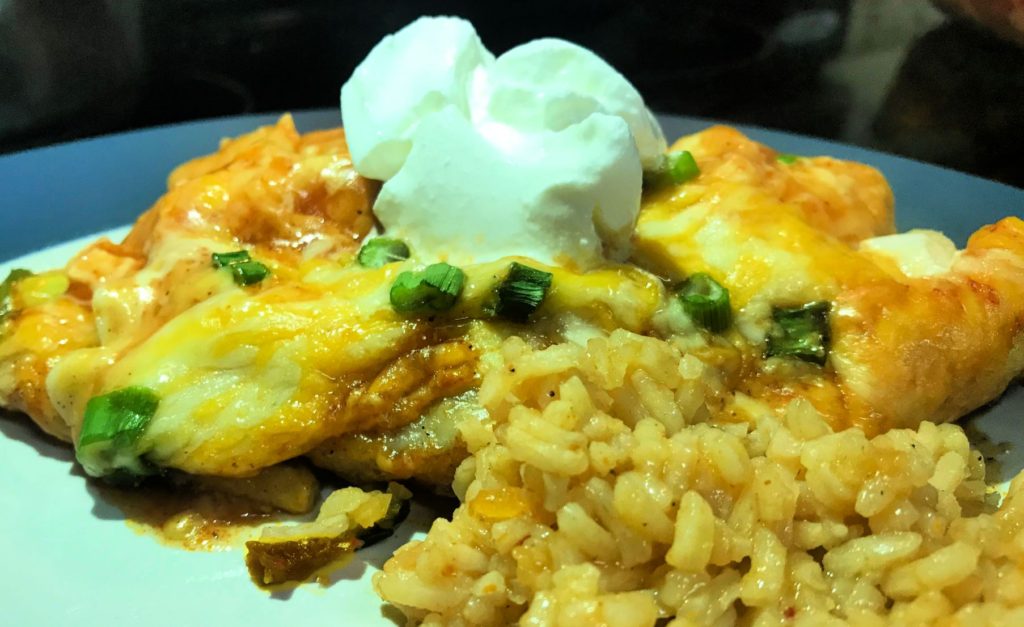
This chicken is so tender and juicy it just falls apart as it soaks in the flavors of salsa and taco seasoning. It is one of those meals that takes only a few minutes to prepare, then you just walk away and let it cook in the slow cooker all afternoon while you do other things.
It is easy to shred, because it becomes very tender in the salsa. It can be served over rice with or without cheese, in tacos or lettuce cups, or my favorite: chicken nachos! Spritz a little lime juice on it right before serving, and you have yourself a perfect crowd pleaser for a meal or appetizer. Just in time for Cinco de Mayo too!
Slow cooker salsa chicken makes great chicken nachos!
Here’s How to Make It:
Ingredients
2 – 4 boneless, skinless chicken breasts (I used 2 in my pictures. You may want to adjust the amount of salsa to taste. We like a lot!)
1 envelope taco seasoning (mild or hot)
1 16 oz. jar or larger of chunky salsa
1 cup Mexican style blend shredded cheese for topping
Instructions
1. Place the chicken breasts in the slow cooker.
2. Sprinkle taco seasoning over all sides of the chicken.
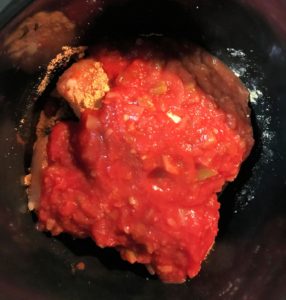
3. Pour half the jar of salsa over the chicken.
Sprinkle the taco seasoning over the chicken breasts first.
Then pour half the jar of salsa on top.
4. Cover and cook on high 3 hours (or on low 6 hours).
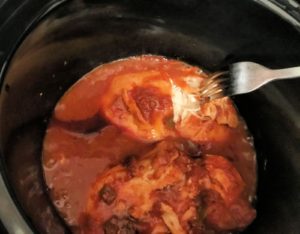
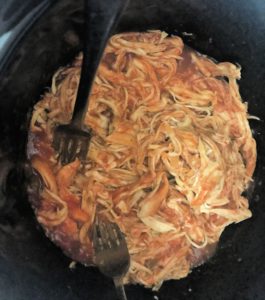
5. Shred the chicken in the slow cooker.
The chicken will be falling apart and very tender, making it shred easily.
You will not need to remove the chicken to shred it. Using two forks, you can just shred it right in the slow cooker.
6. Pour the remaining salsa over the chicken and toss to coat. Cook 10 more minutes before serving to heat the salsa.
Serve over rice, in tacos, in lettuce cups, or as a nacho plate. Let me know if you try this and how it turned out. I think you will really like how easy it is.
There are so many different ways you can serve salsa chicken.My favorite way to serve salsa chicken is a chicken nacho plate as an appetizer or meal.
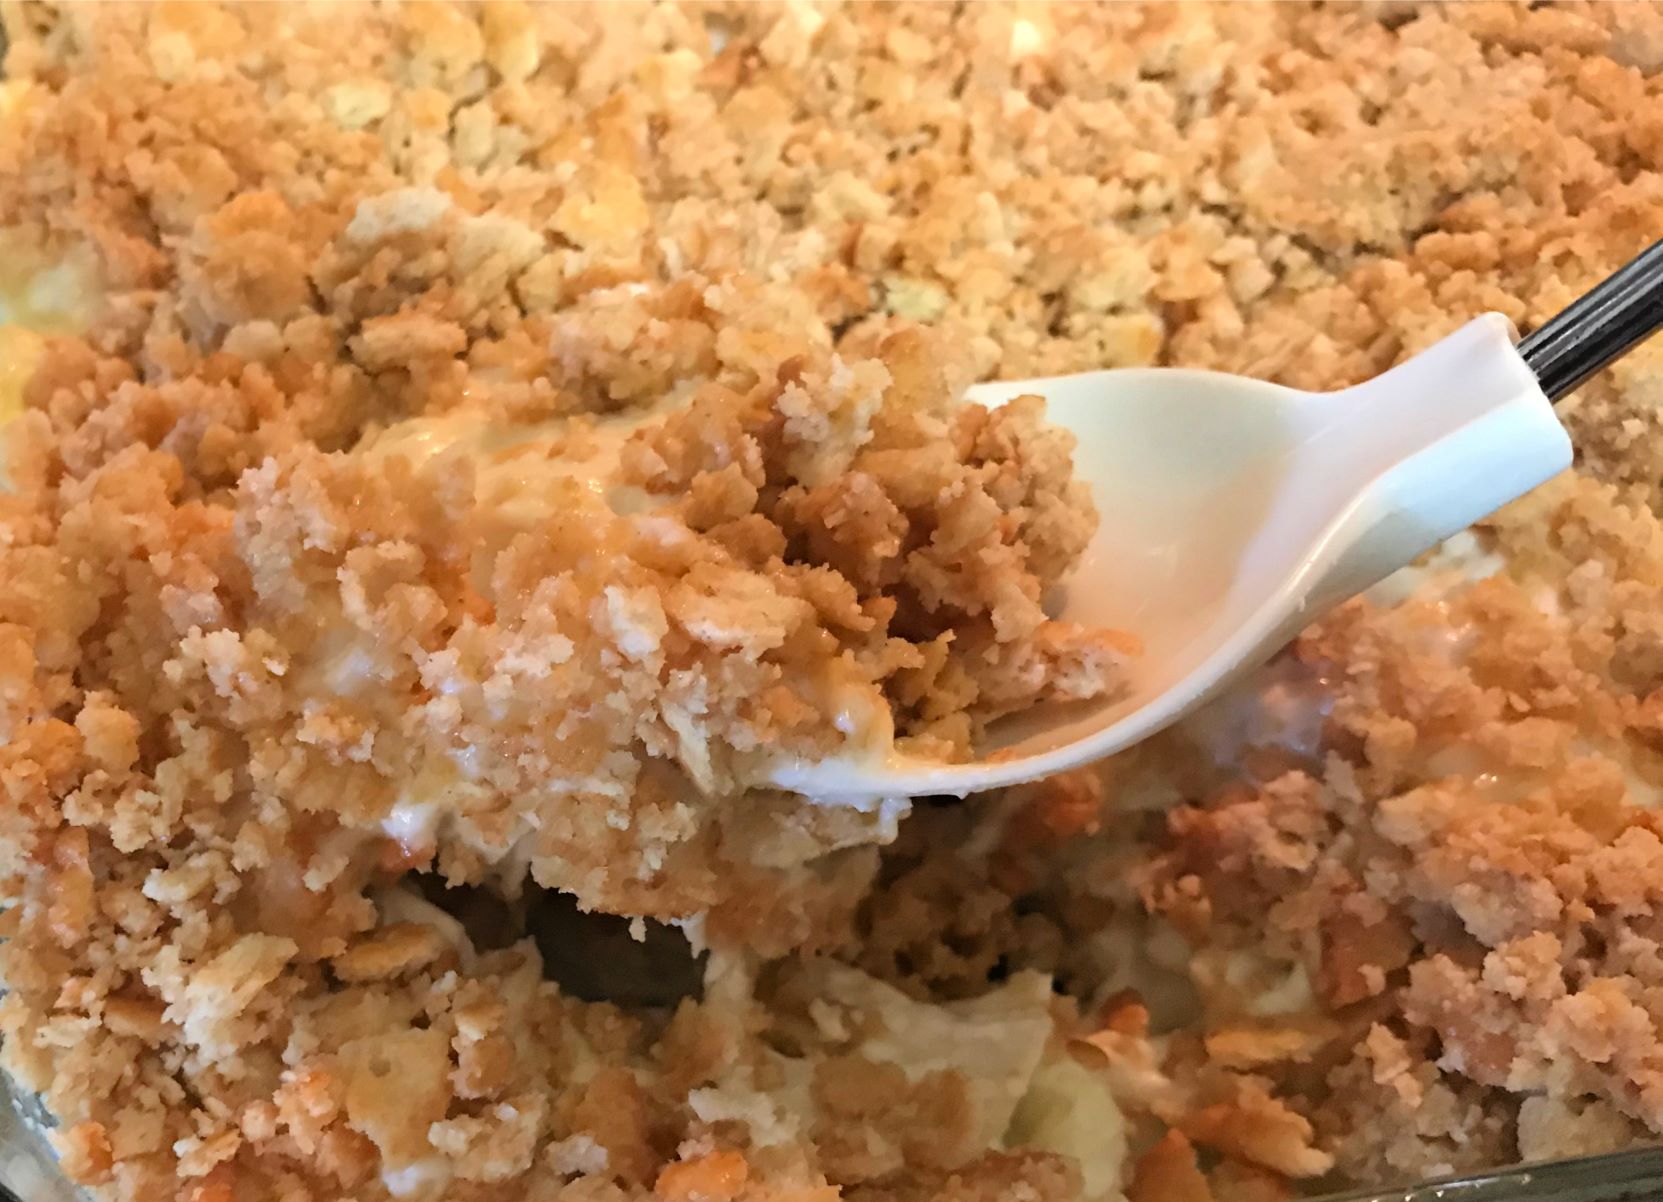
I love chicken casseroles. In fact I love chicken so much that I once thought of opening up a chicken restaurant. This recipe is a popular favorite. It’s a great way to use up leftover chicken or turkey after the holidays as well.
This chicken casserole is a family favorite!
This pan of creamy cheesy deliciousness is good ole American comfort food at its finest. It tastes great, is super easy to make, and uses only a few simple pantry staples, making it inexpensive to cook. I’m giving you the basic version, but there are lots of possible variations. Feel free to be creative and change it up to suit your taste.
Many versions of this recipe call for poppy seeds, but to me they don’t really have much taste and they get stuck in my teeth. But you can put poppy seeds on top if you want. You can add in any vegetable such as steamed brocolli, mushrooms, water chesnuts, onion, carrots, chopped green onions, or just about any vegetable you want.
Some have added a can of Campbell’s chicken noodle soup. That sounds good, but I’ve never tried it. You could also try the condensed cream of chicken with herbs soup instead.
This makes a great easy weeknight family meal and may quickly become one of your go-to classic favorites. If you are only cooking for one or two people this can easily be split into two smaller pans, and you can freeze one. Make sure you double wrap it though to avoid freezer burn. It can also be made ahead of time and frozen to eat later.
Here is all you need:
1 cooked rotisserie chicken from the grocery store (de-boned and shredded)
1 10.5 oz. can condensed cream of chicken soup
1 cup sour cream
1 cup shredded blend cheese (I used Mexican blend)
2 sleeves Ritz crackers, crushed up
1 stick (1/2 cup) salted butter, melted
Instructions:
Preheat oven to 350 degrees.
Spray a 9 x 9 square baking dish (or a 2.5 quart baking dish) with no-stick cooking spray. Note: a 9×13 dish is OK, but cooking time may need to be shortened 5 minutes.
In a large bowl mix together soup, sour cream, cheese, and shredded chicken.
Spread mixture into the pan.
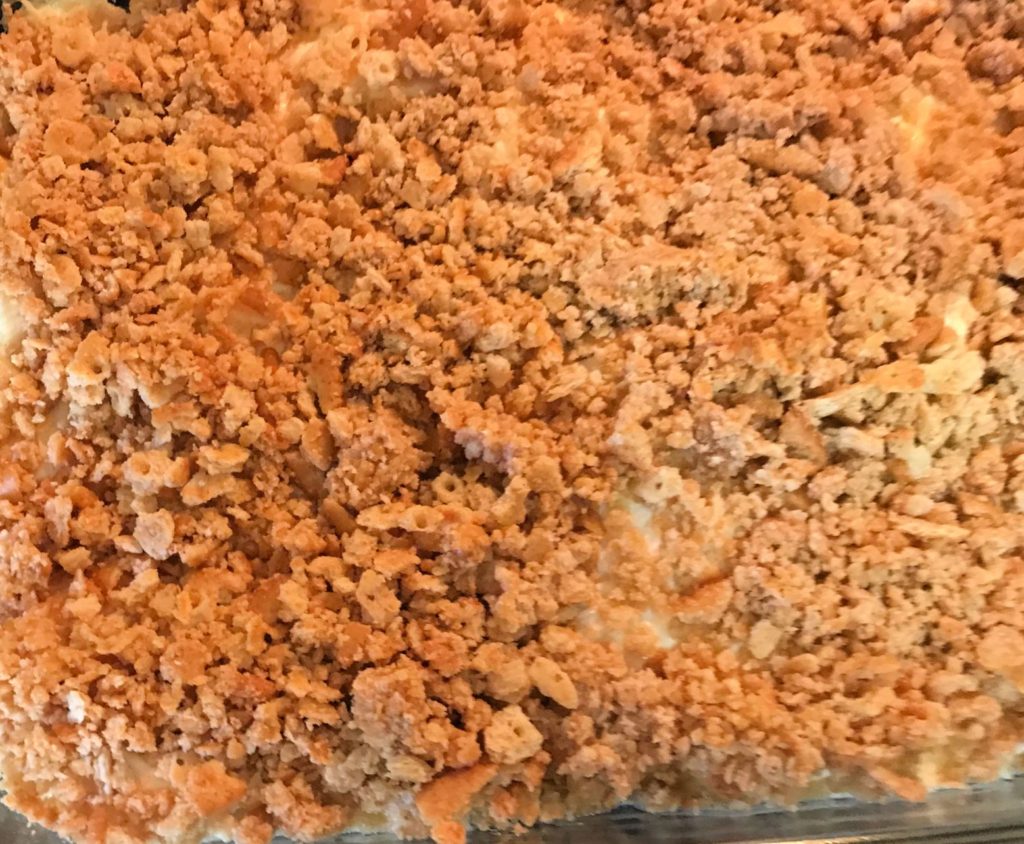
In another bowl mix together the crumbled crackers and melted butter.
Sprinkle the cracker mixture over the casserole.
Bake 25 – 30 minutes until the cracker topping is golden brown and the casserole is bubbly.
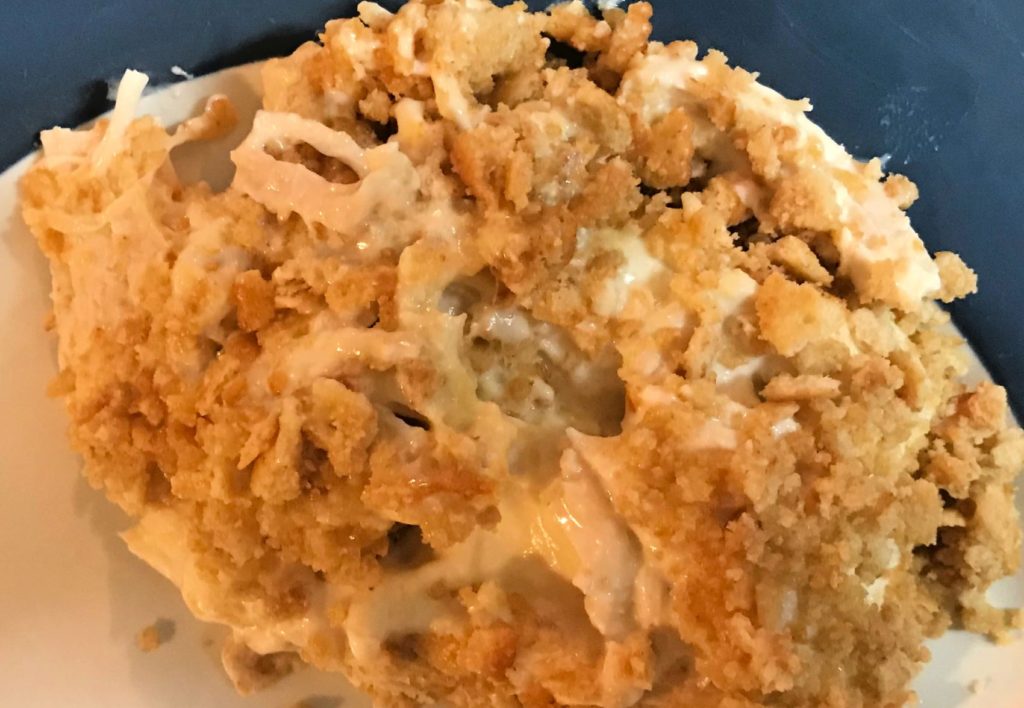
Just mix up 4 simple ingredients and spread it in the dish. Then sprinkle the crumbled crackers mixed with melted butter on top.This creamy deliciousness makes a great comfort food.
This great served with green beans or a tossed green salad and rice. I think this may be one of your favorites too! I hope you like it. Let me know how it turns out!
Creamy Chicken Casserole with Ritz Cracker Topping
Easy Recipe for Creamy Chicken Casserole with Ritz Cracker Topping
Prep Time10 minutesmins
Cook Time25 minutesmins
Total Time35 minutesmins
Course: Main Course
Cuisine: American
Servings: 6
Calories: 480kcal
Ingredients
1cooked rotisserie chicken (store-bought)de-boned and shredded
110.5 oz.can condensed cream of chicken soup
1cupsour cream
1cupshredded Mexican blend cheese
2sleevesRitz crackerscrushed
1/2cup(1 stick) salted buttermelted
Instructions
Preheat oven to 350 degrees.
Spray a 9×9 square baking dish (or 2.5 quart baking dish) with no-stick cooking spray.
In a large bowl mix together the soup, sour cream, cheese, and shredded chicken.
Spread the mixture into the dish.
In another bowl combine crushed crackers with melted butter.
Sprinkle the cracker mixture over the casserole.
Bake uncovered for 25-30 minutes or until the topping is golden brown and the casserole is bubbly.
Notes
Add in broccoli, green onions, water chesnuts, mushrooms, or any veggie you’d like to make it a complete meal. To lower the calories use low fat sour cream and no cheese. Great for pot luck dinners!
Need some quick and easy dinner recipes? Have ground beef in your freezer and no idea what to make tonight? All you need need is a skillet and a stovetop for this easy Italian recipe.
Easy dinner recipe
I love it, because the ingredients are inexpensive, it is easy and quick to make, and it is really delicious. It is one of my husband’s favorites. There are so many different variations you can try. I hope you like it too. Let me know what you think. Here is is:
In a large skillet on the stovetop, cook beef over medium high heat until no longer pink; drain. Add in the onion and saute until soft.
Add the tomatoes, water, soup mix, and Italian seasoning. Bring to a boil. Stir in macaroni. Reduce heat; cover and simmer for 8-9 minutes or until macaroni is tender.
Add in the fresh spinach if desired and stir about 1 minute.
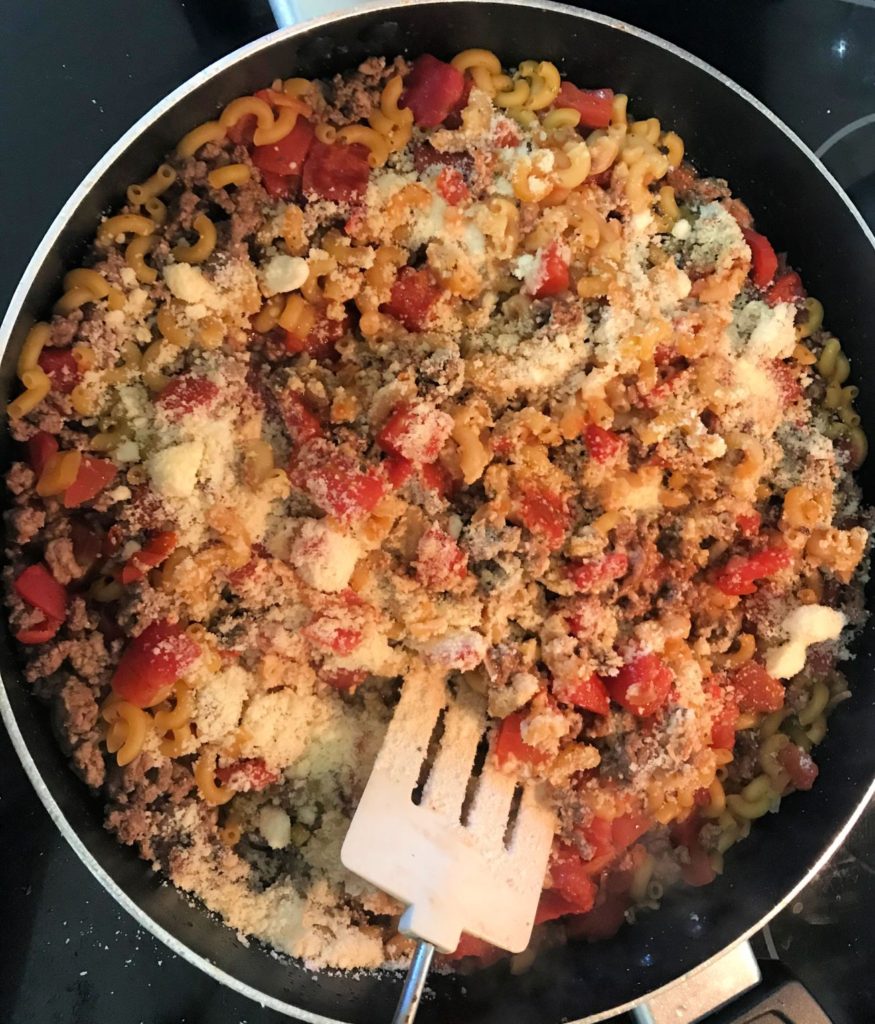
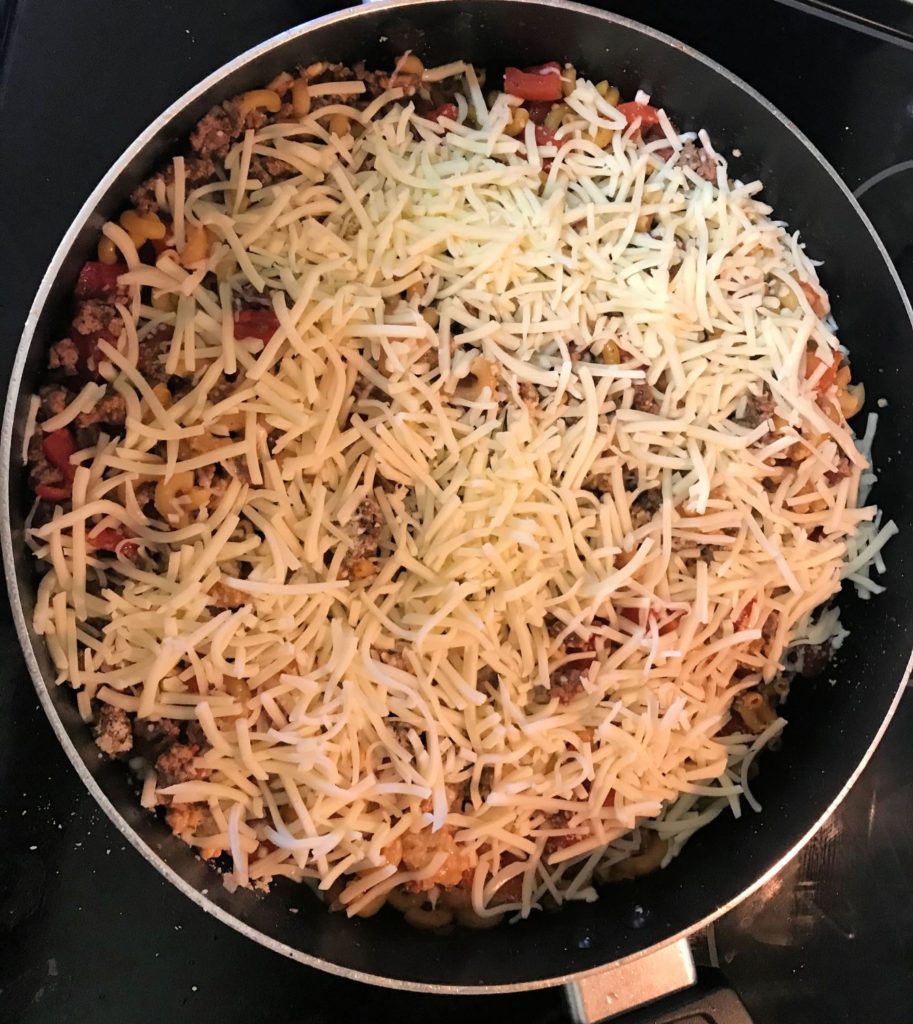
Remove from the heat; stir in Parmesan cheese. Sprinkle mozzarella cheese all over the top. Cover and let stand for 2 minutes or until cheese is melted.
Stir in the Parmesan cheese.If you don’t want it as cheesy, you can reduce the mozzarella to 1 cup.
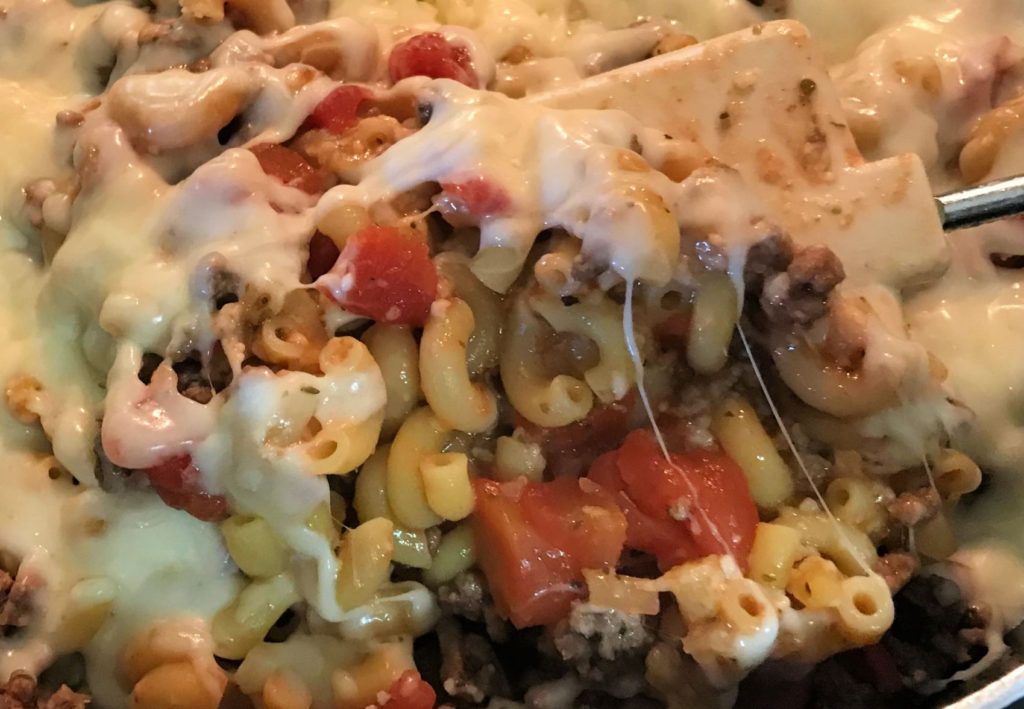
See! Super easy for busy moms or anyone who needs an inexpensive, easy dinner recipe that takes less than 30 minutes. Italian pasta in a skillet. So simple! This is one of the best skillet macaroni and beef recipes I’ve found, because there are so many different variations you can create.
Leave the lid on for about 2 minutes to let the cheese melt.
You can try penne pasta or shells for a thicker version. If you use larger pasta you might want to add in about 8 oz. tomato sauce or about half a jar of spaghetti sauce to add extra liquid. Allow a little longer cooking time as well. If you decide to cook the pasta separately and add it in, make sure you reduce the water to 1 cup.
For the meat you can try half beef and half ground Italian sausage or all ground sausage to add a little more flavor.
To save calories use ground turkey instead. It tastes just as good! You can also use half-skim cheese instead of whole milk mozzarella. You can really use any cheese you happen to have on hand, but mozzarella is my favorite for this dish.
Serve with garlic bread and a salad. Yummy!
Other variations:
Add in a 1/4 teaspoon red pepper flakes or cayenne pepper to add a little kick. Add 1 teaspoon minced garlic with the onion in the browning stage. Increase the Italian seasoning to 2 teaspoons. Add in 1/2 teaspoon each of onion powder and garlic powder.
Throw in some fresh parsley to the sauce. Add 1/4 to 1/2 cup finely chopped green bell pepper. Try adding 1/2 cup mushrooms.
This is one of those recipes that you can throw together with just about anything you happen to have on hand. It is hard to mess it up, and everyone will enjoy it. How can you go wrong with meat, macaroni, tomatoes, and cheese? I really enjoy the flavors of onion and garlic, tomatoes, and cheese. I love all things Italian!
Try it tonight and let me know what you think. Did you prepare it as is, or did you try your own variation? Do you have any creative suggestions of your own? Please leave your reviews, suggestions, and comments below. I’d love to hear from you!